SCCM 2002 Install Guide Using Baseline Media
This post is a SCCM 2002 Install Guide Using Baseline Media. In this post I will cover the step-by-step process on how to install SCCM 2002 from scratch. We will setup ConfigMgr 2002 using baseline media.
The SCCM 2002 install will be done on a Standalone Primary Server in a Windows Server 2019 lab environment from scratch. The SQL 2017 server will located on the same machine.
I am going to break this big post into several topics which makes it easier to follow. If you have any questions, you can post them in comments section.
Table of Contents
About Configuration Manager 2002
Update 2002 for Configuration Manager current branch is available as an in-console update. It is also available as baseline version. You can upgrade to Microsoft Endpoint Configuration Manager (MECM) 2002.
Before you upgrade to version 2002, ensure you are running one the following versions SCCM 1806, SCCM 1810, SCCM 1902 or SCCM 1906 or SCCM 1910.
Configuration Manager 2002 comes with lots of new features and fixes over previous release. Now that the update 2002 is globally available, you can upgrade to version 2002.
You can check the following guide to know all the new features of SCCM 2002. To upgrade your Configuration Manager to version 2002, refer this guide.
Download SCCM 2002 baseline media version
The SCCM version 2002 is also available as baseline version. You can download baseline install media using which you can setup SCCM 2002 from scratch.
Remember that you use the latest SCCM baseline media when you want to install a new site in a new hierarchy.
In addition to that, you also use a baseline version to upgrade from System Center 2012 Configuration Manager.
In one of my posts I have covered about the SCCM in-place upgrade paths. Using a baseline media, you can also perform an in-place upgrade to supported version.
The previous baseline version was SCCM 1902 and I had published a install guide here – https://www.prajwaldesai.com/sccm-1902-install-guide-using-baseline-media/.
There are three ways to download the Configuration Manager 2002 baseline media.
- Download ConfigMgr 2002 from Evaluation Center.
- From MSDN/Visual Studio.
- Download ConfigMgr 2002 from Microsoft VLSC.
I have covered in-depth about downloading SCCM 2002 baseline media using different methods in the following post – https://www.prajwaldesai.com/download-sccm-baseline-version-install-media/
Step by Step SCCM 2002 Install Guide
This step-by-step SCCM 2002 install guide will help you to install Configuration Manager 2002 in your setup from scratch.
However before you deploy or install SCCM 2002 in your prod setup, you must be aware of few things.
If you’re new to Configuration Manager current branch, start with the fundamentals. Before you run setup to install your first site, learn about the basic concepts of Configuration Manager.
The whole idea of publishing this lengthy guide is to make you familiar with the SCCM install process.
The hierarchy, the choice of server OS, installing roles on each server, all these may differ but at the end the installation process will almost remain same. I hope you got what I am trying to say.
Step 1 – Setting up the Configuration Manager 2002 lab
Every time a ConfigMgr baseline version is released, I create new set of VM’s and test the SCCM install. Very rarely Microsoft makes changes to the setup process, but you would get to know only when you test it.
So my SCCM 2002 lab setup is going to be very simple. Even though I have got 64 GB of memory, I am not going to create lots of VM’s.
I may create the VM’s later but to start with I have got 6 virtual machines. And I feel these are sufficient for testing the features.
So my virtual environment consists :-
| Virtual Machine Name | Operating System | Roles | Specs |
| CORPAD.PRAJWAL.ORG | Windows Server 2019 Datacenter | Active Directory, DNS, DHCP | 4GB Memory, 100GB HDD for OS Drive |
| CORPSCCM.PRAJWAL.ORG | Windows Server 2019 Datacenter | Primary Site Server | 12GB Memory, 200GB HDD for OS, 500GB HDD for SCCM Content Library |
| CORPWIN10PRO.PRAJWAL.ORG | Windows 10 2004 Professional x64 | Client Machine | 4GB Memory, 100GB HDD for OS Drive |
| CORPWIN10ENT.PRAJWAL.ORG | Windows 10 2004 Enterprise x64 | Client Machine | 4GB Memory, 100GB HDD for OS Drive |
| CORPWIN20PRO.PRAJWAL.ORG | Windows 10 2004 Professional x64 | Client Machine | 4GB Memory, 100GB HDD for OS Drive |
| CORPWIN20ENT.PRAJWAL.ORG | Windows 10 2004 Enterprise x64 | Client Machine | 4GB Memory, 100GB HDD for OS Drive |
Tip – After you install the OS on each virtual machine, activate the OS and perform windows update.
My CORPAD VM is a domain controller plus it also runs DNS and DHCP services. If you are setting up the SCCM 2002 lab, you can install DHCP service on another server. It’s your choice.
Step 2 – Install SCCM 2002 Prerequisites / Checklist
Yes to install SCCM 2002 you must have the required prerequisites installed. Microsoft actually lists all the prerequisites for every product they release.
Therefore don’t skip this important section. Here are some points that you need to keep in mind before installing SCCM 2002.
- For site and site system prerequisites for Configuration Manager, read this article.
- Supported operating systems for Configuration Manager site system servers – Read this article.
- Install the latest version of Windows 10 ADK. At the time of writing this post, the latest version of Windows ADK available is 2004. You can download it here.
- A minimum version of SQL Server 2012 Native Client which includes support for TLS 1.2 must be installed. Starting in version 1810, the minimum version is SQL 2012 SP4 (11.*.7001.0). Otherwise you might get this warning.
- In my lab setup, I will install SQL Server 2017 – Enterprise edition. I love SQL 2017 because of performance improvements over previous versions.
- Install all applicable critical Windows updates on your machines. Restart the machines prior to installing ConfigMgr 2002.
- You must configure firewall exceptions before you install Configuration Manager 2002. Follow this guide if you need help – https://www.prajwaldesai.com/configure-sccm-2012-firewall-exceptions/.
- You might want to create SCCM Service accounts before you install SCCM and other services. I will probably publish another guide to create accounts for SCCM.
Step 3 – Creating the System Management Container
I have installed the Active Directory Domain services on my CORPAD VM and this VM is now a domain controller. In addition, the DNS and DHCP services are also running on this VM.
We will now look at the steps to create system management container.
Most of all remember that you create system management container only once in each domain that has a primary or secondary site. This will be used to publish data to Active Directory.
Read the following post to know more about System Management Container and Extending AD schema – https://www.prajwaldesai.com/create-system-management-container-extend-ad-schema/.
Using the below steps, create system management container.
- On the domain controller launch ADSI Edit.
- Right click ADSI Edit and click Connect to.
- On the Connection Settings window, the naming context should be Default naming context. Click OK.
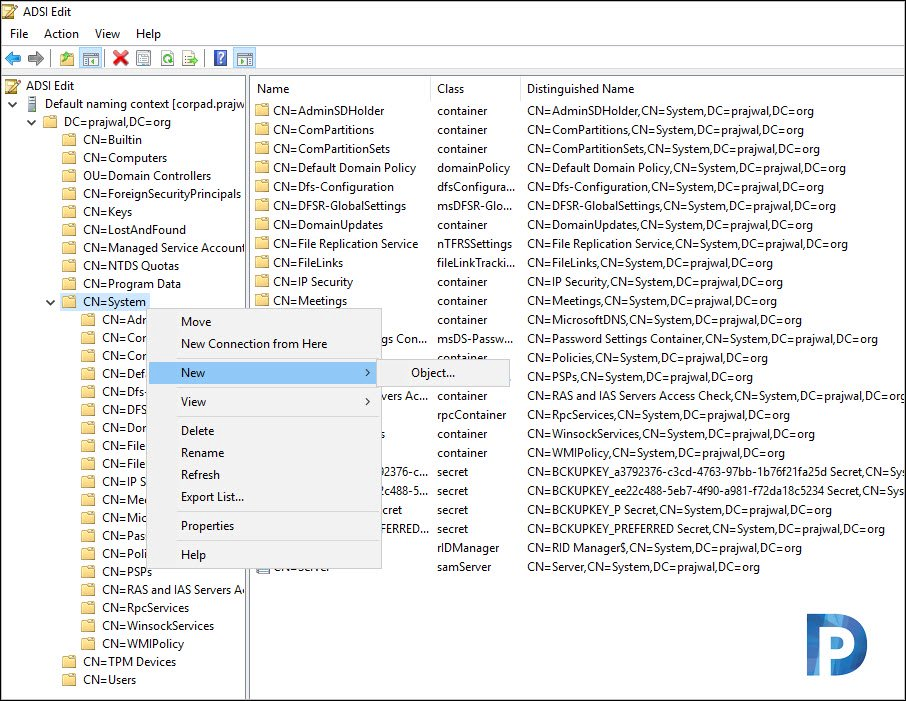
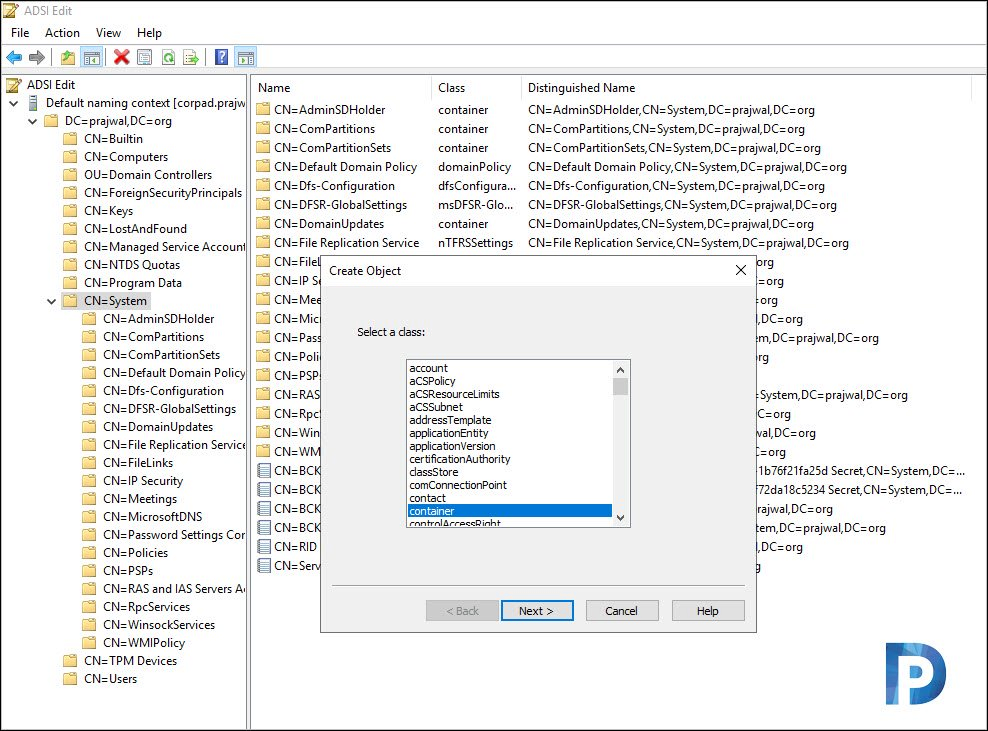
- Expand Default Naming Context. Right click CN=System. Click New and create an Object.
In the Create Object box, select Container. Click Next.
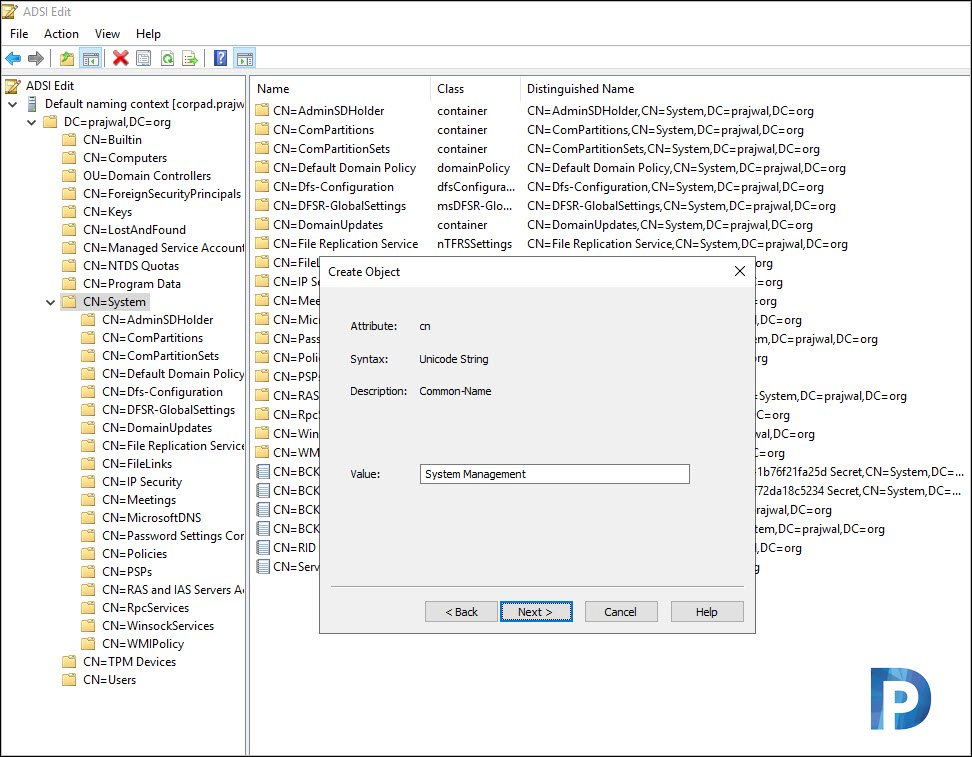
Specify the value as System Management and click Next.
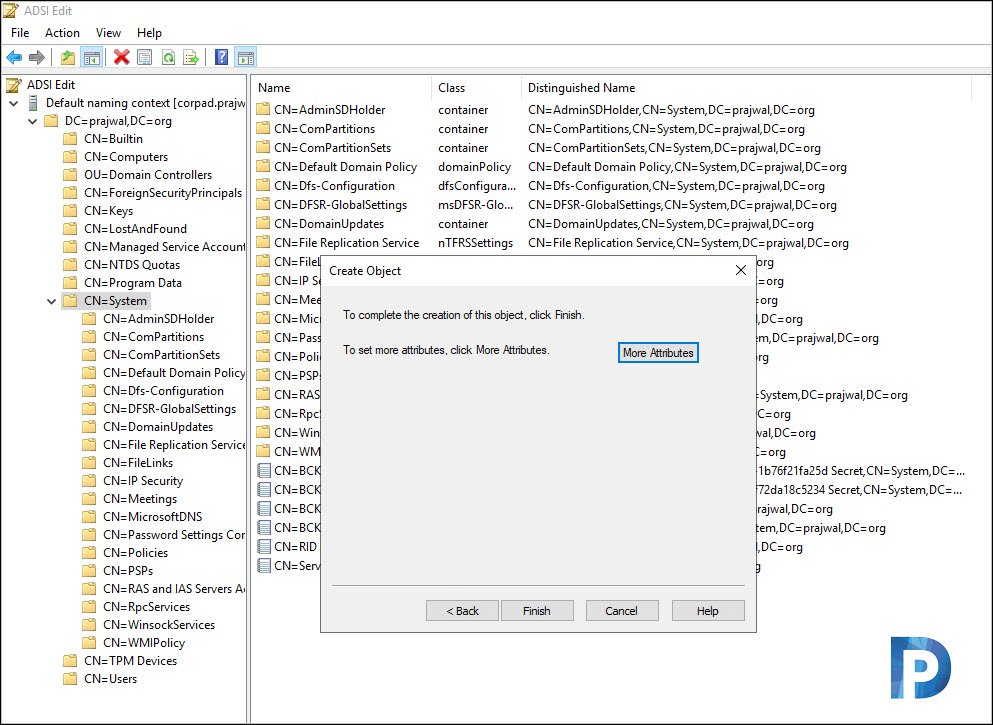
Click Finish.
Step 4 – Grant SCCM Server Permissions on System Management Container
After you create System Management container, you must delegate SCCM server full permissions on System Management container.
This is a very important and I would suggest not to skip this.
- Launch Active Directory Users and Computers.
- Click View and click Advanced Features.
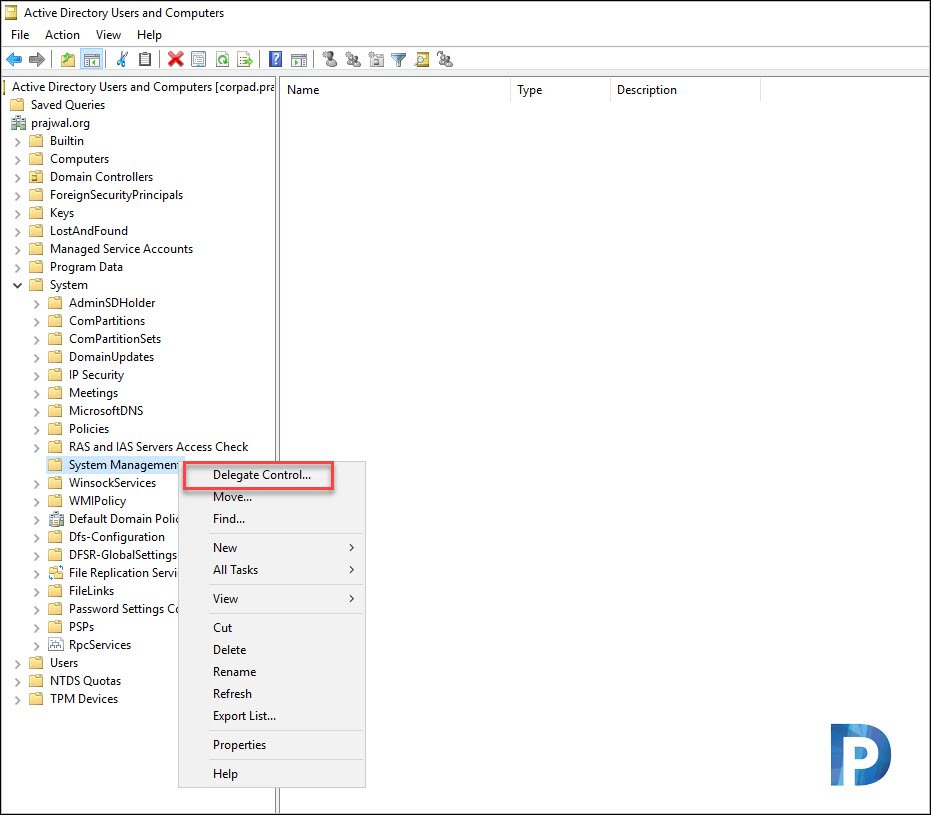
- Expand System, right click System Management container and click Delegate Control.
On the Users or Groups box, click Add. On select users, computers or groups window click on Object Types and check Computers as object types. Click OK.
Type the name of the primary site server computer account and click OK.
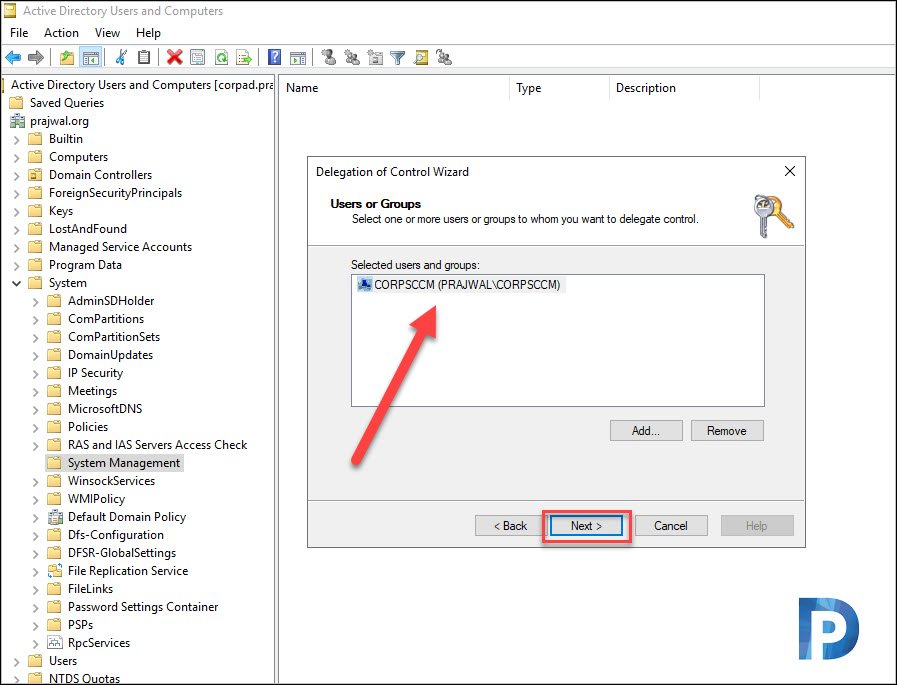
Next, add primary site server computer account and Click Next.
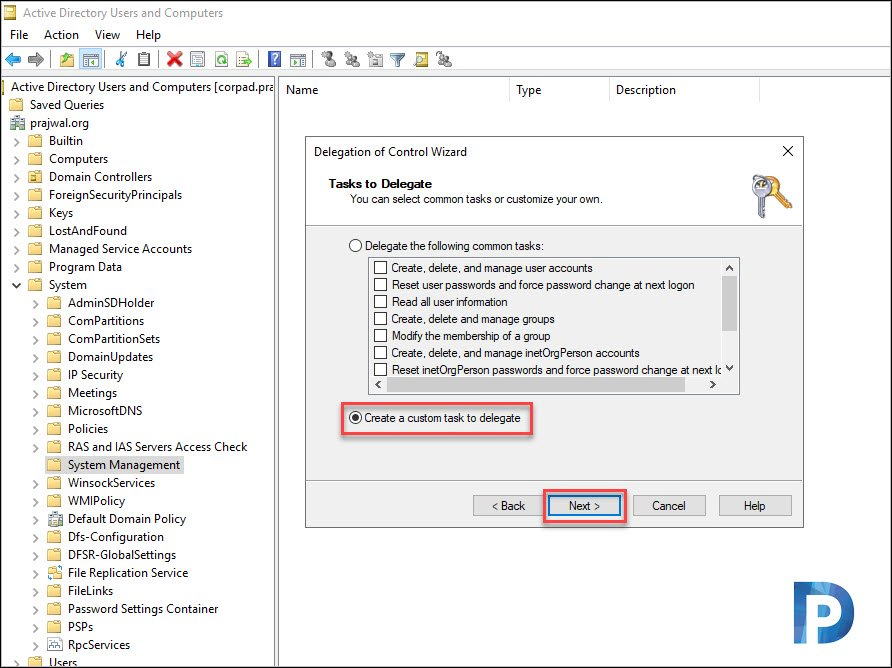
On the Tasks to Delegate page, click Create a custom task to delegate. Click Next.
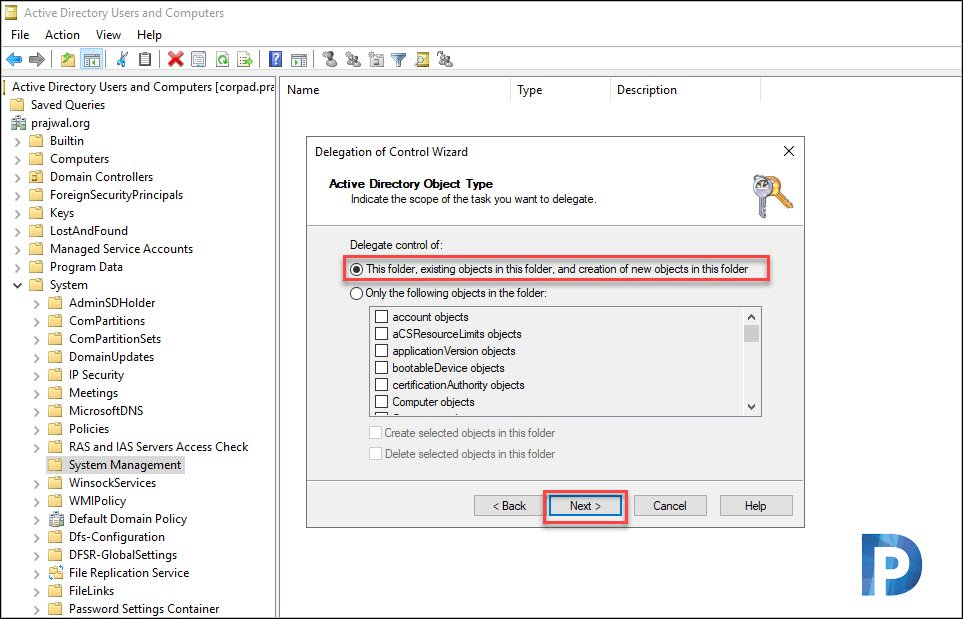
Select This folder, existing objects in this folder and creation of new objects in this folder. Click Next.
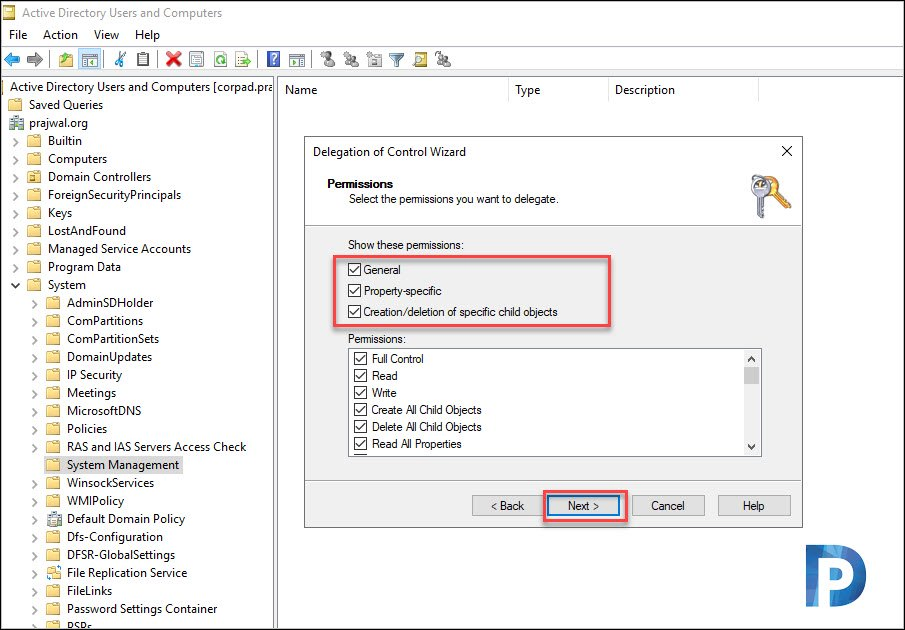
On the Permissions page, select the following.
- General
- Property-specific
- Creation/deletion of specific child objects
Under Permissions, select Full Control. When you do that, all the remaining boxes are checked automatically.
Click Next.
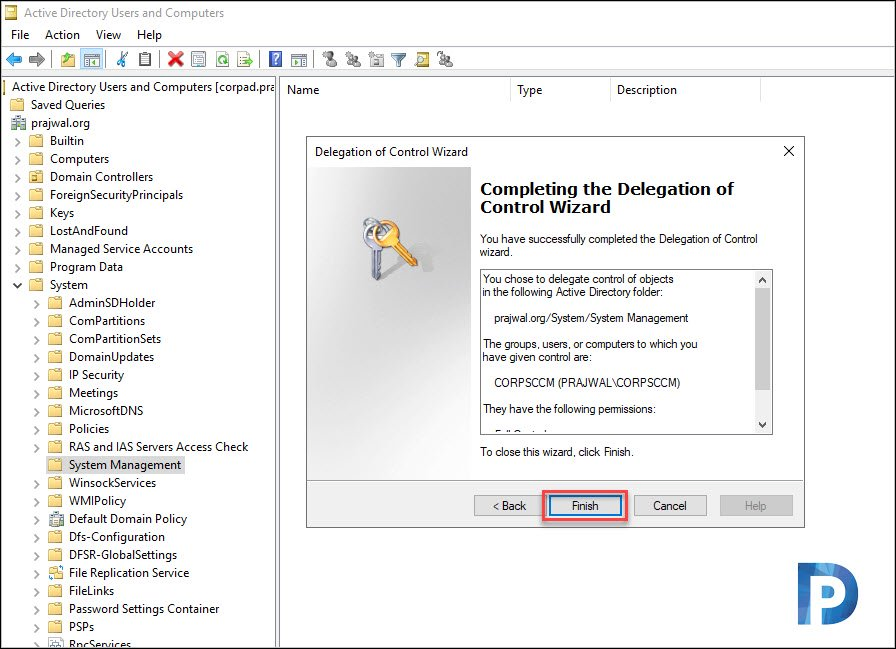
Finally click Close on Delegation of Control wizard page.
Step 5 – Extending Active Directory Schema
To extend Schema, use an account that is a member of the Schema Admins security group.
Ensure that you sign in with this account to the schema master domain controller. You can perform the below on steps on your member server.
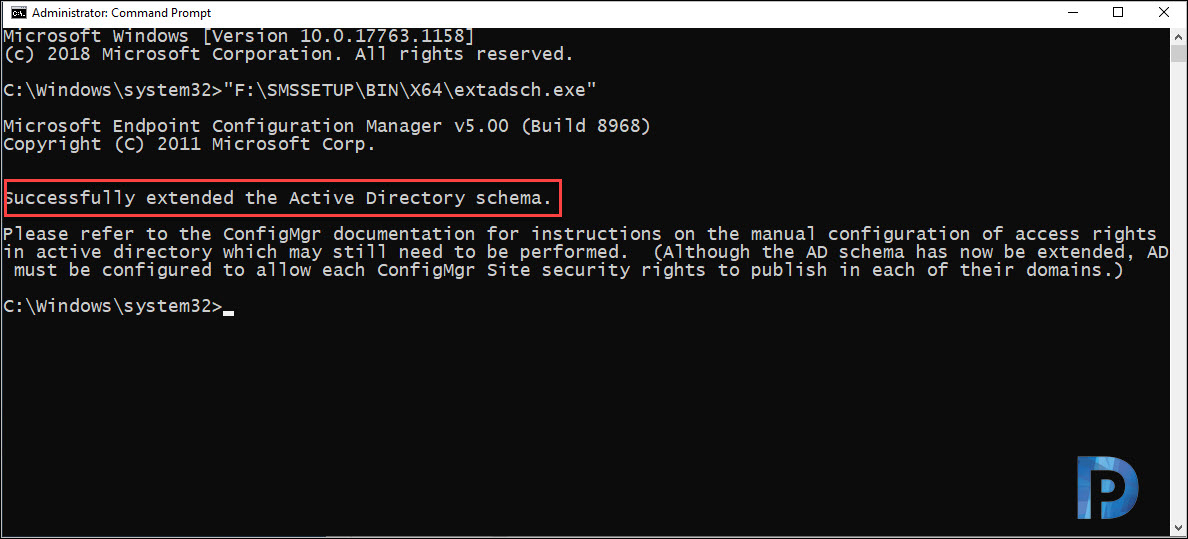
- Locate the extadsch which can be found in SMSSETUP\BIN\X64 of the configuration manager setup media.
- Hold the shift key on your keyboard and right click extadsch and click on Copy as Path.
- Launch the command prompt. Right click and click paste and hit enter.
- You should see the line Successfully extended the Active Directory Schema.
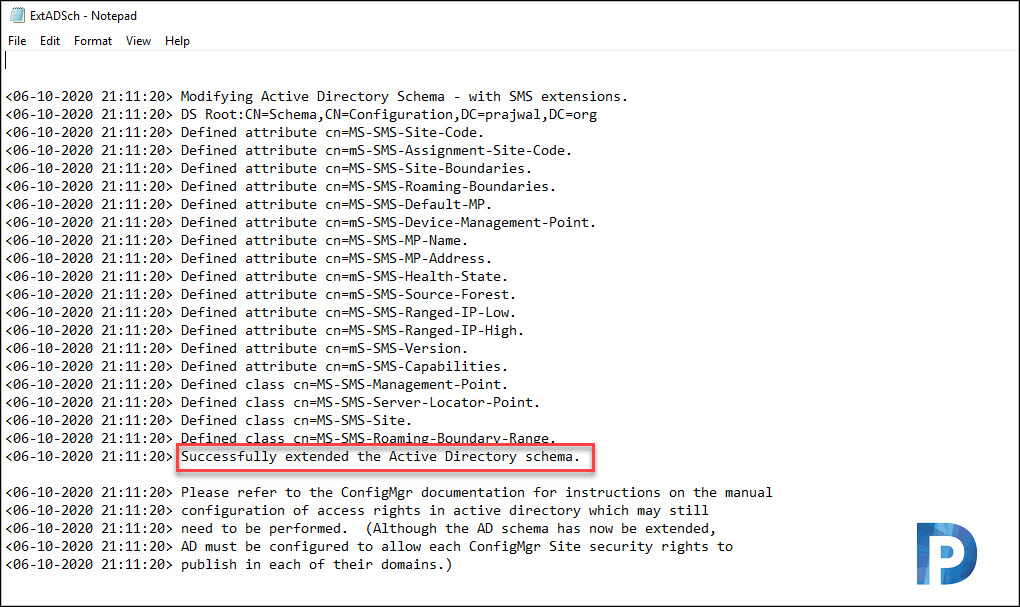
Open the log file extadsch.log located in the root of the system drive. You should see the line Successfully extended the Active Directory Schema.
Modifying Active Directory Schema - with SMS extensions.
DS Root:CN=Schema,CN=Configuration,DC=prajwal,DC=org
Defined attribute cn=MS-SMS-Site-Code.
Defined attribute cn=mS-SMS-Assignment-Site-Code.
Defined attribute cn=MS-SMS-Site-Boundaries.
Defined attribute cn=MS-SMS-Roaming-Boundaries.
Defined attribute cn=MS-SMS-Default-MP.
Defined attribute cn=mS-SMS-Device-Management-Point.
Defined attribute cn=MS-SMS-MP-Name.
Defined attribute cn=MS-SMS-MP-Address.
Defined attribute cn=mS-SMS-Health-State.
Defined attribute cn=mS-SMS-Source-Forest.
Defined attribute cn=MS-SMS-Ranged-IP-Low.
Defined attribute cn=MS-SMS-Ranged-IP-High.
Defined attribute cn=mS-SMS-Version.
Defined attribute cn=mS-SMS-Capabilities.
Defined class cn=MS-SMS-Management-Point.
Defined class cn=MS-SMS-Server-Locator-Point.
Defined class cn=MS-SMS-Site.
Defined class cn=MS-SMS-Roaming-Boundary-Range.
Successfully extended the Active Directory schema.

Please refer to the ConfigMgr documentation for instructions on the manual configuration of access rights in active directory which may still need to be performed.(Although the AD schema has now be extended, AD must be configured to allow each ConfigMgr Site security rights to publish in each of their domains.)
Step 6 – Install Web Server IIS Prerequisites
Windows-based computers require specific configurations to support their use as Configuration Manager site system servers.
We will now install SCCM Web Server IIS prerequisites. To enable Web server role and other features, login to SCCM server.
Launch Server Manager and click Manage > Add Roles and Features. Select Web Server (IIS) server role and click Next.
Enable/Install the following features :-
- .Net Framework 3.5 Features [Install all sub features]
- .Net Framework 4.5 Features [Install all sub features]
- BITS
- Remote Differential Compression
Enable/Install the following Roles Services :-
- Common HTTP Features – Default Document, Static Content.
- Application Development – .NET Extensibility 3.5 and 4.5. Select ASP.NET 3.5, ISAPI extensions, ASP.NET 4.5.
- Security – Windows Authentication.
- IIS 6 Management Compatibility – IIS Management Console, IIS 6 Metabase Compatibility, WMI Compatibility and IIS Management Scripts and Tools.
Complete the installation of all the features and role services and close the wizard. Restart the server after you install the IIS prerequisites.
Step 7 – Download and Install Windows ADK 2004
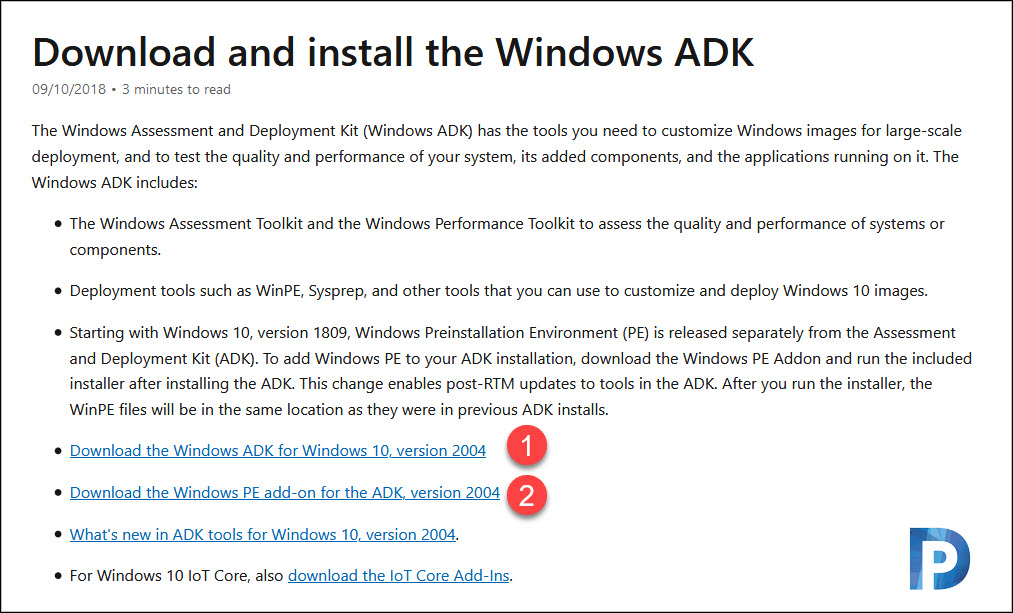
The latest version of Windows 10 ADK available is Windows ADK 2004. You have to download both ADK and Win PE add-on separately and install.
Windows ADK contains set of tools to customize Windows images for large-scale deployment. Read the following post to know about the Windows 10 ADK version history.
To download Windows 10 ADK, go to ADK download link.
- Download the Windows ADK for Windows 10, version 2004
- Download the Windows PE add-on for the ADK, version 2004
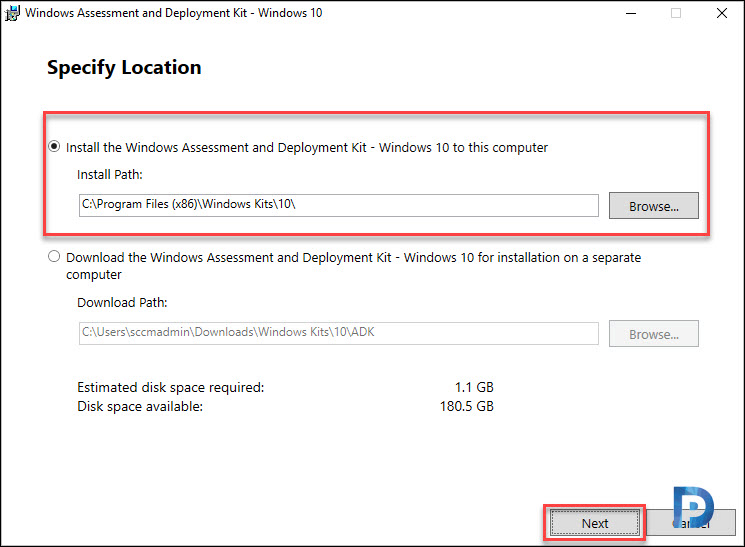
First run the adksetup.exe. Leave the install location to default. Click Next.
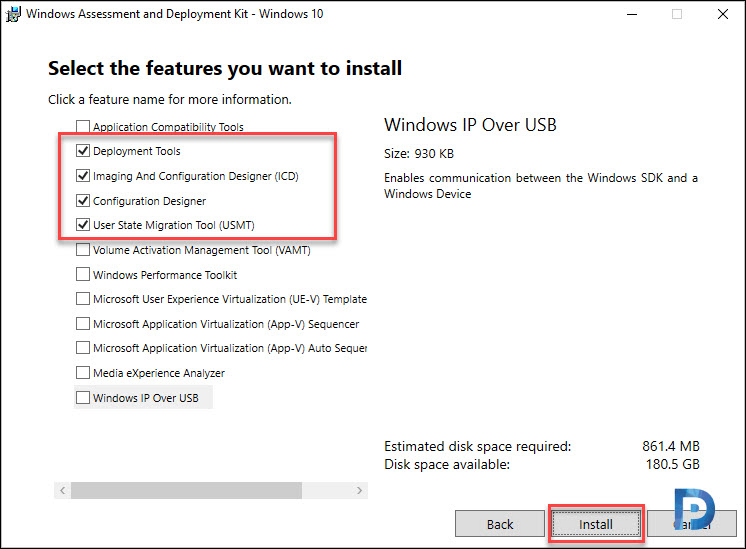
Select the below features to install.
- Deployment Tools
- Imaging and Configuration Designer (ICD)
- Configuration Designer
- User State Migration Tool (USMT)
Click Install.
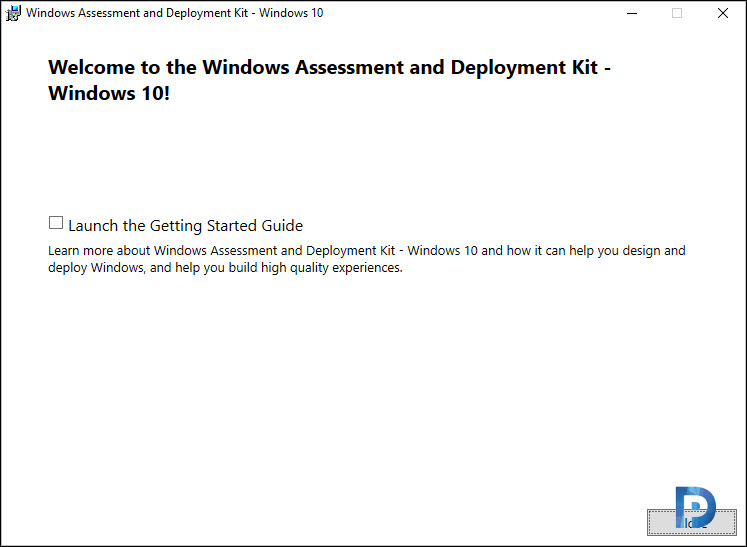
Click Close.
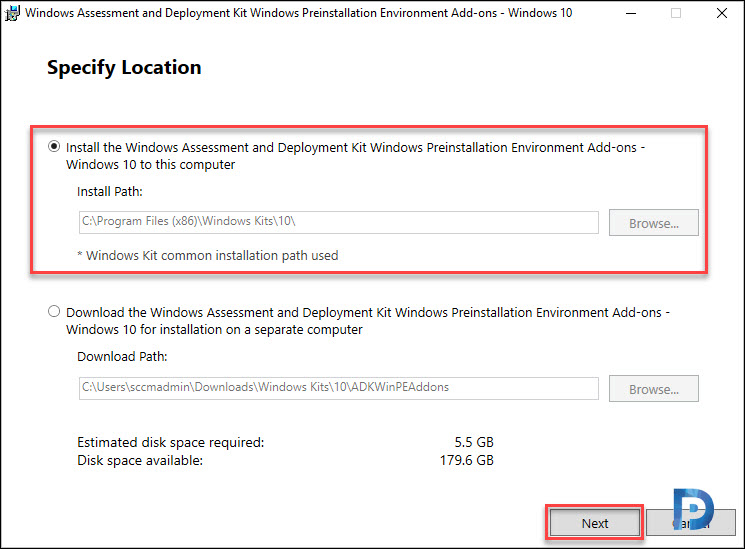
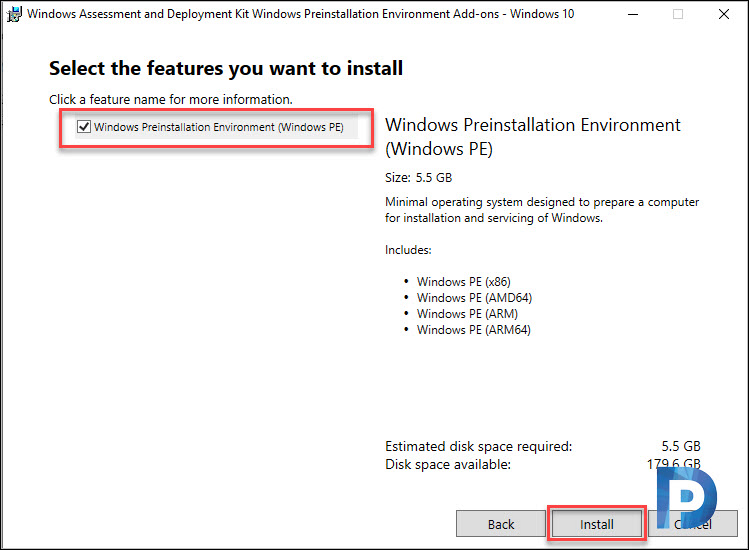
Next, run the adkwinpesetup.exe. Again, leave the install location to default. Click Next.
There is just one feature that installs which is Windows Preinstallation Environment (Windows PE). Click Next.
Click Close.
Step 8 – Supported SQL Server version for Configuration Manager 2002
The following versions of SQL Server are supported by Configuration Manager current branch 2002. Note that SQL Server 2019 is also supported however there are some known issues with it.
I hope this table helps you to decide the right SQL server version for SCCM 2002.
| SQL Server Version | SQL Server Edition | Min Cumulative Update |
| SQL Server 2019 | Standard, Enterprise | No CU Required |
| SQL Server 2017 | Standard, Enterprise | CU2 or higher required |
| SQL Server 2016 SP1, SP2 | Standard, Enterprise | No CU Required |
| SQL Server 2016 | Standard, Enterprise | No CU Required |
| SQL Server 2014 SP1, SP2, SP3 | Standard, Enterprise | No CU Required |
I will be installing SQL Server 2017 Enterprise edition in my setup. The SQL and SCCM will be installed on same server.
After you install SQL Server 2017, ensure you patch it with cumulative update 2 or latest available CU. At the time of writing this post, I see the cumulative update 20 as latest CU available for SQL Server 2017.
Note – Configuration Manager requires a 64-bit version of SQL Server to host the site database.
Step 9 – Install SQL Server 2017 for SCCM 2002
I have copied over the SQL Server 2017 Enterprise media to SCCM server. Mount the media and run the setup.exe as administrator.
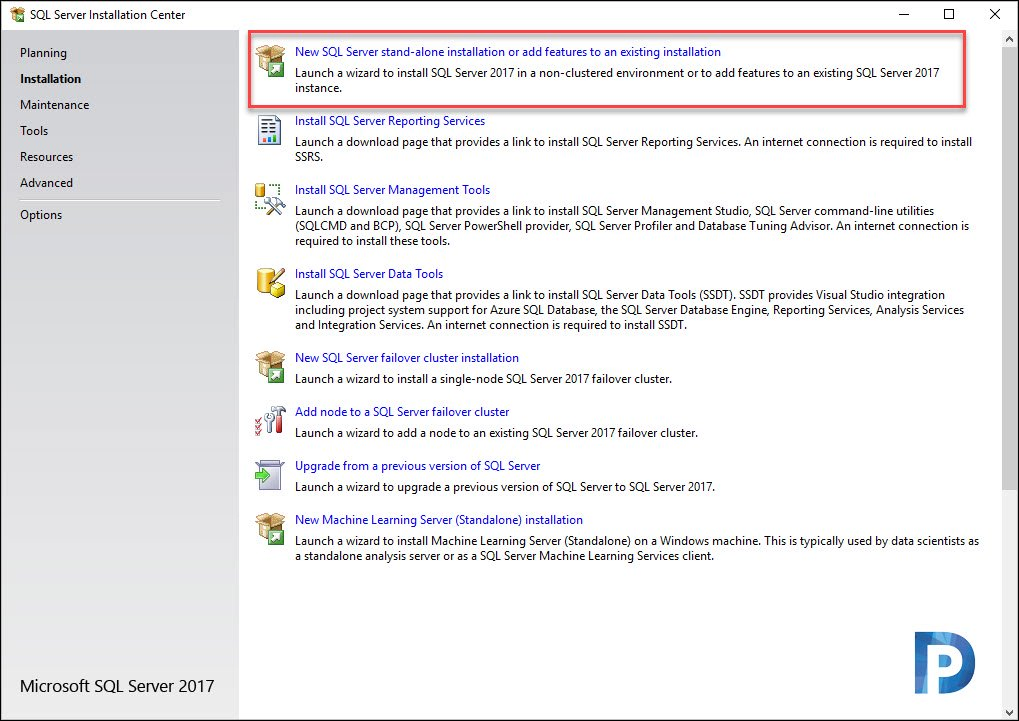
On the SQL Server Installation center page, click Installation. On the right hand side, click New SQL Server stand-alone installation or add features to an existing installation.
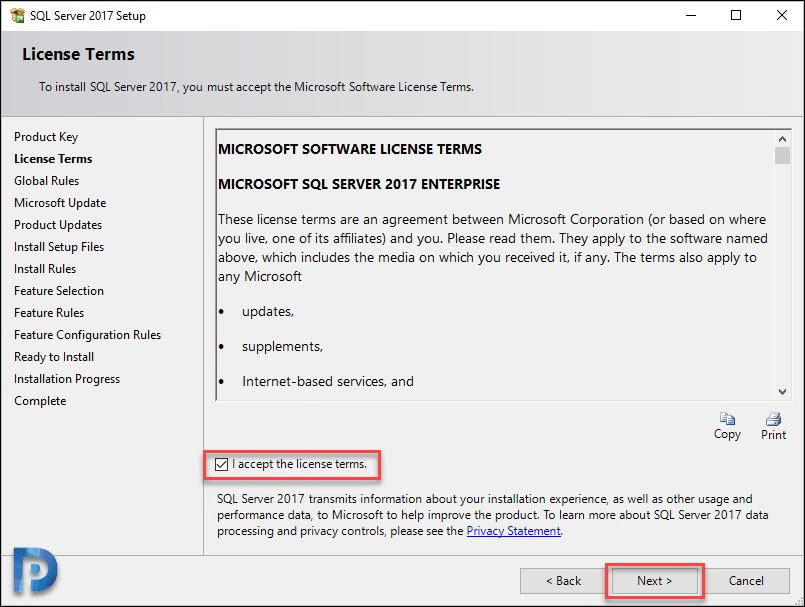
On the License Terms page, click I accept the license terms. Click Next.
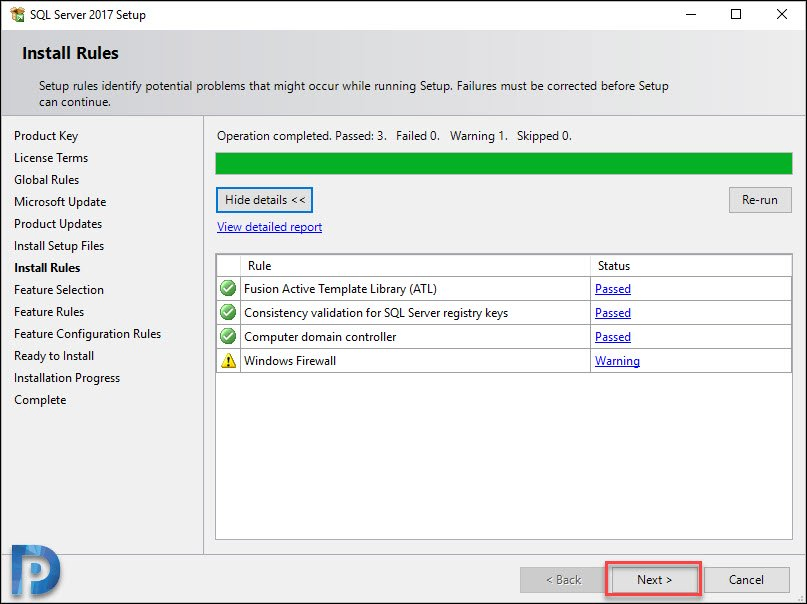
Click Next.
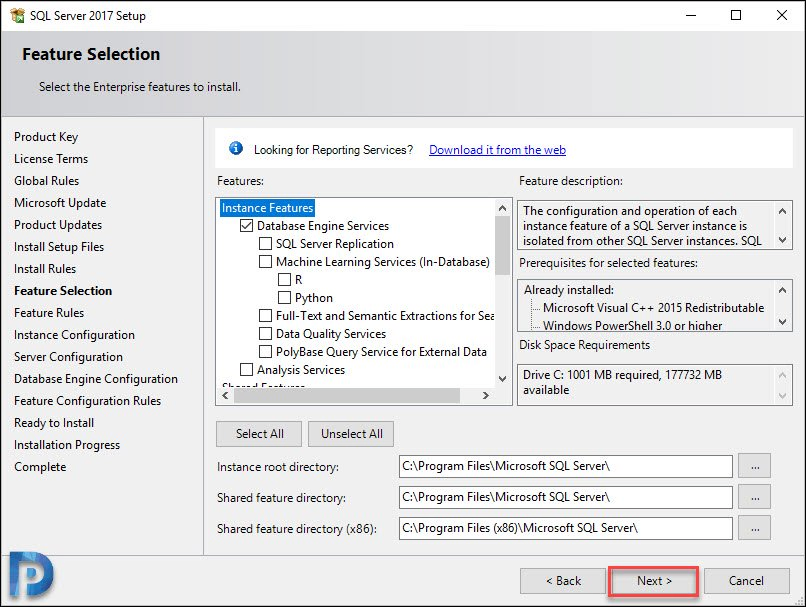
On the Feature Selection page, select Database Engine Services. Click Next.
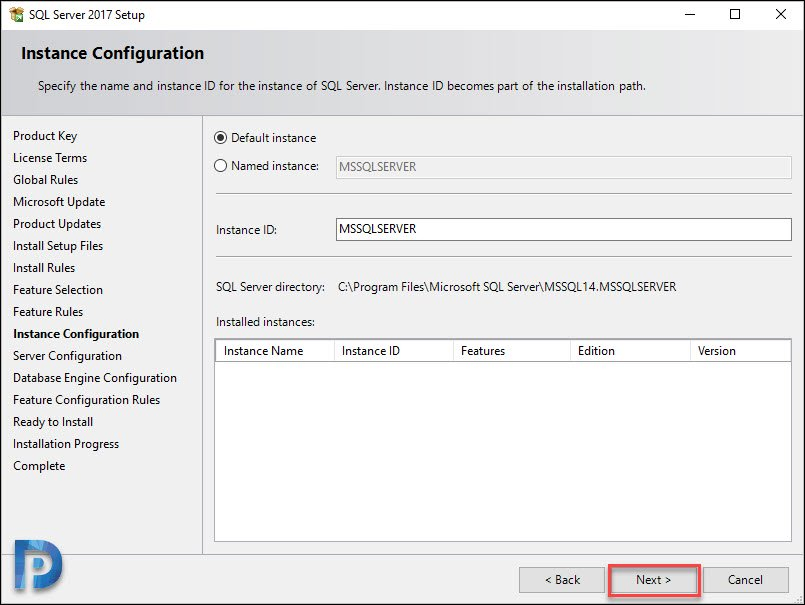
On the Instance Configuration page, select Default Instance. Click Next.
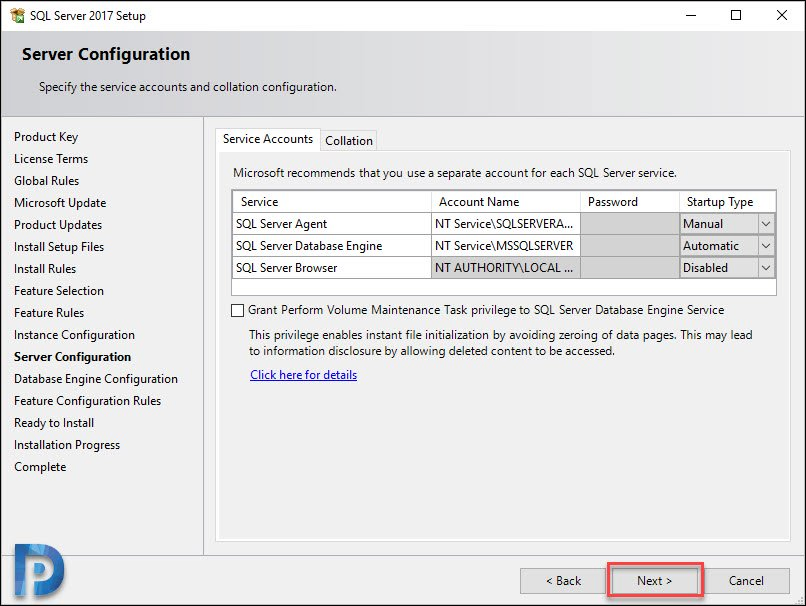
Specify the service accounts. Note the you must use a separate account for each SQL server service.
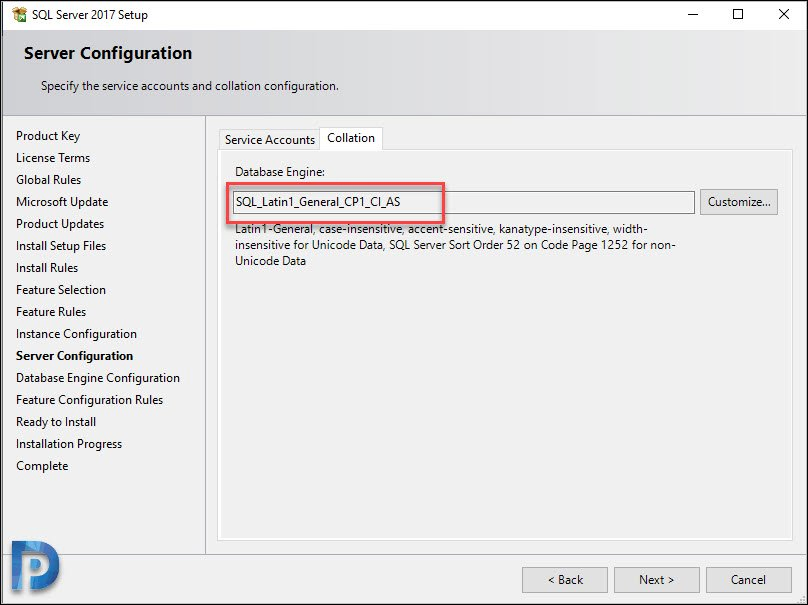
Click Collation tab. Ensure that collation is SQL_Latin1_General_CP1_CI_AS. Click Next.
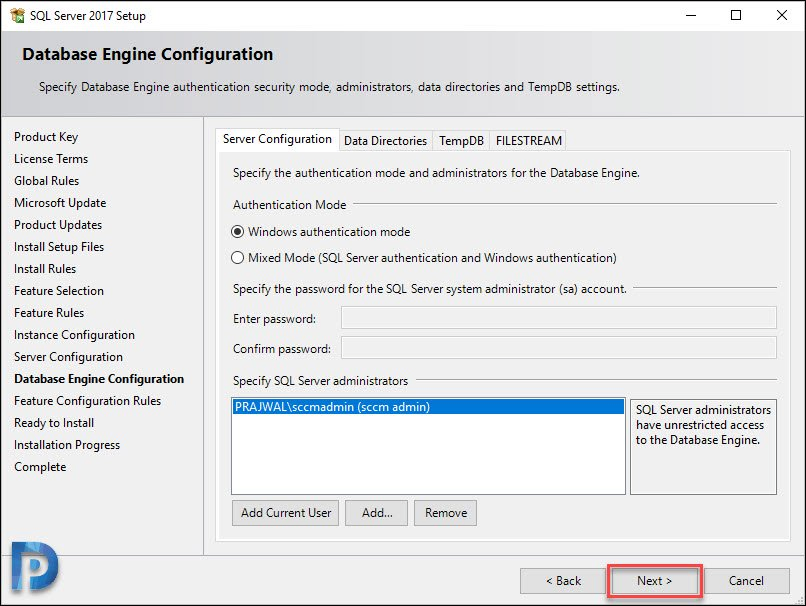
Click Add Current User to add the account to SQL server administrators.
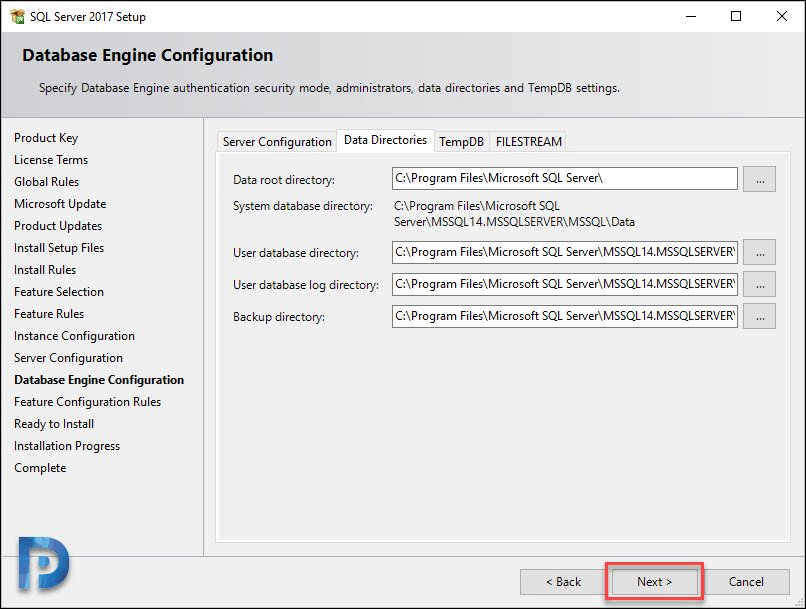
Click Data Directories tab and you can specify a different locations for User database directory, log directory and backup directory.
Click Next.
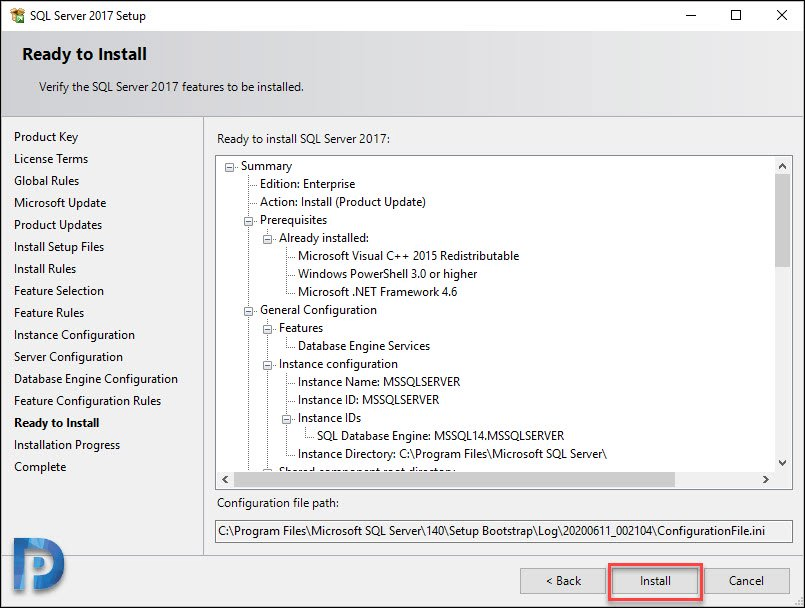
On the Ready to Install page, click Install.
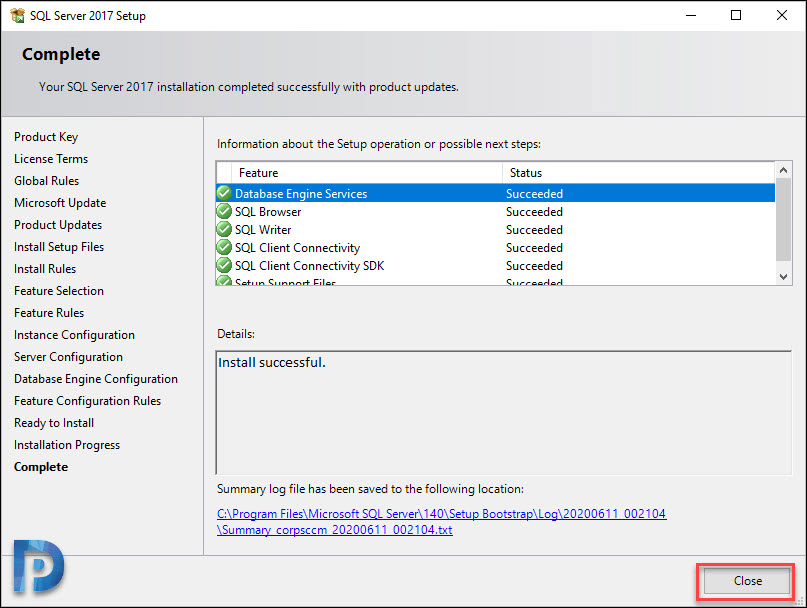
It might take a while to install the Database Engine services and other components. Once the SQL Server installation is complete, click Close.
Step 10 – Install Cumulative Update for SQL Server 2017
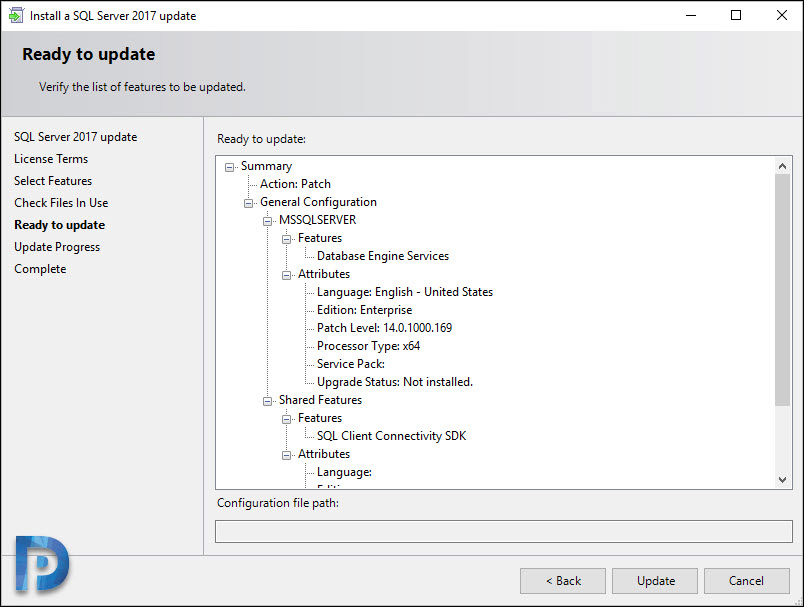
We will now install the SQL Server 2017 Cumulative update 20. Run the SQLServer2017-KB4541283-x64.exe as administrator.
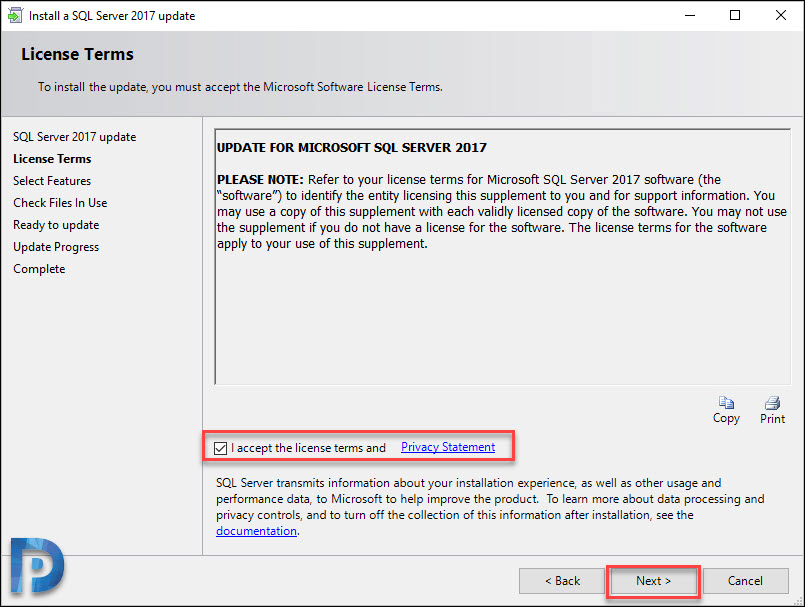
On the License Terms page, checkbox I accept the license terms and privacy statement. Click Next.
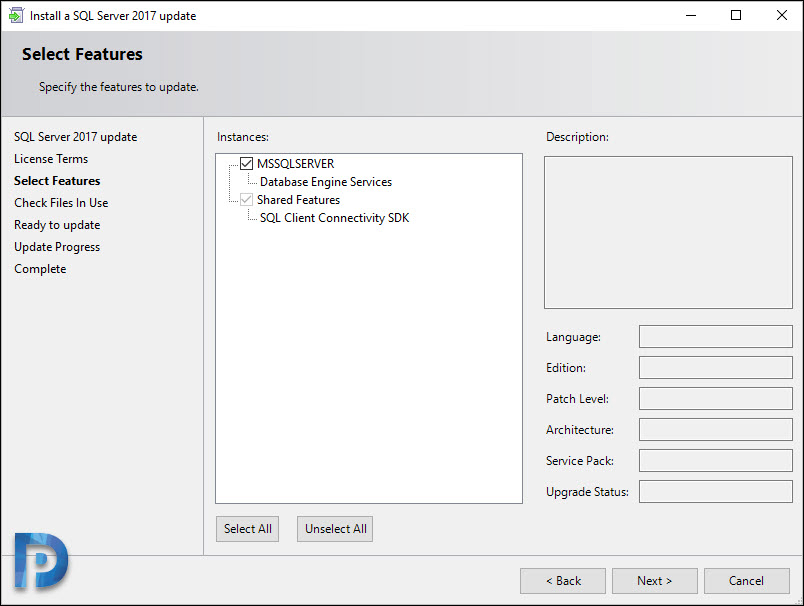
Click Next.
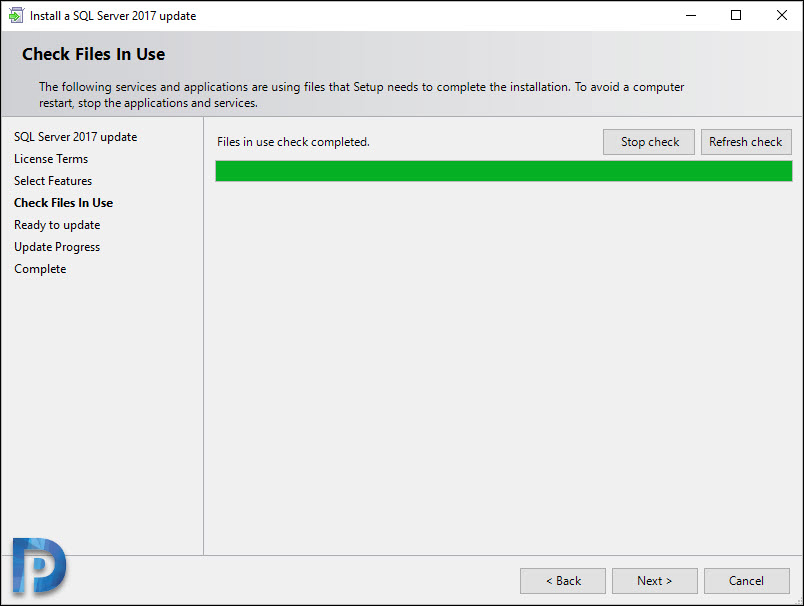
No files in use, click Next.
Click Update.
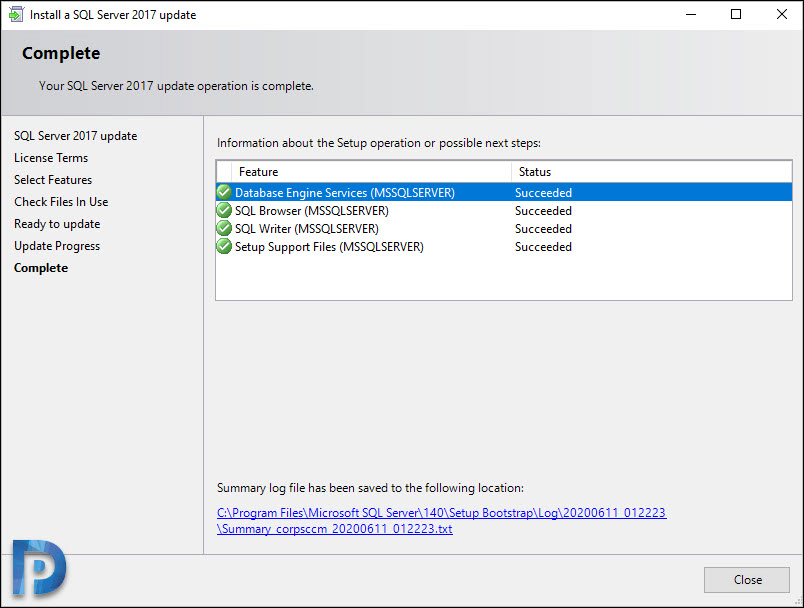
The SQL Server cumulative update 20 installation is complete. Click Close and reboot the server once.
Step 11 – Install SQL Server Management Studio
In this step we will download and install the latest version of SQL Server Management Studio on primary site server.
You can install the reporting services after installing SCCM. So this step is optional and you may skip this and perform it later.
You can install the SSMS on any other server and still access the ConfigMgr database.
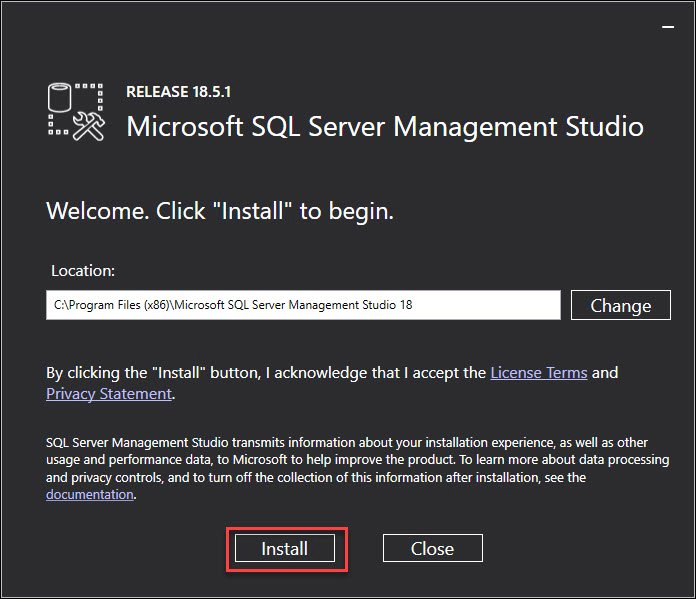
First of all download the latest version of SSMS from here. Run the SSMS-Setup-ENU executable as administrator.
The Installation is simple, just click Install and wait for installation to complete.
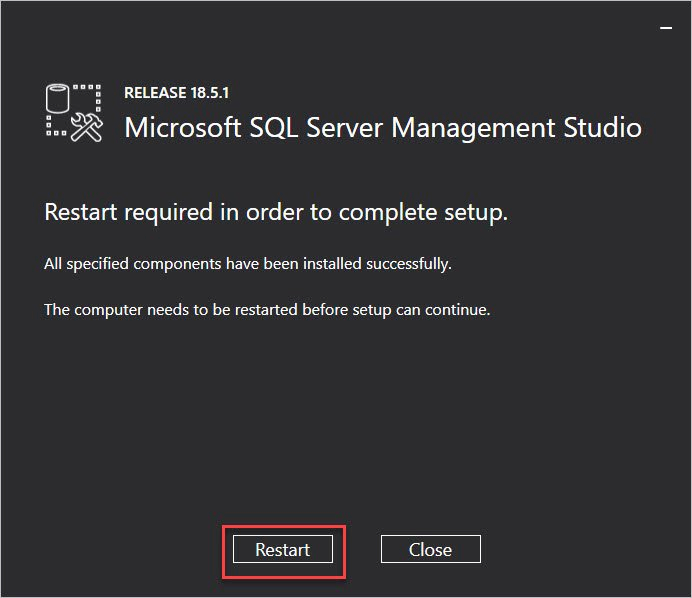
A restart is required after installation. Click Restart.
Step 12 – Install WSUS Role for ConfigMgr 2002
One of the benefits of using Configuration Manager is the ease with which you can deploy updates. If you are planning to deploy updates using SCCM, then WSUS is required.
You must plan for software updates in Configuration Manager. Hence I recommend you read this post to understand more about deploying updates.
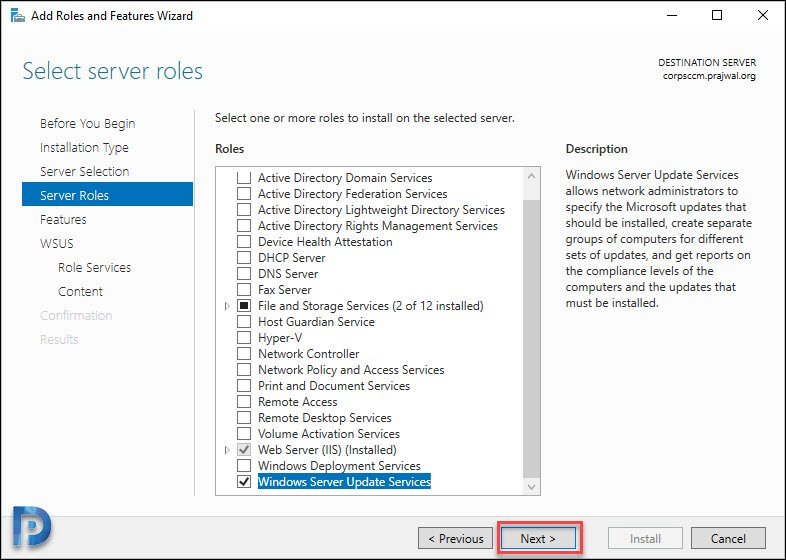
On your Windows Server 2019, launch Server Manager. Click Manage, click Add Roles and Features. Select Windows Server Update Services and click Next.
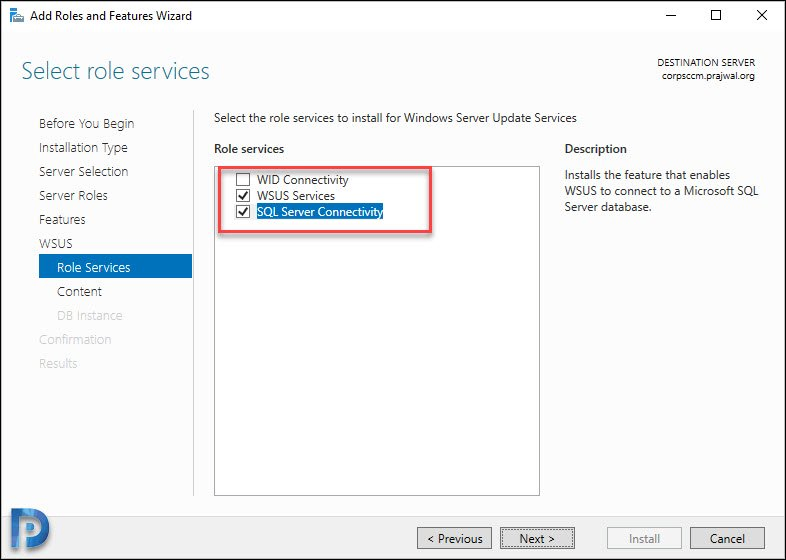
Uncheck WID Connectivity and select SQL Server Connectivity. Click Next.
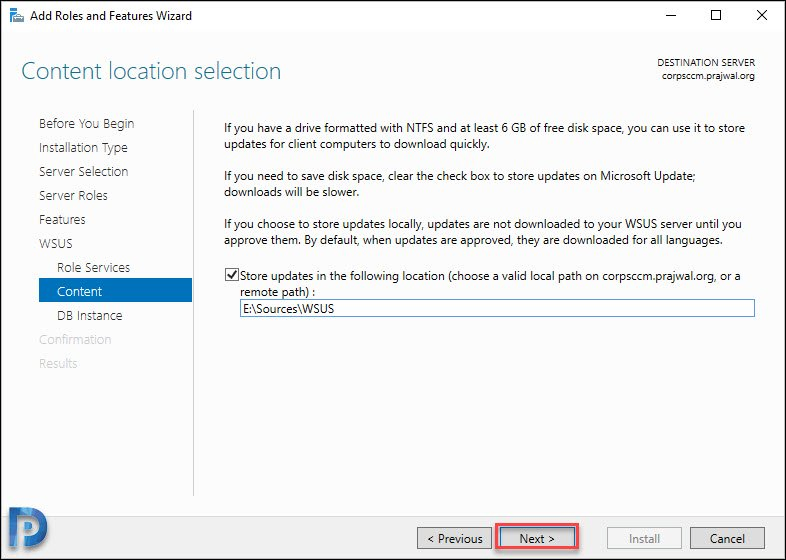
Specify the WSUS content location. Click Next.
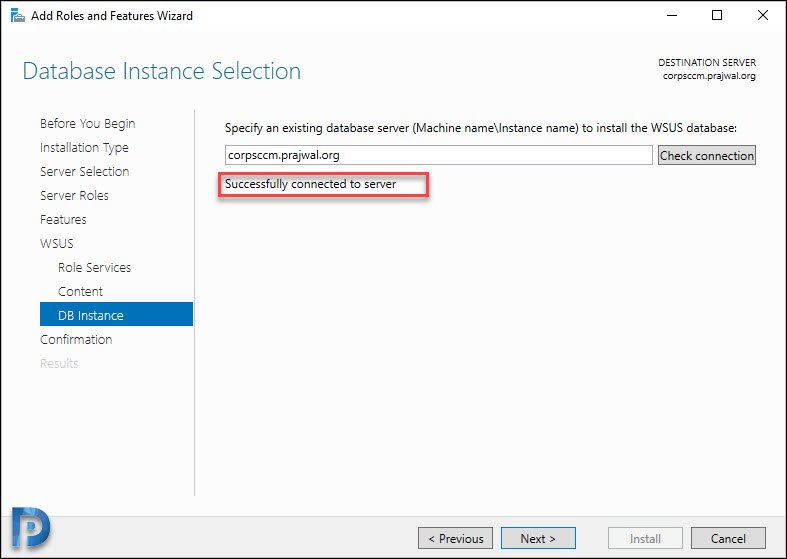
On the database instance selection screen, enter the database server name and click Check Connection. Ensure you see Successfully connected to server message. Click Next.
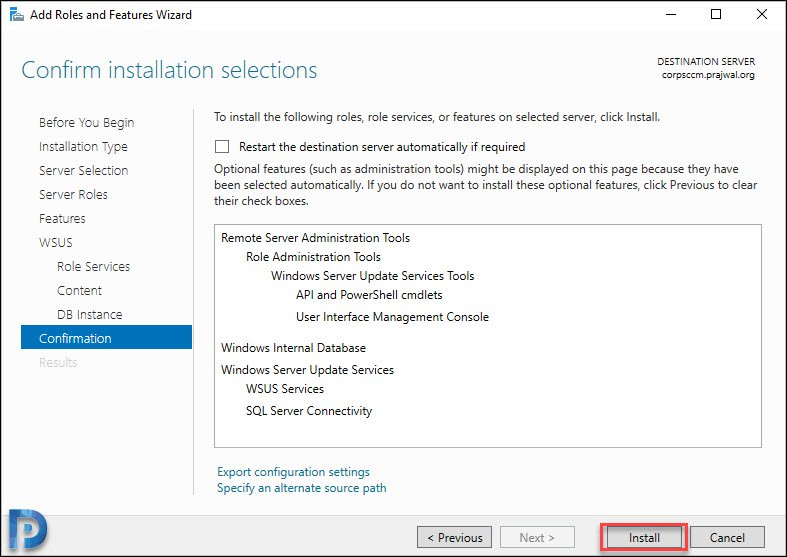
On the Confirmation page, click Install.
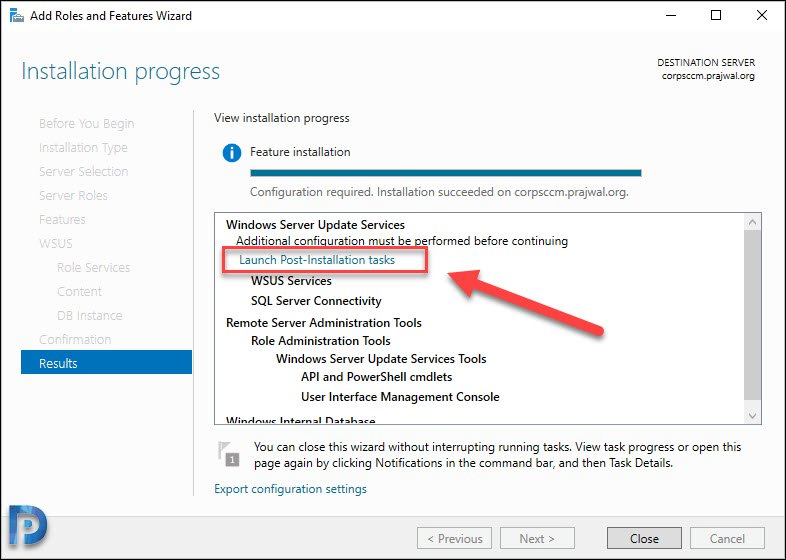
Click Launch Post-Installation tasks.
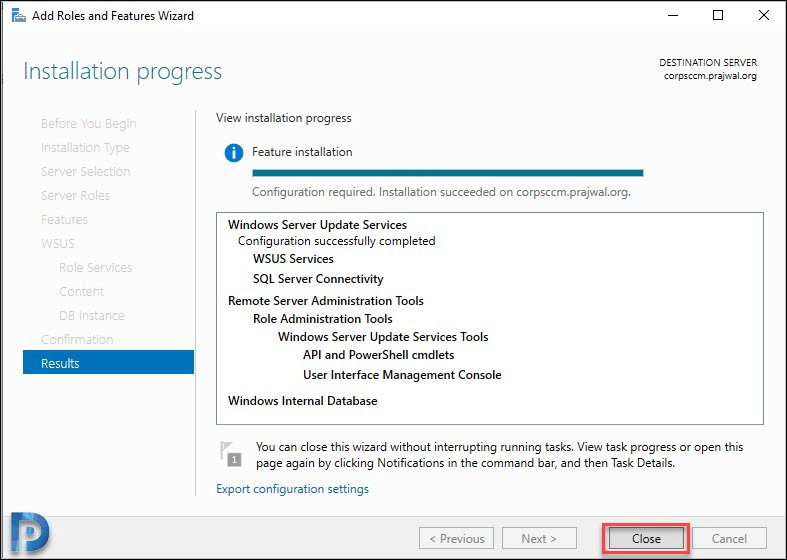
Wait until you see Configuration successfully completed. Click Close.
Step 13 – Verify the SUSDB Creation
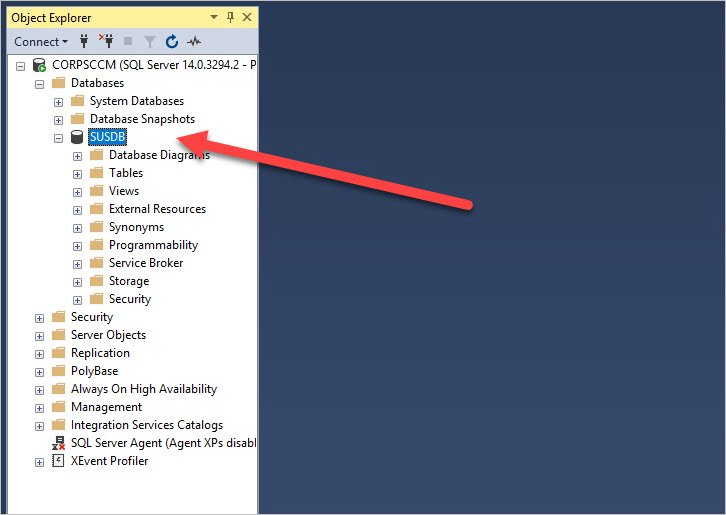
After the post installation tasks are complete, login to SQL server management studio. Expand Databases and you should see WSUS Database SUSDB entry.
If you don’t see the SUSDB, you might want to check if the post installation tasks are completed.
Close the management studio.
Step 14 – Install Microsoft SQL Server Reporting Services
In this step we will install the SQL Server 2017 Reporting Services. SQL Server Reporting Services is a server-based reporting platform that provides comprehensive reporting functionality.
Reporting Services provide the following.
- Paginated reports optimized for document generation and printing.
- Mobile reports optimized for mobile devices, with responsive layout that adapts to different devices and the different ways you hold them.
- A modern web portal you can view in any modern web browser.
Download the latest version of SQL Server 2017 reporting services from the download link.
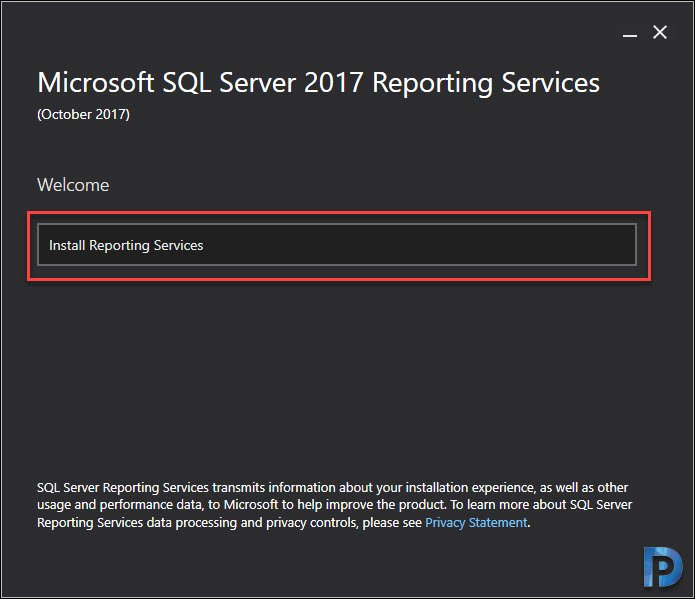
Run SQLServerReportingServices.exe as administrator. On the Welcome page, click Install Reporting Services.
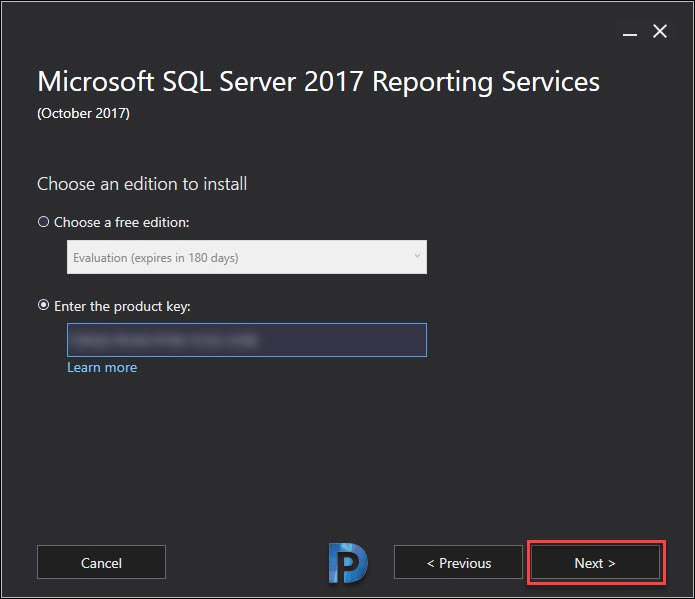
Enter the product key. Here is a guide to find SQL Server Reporting Services Product Key. Click Next.
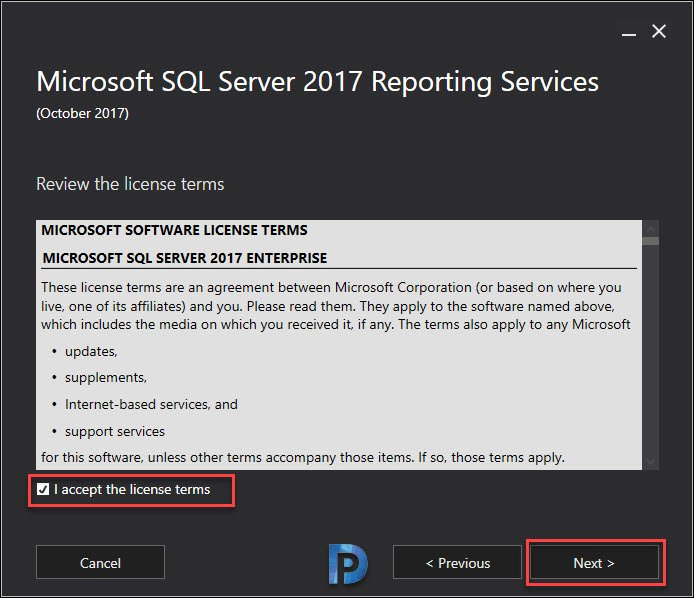
Click I accept the license terms. Click Next.
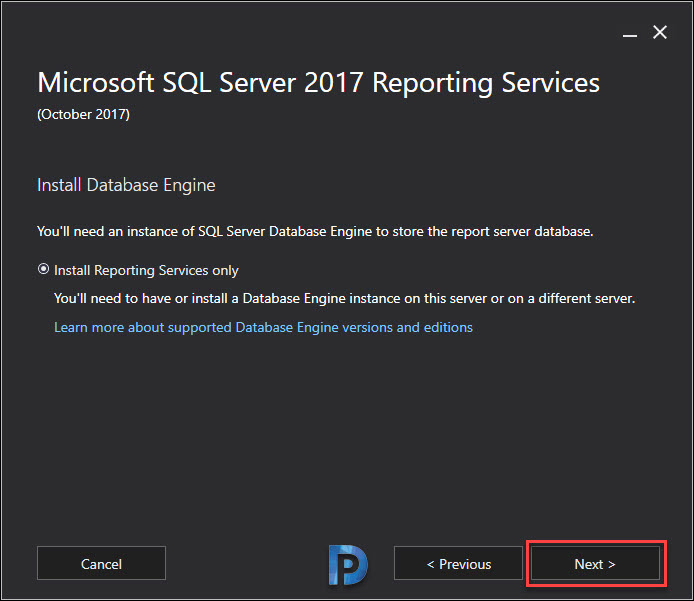
Click Next.
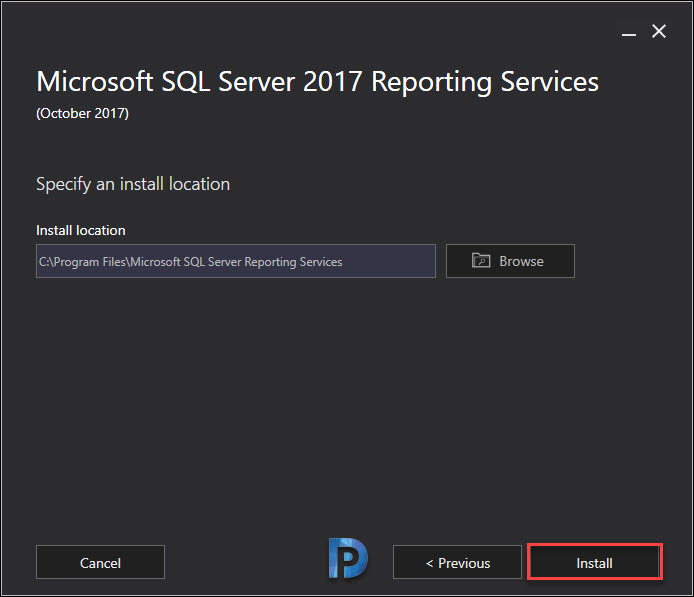
Leave the install location to default, click Next.
In the next step you will see an option to configure report server. Don’t configure report server as we will do that later.
Step 15 – Configure Firewall Settings for SCCM 2002
Before we install Microsoft Endpoint Configuration Manager 2002, the firewall has to be configured properly. If there is a firewall between the site system servers and the client computer, you must ensure required ports are open.
Confirm whether your firewall permits traffic for the ports that are required for the client installation.
- File and Printer Sharing.
- Windows Management Instrumentation (WMI).
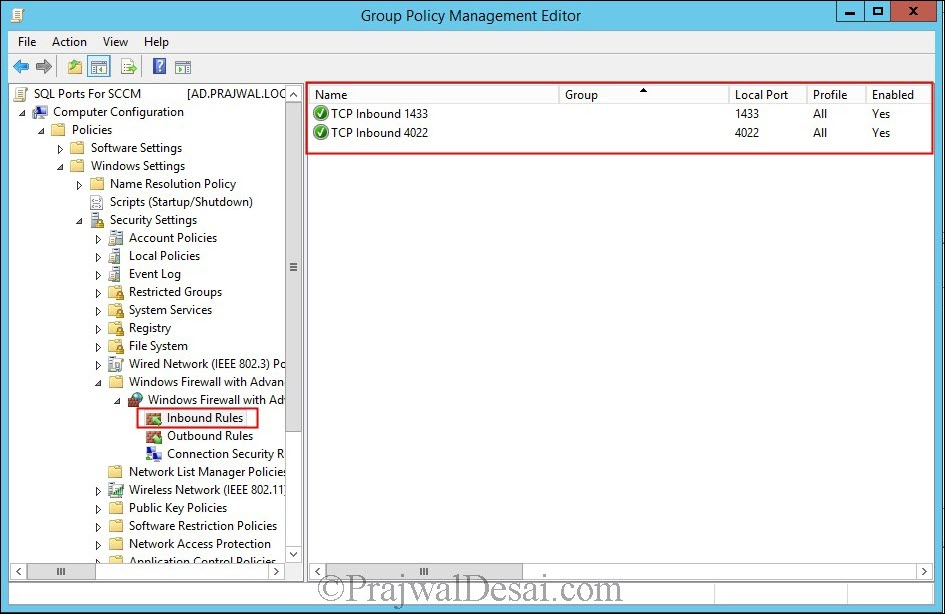
You also need to create a group policy to open TCP ports 1433 and 4022. Refer the following post to configure firewall settings for SCCM 2002.
Step 16 – Download ConfigMgr 2002 Baseline Media
As mentioned in the beginning of this post, to install Microsoft Endpoint Configuration Manager 2002, download the baseline media first.
You can either download it from MSDN or VLSC. To know how to download ConfigMgr 2002 baseline media, read this post – https://www.prajwaldesai.com/download-sccm-baseline-version-install-media/.
Copy the ConfigMgr 2002 baseline media to the server where you want to install Configuration Manager.
Step 17 – Download Configuration Manager 2002 Setup Prerequisites
This is an optional step where you can manually download the required prerequisite files before you install Configuration Manager.
You may skip this step because you can also download the prerequisites online and the wizard will do it for you.
However in rare cases the prerequisite downloads fails, hence you can use this method to manually download them.
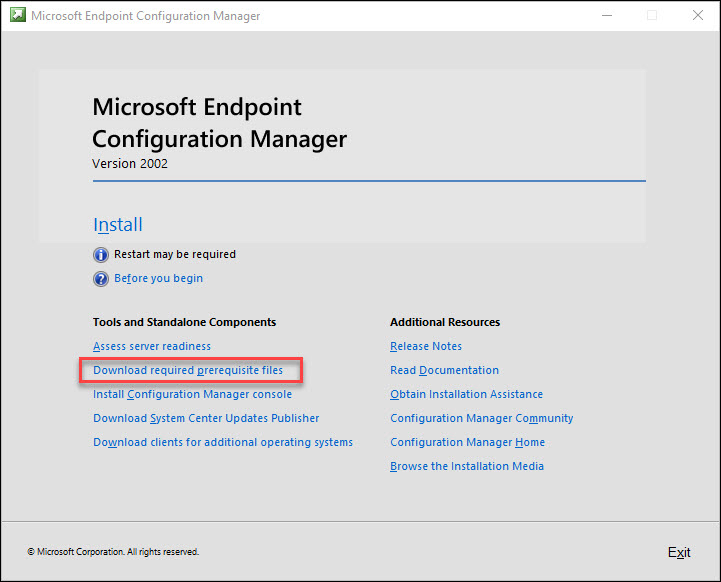
Run the Splash HTML application from the setup folder. On the Welcome screen, click Download required prerequisite files.
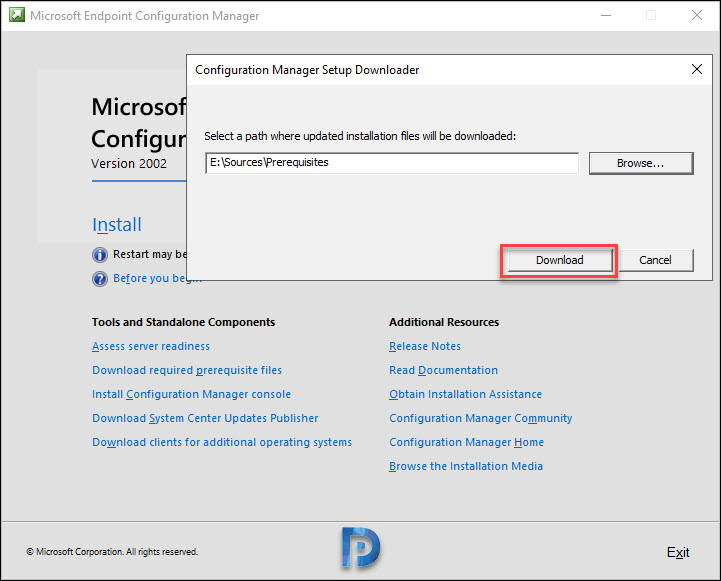
On the Configuration Manager Setup Downloader box, click Browse and specify a folder to download prerequisites. Click Download button.
Wait until all the prerequisites are downloaded. We will use this folder while installing Configuration Manager.
Step 18 – Configure SQL Server memory for ConfigMgr 2002
By default “Maximum server memory (in MB)” allows SQL Server use all available memory. Therefore it is important to limit this memory usage.
Suppose you are running ConfigMgr 2002 on the same server with SQL Server. I’d recommend to allocate about 8GB (not less than that) of memory for ConfigMgr and the Windows Server OS.
Then allocate the rest of memory to SQL Server by using the Maximum Server memory setting.
To configure SQL Server memory for Configuration Manager 2002, launch SQL Server management studio.
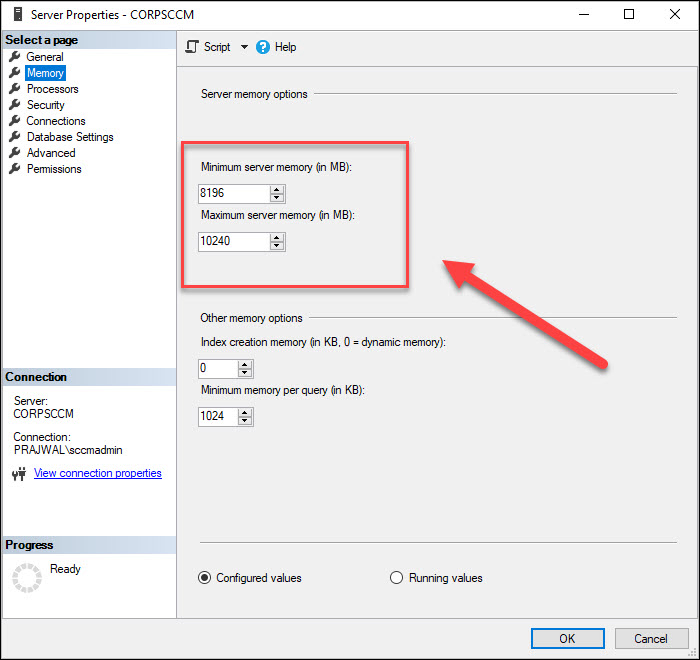
Login to the server and right click the Server and click on Properties. Click on Memory, set Minimum server memory value to 8192 MB or maybe more than that.
Set Maximum server memory as 10240 MB or more. Click OK and close the SQL management studio.
Step 19 – Install SCCM 2002 using Baseline Media
Mount the SCCM 2002 setup media. Run the Splash HTML application from the setup folder.
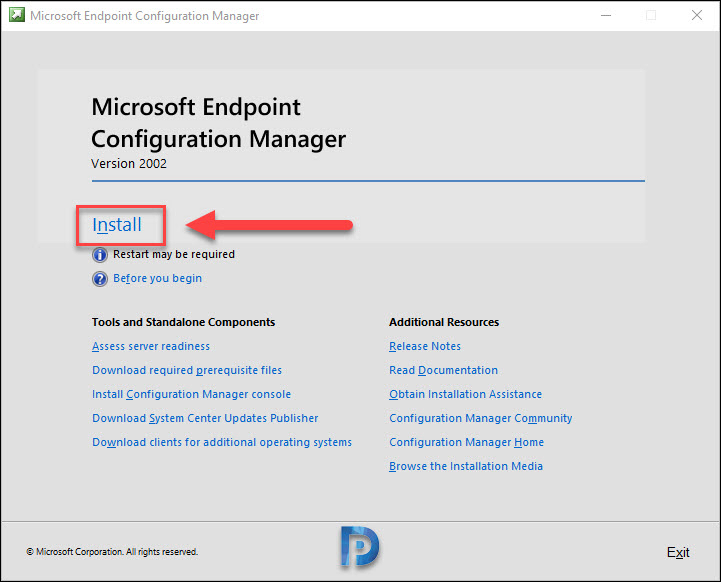
This brings up the System Center Configuration Manager install wizard. We will use this wizard to install Configuration Manager.
Click Install.
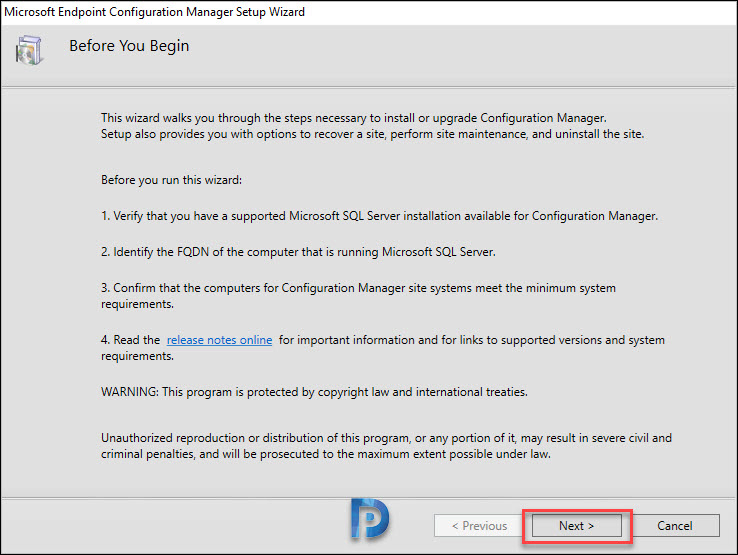
Click Next.
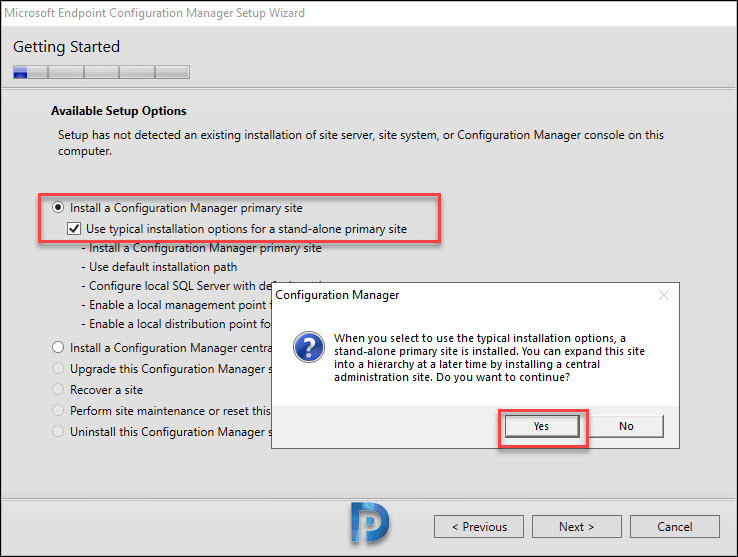
Select Install a Configuration Manager primary site. Also check the box Use typical installation options for a stand-alone primary site. On the confirmation box, click Yes.
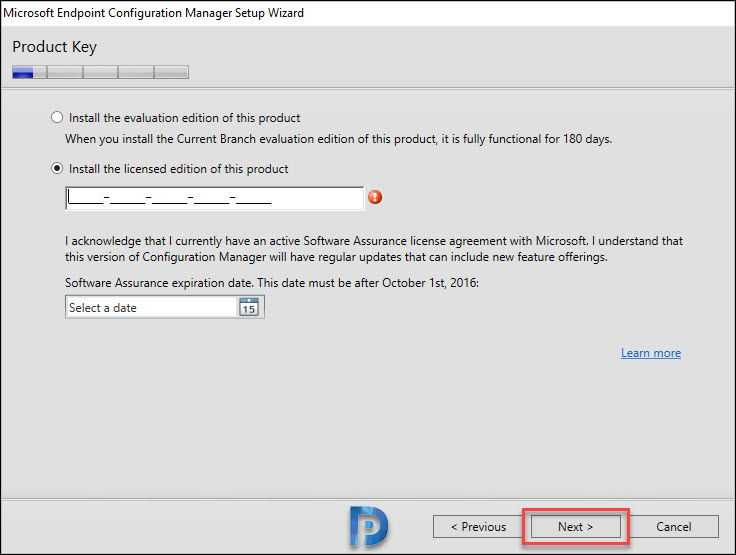
Enter the product key and click Next. If you wish to enter it later, select Install the evaluation edition of this product.
To convert SCCM 2002 from evaluation mode to licensed version, read this post – https://www.prajwaldesai.com/convert-sccm-2012-r2-evaluation-mode-to-licensed-version/.
Click Next.
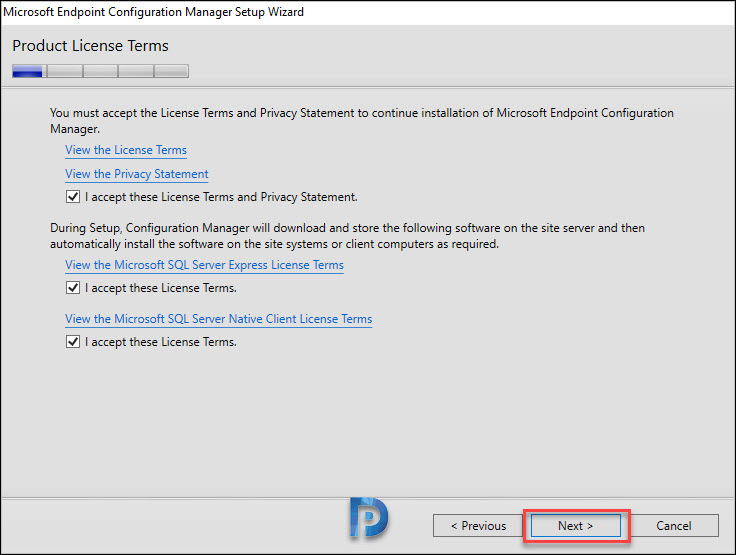
On the Product License Terms page, accept the license terms and click Next.
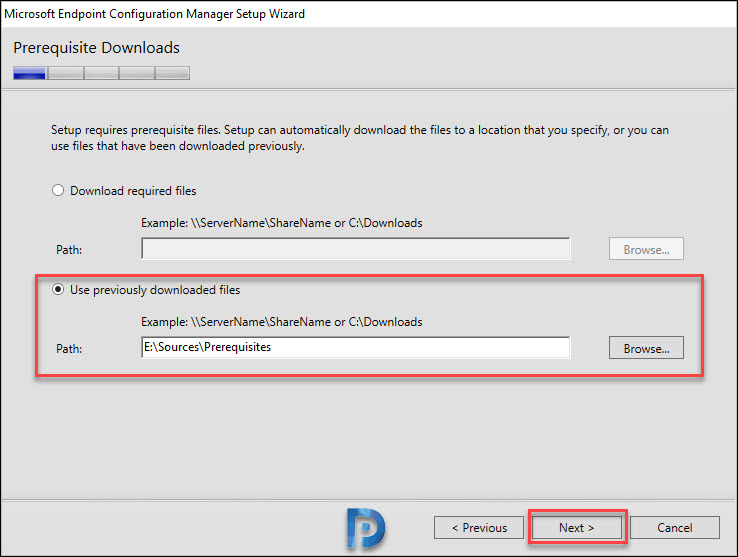
On the Prerequisite downloads page, select one of the options. Since we already have the prerequisites downloaded, I will select Use previously downloaded files.
Click Browse and select the prerequisites folder. Click Next.
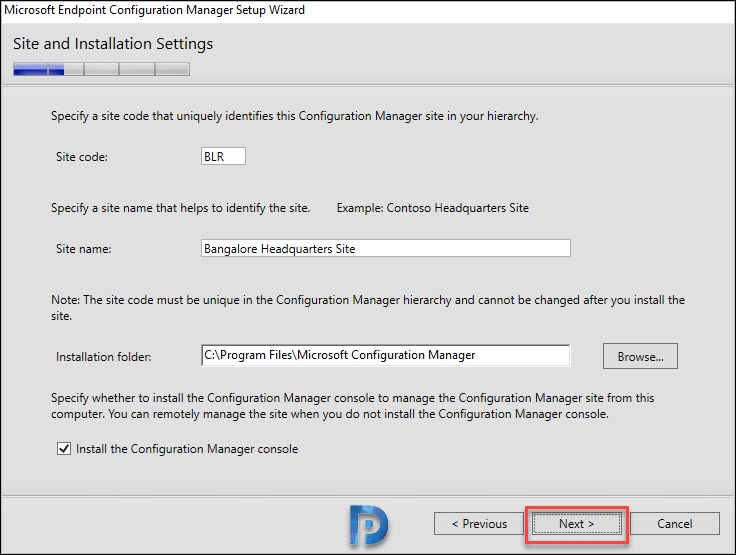
On the Site and Installation Settings page, specify the following.
- Site Code
- Site Name
- Installation Folder – Leave it to default unless you want to change the location.
- Install the Configuration Manager console
Click Next.
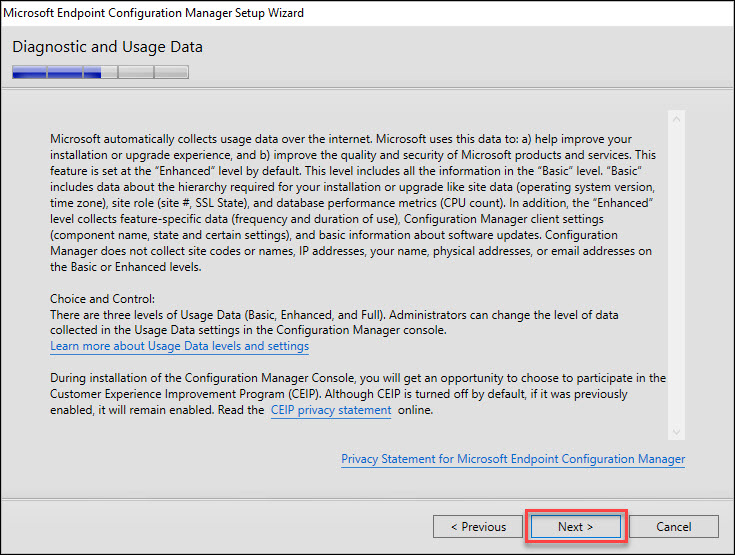
On the Diagnostic and Usage Data page, click Next.
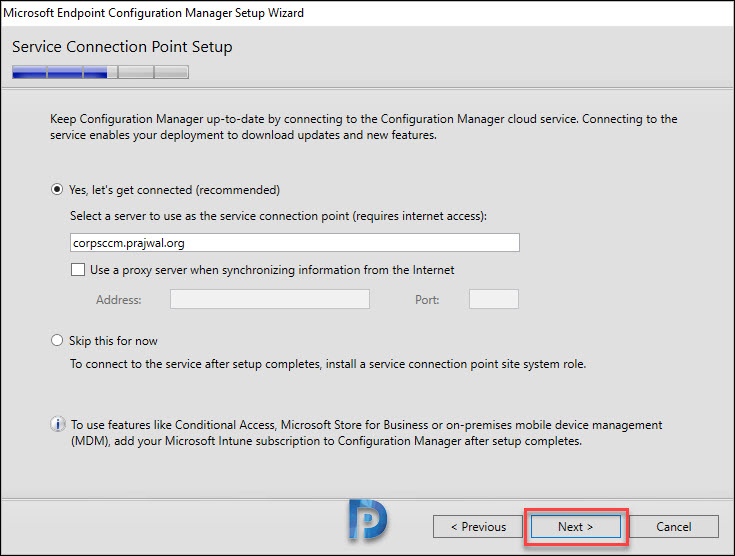
Click Next.
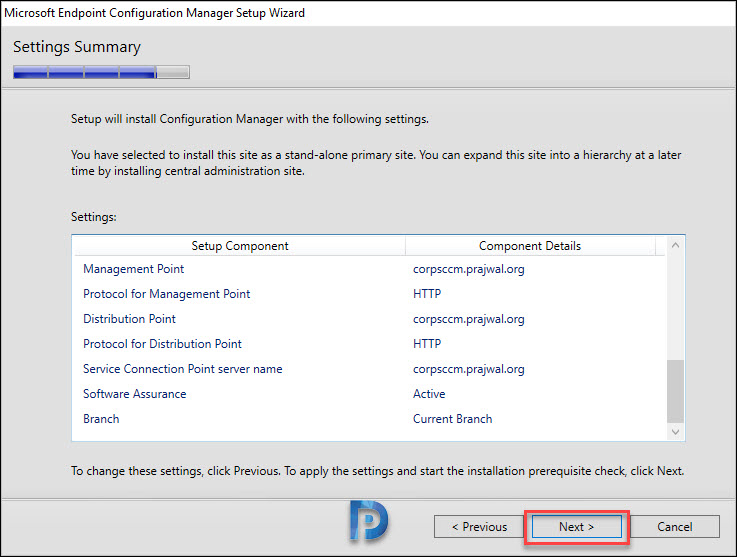
Verify the settings on Summary page and click Next.
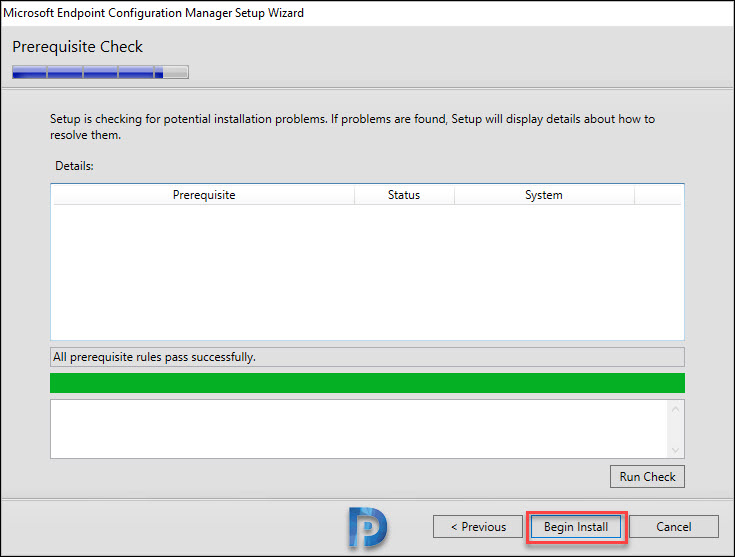
All prerequisite rules pass successfully. Click Begin Install.
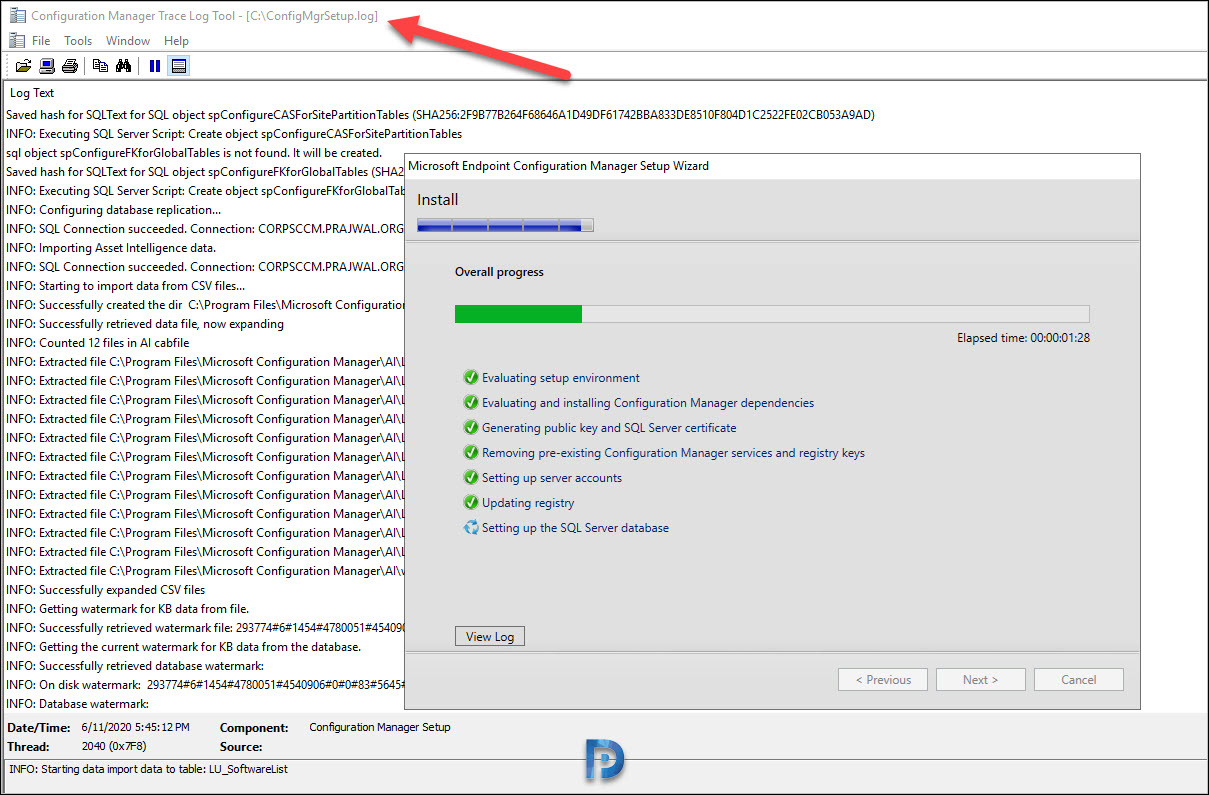
The installation time could take from 30 minutes to more than an hour. So while the installation is happening, you can monitor the install process by opening the ConfigMgrSetup.log file.
Tip – You can open ConfigMgrSetup.log file using CMTrace tool.
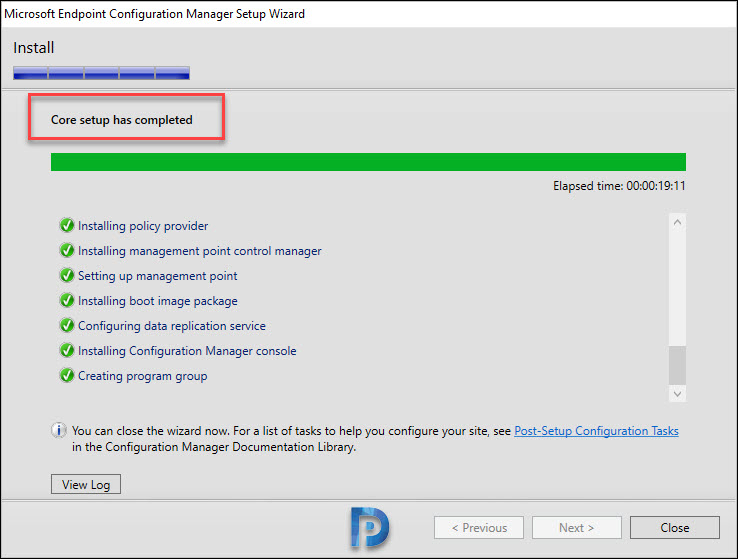
Finally the Configuration Manager 2002 setup is complete. Click Close.
Step 20 – Verify ConfigMgr 2002 Installation
Let’s verify the ConfigMgr 2002 install by checking few things on our new setup.
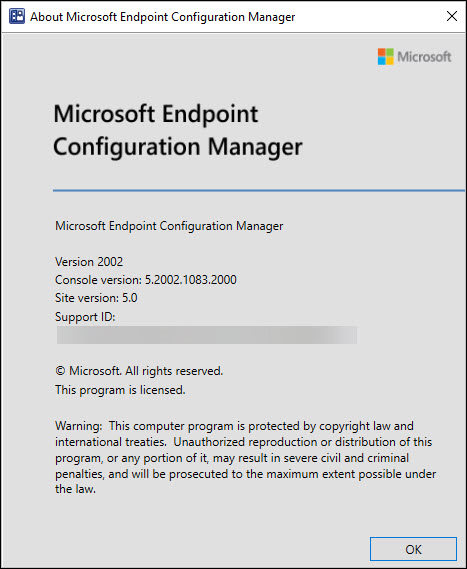
First let’s check the console details. Launch the Configuration Manager console. Click About Configuration Manager.
- Version – 2002 Microsoft Endpoint Configuration Manager
- Console Version – 5.2002.1083.2000
- Site Version – 5.0
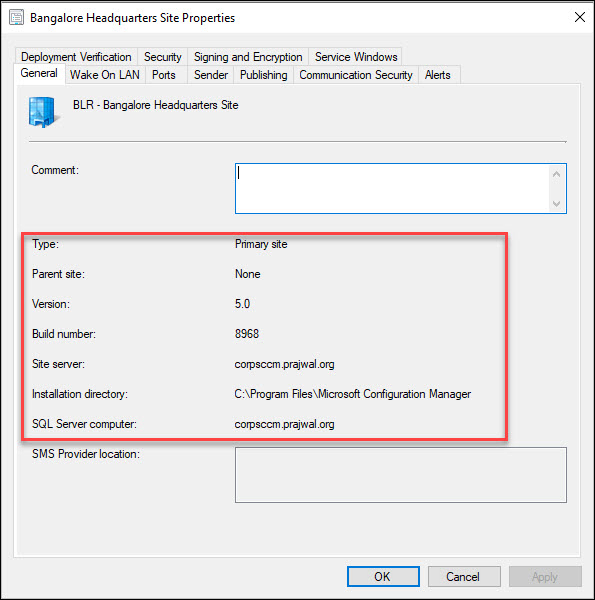
Next, lets check the SCCM 2002 site properties.
In the SCCM console, go to Administration\Overview\Site Configuration\Sites. Right click Primary site and click Properties.
Some details include :-
- Type – Primary site
- Version – 5.0
- Build Number – 8968
This completes the installation of Configuration Manager 2002. After you install SCCM 2002, there are lots of other tasks or you can say post-install tasks that you must perform.
I will not be covering them here because it will make the post even lengthier. As a result, I have published individual guides on configuring basic tasks. I will leave the links below, I hope it helps.
- Configure Boundaries and Boundary Groups
- Install Configuration Manager Clients
- Install SCCM 2002 client agents using Client Push
- SCCM 2002 Site System Roles Installation
- Complete Guide to Install SCCM Software Update Point Role
- Prepare your server for deploying operating system
- Install SCCM secondary site
- Setup PKI for SCCM 2002

Hi,
Can you use this guide for 2103 baseline install
Thanks,
Yes you can use this guide. For ADK, ensure you download the latest version and use it.
Hi Prajwal,
Can I use this guide for 2203 baseline install?
Thanks,
Yes, ensure you use the latest version of Windows ADK and patch SQL with latest cumulative update.
I can only say that you are awesome. I configured everything using your steps and it is working flawless. (After configuring discovery and boundaries)
Thank you
Prajwal, Thank you. I have sccm 2012 environment. unstable. I am planning fresh install of current branch 2002. How to handle old clients? Will the 2002 client push option properly uninstall old and install new?
Thank you very much on this article, it helped on steps to configure SCCM
Glad to hear that.
thanks! your page about sccm is helping a lot
Hi Prajwal,
I am using SQL 2019 – CU6 installed on a remote server, but the SCCM 2002 installation keeps failing at and throws the error “A minimum version of SQL Server 2012 or greater is required”. Do you have any information regarding this error?
He did mention that SQL 2019 has issues
Beautiful work. Thank you.
Question: Why did you choose SQL 2017 instead of SQL 2019? I followed steps using eval of SQL 2019 and all seems well. Any insights would be appreciated. Thanks
SQL 2019 was available at the time of installing SCCM 2002 however I remember there were some issues listed for SQL Server 2019. Yes you can use SQL 2019 instead of 2017.
Thank you much. CU5 or higher. I’m planning an sccm install in a month or so. I would want to avoid a sql upgrade project.
“Specify the service accounts. Note the you must use a separate account for each SQL server service”
I think a calcification is needed that you need AD Accounts to run SQL and Update Screenshots.
“A minimum version of SQL Server 2012 Native Client which includes support for TLS 1.2 must be installed. Starting in version 1810, the minimum version is SQL 2012 SP4 (11.*.7001.0). Otherwise you might get this warning.”
Does SCCM support using OLE DB Driver for SQL Server?
https://docs.microsoft.com/en-us/sql/connect/oledb/download-oledb-driver-for-sql-server?view=sql-server-ver15
I was never prompted to install this during my install, it seems like its installed when you install SQL management studio
Sir,
Could you please suggest whether to run “Launch Post-Installation tasks” after installing WSUS roles. I’m not sure but I’ve read posts where it is said to be not recommended.