How to Check Windows 10 Update History
Microsoft publishes new feature and quality updates for Windows 10 on a regular basis. After installing Windows 10 you might be curious to check the list of updates installed on it. It is always good to know what update has been installed recently. There are multiple ways to check or find out windows 10 update history. While some updates may cause issues, it is always good to find out that update and uninstall it. This post lists the ways to check windows 10 update history. All the Windows 10 update release information is maintained here.
How to Check Windows 10 Update History
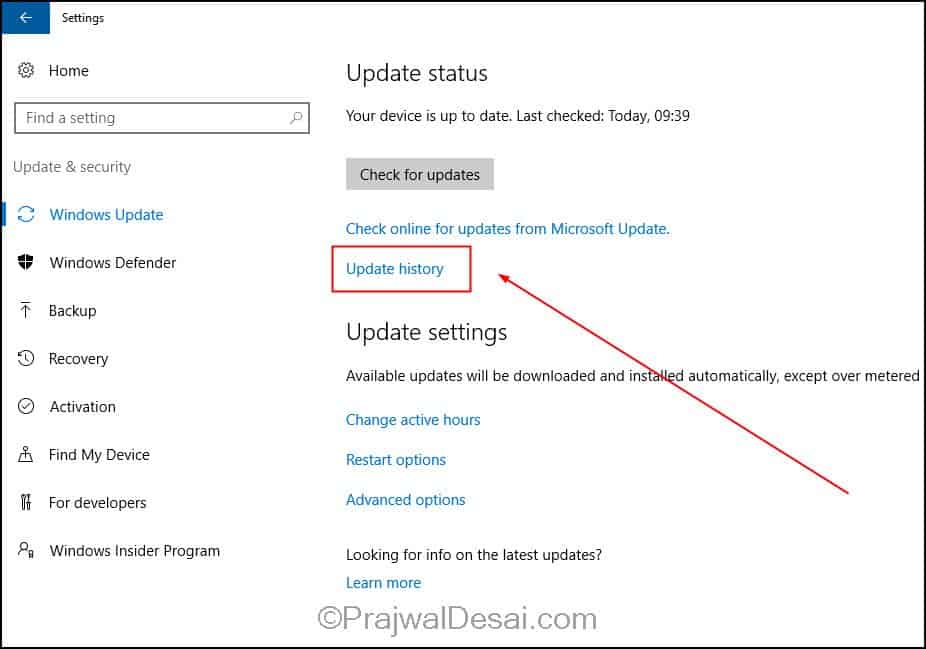
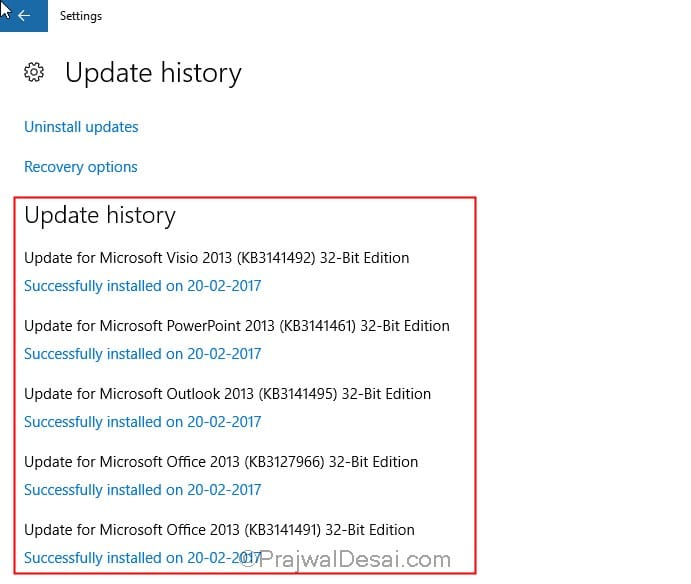
As mentioned above there are various ways to list updates installed on Windows 10. The easiest way to get the info is from Settings. Click Start > Settings > Update and Security. Under the Update Status, click on Update History. The list of installed updates is also found under Control Panel > All Control Panel Items > Programs and Features > View installed updates.
The update history shows the list of updates installed. In addition it also shows if the updated was installed successfully or it failed along with date. The Uninstall updates setting will help you to uninstall an update that’s causing issues.
Furthermore the list of updates can be retrieved using commands. Launch the command prompt as administrator. Type the command wmic qfe. WMIC stands for Windows Management Instrumentation Command-line. Using WMIC, you can list all the hotfixes installed on the computer.
Use the following command to list hotfixes installed wmic qfe get hotfixid. This will display the hotfix ID’s. To find the information about a specific hotfix, use the command wmic qfe | find "hotfix_ID". The hotfix ID that you supply shouldn’t include KB, just add the value after KB. The below screenshot will help.


