How to Pin a Windows 365 Cloud PC to Taskbar
The Windows 365 app allows users to pin their Cloud PC to the taskbar on Windows computers. Let’s see how to pin a Windows 365 Cloud PC to taskbar so that you can quickly access your Cloud PC without having to launch the Windows 365 app.
Starting with Windows 365 Service release 2304, end users can now pin their Cloud PC to the task bar in the Windows 365 app. This lets them launch the Cloud PC from the task bar icon without going into the connection center.
Windows 365 is a PC solution that runs in the cloud. It lets users access a virtual Windows desktop from any device with a web browser. The service is meant to meet the needs of contractors, interns, and other short-term workers. Windows 365 Cloud PC works on all devices, including Macs, iPads, and Android phones.
There are multiple ways to access the Cloud PCs, and one of the easiest methods to connect to a Cloud PC is by using the Windows 365 app. The app is compatible with both Windows 10 and Windows 11 operating systems.
Every time you want to connect to a Cloud PC, you have to open the Windows 365 app. This takes a lot of time, and not everyone would like to do it every time. Microsoft has made it possible to pin a Cloud PC to your taskbar and connect to it with just one click.
Here are some fundamental guides to help you get started with Windows 365 Cloud PCs:
- How to Provision Windows 365 Frontline Cloud PCs
- List of Windows 365 Cloud PC Reports in Intune
- 2 Ways to Get Windows 365 Cloud PC Connection Details
- How to Configure Alerts for Windows 365 Cloud PCs in Intune
- 2 Best Methods to Access Windows 365 Cloud PC Audit Logs
How to Pin a Windows 365 Cloud PC to Taskbar
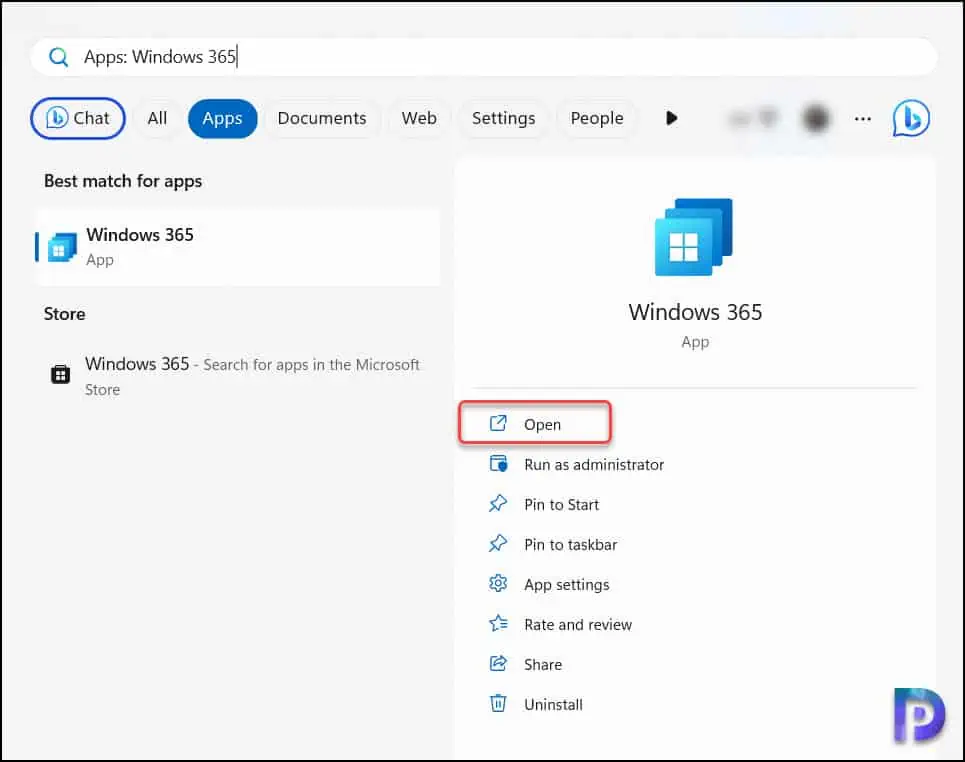
Let’s see how to pin a Cloud PC to taskbar in Windows 11. Click Start and type “Windows 365” in the search box. From the search results, select the Windows 365 app to launch.
After you launch Windows 365 app, the first step you need to do is login with a user account that is assigned a proper license to access a Cloud PC. Enter the email and password and complete the sign-in process.
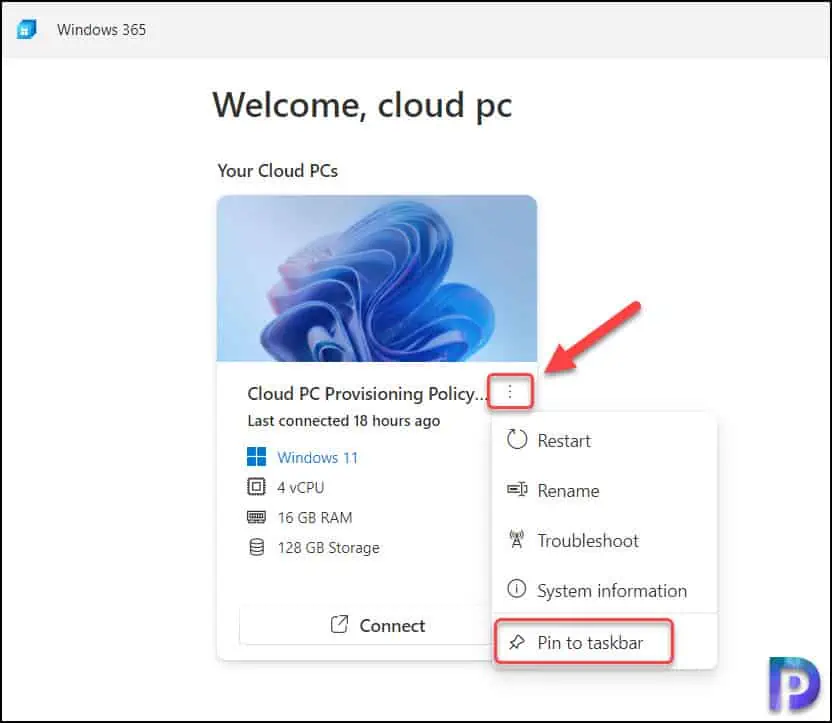
Once you have signed in to Windows 365 app, you can see the Cloud PC assigned to the user. On the Welcome Cloud PC window, you can see the hardware specs of the cloud PC and there is a connect button. Click on the three vertical dots and, from the drop-down menu, select “Pin to taskbar“. This will pin your Cloud PC to the taskbar and the icon appears on the taskbar.
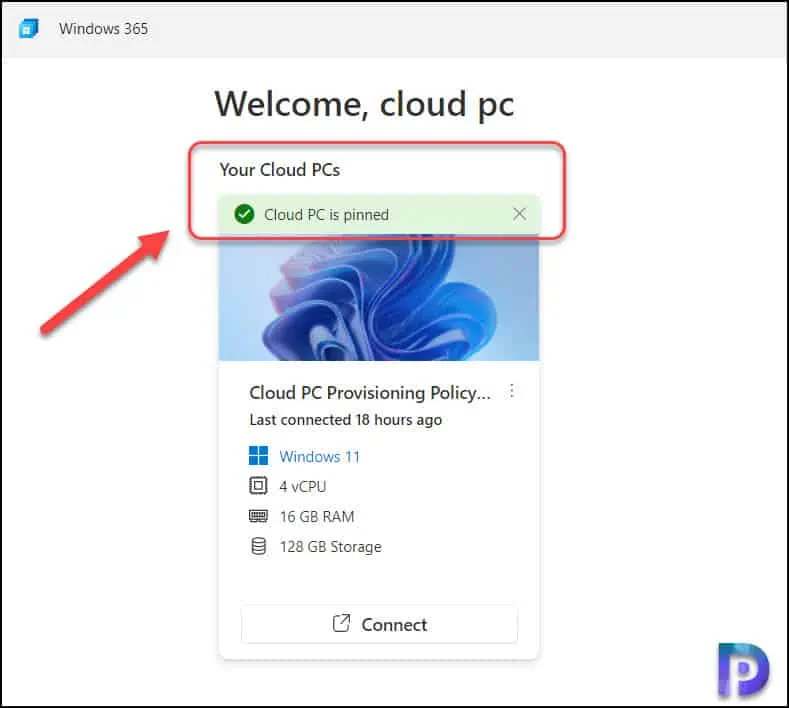
The following message, “Cloud PC is pinned,” will appear after you have completed the above steps, indicating that you have successfully pinned the Cloud PC to the taskbar.
With just one click, you can now instantly connect to your Cloud PC from the taskbar. I found that if you unintentionally click the Cloud PC icon that is pinned to your taskbar, it will connect to the Cloud PC and you will need to sign out or disconnect in order to close it.
How to Unpin Cloud PC from Taskbar
You must use the Windows 365 app to remove the Cloud PC from the taskbar if you’d like to. The pinned Cloud PC icon on the taskbar cannot be unpinned by performing a right-click; Microsoft forbids this.
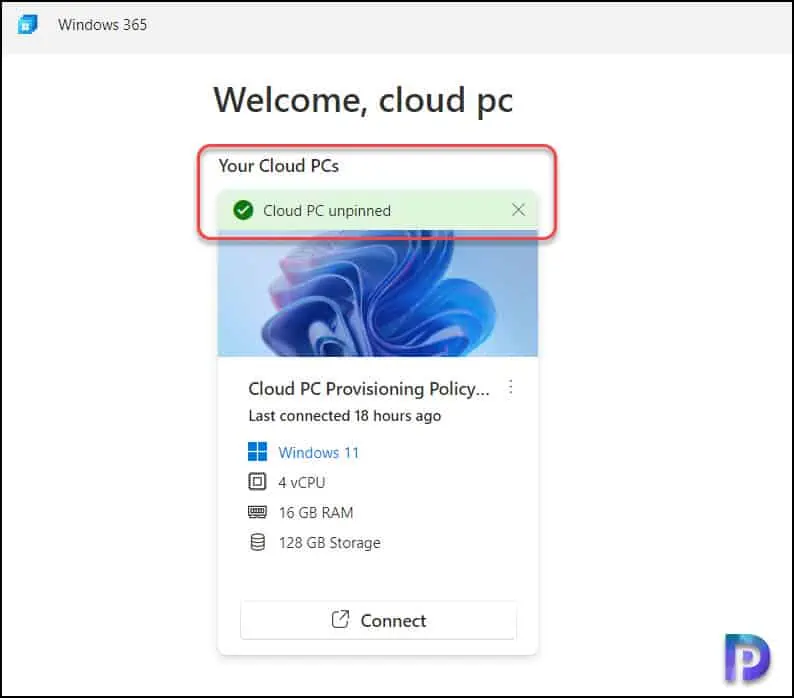
Launch the Windows 365 app and on the welcome window, click on the three vertical dots available for your Cloud PC and select the option “Unpin from taskbar“. That’s how you can unpin the Cloud PC from your taskbar.
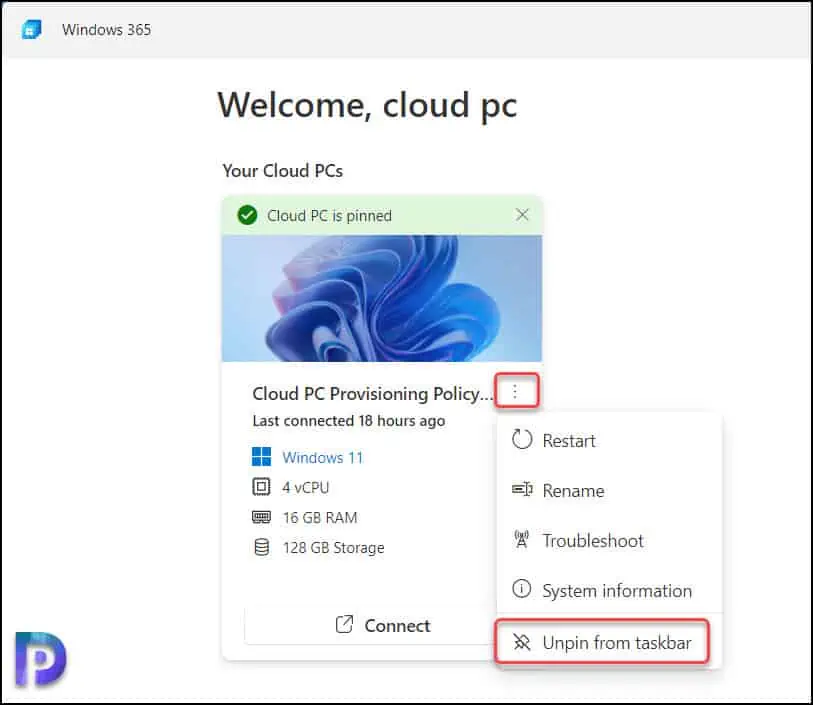
After you unpin the Cloud PC from the taskbar, you’ll see the message “Cloud PC unpinned“.
Also Read
