How to Enable Camera Access for Windows 365 Cloud PC
This article will demonstrate how to enable camera access for Windows 365 Cloud PC. With Windows 365 web client camera support, users can give their Cloud PC access to their local device’s camera.
The Windows 365 web client camera support has been added as a new feature starting in Service Release 2306. When connecting to a Cloud PC using web browser, you can enable camera access for Windows 365 Cloud PC.
When you connect to a Cloud PC using a web browser from your laptop or a PC that is attached to a webcam, the Cloud PC can now access your device’s camera. This enables Cloud PC users to participate in online Skype or Webex conference calls with the Web camera option enabled. Let’s take a closer look at this new feature.
Also Read: Move Windows 365 Cloud PCs to Another Region
Enable Camera Access for Windows 365 Cloud PC
Windows 365 users can give their Cloud PC access to their local device’s camera using the following steps:
- Launch the Edge browser or any supported browser on your PC.
- Navigate to https://windows365.microsoft.com and enter the credentials to access Cloud PCs.
- On their Windows 365 home page, locate the Cloud PC and select Open in browser to connect to the Cloud PC.
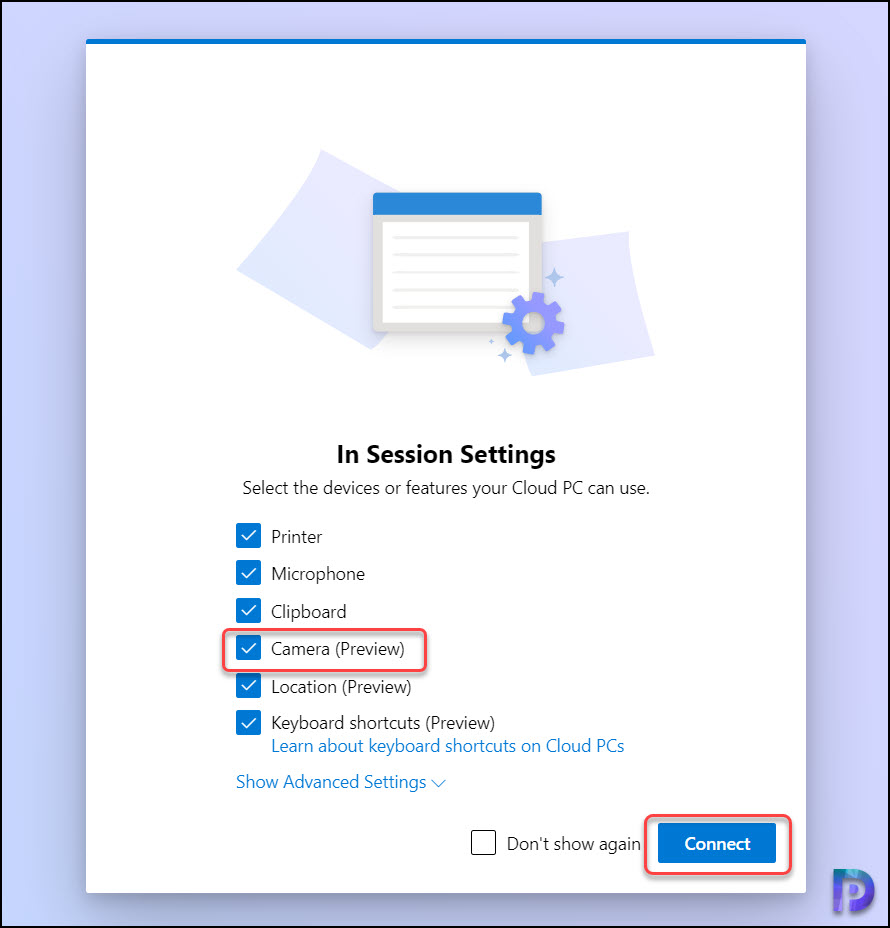
- On the In Session Settings screen, enable the option “Camera” to access the local device’s camera and click Connect.
Once you get connected to the Cloud PC, you see a notification in the top-left corner, “Windows365.microsoft.com wants to use your camera“. To enable camera access for Windows 365 Cloud PC, click Allow.

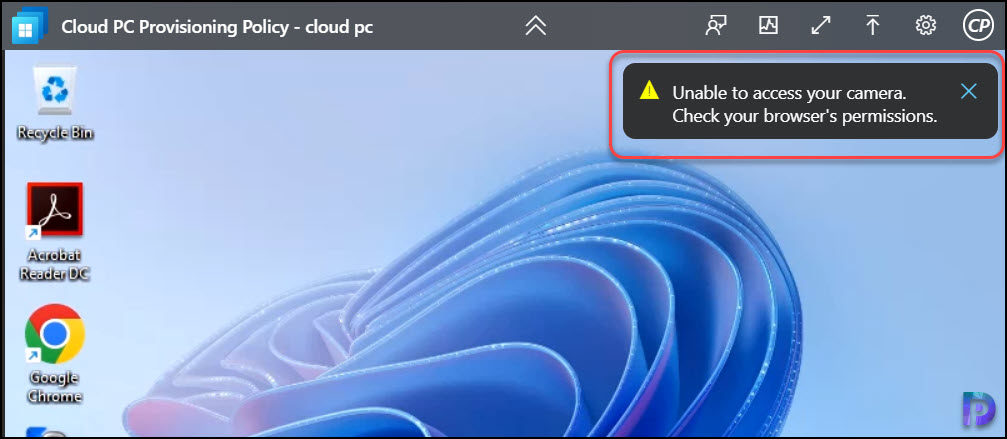
In some cases, your browser may prevent the Cloud PC from accessing the local device’s camera. You see a warning stating that “Unable to access your camera. Check your browser’s permissions“. To resolve this issue, go to browser settings and allow camera access for the site Windows365.microsoft.com in case it was blocked previously.
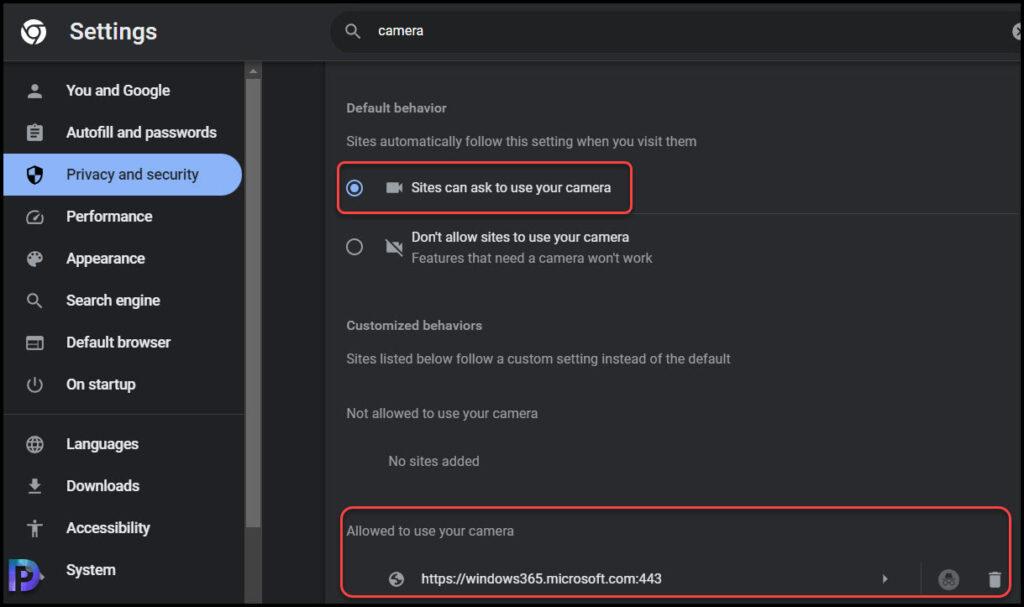
To confirm if your browser allows Windows365.microsoft.com to access the device camera, go to browser settings and in the search box type “camera” and select the Camera Settings. Make sure the Windows365.microsoft.com is listed under the sites that are allowed to use your camera.
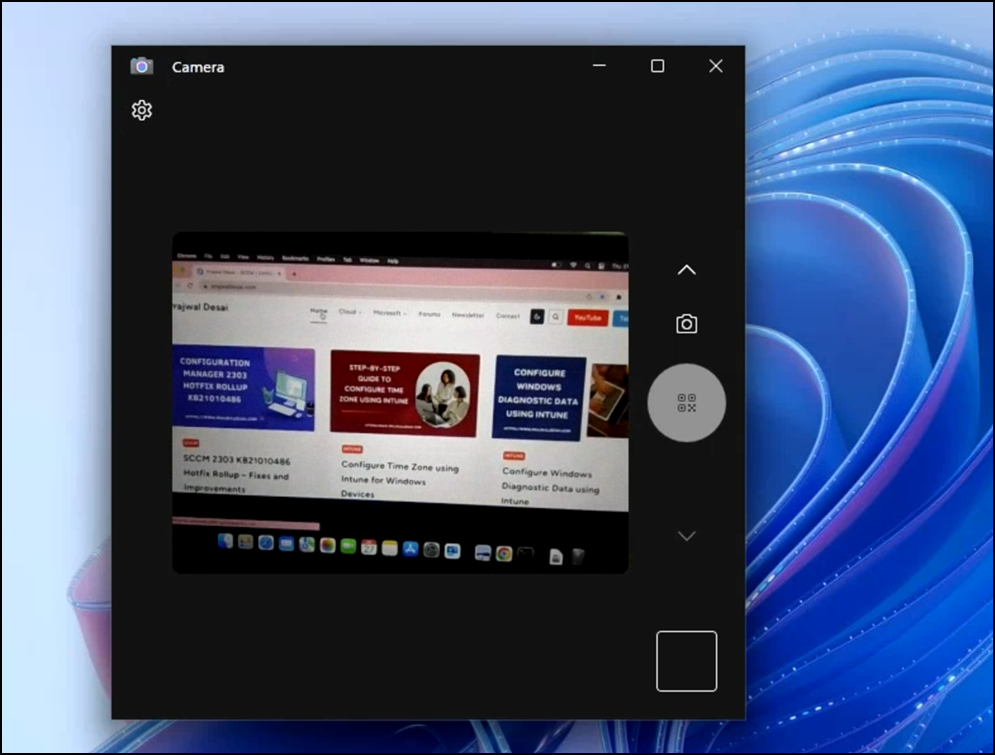
Once you have allowed the Cloud PC to access the device camera in the browser, the user can now access the camera during your online calls. Another way to test if the Cloud PC can access the device camera is using the built-in Windows Camera app.
In the screenshot below, the Windows 365 Cloud PC running Windows 11 can access the device camera on my MacBook using the built-in camera app. We did notice a minor delay, but the camera access functioned properly. On Windows laptops, we didn’t notice any issues with Windows 365 Cloud PC accessing the webcam.
Windows 365 Cloud PC Cannot Access your Camera Error
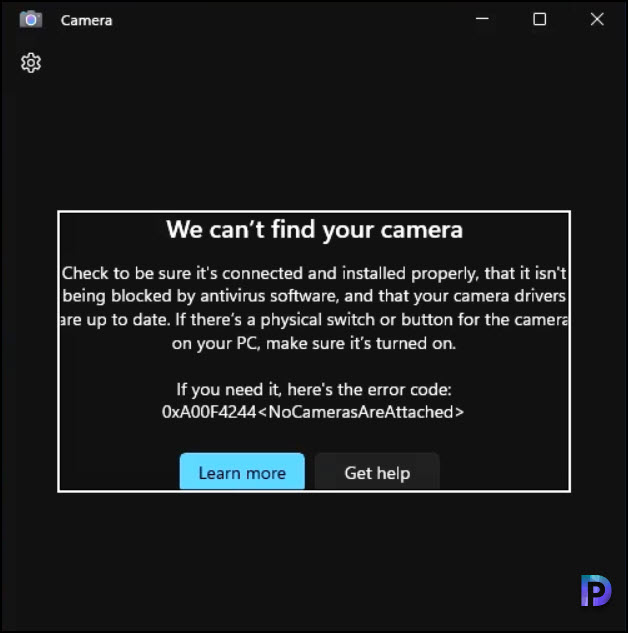
In some cases, you may encounter an error, “We can’t find your camera” when Windows 365 Cloud PC attempts to access local device’s camera. The issue is depicted in the screenshot below, along with an error code 0xA00F4244 that explains why you received the camera access error.
When there is no camera attached to your physical device, error code 0xA00F4244 occurs, and the Cloud PC is unable to access your device’s camera. If you have an external webcam attached to your device, such as Logitech, you should also update the camera drivers.
