2 Best Solutions: Error Can’t Connect to Windows 365
In this article, I will show you how to resolve the error can’t connect to Windows 365. If you are unable to access your Cloud PC using the Windows 365 app, there are two ways to solve this issue.
I normally connect to my Cloud PC using the Windows 365 app. Note that there are multiple ways to connect and access your Cloud PCs. For instance, you can connect to a cloud PC using the Windows 365 home page, the Windows 365 App, or the Microsoft Remote Desktop client.
Cloud PCs are accessible to users only after you assign Windows 365 licenses to users. Note that you should also provision Windows 365 Cloud PCs that allow users to access them from any device. In my case, the provisioning policy in place for Cloud PCs and a valid license was assigned to the user.
In some cases, when you attempt to connect to Cloud PC, there may be gateway errors or connection errors. Refer to the following guide on troubleshooting Cloud PC connection errors, where I have covered solutions for Cloud PC access errors.
Check out some useful guides on Windows 365 Cloud PCs.
- Quickly Reprovision a Cloud PC and Restore Windows 365 Cloud PC
- Create a Provisioning Policy in Windows 365 for Cloud PC
- Delete provisioning policies from Cloud PCs
- Cloud PC Remote Actions in Windows 365
- How To End Grace Period for Cloud PCs in Windows 365
Fix: Can’t Connect to Windows 365
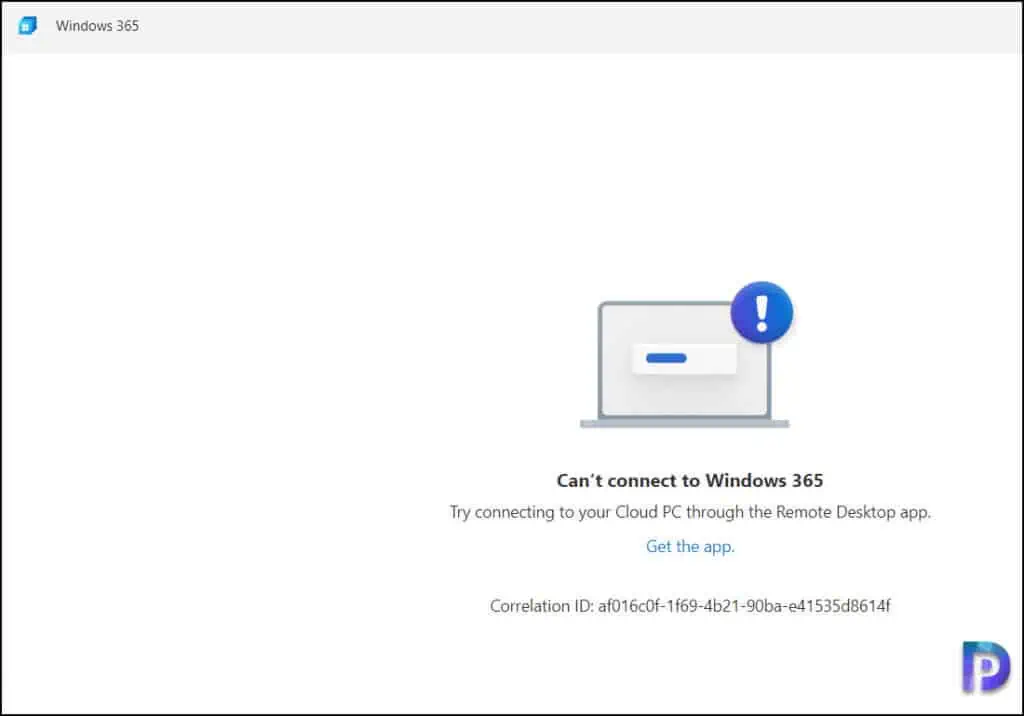
If you are facing an error “Can’t connect to Windows 365” using the Windows 365 App, it means either your Windows 365 Cloud PC subscription has expired or the Windows 365 app is corrupted on your computer.
While I was able to connect to my Cloud PC using Remote Desktop Client, I was unable to do so using the Windows 365 app. On the Windows 365 app, the following error message was displayed:
Can’t connect to Windows 365. Try connecting to your Cloud PC through the Remote Desktop app. Correlation ID.
Solution 1: Check the Windows 365 Subscription
If you are unable to connect to your Cloud PC VM through the Windows 365 app, chances are that the Windows 365 subscription has expired. So, how do you conclude that your Windows 365 subscription is deactivated or expired? Let me show you some screenshots that illustrate this issue.
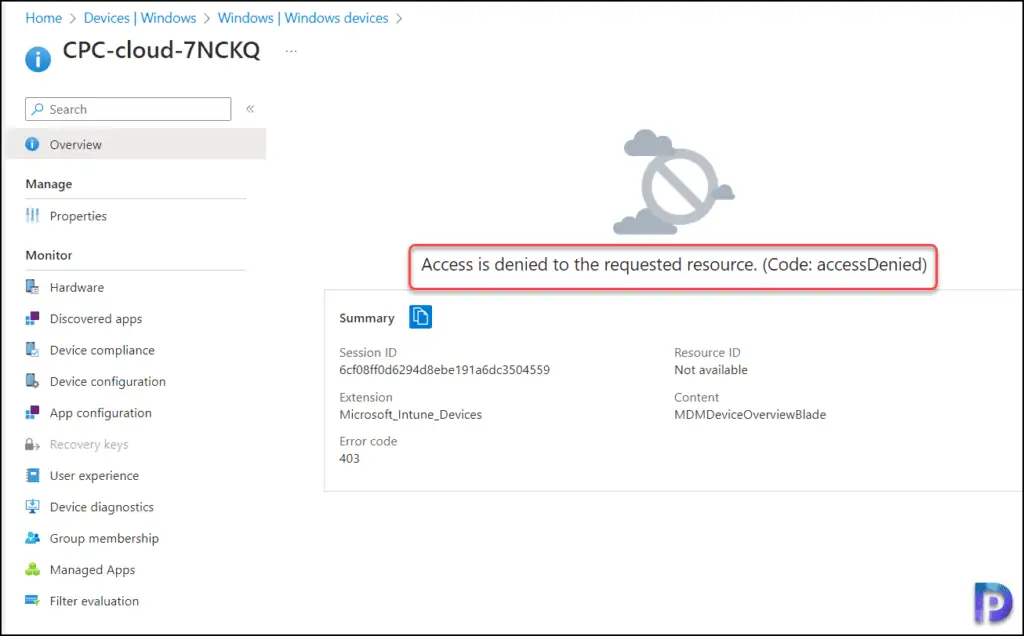
Log in to Microsoft Intune admin center and navigate to Devices > Provisioning > Windows 365 > All Cloud PCs. Here we see the message “access is denied to the requested resource” along with error code 403. The Cloud PC that I was trying to access is not even visible on the console.
Next, checking the licenses in Microsoft 365 admin center shows that Windows 365 license doesn’t apply. Ideally, you’re supposed to see the license count here.

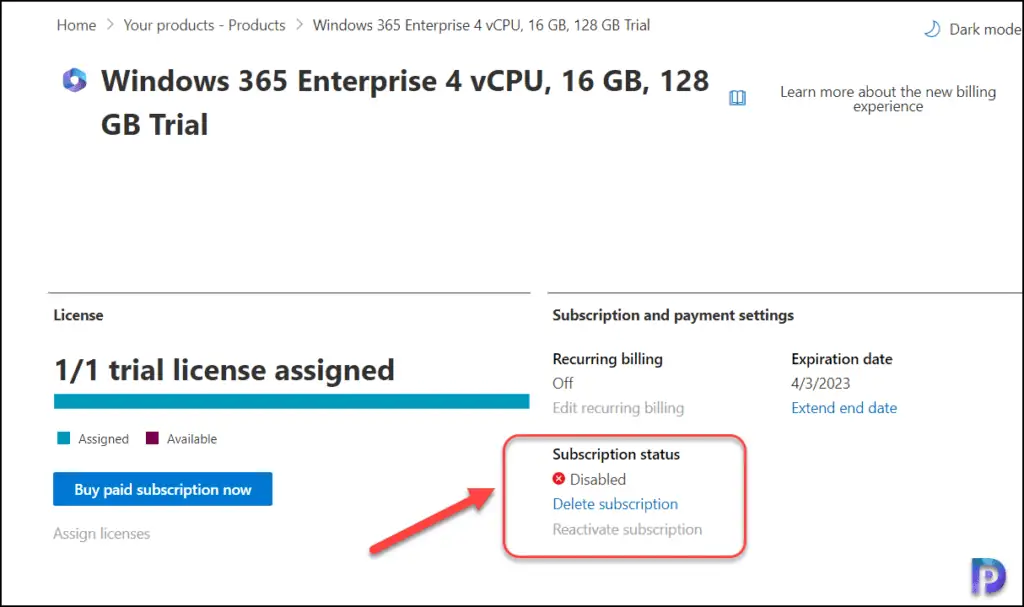
In the Microsoft admin center, under Billing, select “Your Products“. Next, select the Windows 365 Enterprise/Business product to view the subscription details. Here you must check the subscription status. In the screenshot below, we see the subscription status is Disabled. This is one of the reasons why you encounter the error, can’t connect to Windows 365 via the Windows 365 app.
If the subscription status for Windows 365 Enterprise shows as “Disabled“, you cannot connect to your Cloud PC. To access the Cloud PC, you must renew and activate subscription (in case it is expired recently). If you see the Windows 365 subscription status as Active, it means you can connect to Cloud PC without any issues.
Solution 2: Windows 365 App is Corrupted
You could experience the problem can’t connect to Windows 365 when the Windows 365 app installed on your PC becomes corrupted. If the Windows 365 software is corrupted, you might not be able to connect to any Cloud PCs.
Note: Windows 365 app is available in Microsoft Store for Windows 10 and Windows 11. Ensure the app is updated to the latest version. Refer to this useful guide that shows how to update apps on Windows 11.
You can repair, reset, or reinstall the corrupted Windows 365 app on your computer. I advise clearing the app’s data and resetting the app, which is equivalent to installing it from scratch.
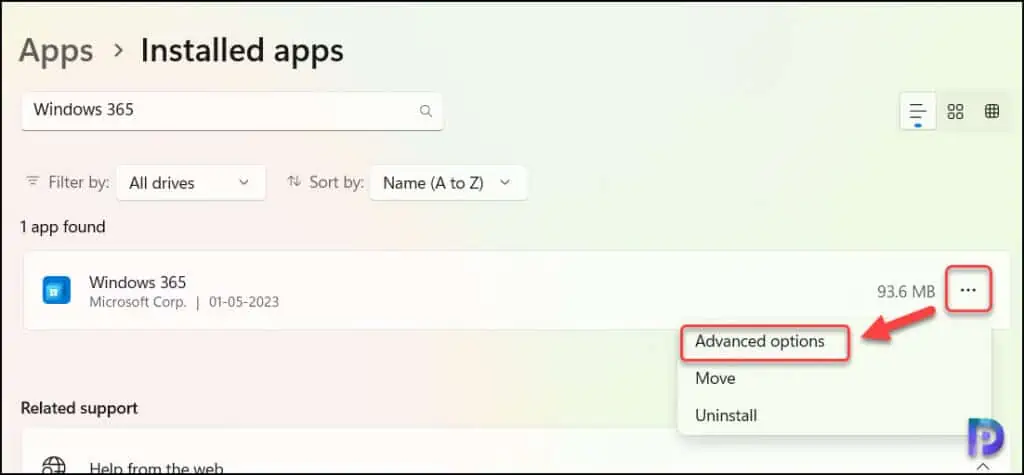
To reset the Windows 365 app, go to Apps > Installed Apps. From the list of apps, select Windows 365 app and click on three horizontal dots. From the drop-down, select Advanced Options.
Among the options Repair and Reset, select Reset.
Tip: Repair will fix the app issues without deleting the app’s data, whereas Reset will resolve all the app issues and app’s data will be deleted.
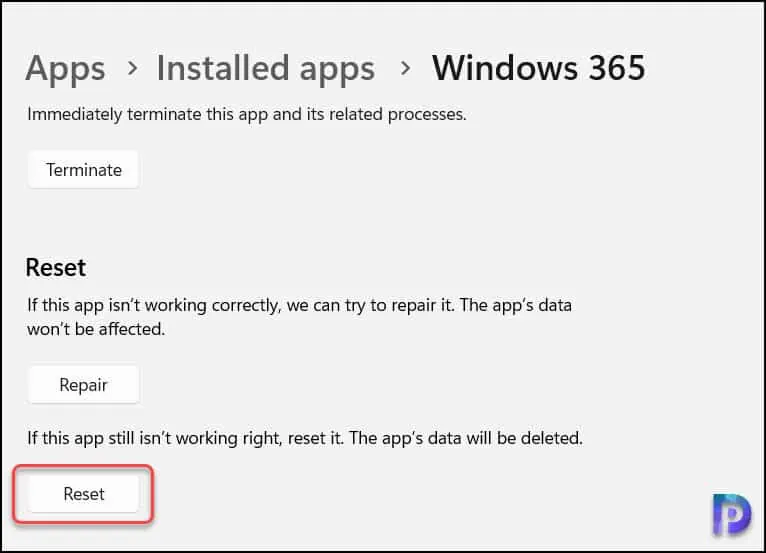
Click on Reset.
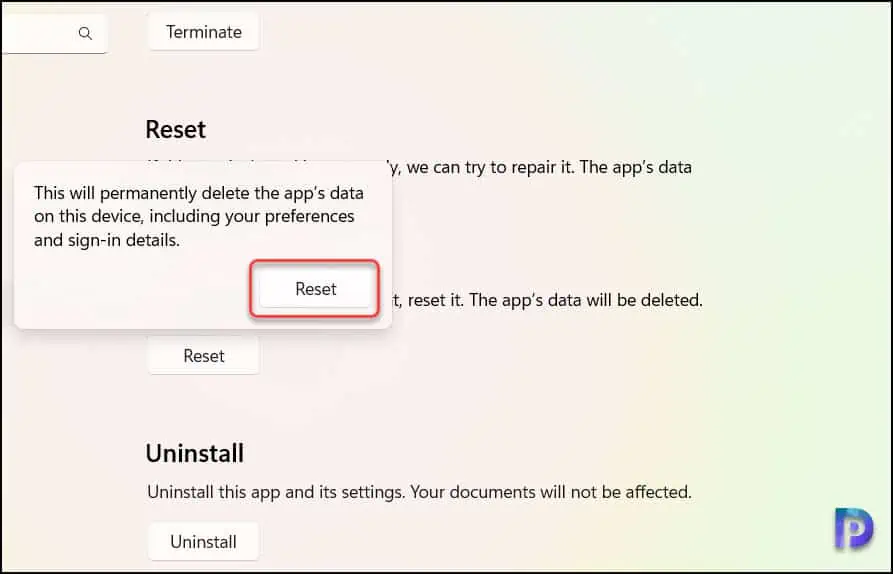
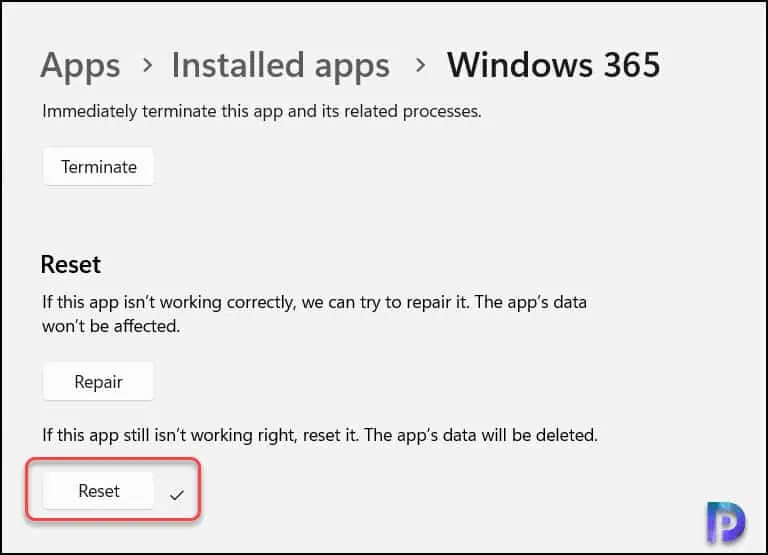
The Windows 365 app is now reset to its default settings and all the app data is cleared.
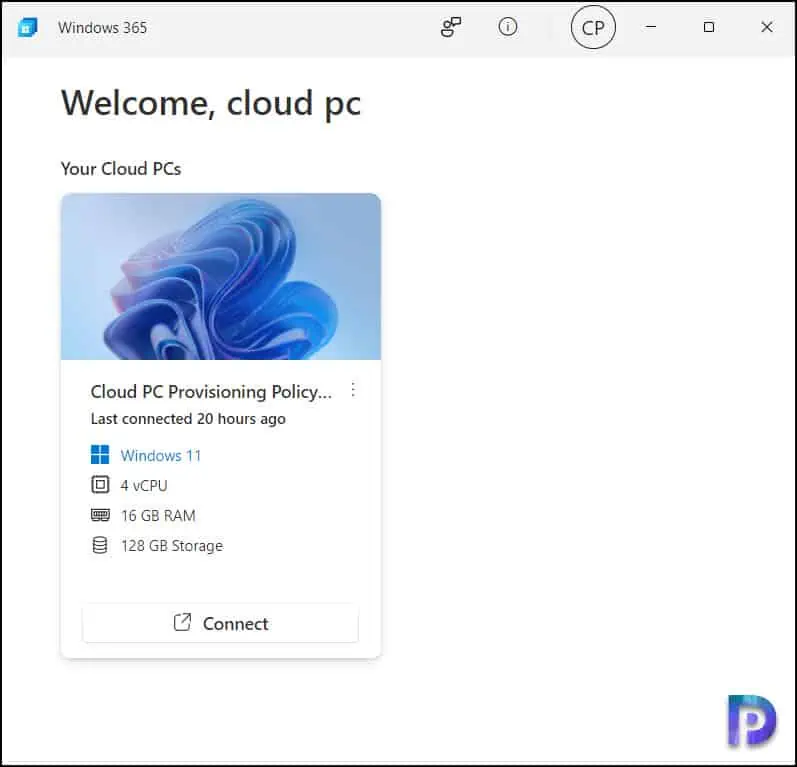
Now launch the Windows 365 app on your PC. The error can’t connect to Windows 365 doesn’t appear any more. The Cloud PC entry is visible on the Windows 365 app, and you can now connect and access it.
Also Read
