How to Enable Telnet on Windows 11 | Disable Telnet
If your PC is running Windows 11, you can enable Telnet on Windows 11 using multiple ways. You need Telnet to remotely access servers and I will show you how to enable Telnet service in Windows 11. The steps to uninstall Telnet will also be covered in this article.
When troubleshooting firewall and network issues at work, I have used Telnet primarily on Windows servers. The procedures for installing telnet in Windows 11 are the same as for other versions of Windows. Telnet has been useful for managing and testing network access for developers and administrators.
When the Telnet client is enabled, you can run commands on a remote server and the output of these will be returned to the Telnet client. In addition to Windows 11, the Telnet client is still available on Windows Server 2022.
Related Article: How to Join Windows 11 PC to Active Directory Domain
What is Windows Telnet?
Telnet is an application protocol that allows you to connect to a different computer. It stands for Terminal Network, which was introduced way back in 1969. Telnet offers a command-line interface to communicate with a device.
In recent times, it has been replaced on most computers by the safer SSH protocol. Although Telnet is outdated, it is not dead and still part of Windows 11. Windows Telnet is still required in some circumstances, such as when testing firewall connectivity and remote SQL connections.
In Windows 10 and Windows 11, Telnet is disabled by default and can be enabled manually when required. The process of enabling telnet only needs to be done once and only requires a few simple steps.
Recommended: How to Get Public IP Address Using PowerShell
Enable Telnet on Windows 11 using the Control Panel
The recommended method to enable the telnet on Windows 11 is from control panel, and you can do that with following steps:
- Click Start and launch the Control Panel on Windows 11 PC.
- View the items by Category and click Programs. Under Programs and Features, click Turn Windows features on or off.
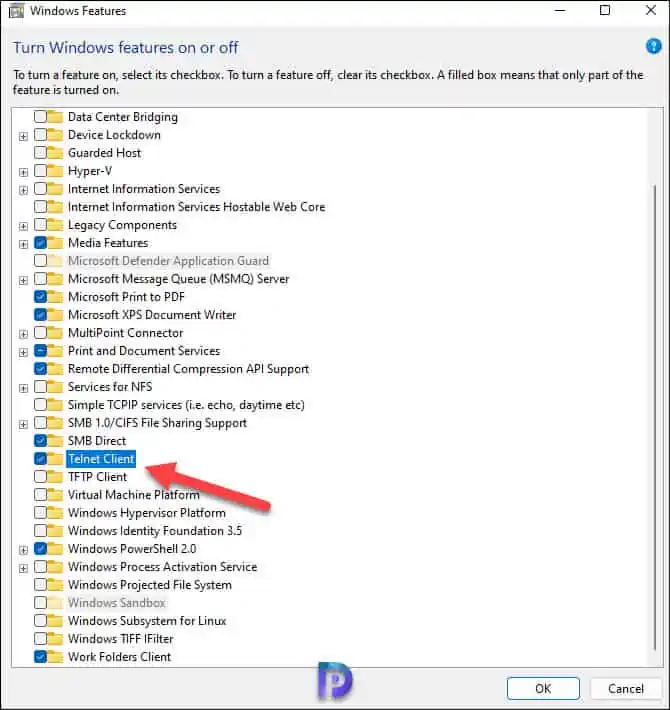
- In the pop-up window, scroll down to find Telnet Client and then tick the checkbox of this item.
- Click OK to save the changes.
Also Read: How to disable Control Panel using Group Policy
Install Telnet on Windows 11 using Command Prompt
Telnet can also be installed on Windows 11 by using Command Prompt (CMD), in addition to turning it on in Control Panel.
- On Windows 11 PC, click Start and type command prompt to the search box, right-click the tool, and choose Run as administrator.
- In the CMD window, type the command – dism /online /Enable-Feature /FeatureName:TelnetClient and press Enter to run the command.
- After the telnet is enabled, you need to restart your PC.
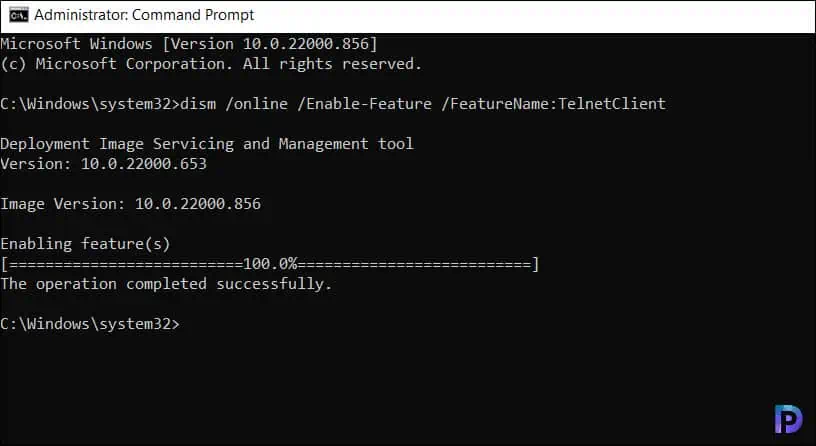
In the below screenshot, we see the DISM is used to install the telnet client on Windows 11. If you encounter error: 740 while enabling the telnet client, it means elevated permissions are required to run DISM. Ensure you use an elevated command prompt to complete these tasks.
Also Read: Fix: RSAT Tools Installation Error 0x800f0954 on Windows
Install Telnet on Windows 11 using PowerShell
Follow these steps to install Telnet on Windows 11 using PowerShell:
- Click Start and type PowerShell in the search box.
- Right-click Windows PowerShell and select Run as administrator.
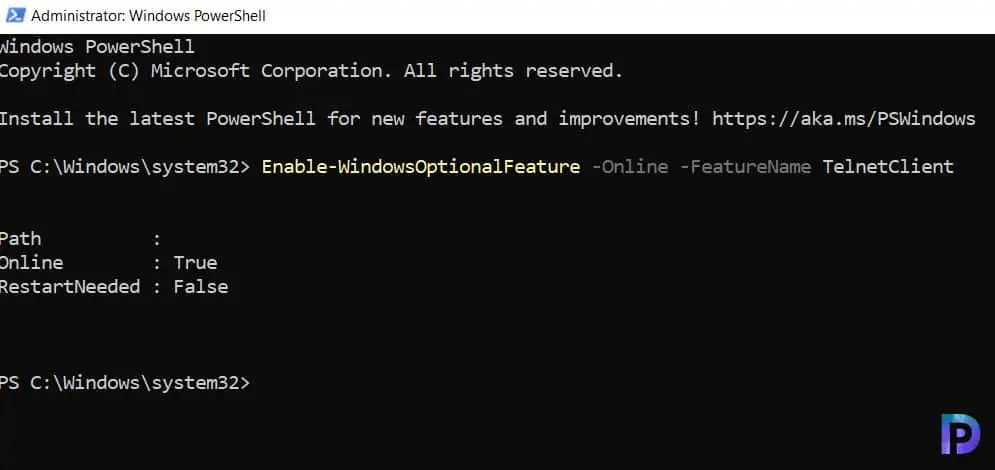
- Type Enable-WindowsOptionalFeature -Online -FeatureName TelnetClient and click Enter.
- This enables the Telnet client on Windows 11.
How to Verify Telnet Is Enabled On Windows 11
After you install Telnet on Windows 11, you can verify whether the Telnet is enabled with the following steps.
- Click Start and launch the Command Prompt as administrator.
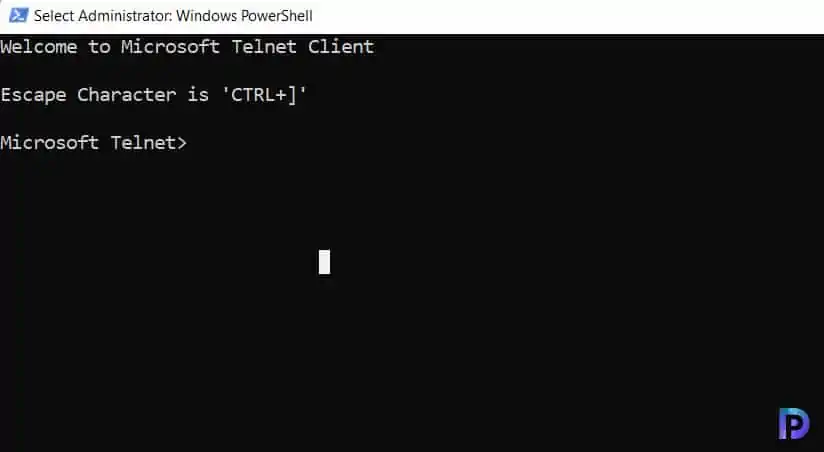
- Type the command Telnet and press Enter key.
- A new Telnet CMD opens which confirms the Telnet is enabled on the Windows 11 PC.
You can now run the Telnet commands and perform the troubleshooting. To exit out of the Telnet shell, type q, and you should now get back to normal command prompt.
How to Disable Telnet on Windows 11
When you don’t need the Telnet client anymore on your Windows 11 PC, you can disable it. You may use different methods to disable telnet on Windows 11, and we will look at these methods in detail.
Disable Telnet using Control Panel
Follow these steps to disable Telnet on Windows 11 using the control panel:
- Click Start and launch the Control Panel on Windows 11 PC.
- View the items by Category and click Programs. Under Programs and Features, click Turn Windows features on or off.
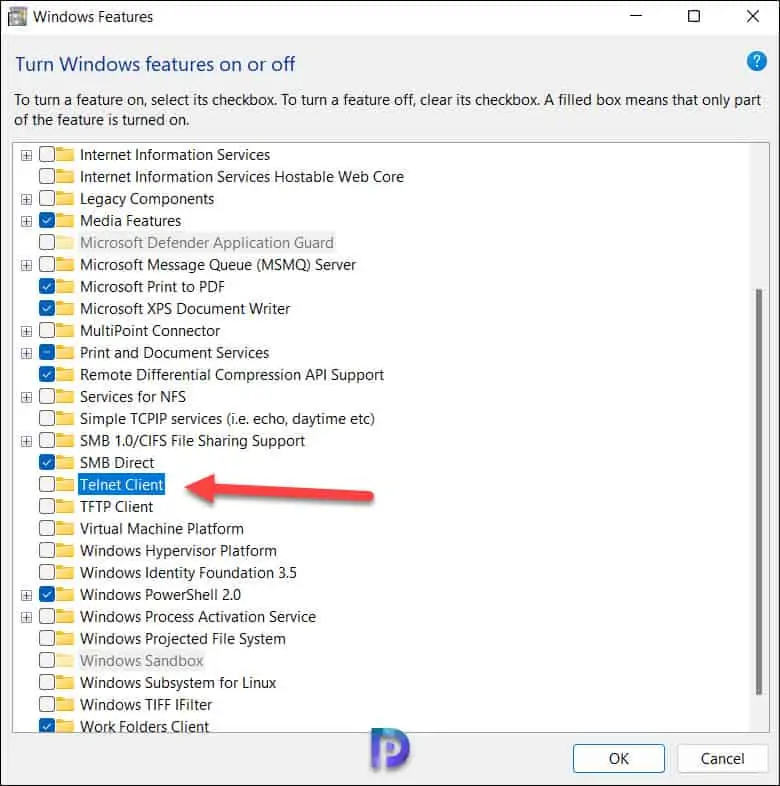
- In the pop-up window, scroll down to find Telnet Client and then Untick the checkbox of this item. Click OK to save the changes.
Disable Telnet using PowerShell
You can disable Telnet using PowerShell with following steps:
- Click Start and type PowerShell in the search box.
- Right-click Windows PowerShell and select Run as administrator.
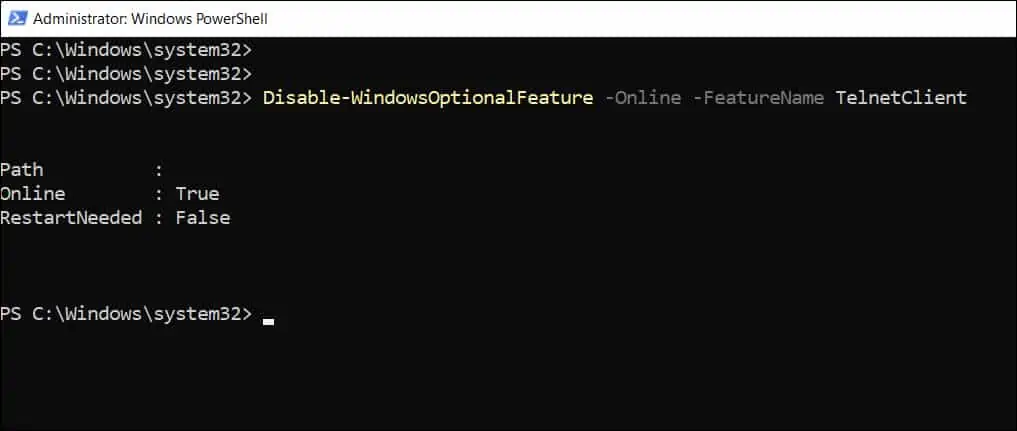
- Type Disable-WindowsOptionalFeature -Online -FeatureName TelnetClient and click Enter.
- This removes the Telnet client on Windows 11.
Uninstall Telnet using Command Prompt (CMD)
You can remove or uninstall telnet using command prompt with following steps:
- On Windows 11 PC, click Start and type command prompt to the search box, right-click the tool, and choose Run as administrator.
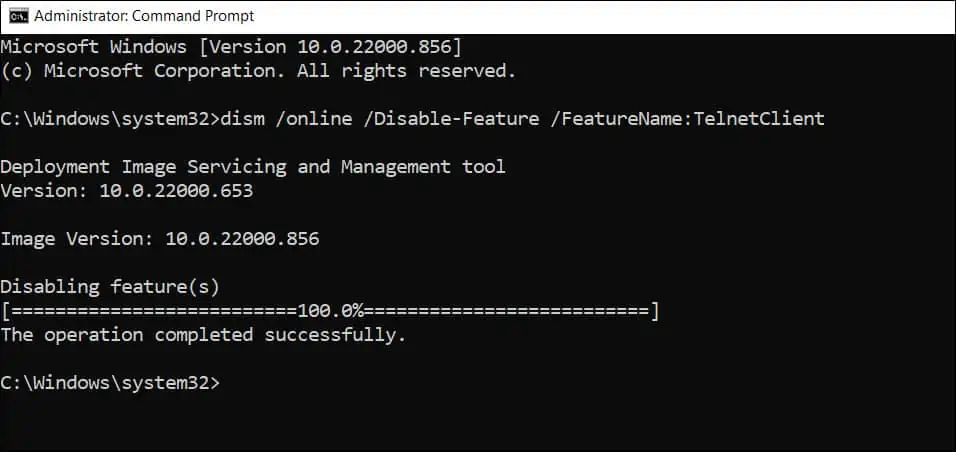
- In the CMD window, type the command – dism /online /Disable-Feature /FeatureName:TelnetClient and press Enter to run the command.
- After the telnet is disabled, you need to restart your PC.
