3 Proven Ways to Repair Remote Desktop Client
In this article, we will demonstrate two methods to repair remote desktop client. If the remote desktop client crashes or reports an error code on your PC, the best option is to repair it.
The Remote Desktop client repair operation repairs the errors in the most recent installation by fixing missing and corrupt files, shortcuts, and registry entries.
According to Microsoft, the Remote Desktop client allows you to connect to Remote Desktop Services from Windows Server and remote PCs, as well as use and control desktops and apps made available to you by your administrator. You can also connect to Azure Virtual Desktop with the Remote Desktop client for Windows.
Note that Microsoft is no longer updating the Microsoft Remote Desktop app for Windows with new features, and support for Azure Virtual Desktop will be removed in the future. For the best Azure Virtual Desktop experience that includes the latest features and updates, it is recommended that you download and install the Windows Desktop client.
There are two ways to download and install the remote desktop client on your PC. You can get the Remote Desktop client installer from the web or download the Remote Desktop app from the Microsoft Store. When you encounter problems with the RD client, no matter which method you used to install it, you can repair it.
Also Read: 2 Proven Ways to Update Apps on Windows 11 [Winget Upgrade]
Repair Remote Desktop Client via Programs and Features
The first method involves repairing the remote desktop client via Programs and Features. On your Windows PC, go to Control Panel\Programs\Programs and Features. Locate the Remote Desktop Client program and select Repair.
When you click on Repair, a Windows Installer window appears that requires the RemoteDesktop.msi installer. Without this installer, you will not be able to proceed with the repair option.
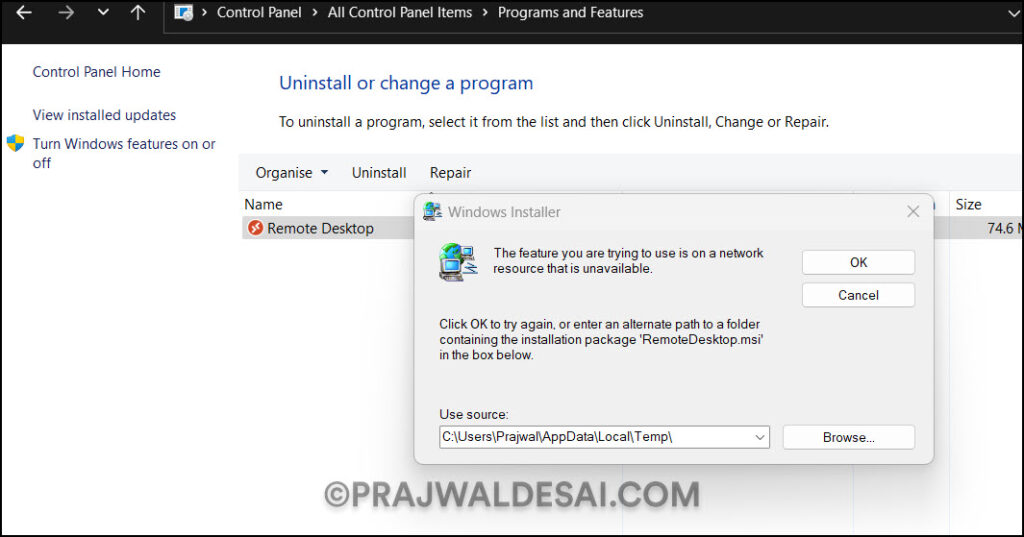
You’ll need to download the latest version of the Remote Desktop client installer and rename the file to RemoteDesktop.msi. That’s because the Windows installer looks specifically for that file name to repair the application.
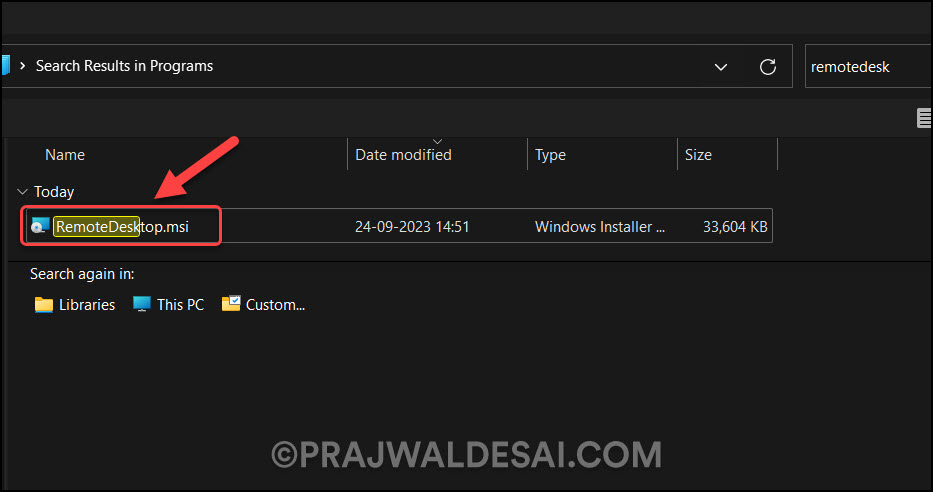
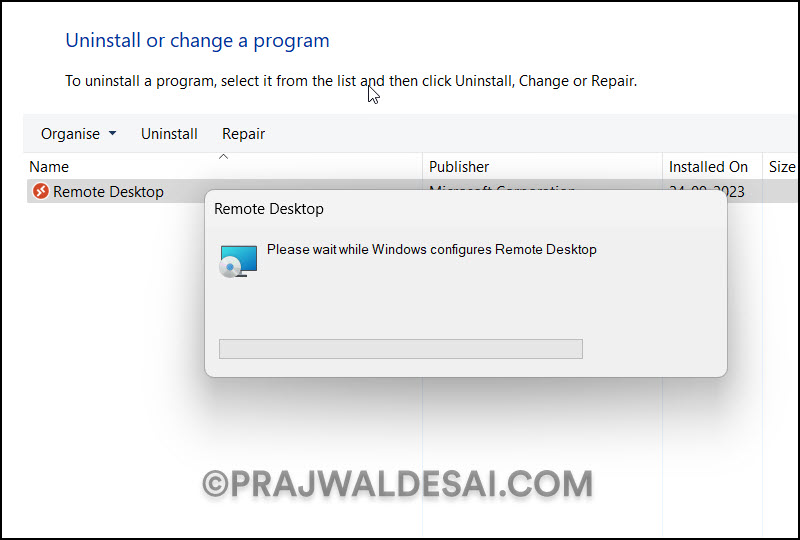
On the Windows installer window, click on Browse and select the RemoteDesktop.msi installer, and the repair operation begins now. It takes just a few seconds to repair the remote desktop client. This should resolve all the issues with your remote desktop client.
Repair Remote Desktop App via Settings
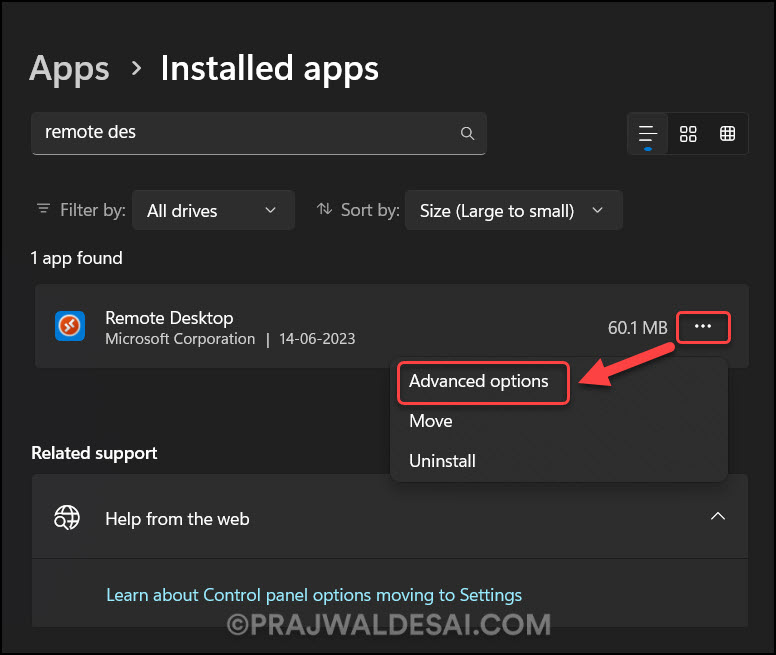
If you downloaded the Remote Desktop app from the Microsoft Store, you can repair it via the Windows App Settings. On your Windows 11/10 PC, go to Settings > Apps > Installed Apps. In the search box, type “Remote Desktop” to locate the app. Click on three horizontal dots, and from the drop-down menu, select Advanced Options.
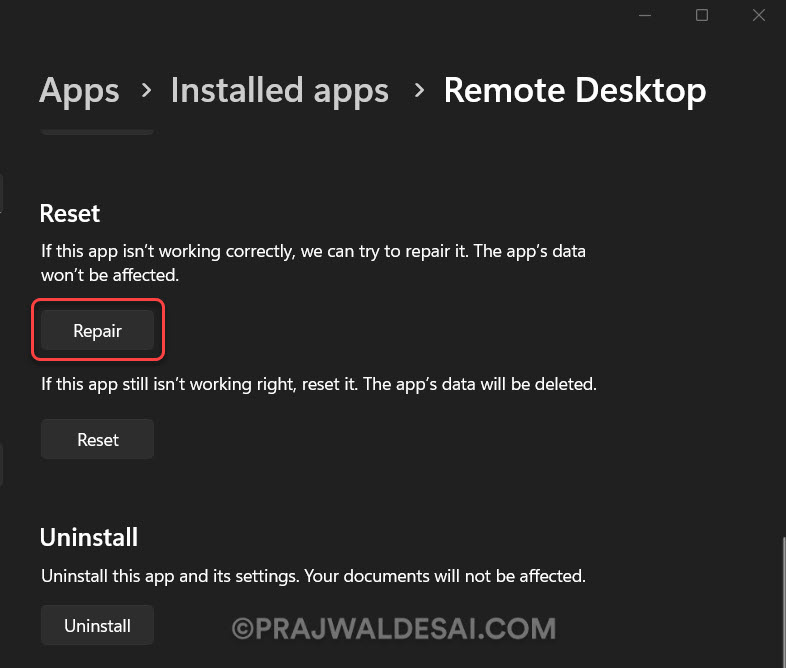
On the Remote Desktop Advanced Options window, scroll down and locate the Repair option. To repair the remote desktop app, click on Repair. You also have the option to reset the app, which will delete the app’s data.
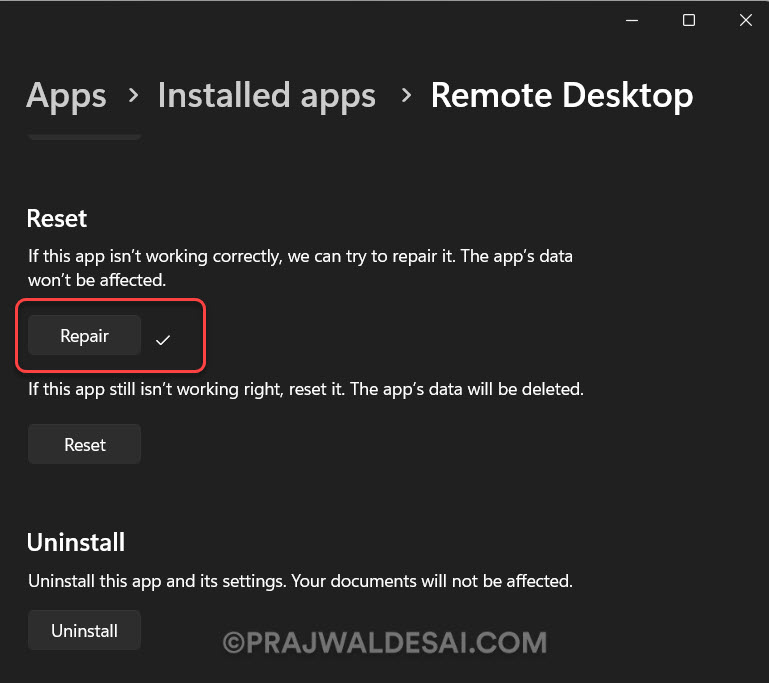
The remote desktop app has been successfully repaired, as indicated by the presence of a tick next to the Repair button.
Repair Remote Desktop Client using the Installer
You can use the Remote Desktop installer (MSI Installer) to repair the RD client installation. You must download the latest version of Remote Desktop Client Installer and use it to repair the application.
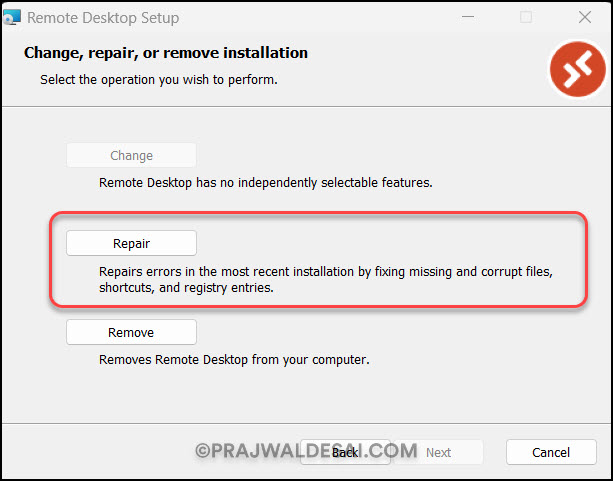
To repair the remote desktop client, run the remote desktop setup (remotedesktop.msi). On the Change, repair, or remove installation screen, select the Repair option.
On the Ready to Repair Remote Desktop window, select Repair.
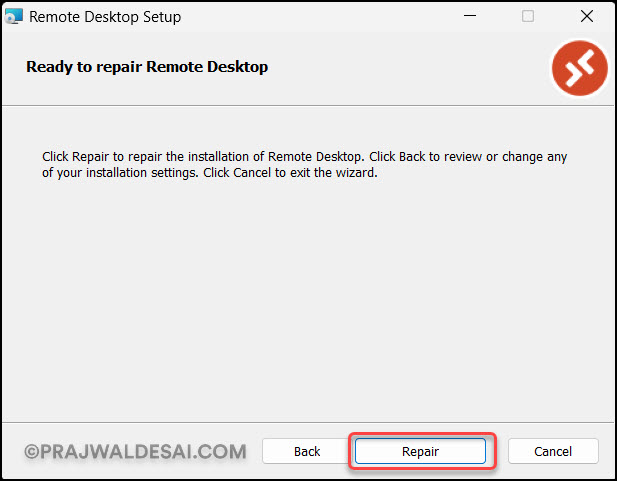
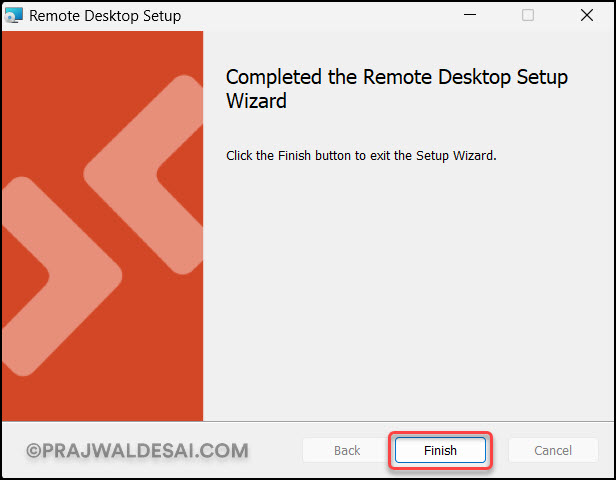
The remote desktop client repair operation begins and resolves the issues with the application. Click Finish to close the Remote Desktop setup wizard.
Recommended Reading
Take a look at some useful guides on repairing some popular applications.
