How to Repair VMware Player Installation
In this guide, you will learn how to repair VMware Player installed on Windows 10/Windows 11. You can repair VMware workstation player when you notice issues with the VMplayer application.
According to VMware, VMware Player is a free desktop application that lets you run a virtual machine on a Windows or Linux PC. VMware Workstation Player is a free desktop application that lets you run a virtual machine on a Windows or Linux PC.
VMware Player provides an intuitive user interface for running preconfigured virtual machines created with VMware Workstation, GSX Server, and ESX Server.
Almost all the VMware software programs such as VMware Workstation, VMware Tools can be repaired including the VMware Workstation Player. If you notice your VMware player isn’t working correctly, you can easily repair the installation.
Note: VMware Workstation Player has no technical support entitlement. Meaning, you cannot get any kind of support for VMware player from the company. However, you can review the documentation, knowledge base, or the communities for assistance.
How to Repair VMware Player Installation
Let’s look at the steps to repair the VMware Workstation Player installed on Windows 10/Windows 11 computer. First, exit the VMware Workstation player application running on your computer.
The repair option for VMware workstation player is available in the Control Panel > Programs and Features. From the list of programs, click VMware Player and select Change.

Now the VMware Workstation Player setup wizard pops up. To continue with repair, click Next.

Repair VMware Workstation Player Setup Wizard Options
The VMware Workstation player setup wizard provides the following options:
- Change – This option lets you change the way the features are installed. You can remove or add the features to the existing VMware player installation.
- Repair – The repair option repairs the VMware player errors in the most recent installation by fixing missing and corrupt files, shortcuts and registry entries.
- Remove – Use this option to remove or uninstall the VMware workstation player from your computer.
From the list of options, select Repair.

To begin the repair of VMware Workstation player, click Repair.

The setup wizard now repairs the VMware player installation on your computer. At this point, do not attempt to launch the player. Wait for the repair operation to complete.

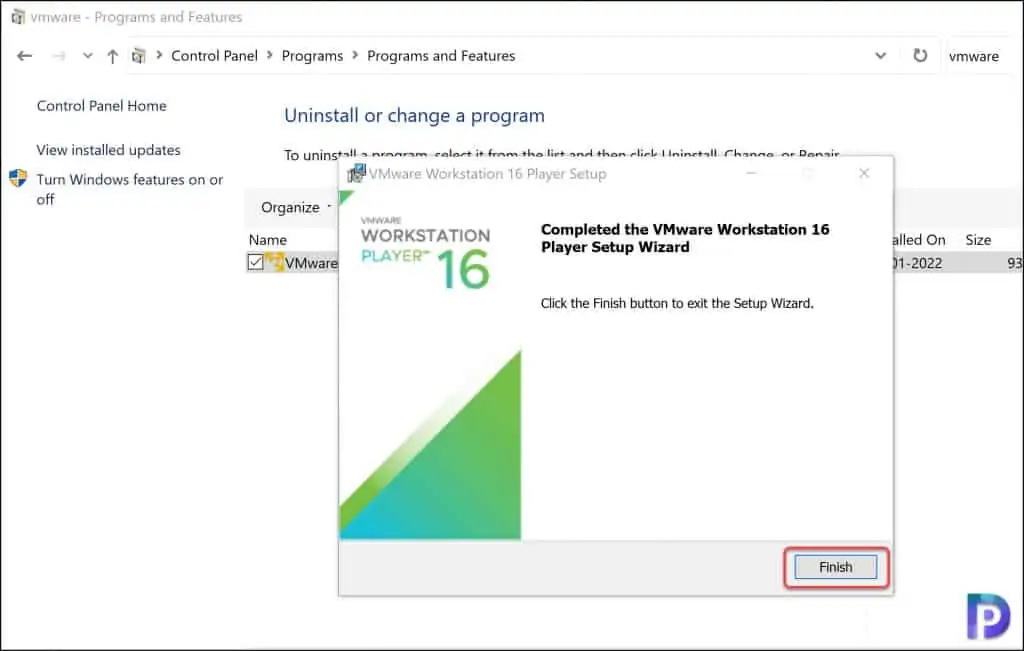
The repair VMware workstation player operation is completed successfully. Click Finish to close the setup wizard. You don’t have to restart your PC after the repair is complete.
Now launch the VMware player on your computer and all the previous issues related to VMware player should be resolved now.

VMware Player Command Line Options
The below table lists all the command line options for VMware player. You can manage your virtual machines with VMware player using the following cmd options.
| VMware Player Command Line Option | Description |
| -v | Displays the product name, version, and build number. |
| -X | Enter the full screen mode when the virtual machine is powered on. |
| –unity | Enter unity when virtual machine is powered on. |
Based on my findings, there is no command line option to repair VMware workstation player. In case I get to know about it, I will update the post.
The next section describes how to uninstall the VMWare player from the computer. In case the repair option doesn’t resolve the issues, you can uninstall VMware player and install it back.
Uninstall VMware Workstation Player
You can uninstall the VMware Player from your computer with following steps:
- On your computer, go to Control Panel\Programs\Programs and Features.
- From the list of programs, select VMware Player program and select Change.
- On the VMware Workstation player setup wizard, select Remove.
- Complete the remaining steps of setup wizard to uninstall VMware Player.

If you have any questions or suggestions, please leave them in the comments section below.
