How to Use Multiple Monitors with Windows 365 Cloud PC
This article will demonstrate how to use multiple monitors with Windows 365 Cloud PC. Before connecting to Cloud PC, you configure the display settings to use a single monitor or multiple displays.
A new feature added in Service version 2305 allows users to change multiple monitor settings for Cloud PCs in the Windows 365 app. The Windows 365 app settings include multiple monitor support for Cloud PC, and this is a useful feature when you have multiple displays and want the Cloud PC to utilize all the displays.
In our earlier article, we demonstrated how you can connect to Cloud PCs using different methods. Before connecting to a Cloud PC, you can configure the Windows 365 Cloud PC to use multiple monitors or limit it to using a single monitor. When you don’t have multiple monitors in your setup, by default, the Cloud PC will use the only display that you have.
In this article, we will show you how you can use multiple monitors with Windows 365 Cloud PC and connect them using a Windows or an Apple Mac device. Having multiple monitors connected to your device allows you to multitask better with Cloud PC. Also see how to turn on high-DPI for Cloud PCs.
Also Read: Turn on Location Redirection for Windows 365 Cloud PC
Enable Multiple Monitor Support for Cloud PC in Windows 365 App
In the Windows 365 app, you can configure the display settings and enable multiple monitor support for Cloud PC with the following steps:
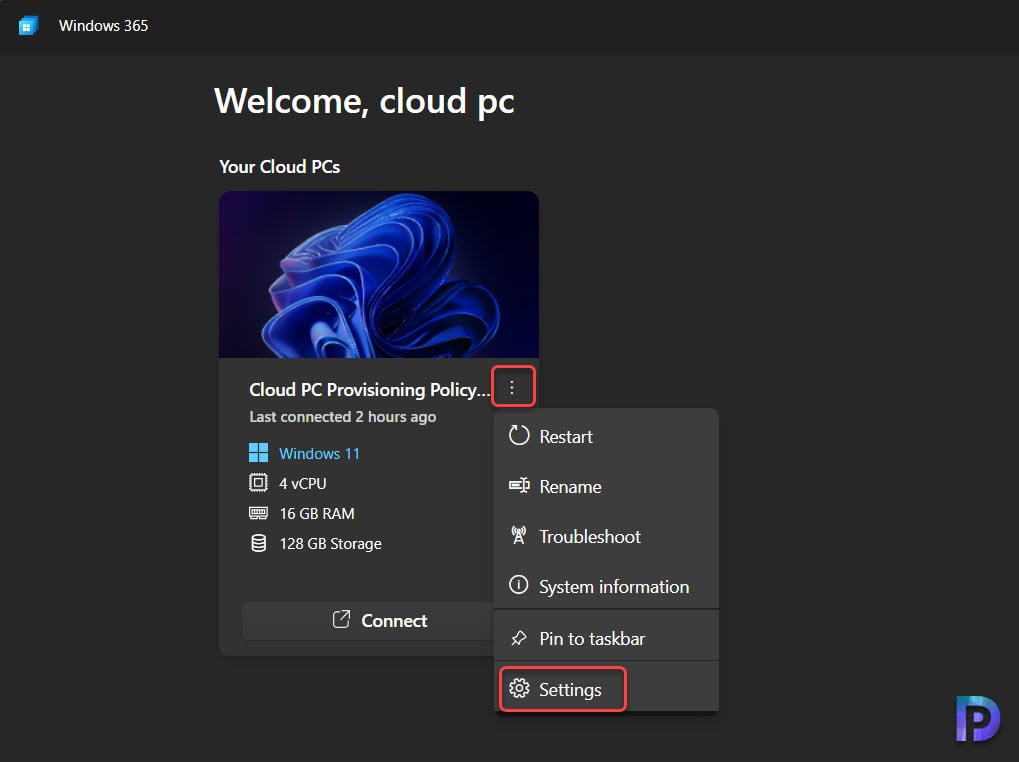
1. First, launch the Windows 365 app on your PC. If you haven’t installed it yet, you can launch the Microsoft Store and get the app from there. Sign in with your credentials to view the Cloud PC associated with your user account. Click on the three vertical dots and select Settings.
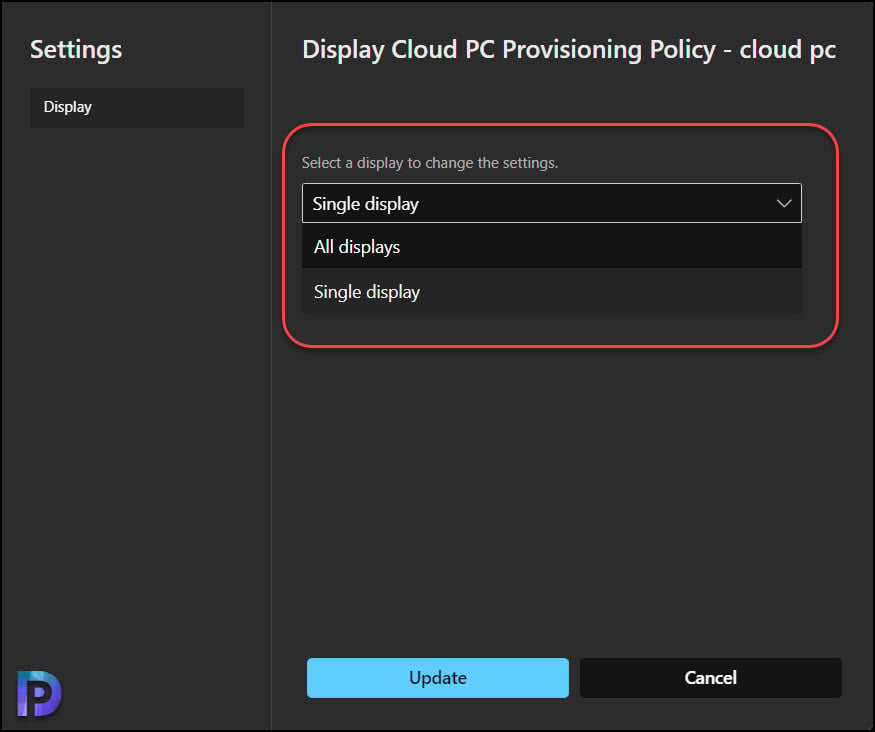
2. The Display Settings in the Windows 365 app allow you to configure how the Cloud PC uses its displays. For the option “Select a display to change the settings“, click the drop-down, and you see two options.
- Single Display: Selecting this option will force Cloud PC to use a single display instead of multiple monitors. When you select this option and connect to a Cloud PC, the Windows 365 app forces the Cloud PC to use a single display.
- All Displays: This is the default option, which allows Cloud PC to utilize multiple monitors when connected to it. This option works only when you have multiple monitors in your setup.
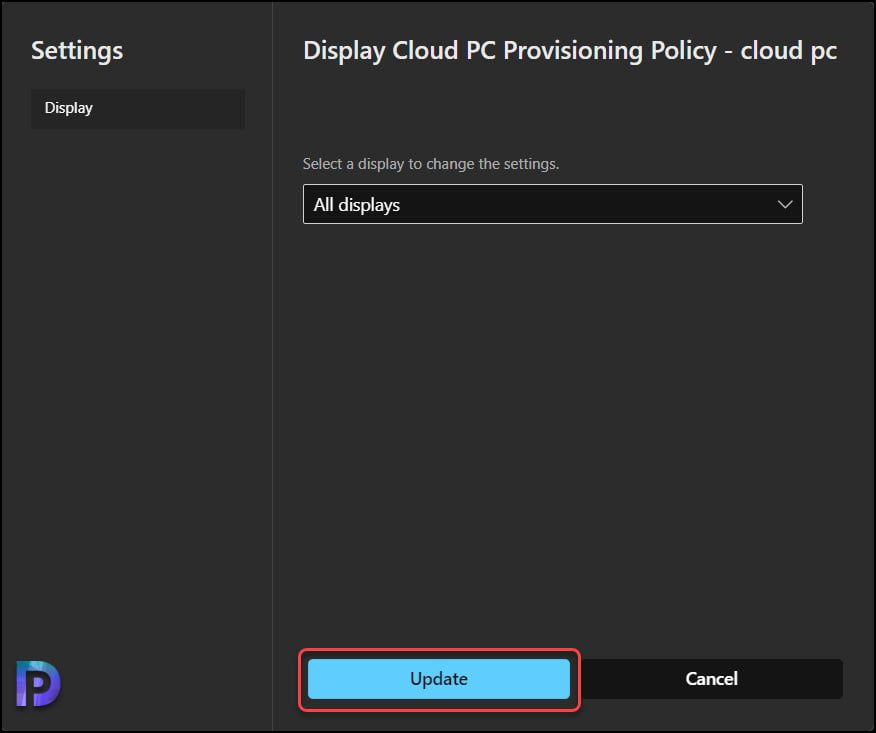
Now that you know about choosing the display options for Windows 365 Cloud PC, select the desired option and click on Update. In the screenshot below, we have configured the Cloud PC to use multiple monitors with Windows 365.
When you connect to the Cloud PC now, we see that all the monitors are in use and that the display is spread across the monitors. The screenshot below shows the Cloud PC using both monitors (Monitor 1 and Monitor 2).

Useful Article: How to Enable Camera Access for Windows 365 Cloud PC
Remote Desktop: Use Multiple Monitors with Windows 365 Cloud PC
If you are using the Remote Desktop app on your PC to access your Cloud PC, you can configure the display settings and configure multiple monitor support for Windows 365. The Remote Desktop app provides more options to configure the display settings for Cloud PCs when compared to the new Windows 365 app.
Use the following steps to configure the display options for Windows 365 Cloud PC using the remote desktop app:
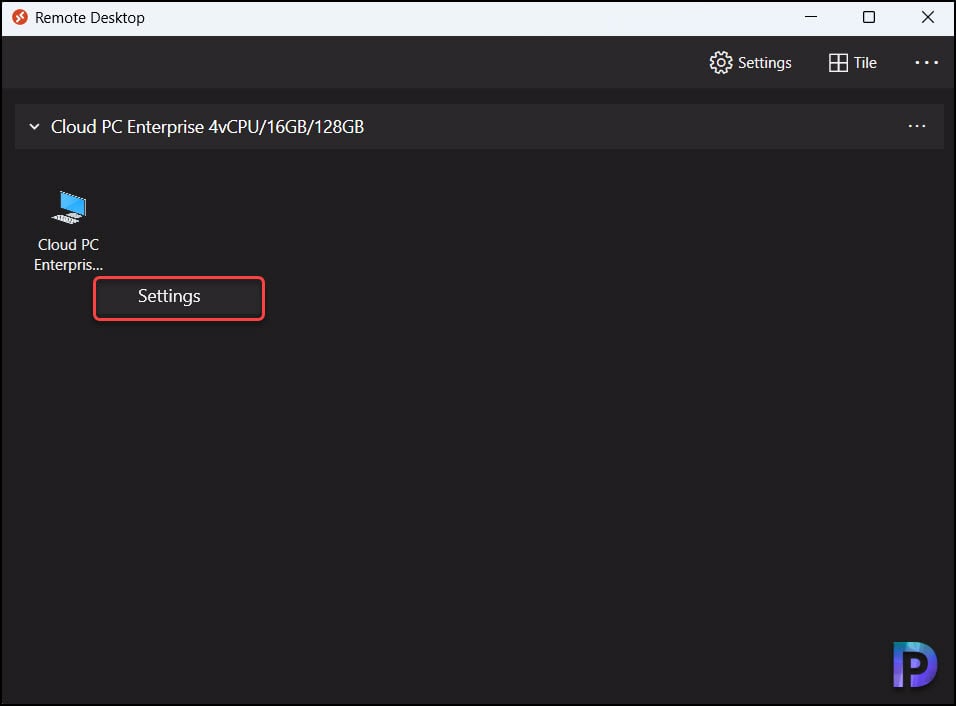
1. Launch the Microsoft Remote Desktop Client application. Right-click on the Cloud PC icon and select Settings.
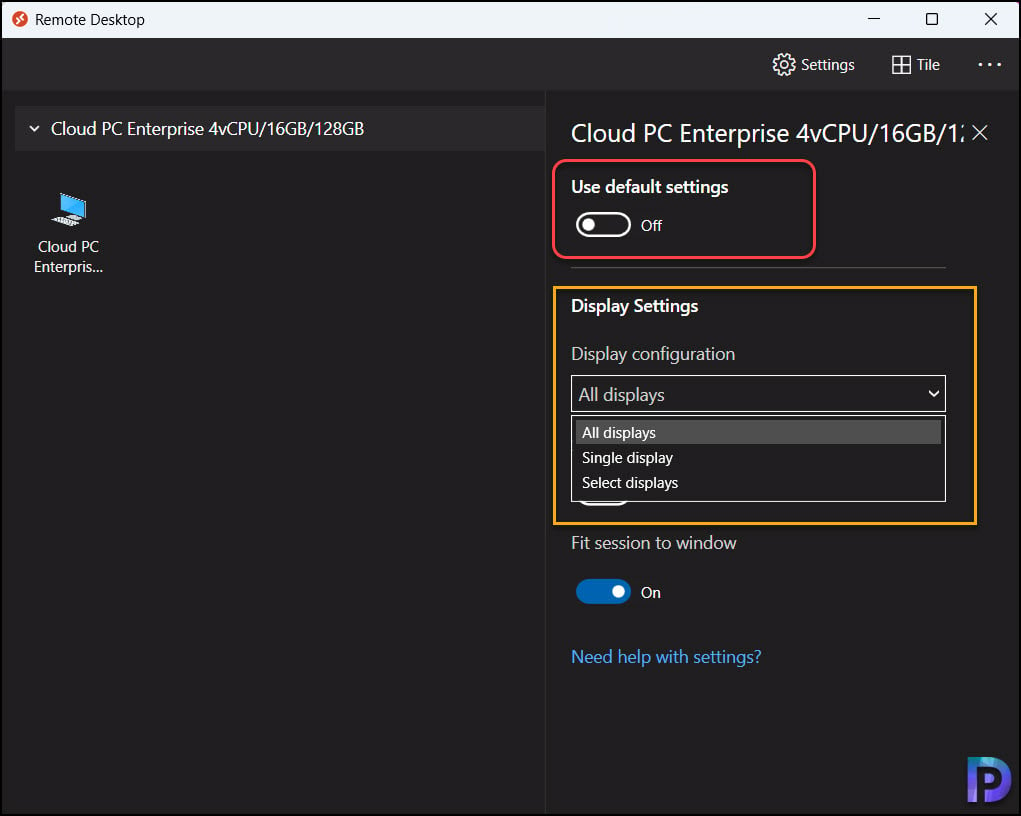
2. On the Cloud PC settings panel, toggle the “Use default settings” option to the OFF position. When the default settings are ON, you cannot configure the multiple monitor support for Windows 365.
Configure Display Settings for Cloud PC
On the Remote Desktop app, under the display settings, you get the following display configuration options:
- All Displays: This is a default option where the Cloud PC is set to utilize all displays when connected to it using the Remote Desktop app.
- Single Display: Selecting this option allows the Cloud PC to use a single display (monitor) instead of multiple monitors.
- Select Displays: This option allows you to choose the monitors for your Cloud PC session.
We will explore all the above options in detail now.
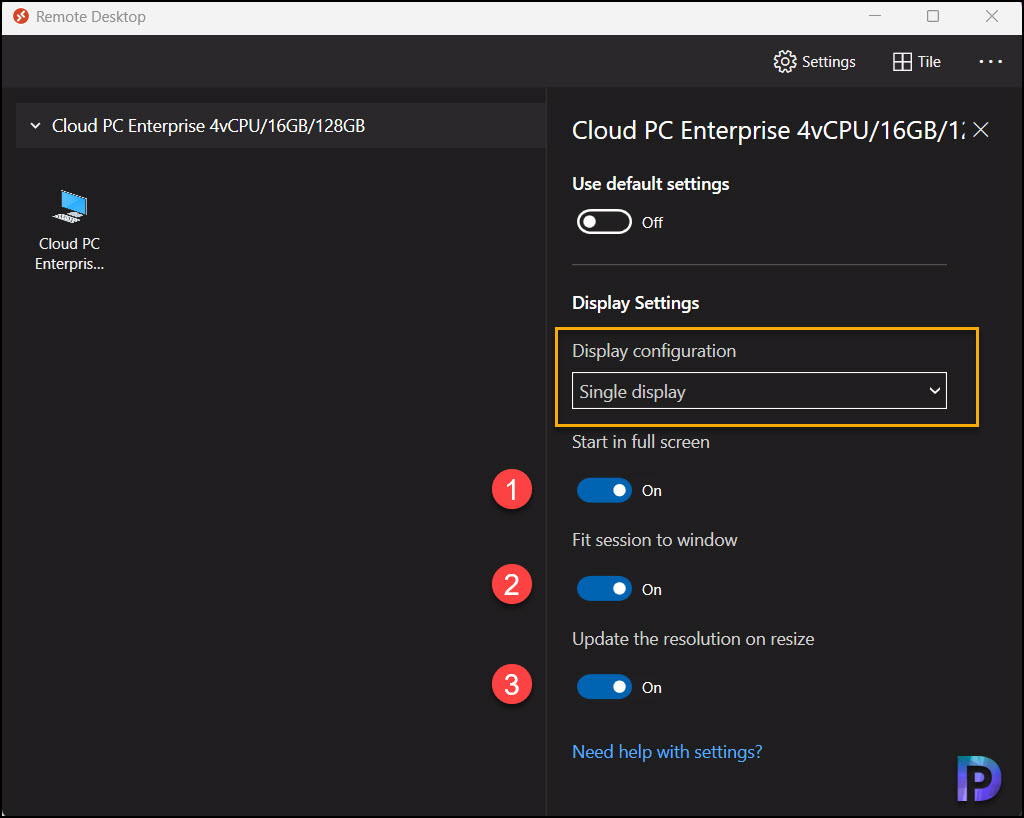
When you select the “Single Display” configuration for your Cloud PC, you are limiting the Cloud PC to using only one monitor. You must configure these options when you don’t want to use multiple monitors with Windows 365. When you select the single display configuration, you get to configure the following options:
- Start in full screen: Starts the Cloud PC session in full-screen mode.
- Fit session to window: If enabled, the Cloud PC session will be set to fit to window.
- Update the resolution on resize: When you disable this option, you get a list of screen resolutions to select from and select one. The selected resolution will be applied when you attempt to resize the Cloud PC display resolution.
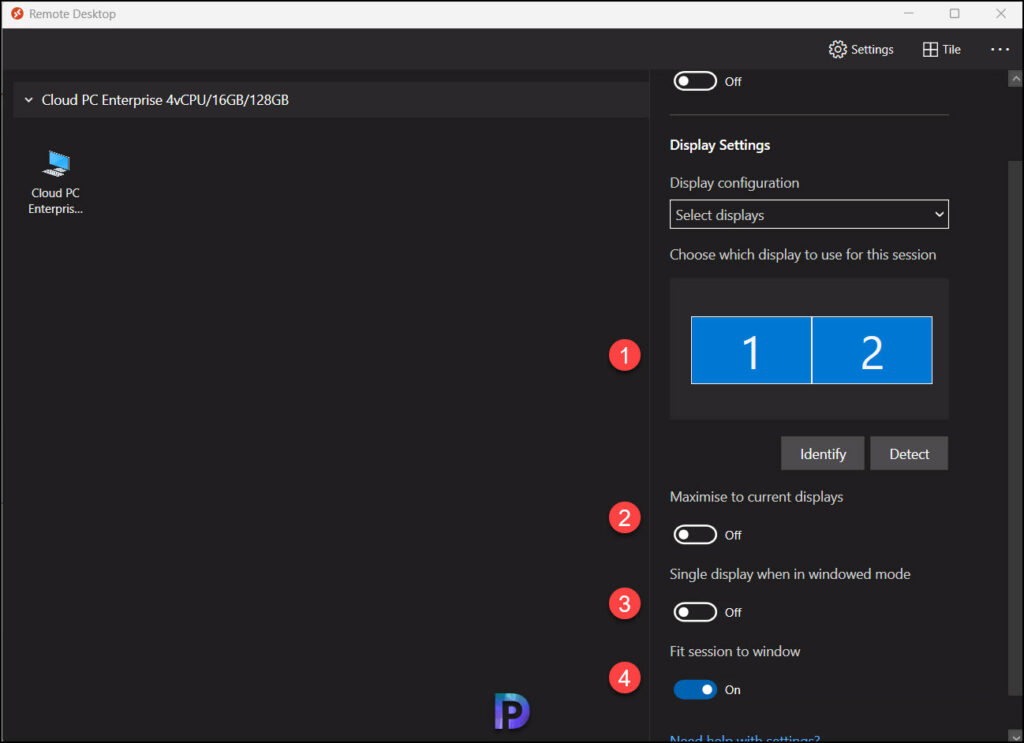
The last option under the display configuration is Select Displays. This configuration allows you to select which display to use for the Cloud PC session. If you have multiple monitors, you can specifically select the monitors that you want Cloud PC to use. Each of the monitors is labeled with numbers to help you identify them. You can use the Detect option to find out the display labels.
Apart from choosing the displays for the Cloud PC session, you get to configure the following options under display configuration:
- Maximize current displays
- Single display when in windowed mode
- Fit Session to Window
Using Multiple Monitors with Windows 365 Cloud PC on MacOS Devices
If you are connecting to a Cloud PC from your Mac device, you can configure the display settings and enable multiple monitor support for Windows 365. The Remote Desktop app, which is available for both Windows and MacOS, allows you to access Cloud PCs.
Currently, there is no Windows 365 app for macOS. As a result, you will need to use the Remote Desktop App or a web browser to access your Cloud PC via windows365.microsoft.com.
To use multiple monitors with Windows 365 on Mac, you must first download and install the Remote Desktop app from the App Store. Next, add the Cloud PC using the workspace URL in order to connect to it.
Once you find the Cloud PC entry listed in the Remote Desktop app, right-click on the Cloud PC entry and select Edit.
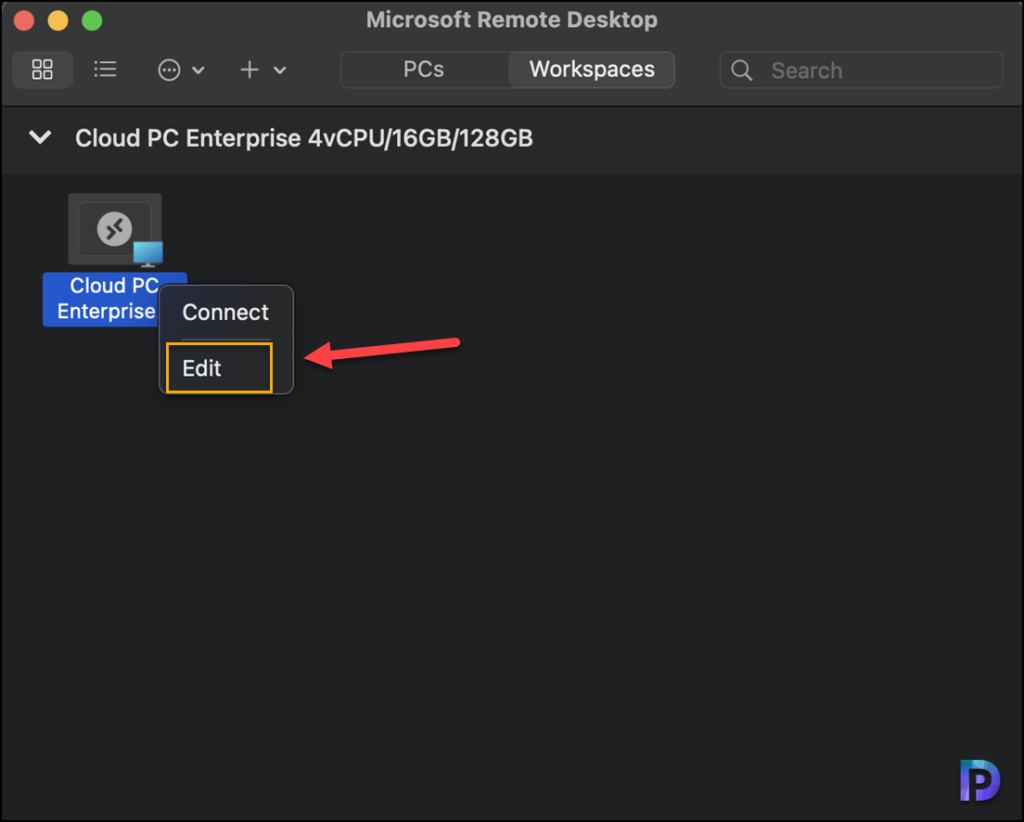
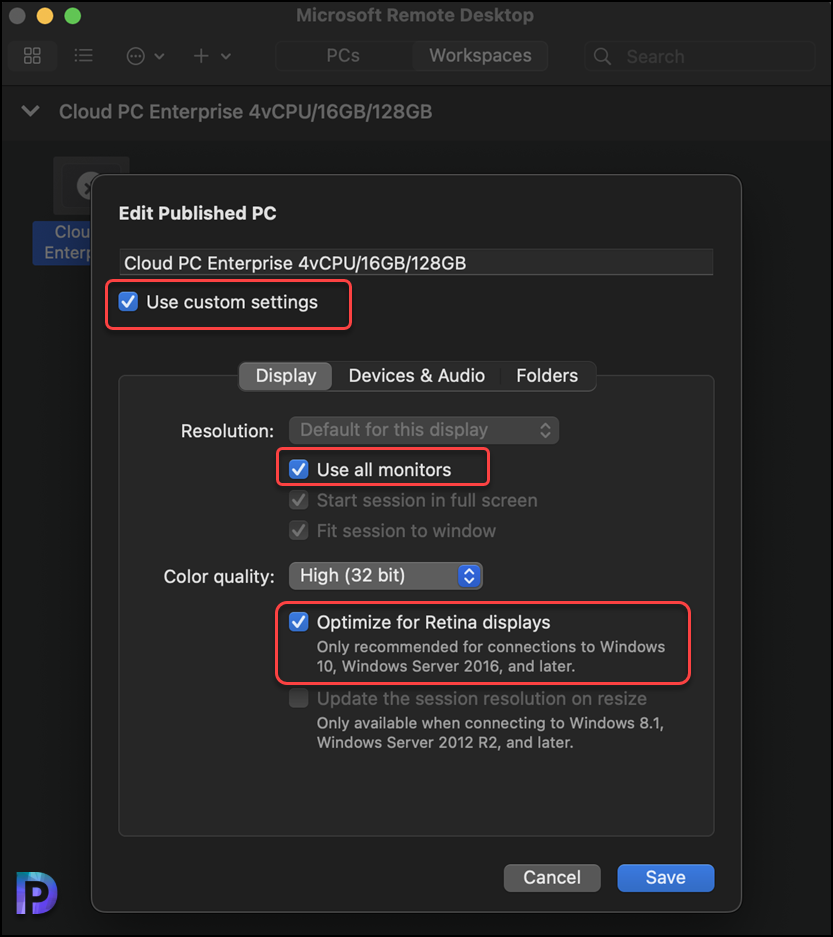
On the Edit Cloud PC window, enable the option “Use custom settings“. Choose the Display tab to configure the display settings for Cloud PC. To enable multiple monitor support, activate the checkbox “Use all monitors“. This will ensure Windows 365 Cloud PC will use all your monitors when connecting to it. You can also enable the option “Optimize for Retina Displays” to optimize for retina displays in Remote Desktop. Click Save.
After making the above changes, launch your Cloud PC, and all the monitors connected to your Mac will be used by Windows 365.
