Enable Watermarking for Windows 365 Cloud PCs
In this article, we will show you how to enable watermarking for Windows 365 Cloud PCs. Using an Intune configuration profile, you can now apply QR watermarks to cloud PCs and even Azure virtual desktops.
Watermarking Cloud PCs helps prevent sensitive information from being captured on client endpoints. When you enable watermarking, QR code watermarks appear as part of remote desktops. Organizations that want to secure their Windows 365 cloud PCs can now use Intune to add watermarks to the cloud PCs.
In February 2013, Microsoft released the details of the public watermarking preview for Azure Virtual Desktop. Using the AVD watermarking feature, you can enable QR code watermarks on Azure Virtual Desktops and scan the QR code watermarks to discover the session’s connection ID. This feature is now extended to cloud PCs as well.
In addition to watermarking features, admins can also configure a screen capture protection feature for cloud PCs to stop users from taking screenshots of their desktops. This feature will be covered in a separate article.
Useful Article: Windows 365: Enable Cloud PC Reset Option for Users
Prerequisites
If you want to enable QR watermarks on your Windows 365 Cloud PCs, here are some important prerequisites.
- The remote desktop client should support watermarking. We recommend using the latest version of Remote Desktop Client or the updated Windows 365 app.
- Watermarking is for remote desktops only. With the remote app, watermarking is not applied, and the connection is allowed.
- Azure Virtual Desktop Insights must be configured for your environment.
- The cloud PCs should be online in order for the watermark to apply.
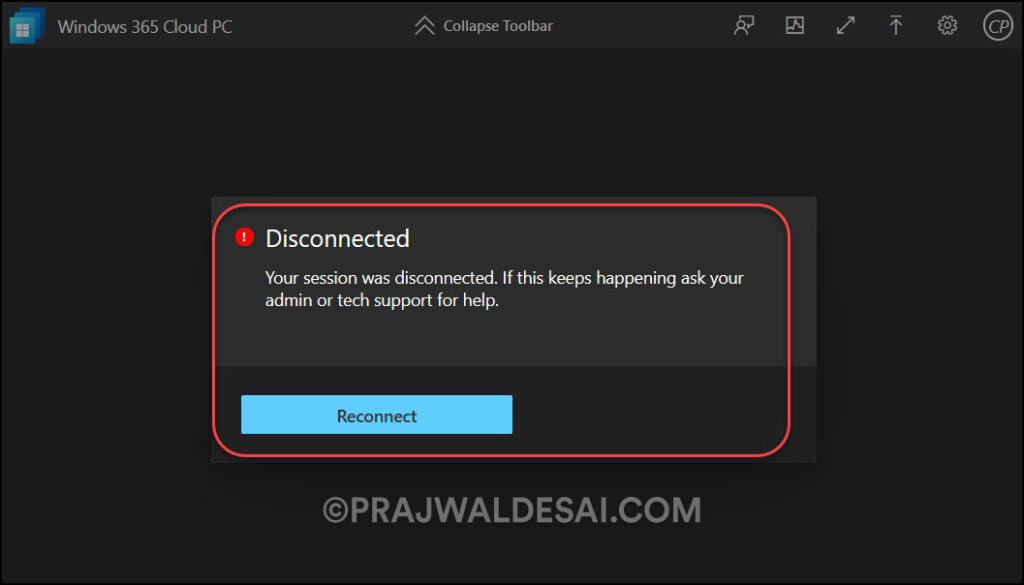
- You cannot connect to a cloud PC using a web browser after applying the watermarking policy. You must use the Windows 365 app instead.
Also Read: Create a Provisioning Policy in Windows 365 for Cloud PC
Enable Watermarking for Windows 365 Cloud PCs
We will now create a configuration profile in Intune, configure watermarking for cloud PCs, and apply this profile to our cloud PCs. The procedure to enable watermarking for Windows 365 Cloud PCs is as follows:
- Sign in to the Microsoft Intune admin center.
- Select Devices > Windows > Configuration Profiles.
- To create a new configuration profile, select +Create Profile.
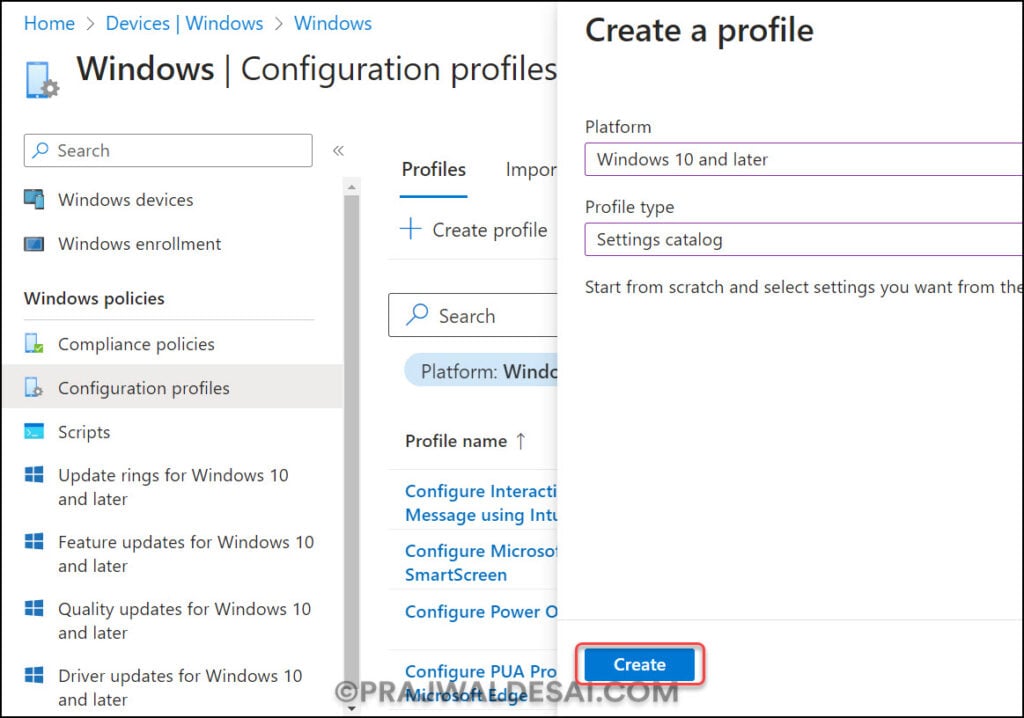
On the Create a Profile pane, configure the following and select Create.
- Platform: Windows 10 and later
- Profile Type: Settings Catalog
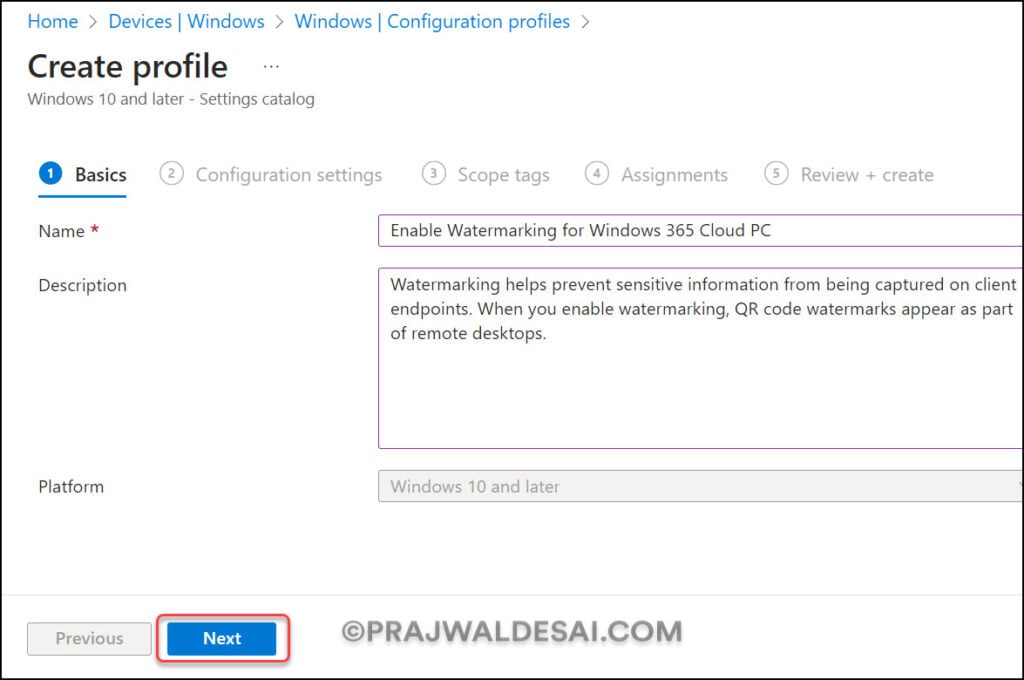
In the Basics tab, enter the following properties:
- Name: Enter a descriptive name for the profile, which you can easily identify later. For example, a good profile name is ‘Enable Watermarking for Windows 365 Cloud PCs‘.
- Description: Enter a brief description of the profile. This setting is optional but recommended.
Click Next.
In the Configuration Settings section, under Settings Catalog, click Add Settings. The Intune Settings catalog allows you to apply QR watermarks to cloud PCs.
Useful Article: Turn on Location Redirection for Windows 365 Cloud PC
Watermarking Policy for Cloud PCs
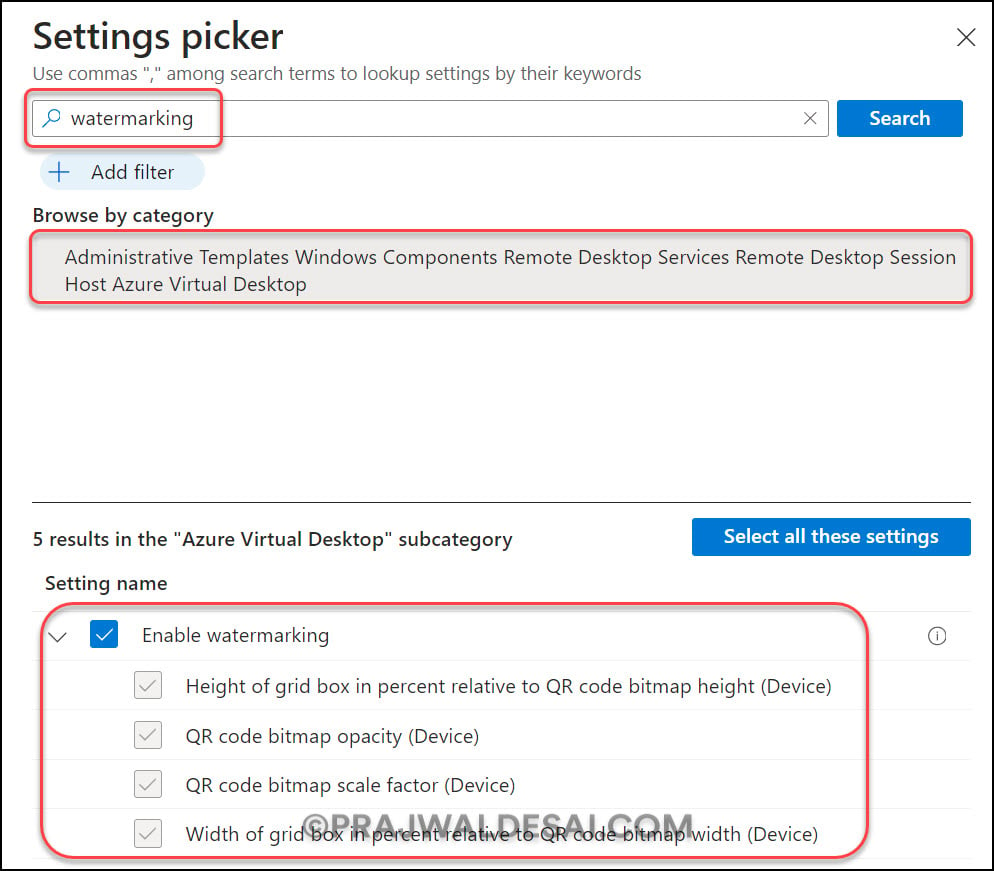
On the Settings picker window, type “Watermarking” in the search box and click Search. From the search results, select Administrative Templates\Windows Components\Remote Desktop Services\Remote Desktop Session Host\Azure Virtual Desktop.
Enable Watermarking: The watermarking policy for cloud PCs allows you to specify whether watermarking is enabled for a remote session. If you enable this policy setting, then the RD Session Host server will instruct the client to project the watermarking QR code in a remote session. If the client is incompatible with watermarking, then the connection will be denied. When you disable or do not configure this policy setting, then the watermarking will be disabled.
Configure Watermarking Options for Cloud PCs
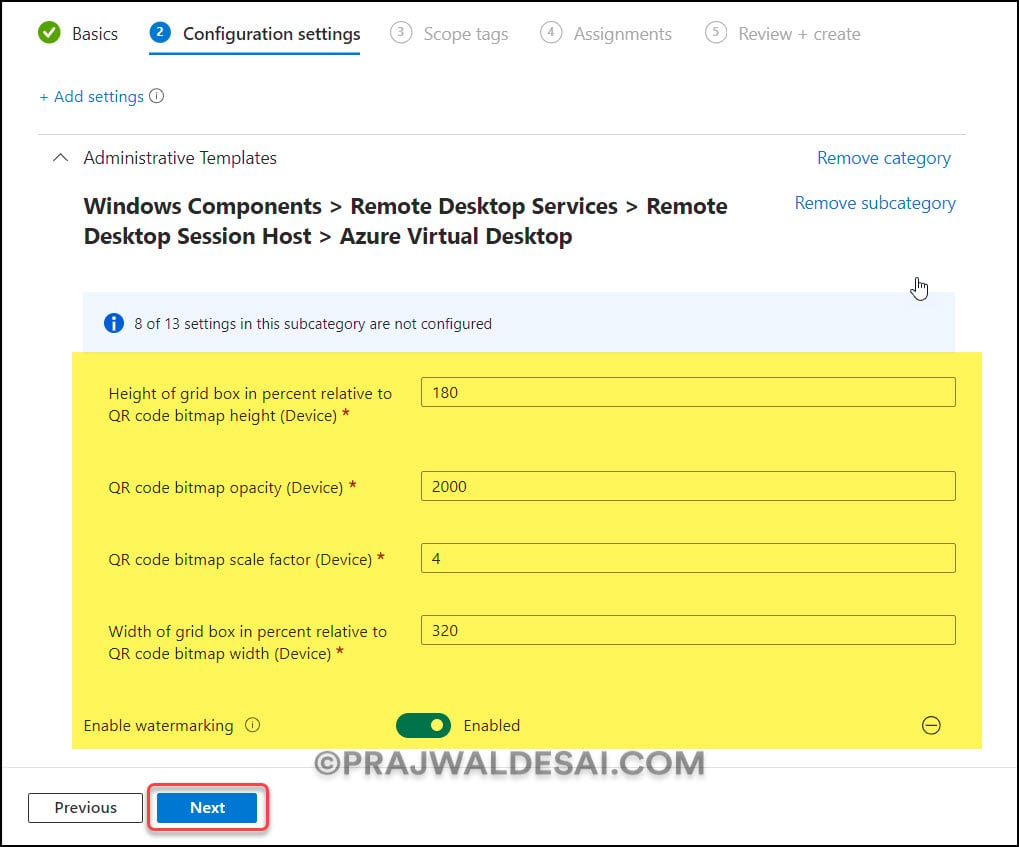
When you turn on the setting “Enable Watermarking” the following settings are also selected for Watermarking Cloud PC devices. Each of these watermarking options can be configured with custom values.
Microsoft provides the information in the table below that describes the watermarking options, the default values for each option, and its description. Watermarking Cloud PCs and Azure Virtual Desktops are configured using the same values.
| Watermarking Options for Cloud PCs | Values | Description |
|---|---|---|
| QR code bitmap scale factor | 1 to 10 (default = 4) | The size in pixels of each QR code dot. This value determines the number of squares per dot in the QR code. |
| QR code bitmap opacity | 100 to 9999 (default = 700) | How transparent the watermark is, where 100 is fully transparent. |
| Width of grid box in percent relevant to QR code bitmap width | 100 to 1000 (default = 320) | Determines the distance between the QR codes in percent. When combined with the height, a value of 100 would make the QR codes appear side-by-side and fill the entire screen. |
| Height of grid box in percent relevant to QR code bitmap width | 100 to 1000 (default = 180) | Determines the distance between the QR codes in percent. When combined with the width, a value of 100 would make the QR codes appear side-by-side and fill the entire screen. |
In the screenshot below, we are using the default values populated in Intune. If you want to change any of these values, look through the options in the table above.
Click Next to continue.
In Intune, Scope tags determine which objects admins can see. In the Scope tags section, you specify scope tags. Specifying scope tags is optional, and you may skip this step. Click Next.
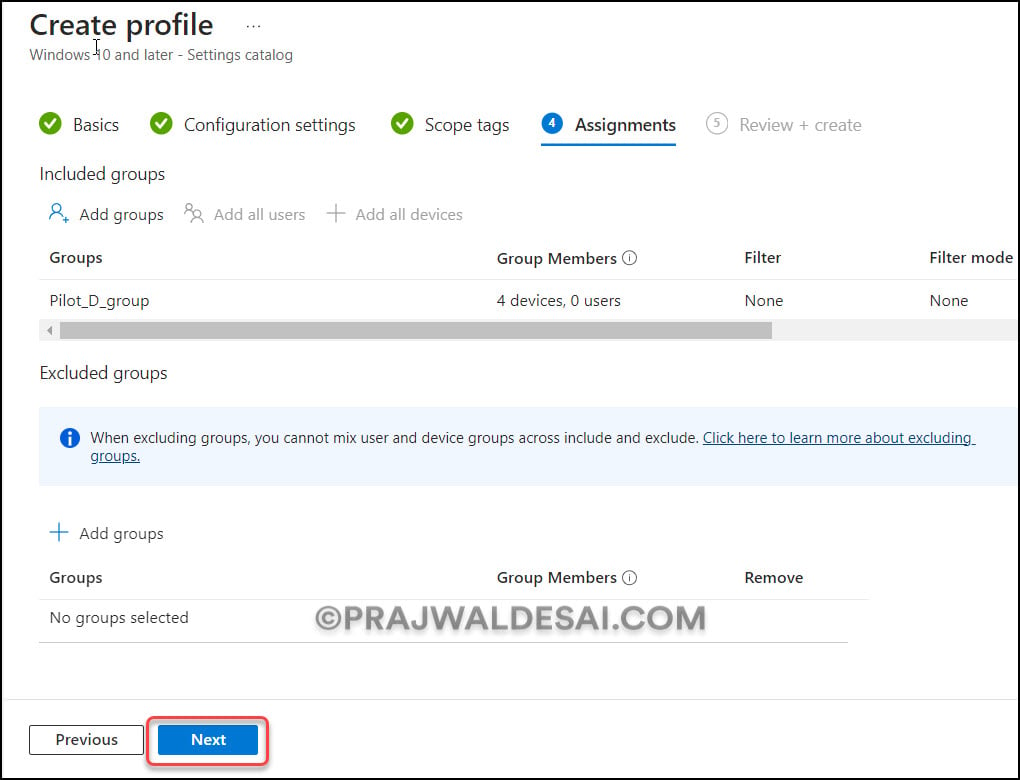
On the Assignments tab, select a group to which you want to assign the configuration profile. We recommend first deploying the profile to a few test groups comprised of cloud PCs and then expanding it to larger groups if the testing is successful. Select Next.
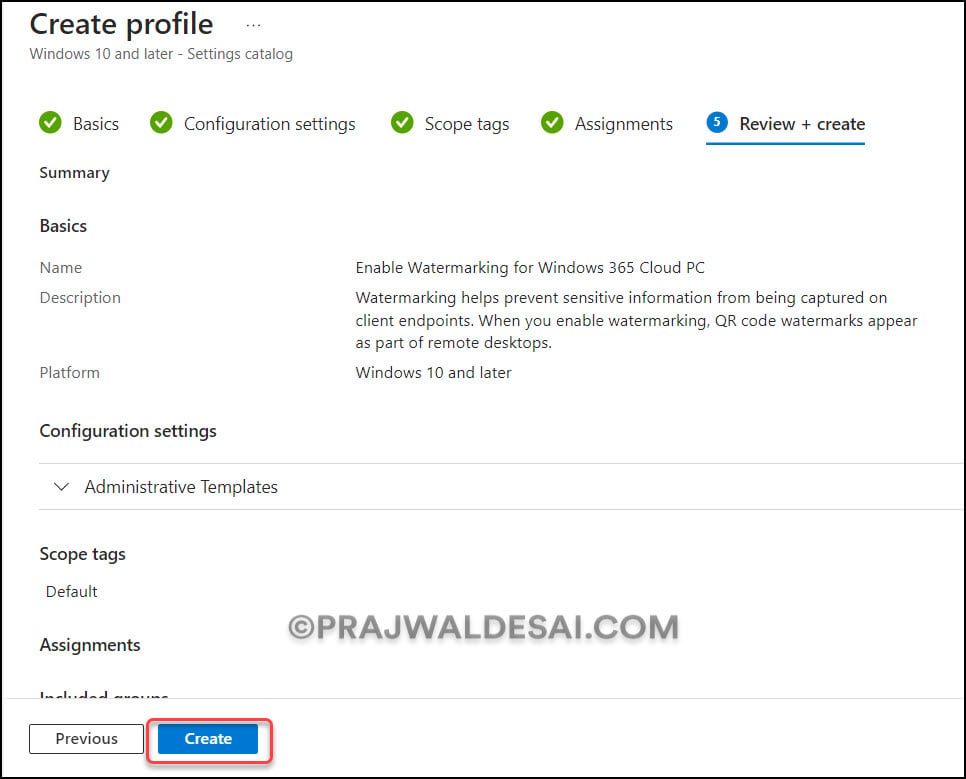
On the Review + Create page, review all the settings that you have defined to enable watermarking of Windows 365 cloud PCs and select Create.
After you create a configuration policy in Intune, a notification appears: “Policy Enable Watermarking for Windows 365 Cloud PC created successfully”. This confirms that the policy has been created and is being applied to the groups we chose. The new profile that we created to watermark cloud PCs appears in the list of configuration profiles in Intune.
Sync Intune Policies on Windows Computers
Once you have assigned a configuration profile to your devices, you must wait for the policy to be applied to the targeted groups, and the devices will receive your profile settings once they check in with the Microsoft Intune service. In order to receive policies from Intune, the devices must be online. You can also force manual sync of Intune policies on your computers to get the latest policies and settings from Intune.
Also See: How to Manually Sync macOS device with Intune
Monitor Cloud PC Watermarking Policy in Intune
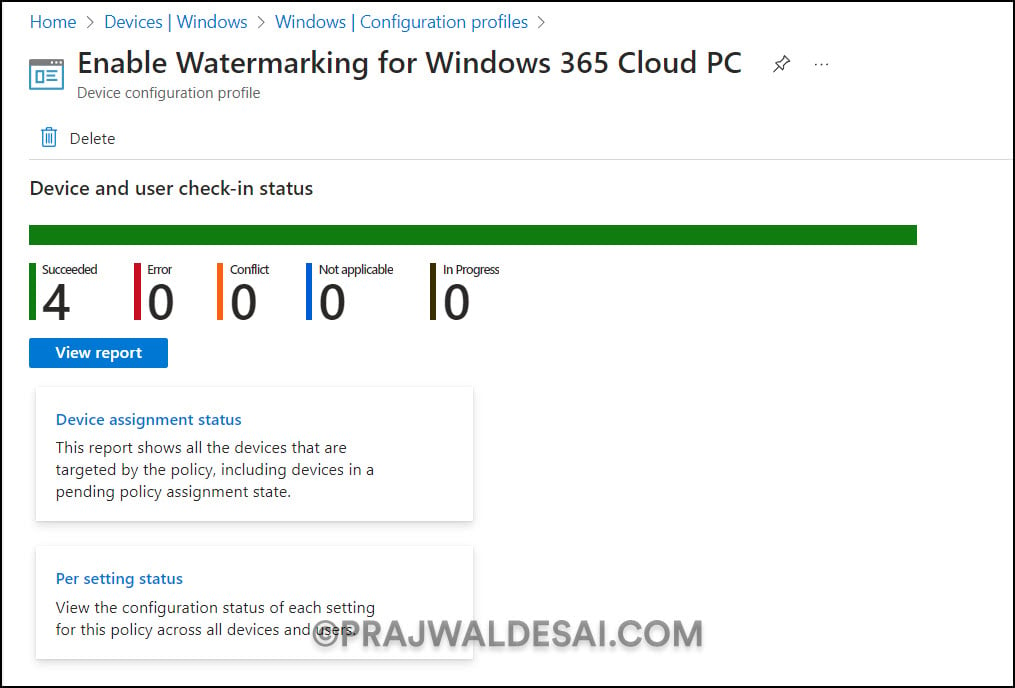
To monitor the Cloud PC Watermark policy in Intune that you applied to your groups, select the policy and review the Device and user check-in status.
Under the Device and user check-in status, we see the total number of cloud PCs that succeeded in receiving the watermarking policy. In some cases, the watermarking policy may fail to apply to certain cloud PCs. To resolve the issues, you will need to troubleshoot the issue by reviewing Intune logs on Windows computers.
The screenshot below shows that the watermarking policy has been successfully applied to our Cloud PCs. Click on View Report to view all the Windows Cloud PCs that have received the watermark settings successfully.
End User Experience: Watermarking Cloud PCs
After the cloud PCs have received the watermarking policy assigned by Intune, we will check to see if the QR watermarks are enabled. We will also show you how a watermark looks on the cloud PC for end users.
Here’s a screenshot showing what watermarking looks like when it’s enabled. To connect to our cloud PC, we used the Windows 365 app. Notice those QR codes that are all over the desktop. These QR code watermarks allow you to trace the session’s information. If you have configured the Windows 365 app to use multiple monitors, the QR watermarks appear on all the displays.

Fix QR Watermarks not applied to Cloud PCs
In some cases, you may encounter an issue where the QR watermarks are not displayed on the cloud PCs. To resolve this issue, make sure the ‘Enable Watermarking‘ setting is enabled in the Configuration Profile. Another solution is to restart the cloud PC. The QR watermark did not appear on one of our cloud PCs, despite Intune indicating that the policy was successfully applied. The watermark was applied upon login after we restarted the cloud PC.
Also Read: How to Enable High DPI for Windows 365 Cloud PC
Cloud PC Session Disconnected after Watermarking
You cannot connect to your Cloud PC using a web browser after watermarking it with Intune. This is what we observed during our testing: When we attempted to access the cloud PC from the browser using windows365.microsoft.com, after signing in with credentials, we noticed the following error:
Disconnected: Your session was disconnected. If this keeps happening, ask your admin or tech support for help.
To resolve this issue, avoid using the browser to access Cloud PC and instead use the Windows 365 app.
