Create Win32 Applications using Patch My PC in Intune
In this guide, I will show you how to create Win32 applications using Patch My PC in Intune. Using Patch My PC tool, you can easily create and upload Win32 Applications to Intune.
To create Win32 application in Intune using Patch My PC, you must integrate Patch My PC with Intune. Here is an easy guide to Integrate Patch My PC with Intune.
Most of the Intune admins are aware of the procedure and time it takes to create Win32 apps. The same applies while creating apps in Configuration Manager.
With Intune Win32 app deployment, you will notice that most of the deployment options that you see are familiar and derive from Configuration Manager. You can use Patch My PC tool to create Win32 applications, and you deploy them to endpoints.
With Patch My PC, you can easily extend Microsoft SCCM to deploy and update over 400+ third-party applications across 190+ enterprise products. When you integrate Patch My PC with Intune, you can automatically create Win32 applications in Intune. This saves a lot of your time in creating Win32 applications.
If you are new to Patch My PC, I recommend checking my guides on Patch My PC tool. The guides cover about Patch My PC tool, installation and configuration.
- Install Patch My PC – Publishing Service Setup Guide
- Configure Patch My PC – Publishing Service Configuration Guide
- Automate Application Creation in SCCM using Patch My PC
- Easy Steps to Configure Email Reports in PatchMyPC
- Integrate PatchMyPC with Teams for Update Notifications
Once the Win32 applications are created by Patch My PC, you can deploy them to devices in Intune.
Create Win32 Applications using Patch My PC in Intune
Let’s look at the steps to create Win32 applications in Intune using Patch My PC.
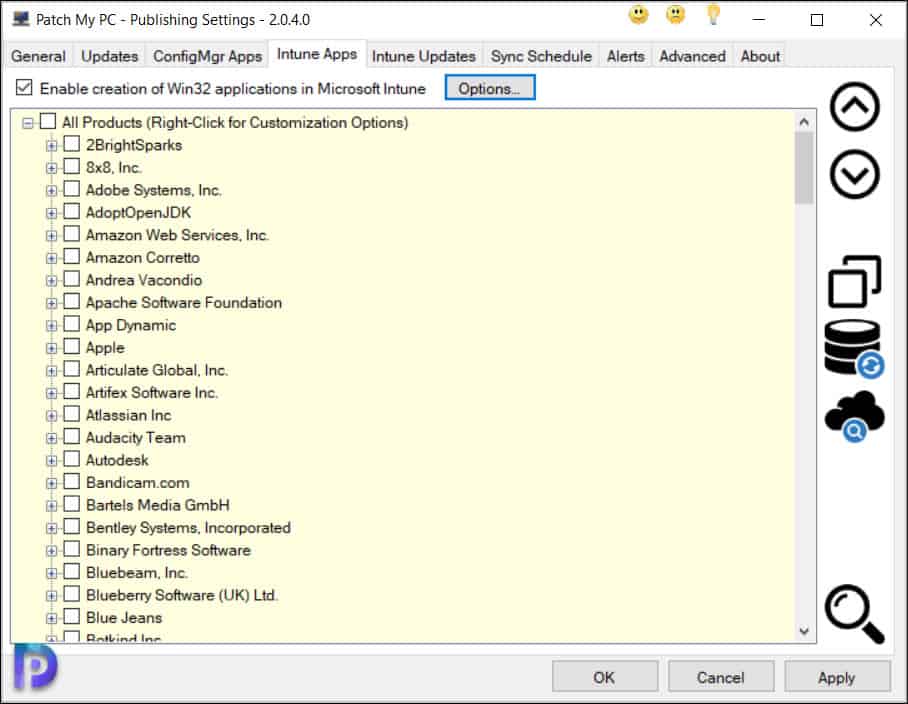
- Launch the Patch My PC tool and click Intune Apps.
- Select the checkbox to Enable creation of Win32 applications in Microsoft Intune.
- Click Apply and OK to save the configuration.
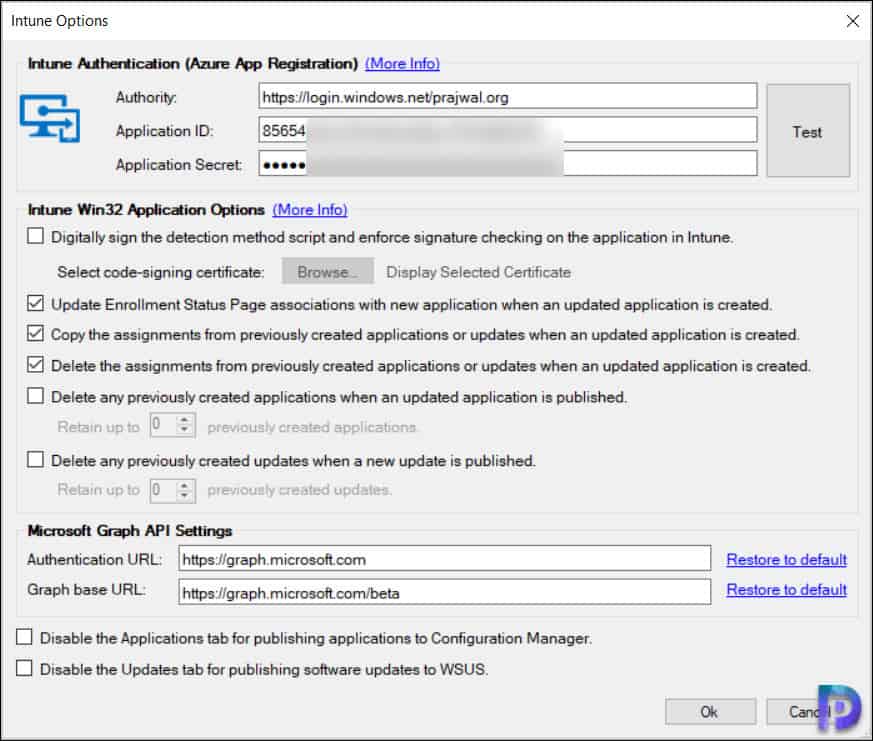
Select the Intune Options, ensure you have specified Authority, Application ID and Application Secret. Click Test to confirm if the details are correct. Click OK.
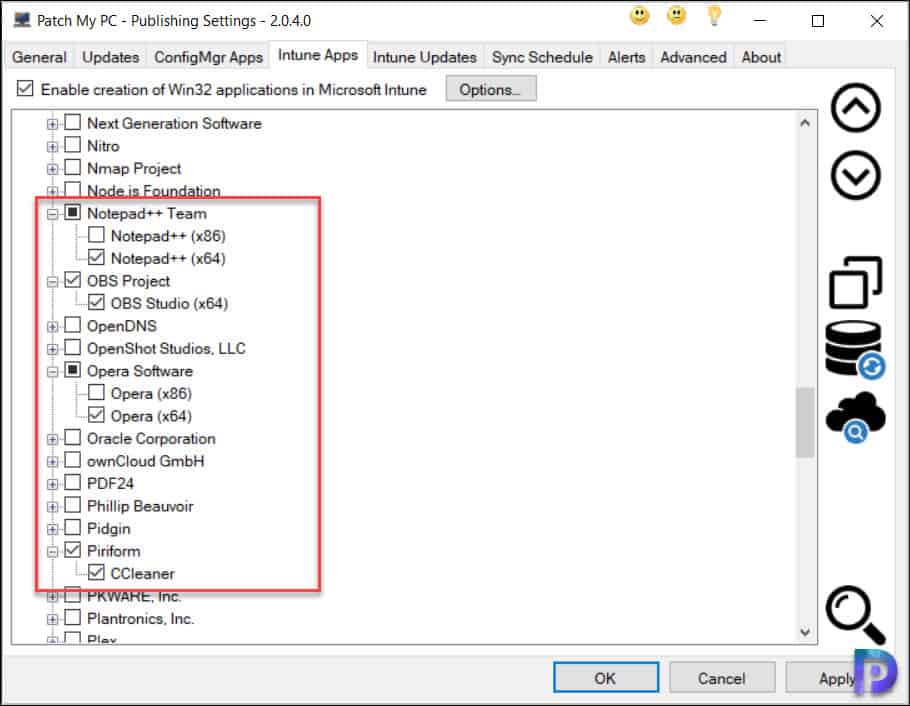
Next, you need to select the Win32 applications that you want to see them created in Intune. I am going to select a few basic applications here. You can also search for the application by pressing CTRL+F or clicking the lens icon. Select the applications and click Apply.
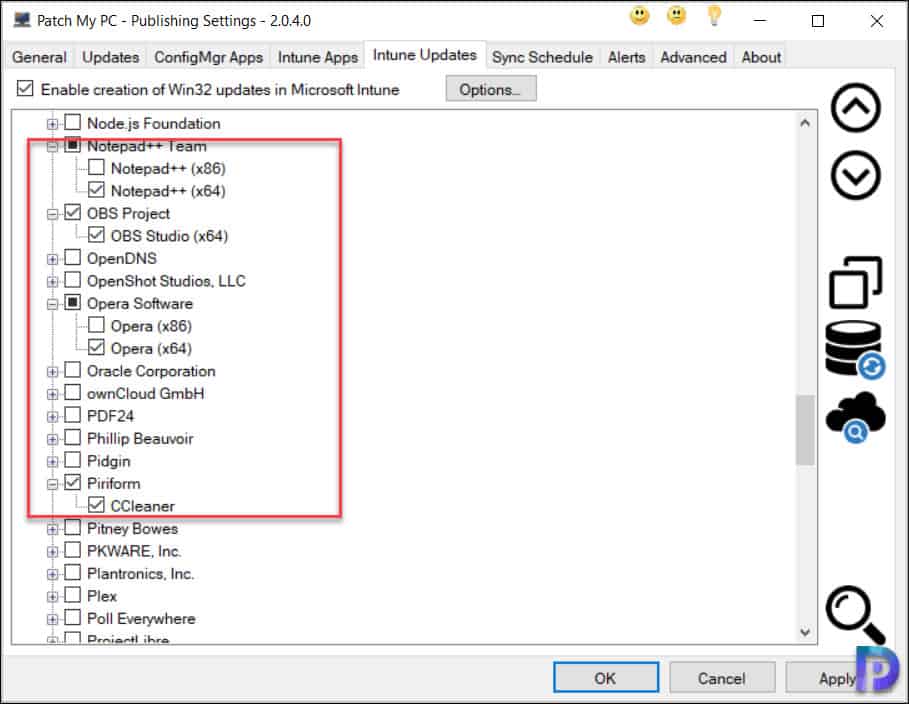
Select Intune Updates tab, and you can select the applications that you want to update. Note that when you select the application updates, both the applications and updates will appear in Intune portal. Click Apply.
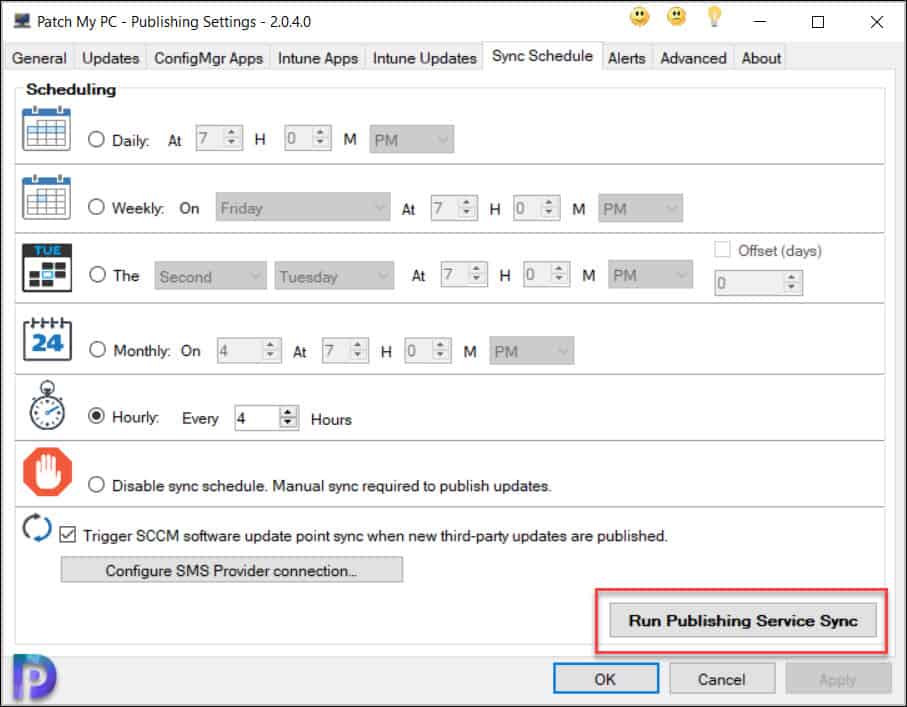
Click Sync Schedule and take a look at the scheduling options. In my case, I have set the schedule to Hourly which is every 4 hours. If you have set it to daily, then wait for the publishing service sync to trigger. Otherwise, at the bottom click Run Publishing Service sync.
Monitor Win32 Applications using PatchMyPC.log
You can monitor the Patch My PC Win32 application creation by reviewing the PatchMyPC.log. The PatchMyPC.log file is located in C:\Program Files\Patch My PC\Patch My PC Publishing Service\ folder path.
In the PatchMyPC.log file you can notice that the new Intune application is first created, the application icon is set, and the application is sent to Intune Server. Once this whole process is complete, visit the Intune portal (Microsoft Endpoint Manager admin center).
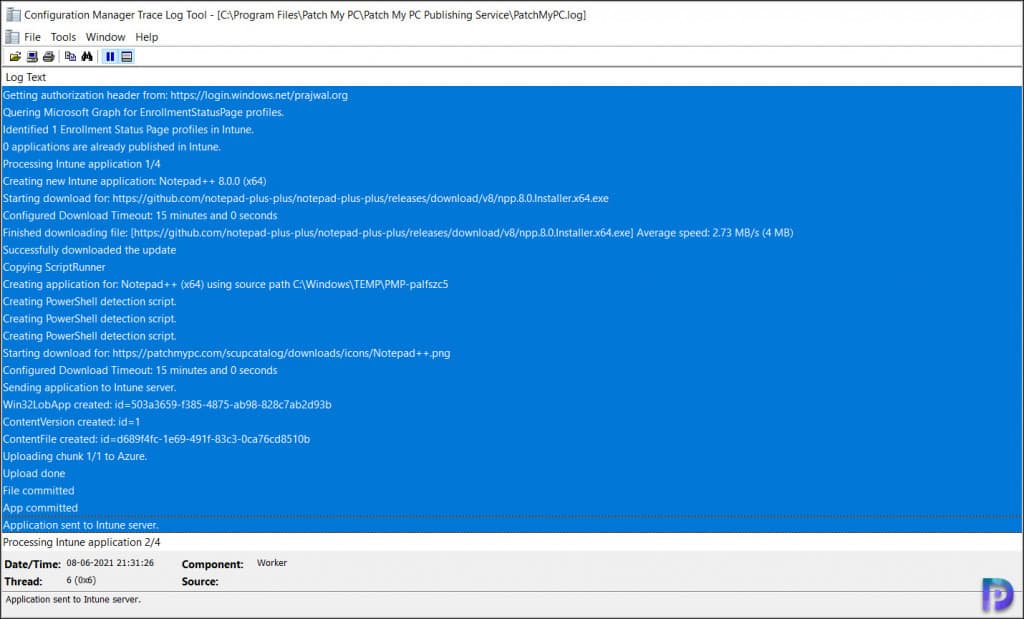
A section from the PatchMyPC.log is pasted below.
Connecting to Intune Server with AppId: 85654a3f-a1f8-4d3e-8d2a-7673a53b1ff1    IntuneServer
 Getting authorization header from: https://login.windows.net/prajwal.org    IntuneProxy
 Connecting to Intune Server with AppId: 85654a3f-a1f8-4d3e-8d2a-7673a53b1ff1    IntuneServer
 Getting authorization header from: https://login.windows.net/prajwal.org    IntuneProxy
 Quering Microsoft Graph for EnrollmentStatusPage profiles.
 Identified 1 Enrollment Status Page profiles in Intune.    Worker
 0 applications are already published in Intune.    Worker
 Processing Intune application 1/4    Worker
 Creating new Intune application: Notepad++ 8.0.0 (x64)    Worker
 Starting download for: https://github.com/notepad-plus-plus/notepad-plus-plus/releases/download/v8/npp.8.0.Installer.x64.exe    Downloader
 Configured Download Timeout: 15 minutes and 0 seconds    WebClientEx
 Finished downloading file: [https://github.com/notepad-plus-plus/notepad-plus-plus/releases/download/v8/npp.8.0.Installer.x64.exe] Average speed: 2.73 MB/s (4 MB)
 Successfully downloaded the update    Downloader
 Copying ScriptRunner    Worker
 Creating application for: Notepad++ (x64) using source path C:\Windows\TEMP\PMP-palfszc5
 Creating PowerShell detection script.
 Creating PowerShell detection script.
 Creating PowerShell detection script.
 Starting download for: https://patchmypc.com/scupcatalog/downloads/icons/Notepad++.png
 Configured Download Timeout: 15 minutes and 0 seconds    WebClientEx
 Sending application to Intune server.
 Win32LobApp created: id=503a3659-f385-4875-ab98-828c7ab2d93b
 ContentVersion created: id=1
 ContentFile created: id=d689f4fc-1e69-491f-83c3-0ca76cd8510b
 Uploading chunk 1/1 to Azure.
 Upload done    IntuneServer
 File committed    IntuneServer
 App committed    IntuneServer
 Application sent to Intune server
Login to Microsoft Endpoint Manager admin center and go to Apps > All Apps. Here you should find all the Intune Win32 apps that were created by Patch My PC. The new Win32 applications and the application updates are created by Patch My PC successfully.

In the next step, you can deploy Win32 applications to your endpoints. I hope this post gives you an idea on how to create Win32 applications using Patch My PC. If you have any questions or suggestions, let me know in the comments section below.
