Customize and Deploy Adobe Acrobat Reader using SCCM
In this article, you will learn how to deploy Adobe Acrobat Reader using SCCM. We will download the latest version of Adobe Acrobat Reader DC, customize it using the Acrobat Customization Wizard DC and deploy it to our Windows 10 clients.
Adobe Acrobat Reader DC software is the free global standard for reliably viewing, printing, and commenting on PDF documents. The main purpose of this program is to edit and view Portable Document Format (PDF) files.
Adobe Acrobat Reader has two versions – Adobe Acrobat Reader DC and Adobe Acrobat Pro DC. So what is the difference between Adobe Acrobat Reader DC and Adobe Acrobat Pro DC ?. Adobe Acrobat Reader DC is a free, stand-alone application that you can use to open, view, sign, print, annotate, search, and share PDF files. Acrobat Acrobat Pro DC are the paid version using which you can create, protect, convert and edit your PDFs.
Before you deploy Adobe Acrobat Reader using SCCM, take a look at some deployment guides related to Adobe, hope you find them useful.
- Deploy Adobe Creative Cloud using SCCM
- Deploy Adobe FrameMaker Using SCCM
- How to deploy Adobe Air silently using SCCM
- Deploying Adobe Reader Updates Using SCCM
Table of Contents
Download Adobe Acrobat Reader DC
When you want to download the Adobe Acrobat Reader DC software you need to visit the correct download link.
Usually, when you download the Adobe Acrobat Reader, you get an small installer that further downloads the Adobe Reader.
An internet connectivity is required to download additional setup files. This is not what we want, and we need the full Adobe Reader enterprise installer.
Adobe provides the enterprise installers where you can download the full installer. The installer is an executable file, and you have to extract the Adobe Reader MSI using a tool.
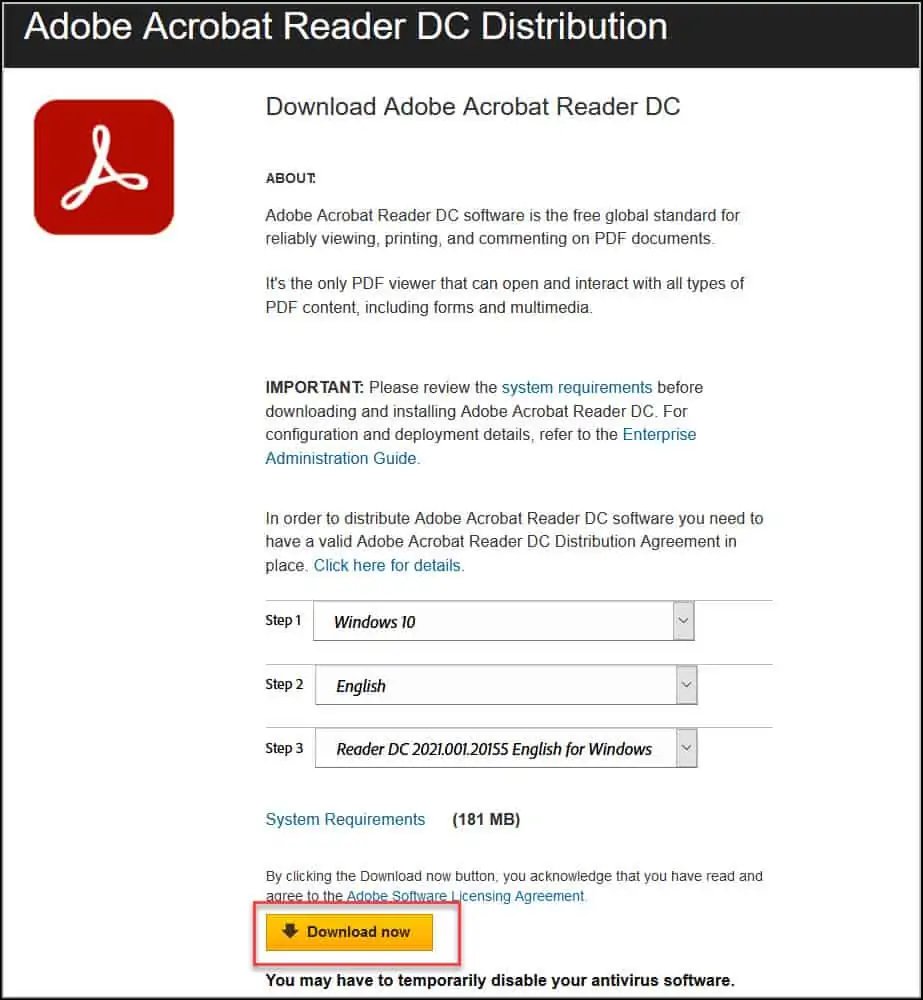
Before you download it, you get to choose the operating system, language and version. Go to the Adobe Acrobat Reader DC distribution page and download the installer.
Save this installer on the SCCM server or the shared folder which we will while creating application in SCCM.
Download Acrobat Customization Wizard DC
The Acrobat Customization Wizard DC streamlines the task of configuring (customizing) the installer before organization-wide deployment.
When you install Adobe Acrobat Reader DC, it installs with default settings. However, for enterprise deployments, you can customize the installer to not only skip the standard registration questions, but also accept the EULA and fill in your organization name automatically.
Some of the options that you can customize include :-
- Leverage existing deployments by copying enterprise files and registry configurations.
- Modify the registry (via the Registry Editor) and installer tables (via the Direct Editor) directly.
- Optimize the behavior of the installer by setting up silent installation, pre-serialization, reboot options, languages, and so on.
- Remove previous versions of Reader and Acrobat.
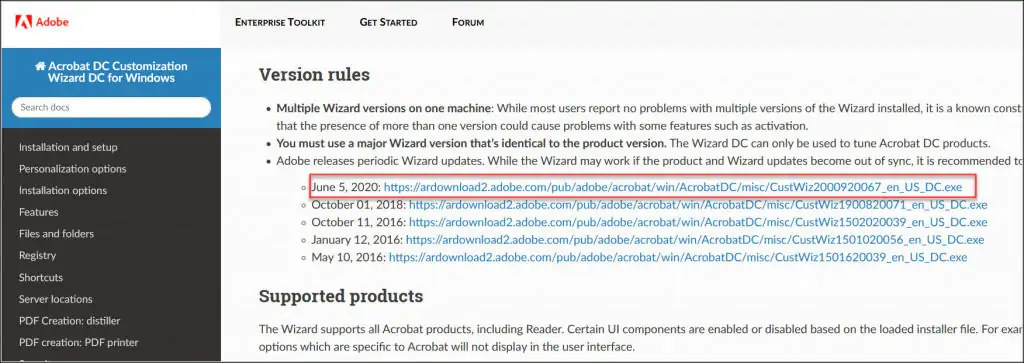
Download the latest version of Acrobat Customization Wizard DC and install it on a computer that you normally use while packaging applications in SCCM. Once we complete customizing the installer we will deploy Adobe Acrobat Reader using SCCM.
Install Acrobat Customization Wizard DC
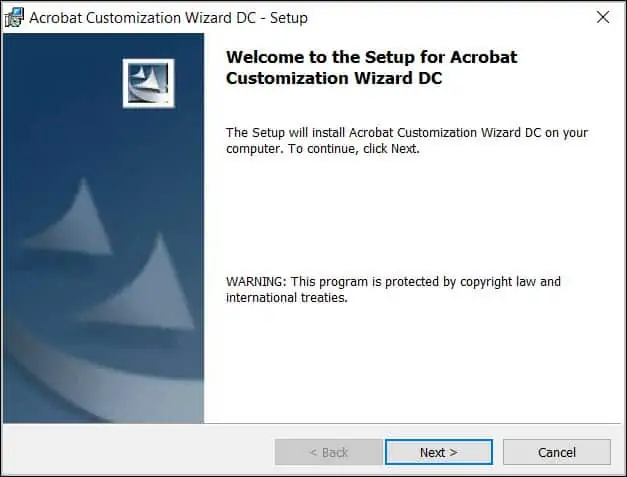
We will now install Acrobat Customization wizard DC. Right click the Acrobat Customization Wizard installer and click Run as administrator. The tool extracts the files for installation. On the welcome page of Acrobat Customization Wizard DC click Next.
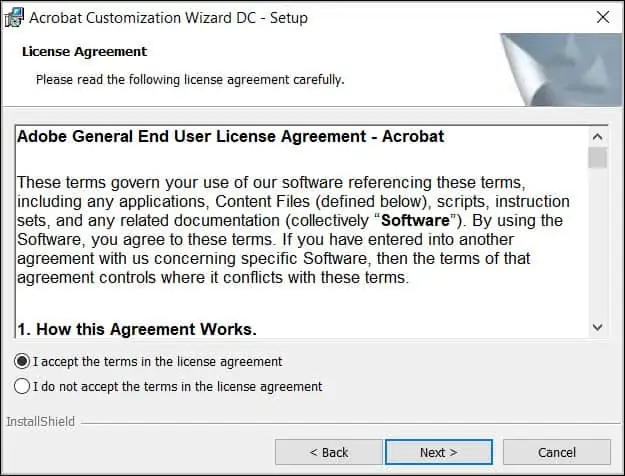
Accept the license agreement and click Next.
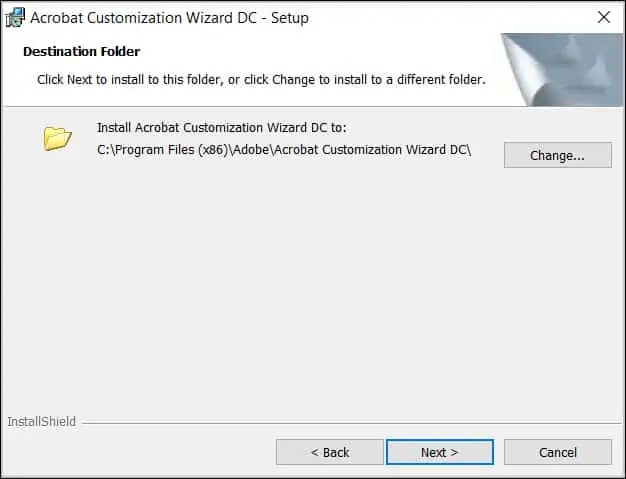
You can specify a custom destination folder by clicking Change option. I would recommend to leave the destination folder as default and click Next.
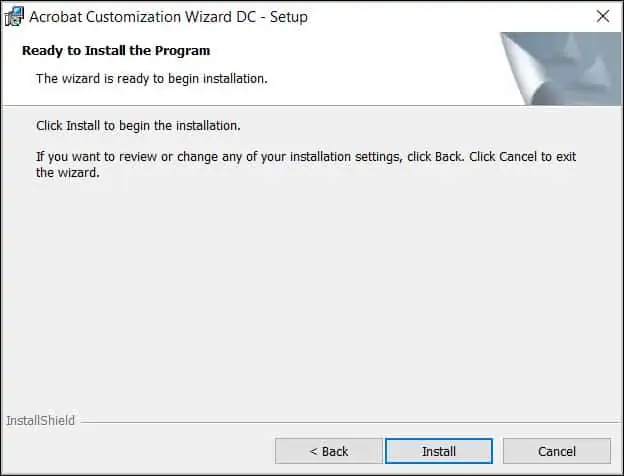
To install Acrobat Customization Wizard DC click Install.
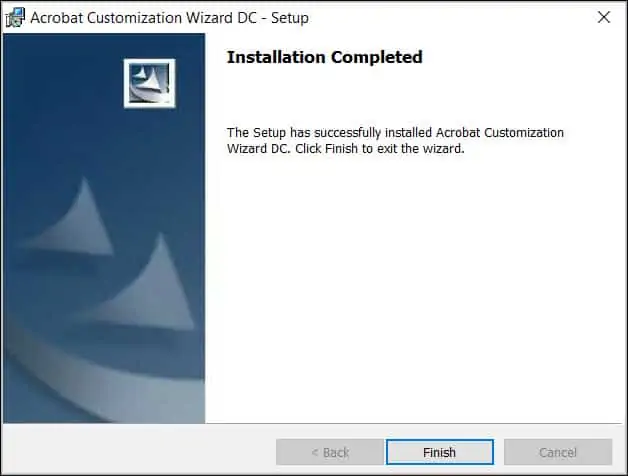
The Acrobat Customization Wizard DC installation is complete. Click Finish.
Extract the Adobe Acrobat Reader Installer
Like I mentioned earlier when you download the Adobe Acrobat Reader Installer, you download an executable file.
You have to extract the MSI installer from this executable so that we can use it to customize using the Acrobat Customization Wizard DC. Use a tool like WinRAR or 7Zip to extract the AcroRead.msi from the installer.
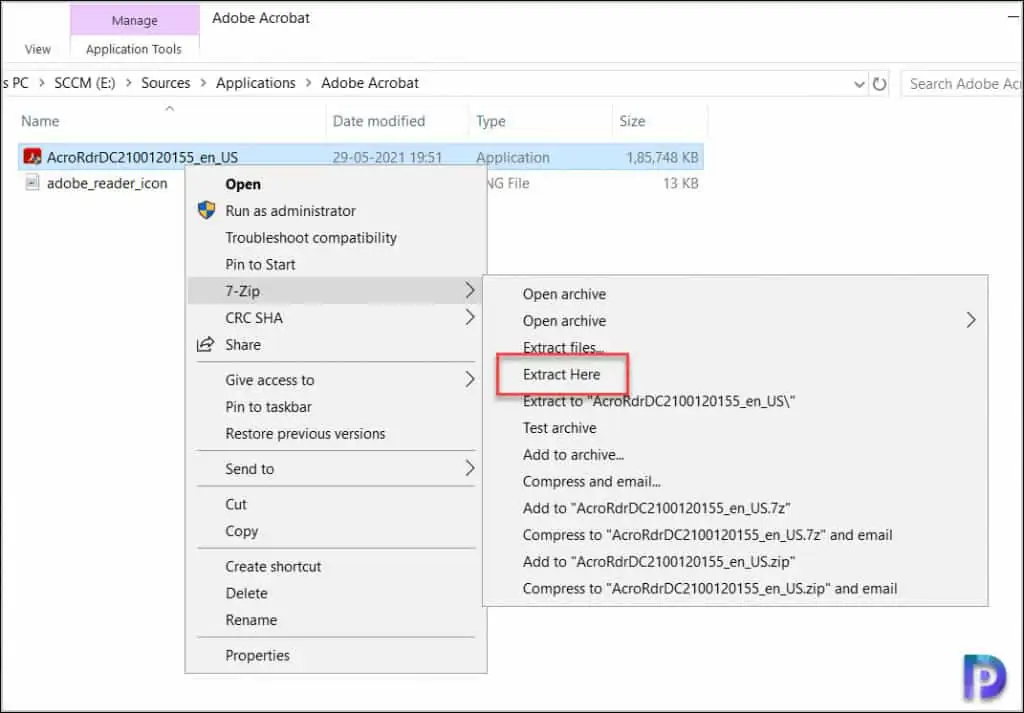
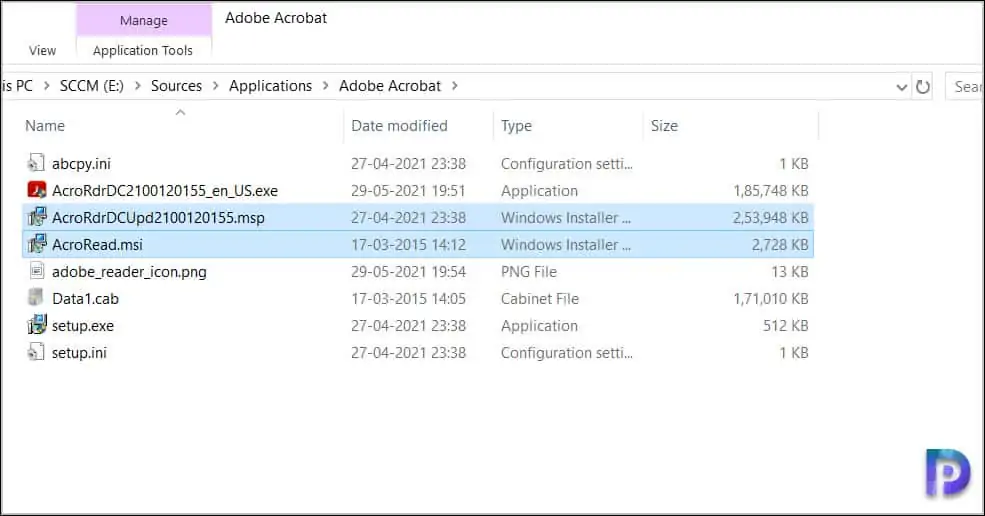
I have extracted the files in the same folder and notice that we have two files which are important.
- AcroRdrDCUpd2100120155.msp – This is the update file or patch that installs over the Adobe Reader.
- AcroRead.msi – This msi installer installs the Acrobat Reader DC on your system.
Customize the Adobe Reader DC Installation Package
In this section, we will customize the Adobe Reader DC installation package using the Acrobat Customization Wizard DC.
This is an optional step before you deploy Adobe Acrobat Reader using SCCM. Click Start and launch the Acrobat Customization Wizard DC.
On the Menu bar, click File and select Open Package. Select the AcroRead.msi file from the Acrobat Reader folder.
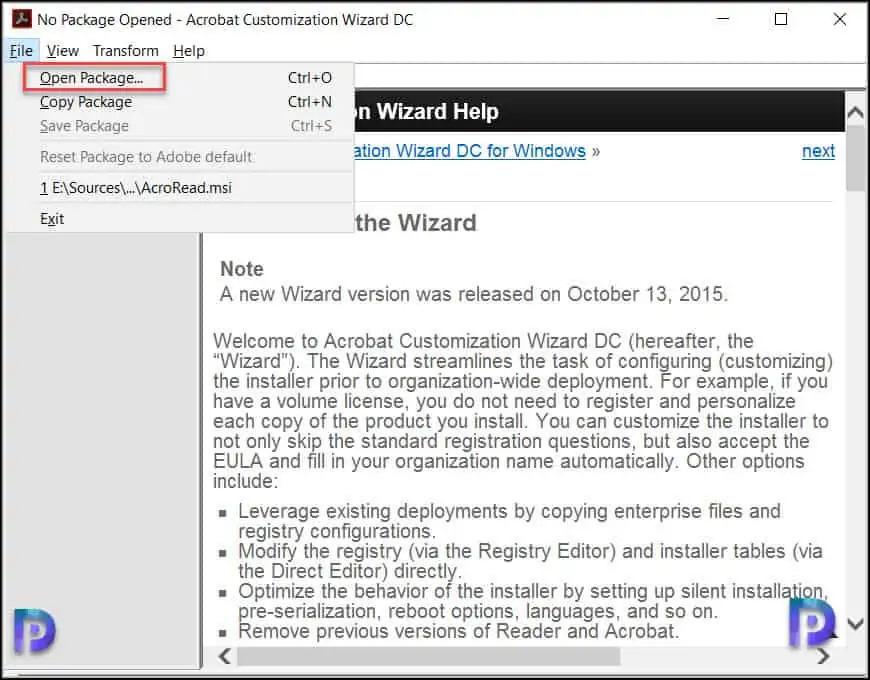
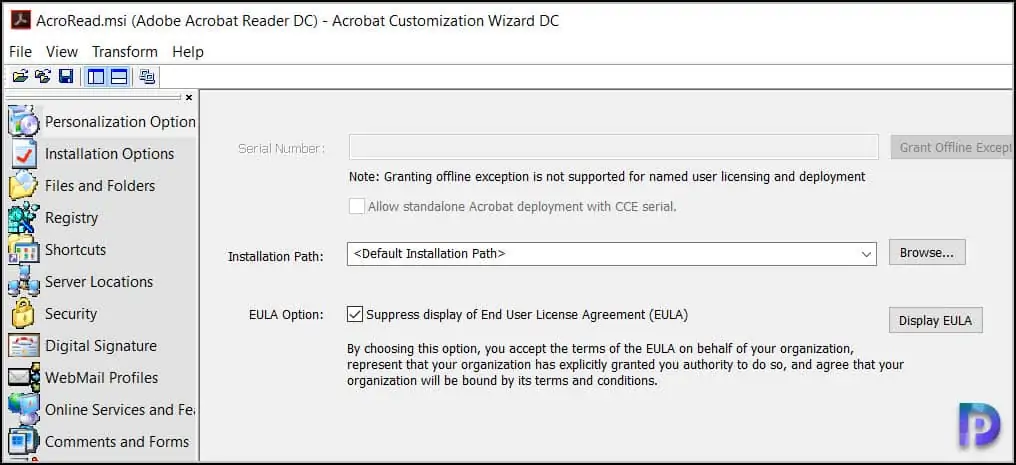
Now you can start customizing the AcroRead.msi. We will customize a few basic options here. On the left pane, select Personalization option.
You can customize the default installation path however I will leave it to default. Next to EULA option select Suppress display of End user license agreement.
By selecting this option, you accept the EULA on behalf of the user and organization. This also means the EULA won’t be displayed for users when the Acrobat Reader DC is launched.
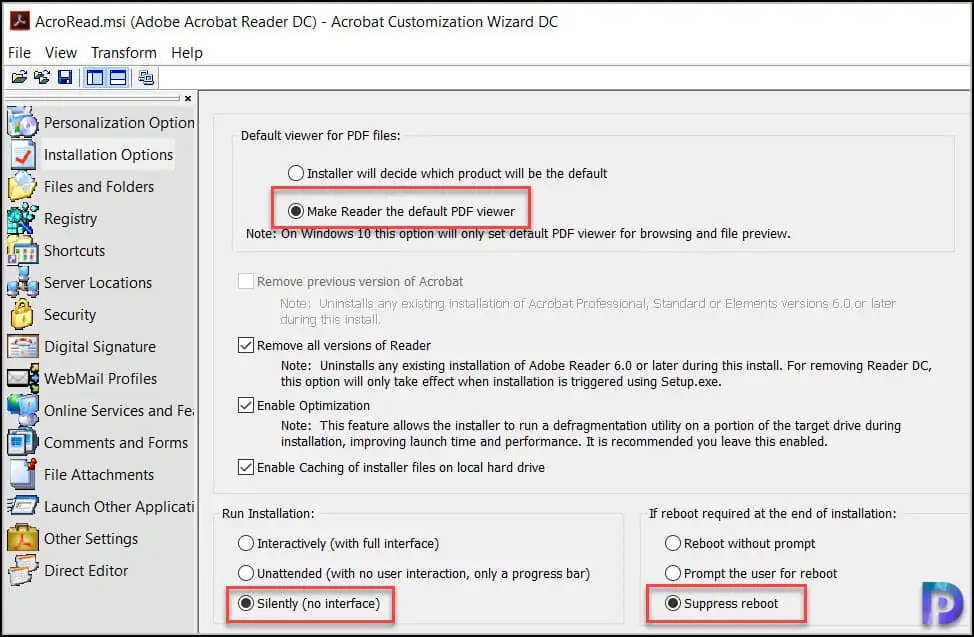
Click Installation options in the left pane and here you can perform the following customization.
- Default viewer for PDF files – Select Make Reader the default PDF viewer. When you select this option, the default PDF reader on the system is set to Acrobat Reader DC. This option is useful when you want to avoid users manually changing the default PDF browser from Edge to Adobe.
- Remove all versions of reader – Enable this option to uninstall any existing installation of Adobe Reader.
- Enable Optimization – This feature allows the installer to run a de-fragmentation utility on a portion of the target drive during installation. Enabling this option improves the launch time and performance of Adobe Acrobat Reader DC.
- Run Installation – Select Silently (no interface)
- Reboot required at end of installation – Suppress reboot
You can customize other options based on your requirements. When you are done with customization, click File and select Save Package. This creates a new transformation file AcroRead.mst in the folder where the installer is present.
Create Adobe Acrobat Reader DC Application in SCCM
- Launch the SCCM console.
- Go to Software Library\Overview\Application Management\Applications.
- Right click Applications and click Create Application.
- On the General window, specify the location of Adobe Acrobat Reader DC application (AcroRead.msi). Click Next.
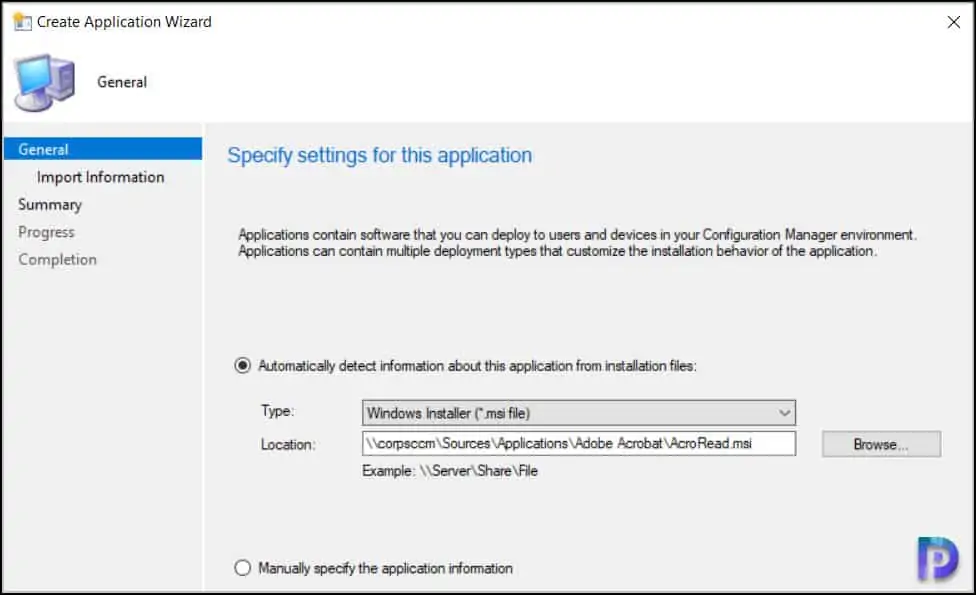
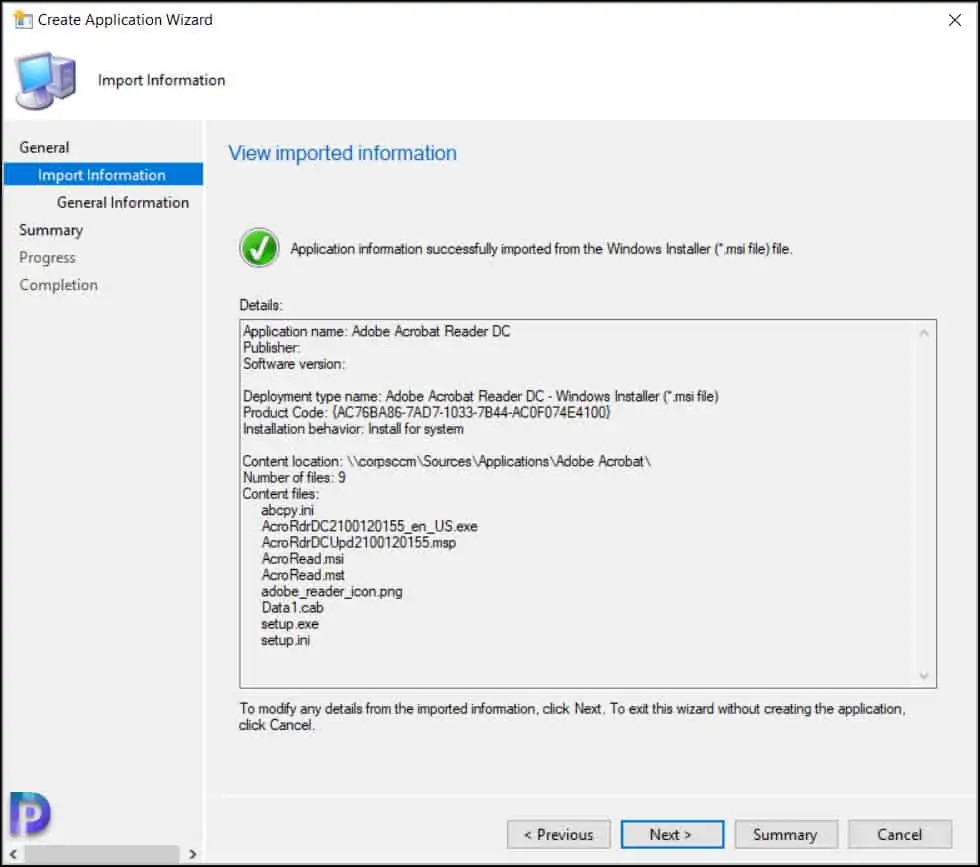
On the import information window, you can notice that application information has been imported successfully. This is truly an advantage of using the Windows Installer (*.msi) file. Click Next.
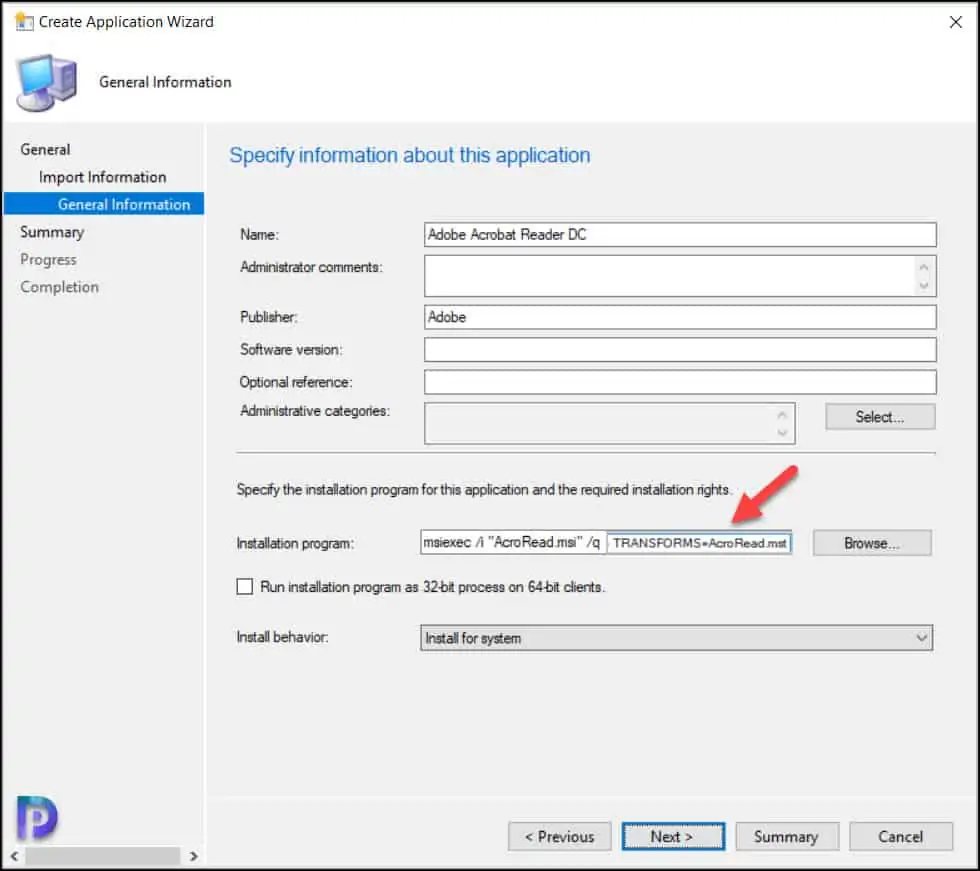
On the General information window, you can specify additional details about Adobe Acrobat Reader application such as Publisher, Software version etc.
The installation program is populated automatically, and you need to add TRANSFORMS=AcroRead.mst at the end of the command. Set the install behavior to install for system. Click Next.
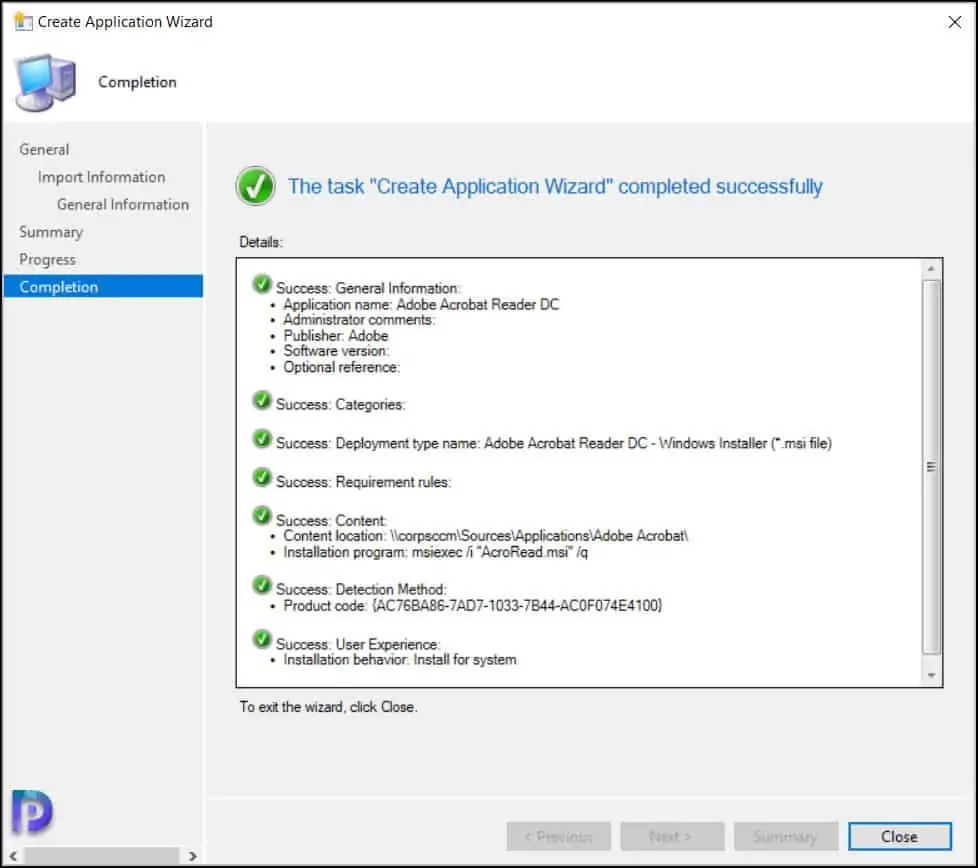
Review the settings on Summary page and on the Completion window, click Close.
Specify Adobe Reader DC Application Icon in SCCM
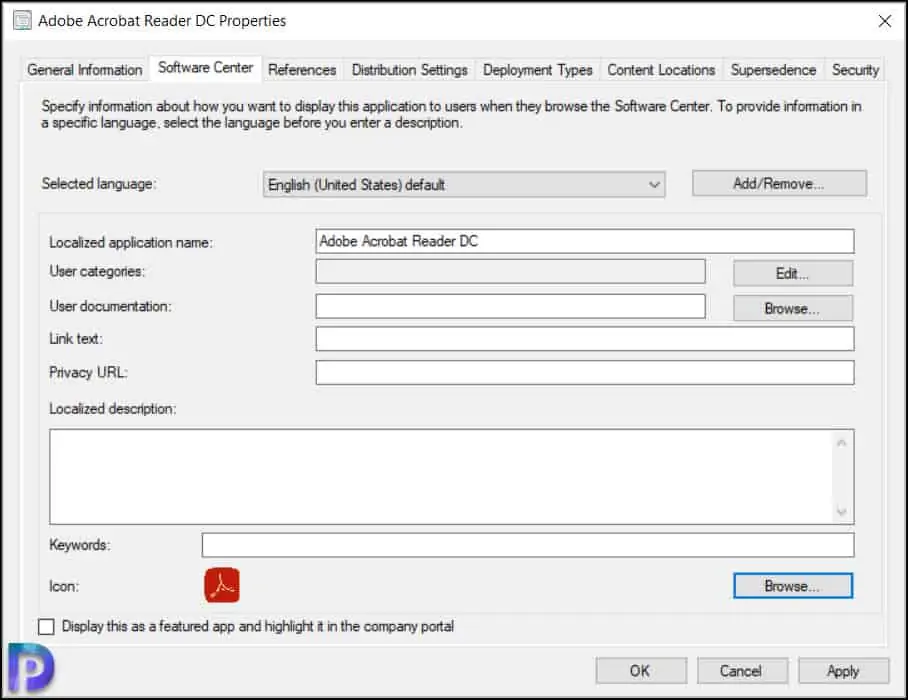
This is an optional step where you can specify Adobe Reader DC Application Icon in SCCM console. To specify the Adobe Reader DC icon, right click the Adobe Acrobat Reader DC application and click Properties. Select the Software Center tab and specify the icon by clicking Browse button. Click Apply and OK.
Deploy Adobe Acrobat Reader using SCCM
Use the below steps to deploy Adobe Acrobat Reader using SCCM.
- Launch the ConfigMgr console.
- Go to Software Library\Overview\Application Management\Applications.
- Right click Adobe Acrobat Reader DC application and click Deploy.
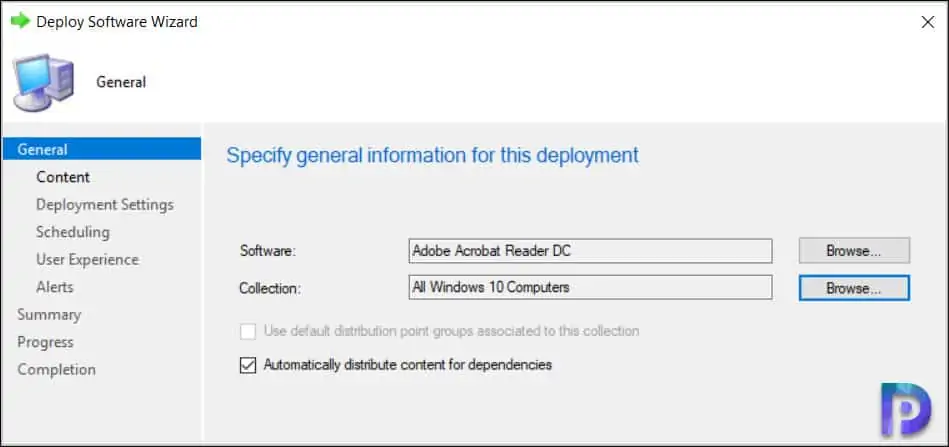
On the General window, click Browse and specify the SCCM device collection to which you want to deploy Adobe Acrobat Reader DC application. Click Next.
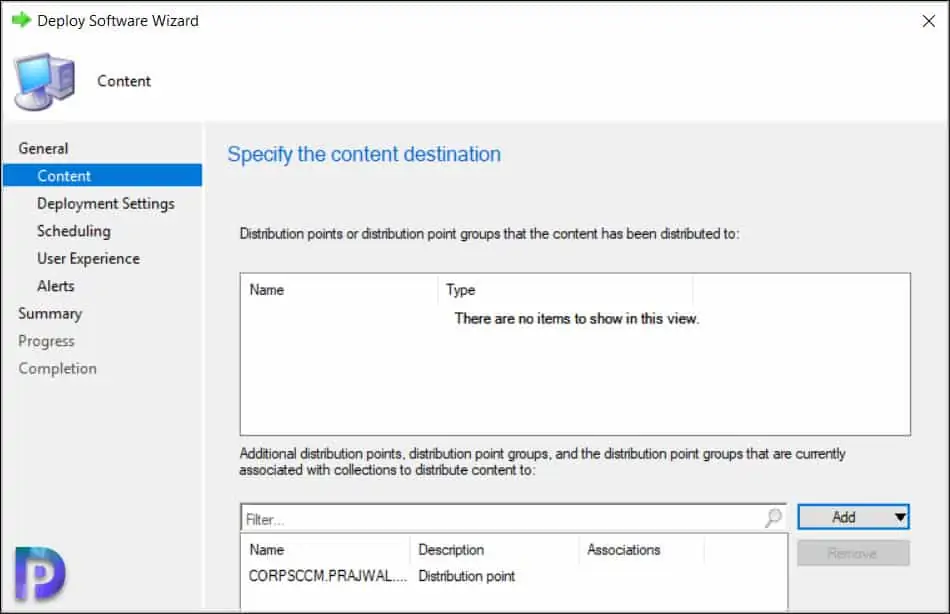
Specify the distribution points to which you want to distribute the content. Click Next.
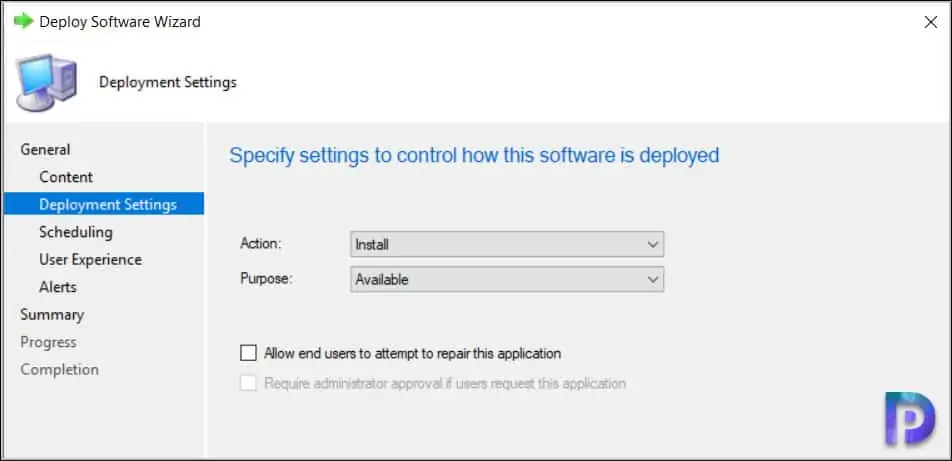
Specify the deployment settings which includes selecting Action and Purpose. Select the Action as Install and purpose as Available. You can also mark Allow end users to attempt to repair the application but we can set this later. Click Next.
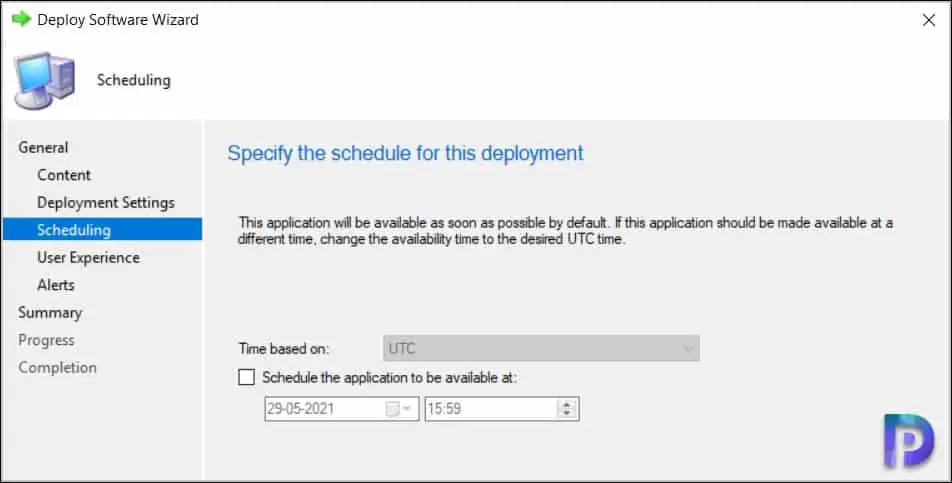
You may specify the schedule for the deployment on Scheduling window. Click Next.
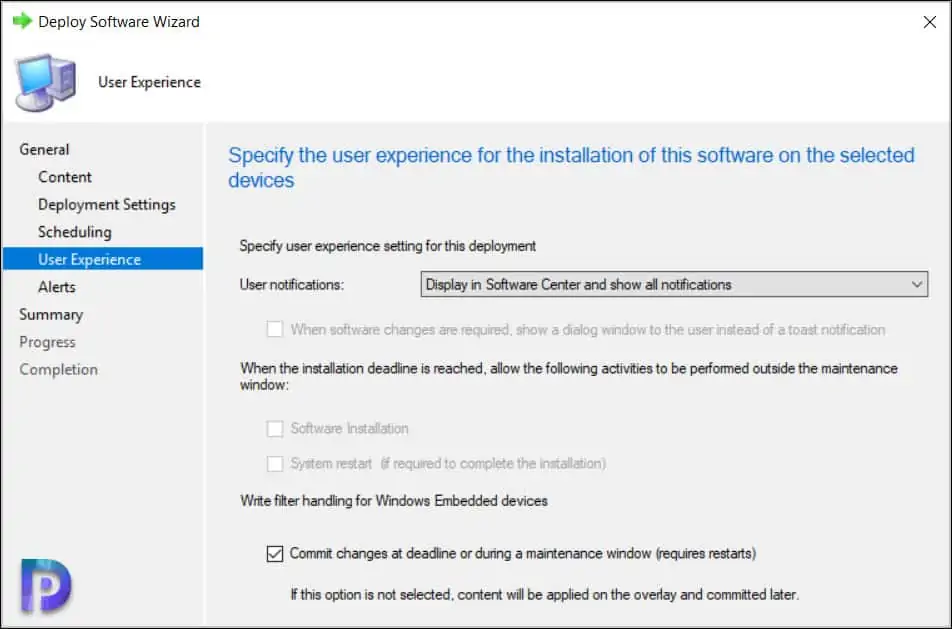
On the user experience window, you can specify the user experience settings for the deployment. Click Next.
On the Alerts window click Next. Review the deployment settings on Summary window and click Close on Completion box.
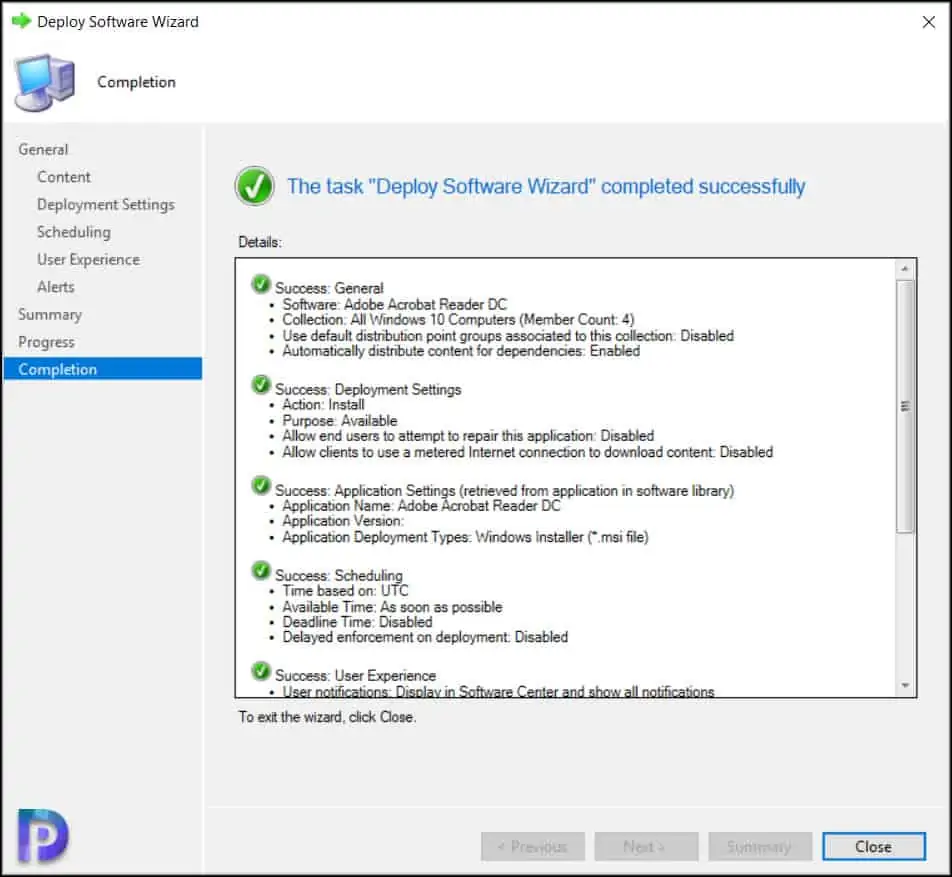
We have completed the steps to deploy Adobe Acrobat Reader using SCCM to our Windows 10 computers. In the next section we will test the deployment.
Test the Adobe Acrobat Reader Deployment
In this section, we will test if the Adobe Acrobat Reader installs on our Windows 10 computers and applies the changes that we did to the installer.
On the client computer, launch the Software Center and select Applications. On the right hand side, select Adobe Acrobat Reader application and click Install.
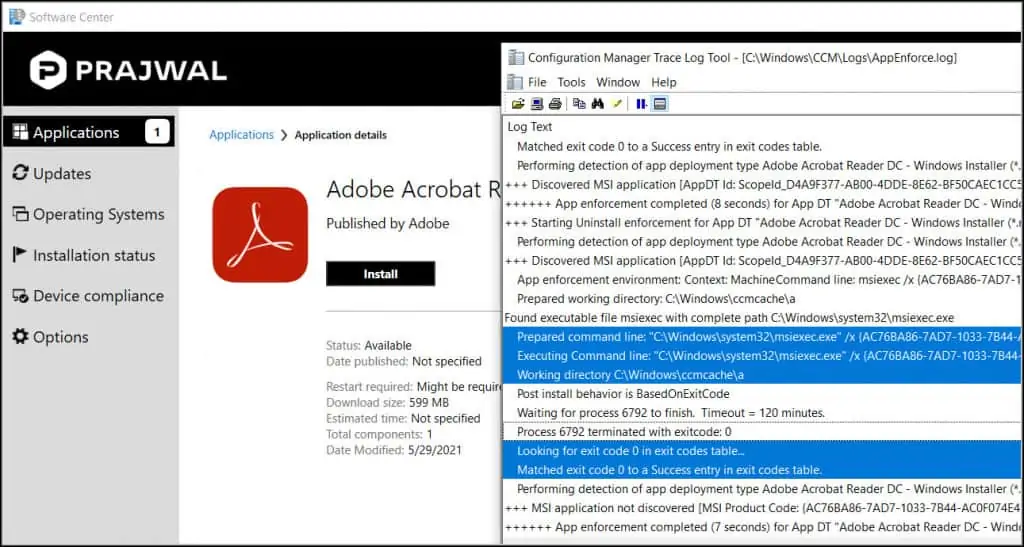
The Adobe Acrobat reader application installed successfully on the client computer. You can monitor the application installation progress by opening AppEnforce.log on the client computer.
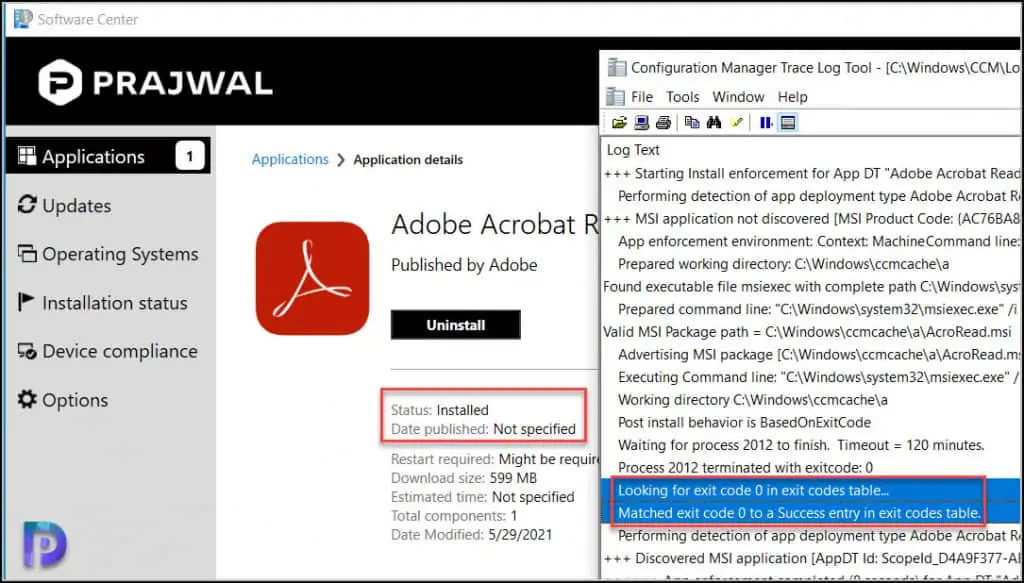
Below lines are from AppEnforce.log located on the client computer.
+++ Starting Install enforcement for App DT "Adobe Acrobat Reader DC - Windows Installer (.msi file)" ApplicationDeliveryType - ScopeId_D4A9F377-AB00-4DDE-8E62-BF50CAEC1CC5/DeploymentType_977fb81c-03f4-4be0-a6c3-723c15a48f49, Revision - 1, ContentPath - C:\Windows\ccmcache\a, Execution Context - System Performing detection of app deployment type Adobe Acrobat Reader DC - Windows Installer (.msi file)(ScopeId_D4A9F377-AB00-4DDE-8E62-BF50CAEC1CC5/DeploymentType_977fb81c-03f4-4be0-a6c3-723c15a48f49, revision 1) for system.
+++ MSI application not discovered [MSI Product Code: {AC76BA86-7AD7-1033-7B44-AC0F074E4100}, MSI Product version: ]
App enforcement environment:
Context: Machine
Command line: msiexec /i "AcroRead.msi" /q
Allow user interaction: No
UI mode: 0
User token: null
Session Id: 1
Content path: C:\Windows\ccmcache\a
Working directory: AppEnforce
Prepared working directory: C:\Windows\ccmcache\a
Found executable file msiexec with complete path C:\Windows\system32\msiexec.exe
Prepared command line: "C:\WINDOWS\system32\msiexec.exe" /i "AcroRead.msi" /qn TRANSFORMS=AcroRead.mst
Valid MSI Package path = C:\Windows\ccmcache\a\AcroRead.msi
Advertising MSI package [C:\Windows\ccmcache\a\AcroRead.msi] to the system.
Executing Command line: "C:\WINDOWS\system32\msiexec.exe" /i "AcroRead.msi" /qn TRANSFORMS=AcroRead.mst
Working directory C:\Windows\ccmcache\a
Post install behavior is BasedOnExitCode
Waiting for process 2012 to finish. Timeout = 120 minutes.
Process 2012 terminated with exitcode: 0
Looking for exit code 0 in exit codes table
Matched exit code 0 to a Success entry in exit codes table
Performing detection of app deployment type Adobe Acrobat Reader DC - Windows Installer (*.msi file)(ScopeId_D4A9F377-AB00-4DDE-8E62-BF50CAEC1CC5/DeploymentType_977fb81c-03f4-4be0-a6c3-723c15a48f49, revision 1) for system.
Let’s test the uninstall option. Click Uninstall and you will notice that the application is uninstalled without any issues. Again use the Appenforce.log file for troubleshooting uninstall issues.
Prepared command line: "C:\Windows\system32\msiexec.exe" /x {AC76BA86-7AD7-1033-7B44-AC0F074E4100} /q /qn
Executing Command line: "C:\Windows\system32\msiexec.exe" /x {AC76BA86-7AD7-1033-7B44-AC0F074E4100} /q /qn with user context
Working directory C:\Windows\ccmcache\a
Looking for exit code 0 in exit codes table…
Matched exit code 0 to a Success entry in exit codes table.
Conclusion
I hope this guide helps you to customize and deploy Adobe Acrobat Reader using SCCM. If you have any question, let me know in the comments section below.

The AcroRead file that is extracted is from 2015. How do you extract a more recent file?
Hi,
I have deployed Adobe reader DC to the firm. I need to enable Adobe to automatically update without any intervention from me.
What is the best way to do this?
Any advice is appreciated, thanks
Adobe Acrobat Reder DC 15.007.20033 installed by itself with this method.
This can happen if you have deployed the application as required.
This is happened when we deploy Adobe Reader DC version 2022.002.20212.
At the end, there is 2 version found at PC (Adobe Acrobat Reader DC 15.007.20033 and Adobe Reader DC version 2022.002.20212).
Is there any missing steps or way to prevent this?
Hello,
First i would like to thank you for everything, whitout your blog i don’t know where would i be: D
With this manual I’ve created the application in SCCM, until this day everything was perfect.
Today if i click on the install button in the Software Center the next version will be installed:
2015.007.20033
If i download the latest msi file what is 2022.001.20117 the problem is the same.
Do you have any ideas why is this happening?
Thanks in advance.
Best regards, Vitaly
for me is better using setup.exe with *.cmd START /WAIT “%~d0” “Setup.exe” /sAll /rs /sl “1029”
(/sl “1029” is my language)
first, there is no new package for my language (it always downloads the old version 19.0.** or 21.0.**) so I download the MUI version and the second is that this is the initial installation of adobe via sccm so I set in the installation that I want to uninstall all previous installations of the reader (currently we only use 64bit, but historically there are a lot of machines with 32bit versions) and this function only works when you run setup.exe. (see note under this option)
It’s worth noting that when installing Adobe Acrobat DC, the standard detection method of using the MSI ID doesn’t work because Adobe have used the same MSI ID for every version of Adobe DC since at least 2015. I’ve managed to get it working using the MSI ID *and* the specific version number:
Setting Type: File System
Type: File
Path: %ProgramFiles(x86)%\Adobe\Acrobat DC\Acrobat
File of folder name: Acrobat.exe
• The file system setting must satisfy the following rule to indicate the presence of this application
Property: Version
Operator: Greater than or equal to
Value: 22.1.20117.0
Note: You must ensure any older versions of Adobe DC are set to use the “Equals” operator, otherwise SCCM will not be able to tell the difference between the new and old versions and will repeatedly uninstall your application.
I’ve twinned this with another detection method (using the Or connector) looking for a specific registry entry. Possibly redundant, but I wanted to nail it down tight after having a *lot* of trouble with this deployment:
Setting Type: Registry
Hive: HKEY_LOCAL_MACHINE
Key: SOFTWARE\WOW6432Node\Microsoft\Windows\CurrentVersion\Uninstall\{AC76BA86-1033-FFFF-7760-0C0F074E4100}
Value: DisplayVersion
Data Type: String
• This registry setting setting must satisfy the following rule to indicate the presence of this application
Operator: Equals
Value: 22.001.20117
Hope that’s of use.
There are several way to do this.
The straight MSI command requires the actual patch path to be included, which will be difficult considering the ccmcache folder will be different every time:
msiexec /i AcroRead.msi /qn TRANSFORMS=AcroRead.mst PATCH=C:\<path to patch file\AcroRdrDCUpd2200120085.msp
The PowerShell method could handle it like this:
$args = "/i $PSScriptRoot\AcroRead.msi /qn TRANSFORMS=$PSScriptRoot\AcroRead.mst PATCH=$PSScriptRoot\AcroRdrDCUpd2200120085.msp"
Start-Process -FilePath msiexec.exe -ArgumentList $args -Wait -WindowStyle Hidden
But of course the easiest way to install after running the customization wizard is to simply run Setup.exe by itself. It will find the setup.ini file in the same directory and will install the MSI, the transform, and the patch automatically.
Hello,
How to detect the application if we have older version already installed? (like 21.1.20140.30039)
The msi ID is the same since like 2015, {AC76BA86-7AD7-1036-7B44-AC0F074E4100}, and apply the .msp update does not change the msi ID.
So if we need to update, we need another detection methode.
Im looking at acroread.exe, version attribute (wich is the .msp version number) but it doesn’t work correctly.
Another idea ?
Thank you.
Why .msi does not use .msp file?
I used this tool to customize latest Adobe DC, it’s easy to use.
Does the MSP patch get applied using this method? I thought you had to call setup.exe in order for the setup.ini (which contains the patch path, etc) to be applied.
Yes the command that we use covers the patch installation as well.
The patch does not install using the provided example.
Tested on
Reader DC 2022.003.20322 MUI for Windows-64bit
Reader DC 2022.003.20322 MUI for Windows-32bit
after install the 32 bit version is 15.007.20033 the 64 bit version is 2021.001.20135
I will try playing with Christopher Ireland’s suggestion to see if I can get the patches to install.
are you sure? I did all the steps but msi does not use msp.
Can this customized “Adobe Acrobat Reader DC Application” be used in task sequence as well?