Configure Delivery Optimization with Microsoft Intune via OMA-URI
In this post I will show you how to configure delivery optimization with Mircrosoft Intune using OMA-URI. We will see how we can deliver the release updates optimizations of Microsoft Office 365 through Microsoft Intune and OMA-URI.
The main benefit of “Delivery Optimization” is to help with bandwidth management. Delivery Optimization can be an effective way to reduce network bandwidth without the need for additional infrastructure or administrative overhead.
This is especially relevant for those organizations that don’t have Microsoft Endpoint Configuration Manager (current branch) or other enterprise software distribution tools. To know more about Delivery Optimization, click this link.
Configure Delivery Optimization with Microsoft Intune via OMA-URI
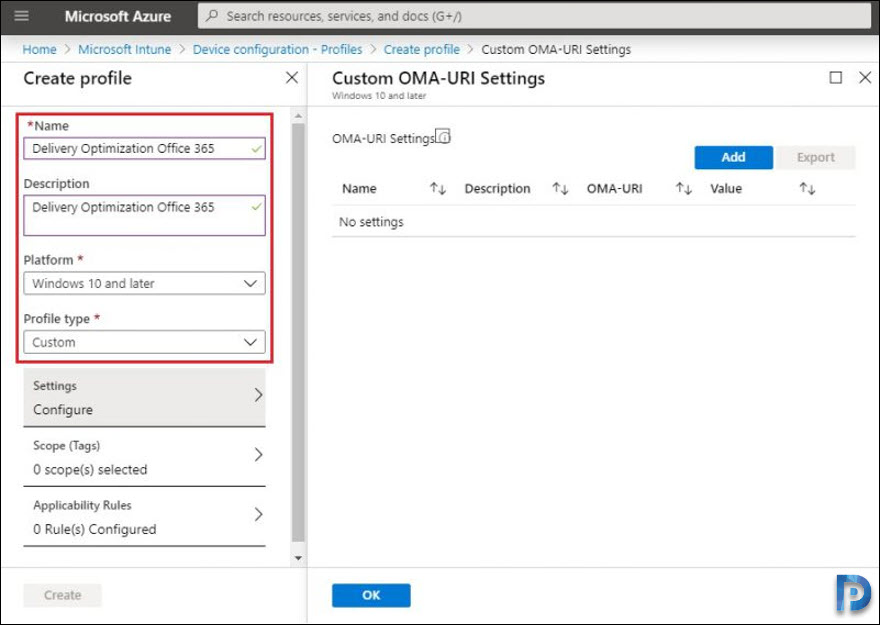
Let’s look at the steps to configure delivery optimization with Microsoft Intune via OMA-URI. The first thing we should do is access the device management portal. In the Microsoft Intune section, go to Device Configuration > Profiles. Create a new profile as shown below.
Specify the name as Delivery Optimization Office 365. You can also add a description. Select Platform as Windows 10 and later and profile type as Custom.
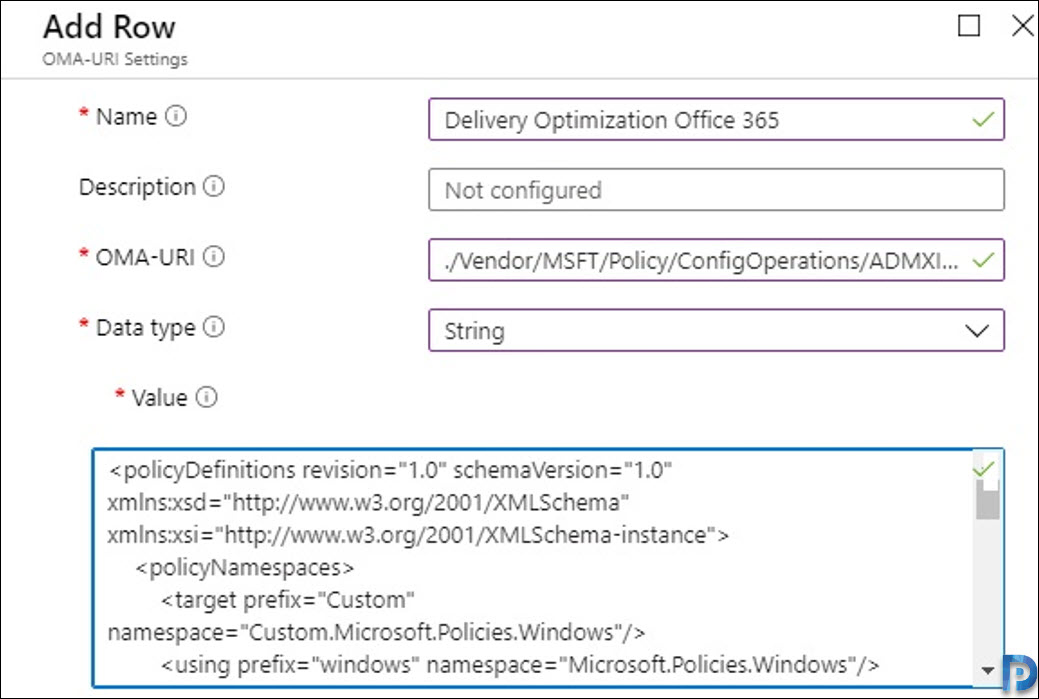
 Now click on Add and enter the following information.
- Name: Delivery Optimization Office 365
- OMA-URI: ./Vendor/MSFT/Policy/ConfigOperations/ADMXInstall/CustomOfficeDOSettings/Policy/CustomOfficeDOSettings
- Data type: string
- Value:
<policyDefinitions revision="1.0" schemaVersion="1.0" xmlns:xsd="http://www.w3.org/2001/XMLSchema" xmlns:xsi="http://www.w3.org/2001/XMLSchema-instance">
    <policyNamespaces>
        <target prefix="Custom" namespace="Custom.Microsoft.Policies.Windows"/>
        <using prefix="windows" namespace="Microsoft.Policies.Windows"/>
    </policyNamespaces>
    <resources minRequiredRevision="1.0" fallbackCulture="en-us"/>
    <categories>
        <category name="CustomOfficeDOSettings" displayName="Custom Office DO Settings" explainText="https://docs.microsoft.com/en-us/DeployOffice/delivery-optimization">
            <parentCategory ref="windows:Custom" />
        </category>
    </categories>
    <policies>
        <policy name="SetDOAsPrimary" displayName="SetDOAsPrimary" explainText="https://docs.microsoft.com/en-us/DeployOffice/delivery-optimization" key="SOFTWARE\Policies\Microsoft\office\16.0\common\officeupdate" class="Machine" valueName="SetDOAsPrimary">
            <parentCategory ref="CustomOfficeDOSettings"/>
            <supportedOn ref="windows:SUPPORTED_Windows7" />
            <enabledValue>
                <decimal value="1" />
            </enabledValue>
            <disabledValue>
                <decimal value="0" />
            </disabledValue>
        </policy>
    </policies>
</policyDefinitions>
When you add the above information, it should look something like this.
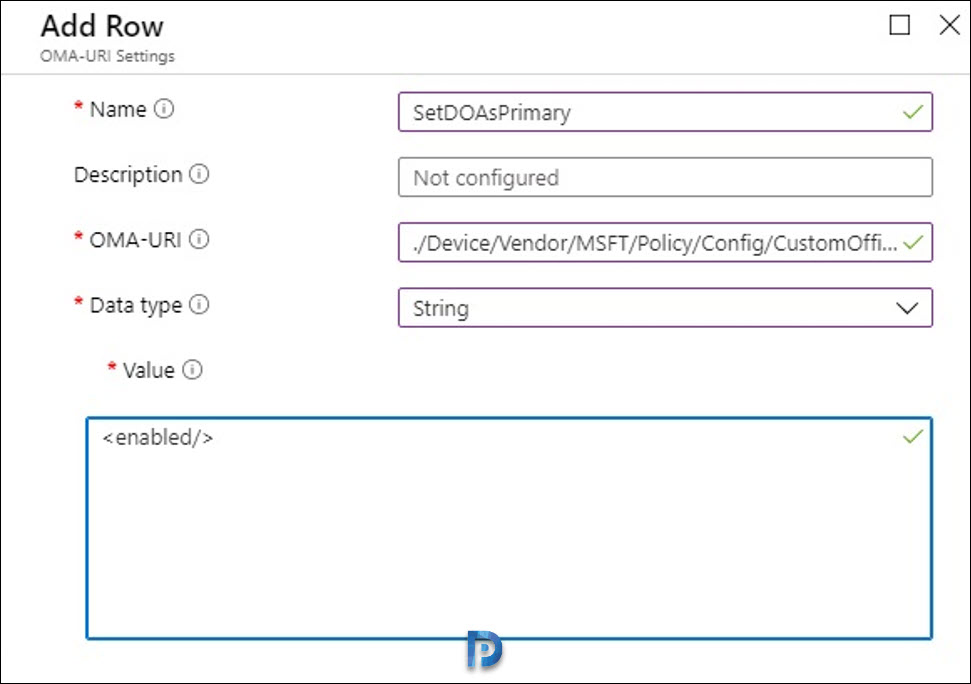
 We must also add the following value.
- Name: SetDOAsPrimary
- OMA-URI: ./Device/Vendor/MSFT/Policy/Config/CustomOfficeDOSettings~Policy~CustomOfficeDOSettings/SetDOAsPrimary
- Data Type: string
- Value:<enabled/>
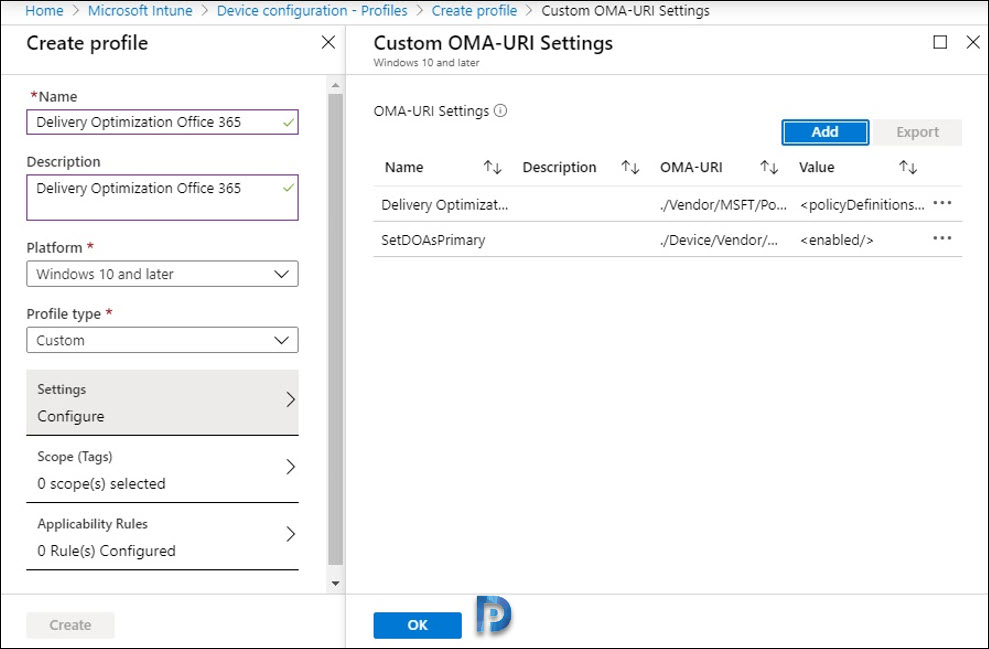
 We can see the result as shown below. Finally, we click on OK and Create.
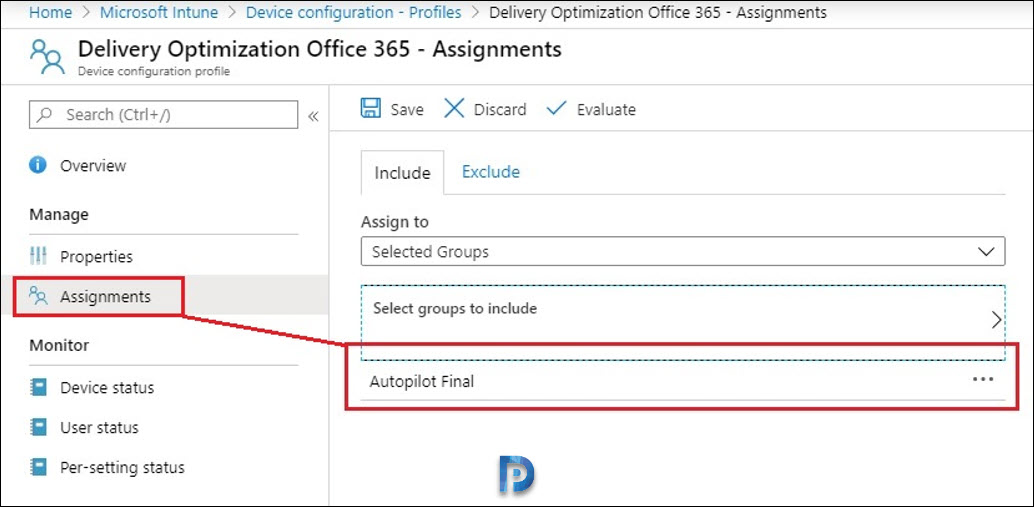
 Next, we must assign this profile to our group of teams by clicking on assign group.
 Now we can see the result after a few minutes of applying the policy. The deployment status now shows as Succeeded.
 I hope this post helps. If you have any questions, feel free to put them in comments section. Goodbye to all my readers, I will again come back with new posts.
