Enroll macOS Devices in Intune using Company Portal App
This article demonstrates the steps to enroll macOS devices in Intune using the company portal app. You can enroll macOS devices into Microsoft Intune using the Company Portal app to gain secure access to the organization’s email, files, and apps.
Microsoft Intune supports enrollment of macOS for both personal and company-owned devices. When you enroll your macOS device in Intune, it is called a managed device. Intune can manage macOS devices efficiently provided they fall under supported devices list. Your organization can assign policies and deploy DMG apps to macOS devices using an MDM solution such as Intune.
This article describes how to use the Company Portal app to enroll macOS devices in Intune. Like Windows devices, the company portal app can be installed and used for enrolling macOS devices into Intune.
Refer to these useful guides related to device enrollment in Intune:
- Enroll iOS iPadOS devices in Microsoft Intune
- Configure Intune Device Enrollment Restrictions
- Enroll Windows 11 Devices in Intune with 2 Easy Methods
- Enroll Windows 10 devices in Intune
- Enroll HoloLens 2 Device for Autopilot Deployment
What happens after you enroll macOS devices in Intune?
Before you enroll your macOS devices into Intune, let’s understand about the benefits that you get. When you enroll macOS in Intune, you give your IT support permission to manage your device to help protect the company information on the device. When your Mac device is enrolled, your company support can:
- Reset your device back to manufacturer’s default settings if the device is lost or stolen.
- Remove all installed company-related data and business apps. Your personal data and settings aren’t removed.
- Require you to have a password or PIN on the device.
- Require you to accept terms and conditions.
- Disable the camera on your device to prevent you from taking pictures of sensitive company data.
- Enable or disable web browsing on your device.
- Enable or disable backup, document sync, Photo Stream to iCloud.
- Enable or disable data roaming on your device. If data roaming is allowed, you might incur roaming charges.
- Enable or disable voice roaming on your device. If voice roaming is allowed, you might incur roaming charges.
- Enable or disable automatic file synchronization while in roaming mode on your device. If automatic file synchronization is allowed, you might incur roaming charges.
Prerequisites for enrolling macOS devices in Intune
To enroll macOS devices in Intune, following are the prerequisites:
- Intune now supports macOS 10.15 and later. Review the Intune Monthly updates for more information.
- You must download and install Company Portal app for macOS before enrollment.
- Intune company portal can only be installed on macOS version 11 or later.
- To log in to the company portal, you’ll need a user account with an Intune license.
- Maintain an internet connection until all steps are complete.
- Have access to Safari web browser on your device.
Steps for Enrolling macOS in Intune
The procedure to enroll macOS devices in Intune includes a series of steps that needs to be followed. After the successful enrollment of macOS, you can apply policies and configuration profile from Intune Portal.
The following high-level steps are involved in enrolling macOS devices into Intune.
- Check the prerequisites and ensure you are using supported macOS devices for enrollment.
- Apple MDM Push certificate configuration: Involves downloading the Intune certificate signing request and creating a new push certificate. Later, upload this push certificate in Intune portal.
- Install the Company Portal app on an macOS device and authenticate.
- Set up macOS devices to access your company resources.
- Manage macOS devices from Intune Portal.
Note: If you have already created the Apple MDM push certificate during the enrollment of iOS devices in Intune, you can proceed with the next steps.
Step 1: Set up Apple MDM Push Certificate
An Apple MDM Push certificate is required to enroll and manage macOS devices in Microsoft Intune. You can configure Apple MDM push certificate with following steps:
- Sign in to Microsoft Intune Admin Center.
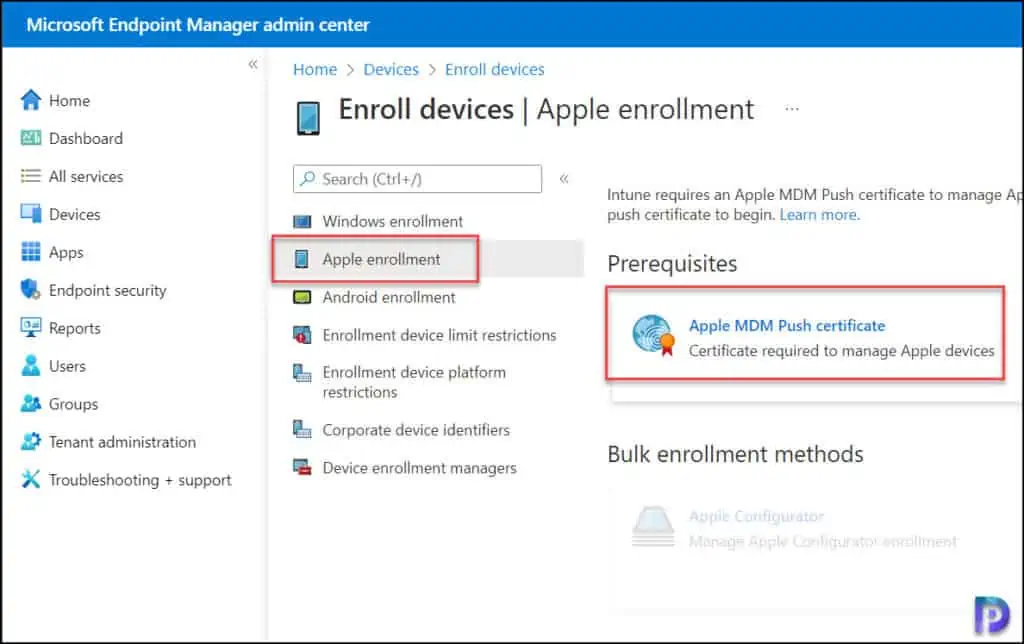
- Navigate to Devices > Enroll Devices > Apple Enrollment and click on Apple MDM Push Certificate.
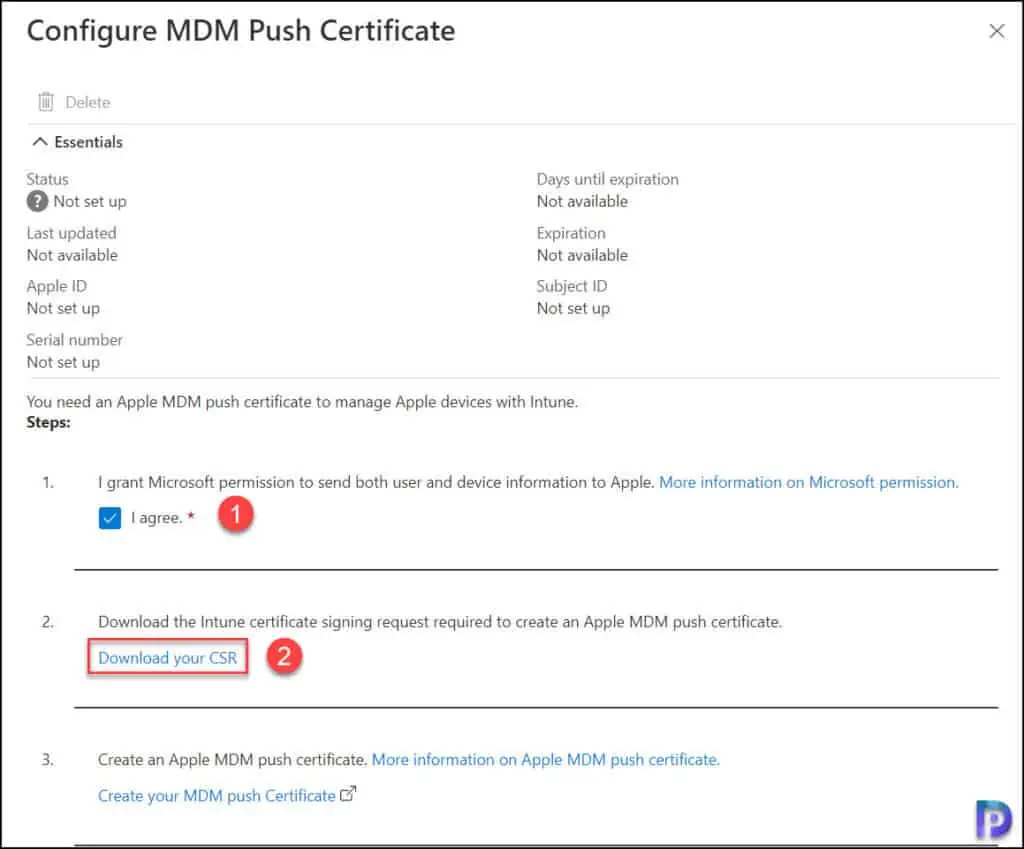
On the Configure MDM Push Certificate window, select I agree to give Microsoft permission to send data to Apple. This is a mandatory step.
Step 2: Download the Intune Certificate Signing request
In this step, you have to download the Intune certificate signing request required to create an Apple MDM push certificate. Select Download your CSR to download and save the request file locally. Refer to the above screenshot for more details.
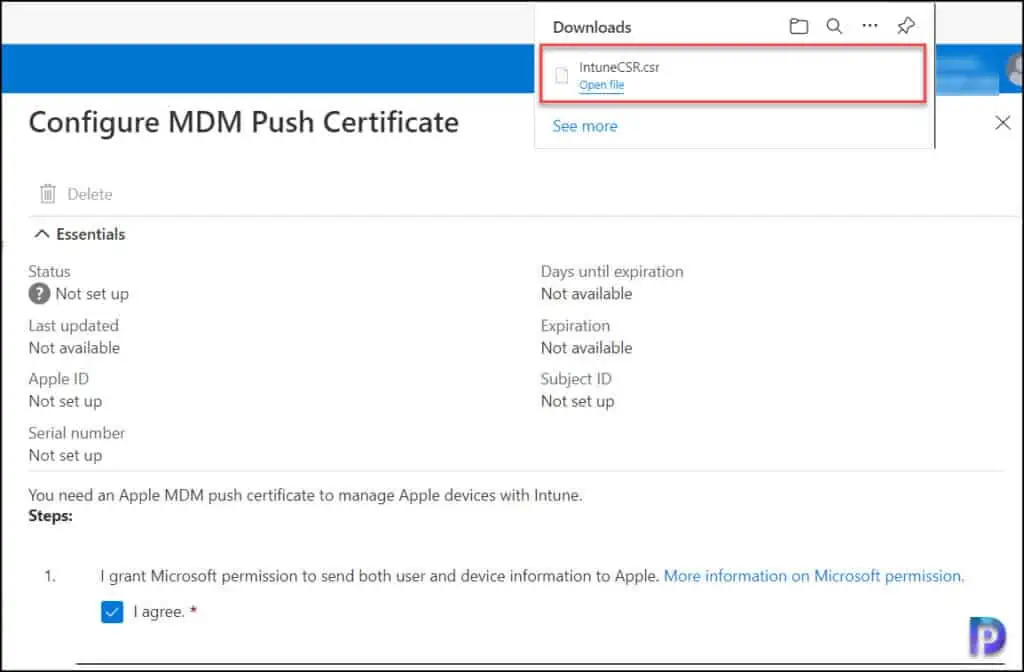
Shortly, the IntuneCSR.csr file will be downloaded and saved to the default location on your computer. We will need this file to request a trust relationship certificate from the Apple Push Certificates Portal.
Step 3. Create an Apple MDM Push Certificate
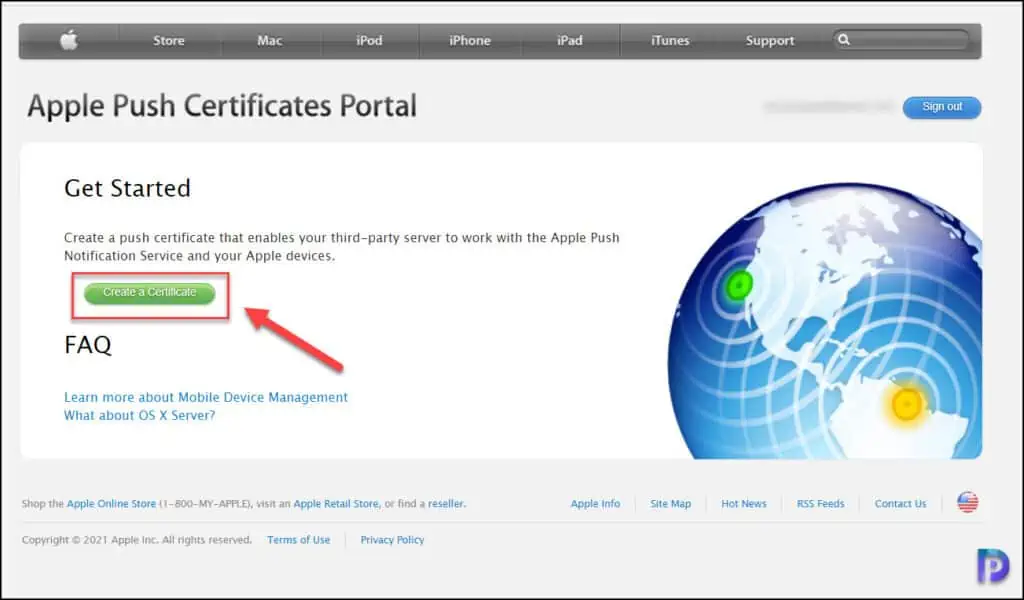
On the Configure MDM Push Certificate window, click Create your MDM push certificate. This is required to enroll macOS in Intune. A new link opens in your default browser and takes you to the Apple Push Certificates Portal. You must sign in with your company email address Apple ID, and then click Create a Certificate.
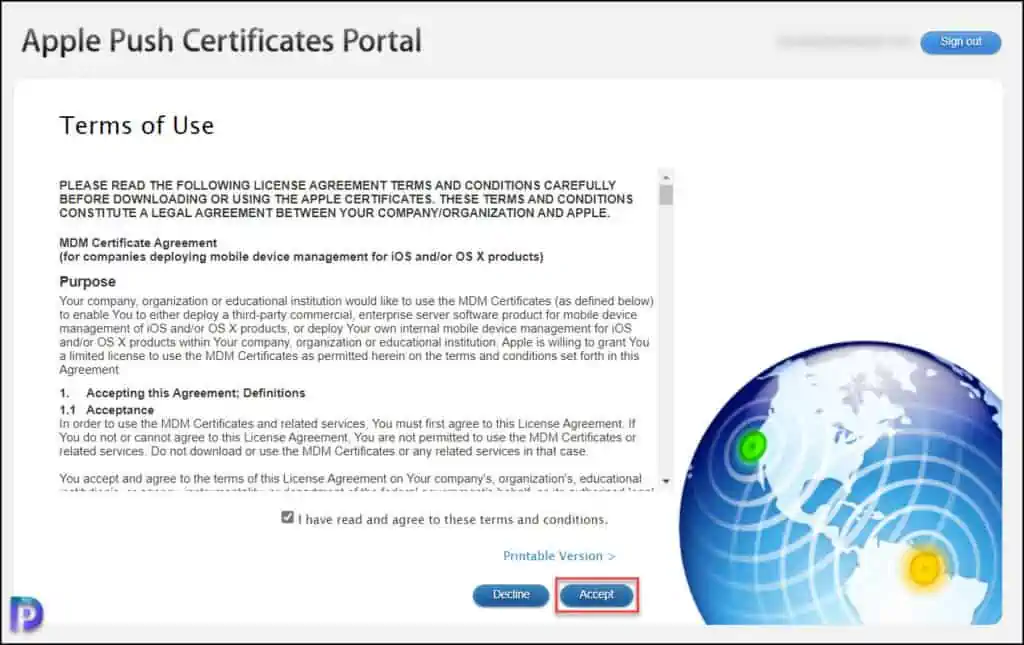
On the Terms of Use page, click Accept.
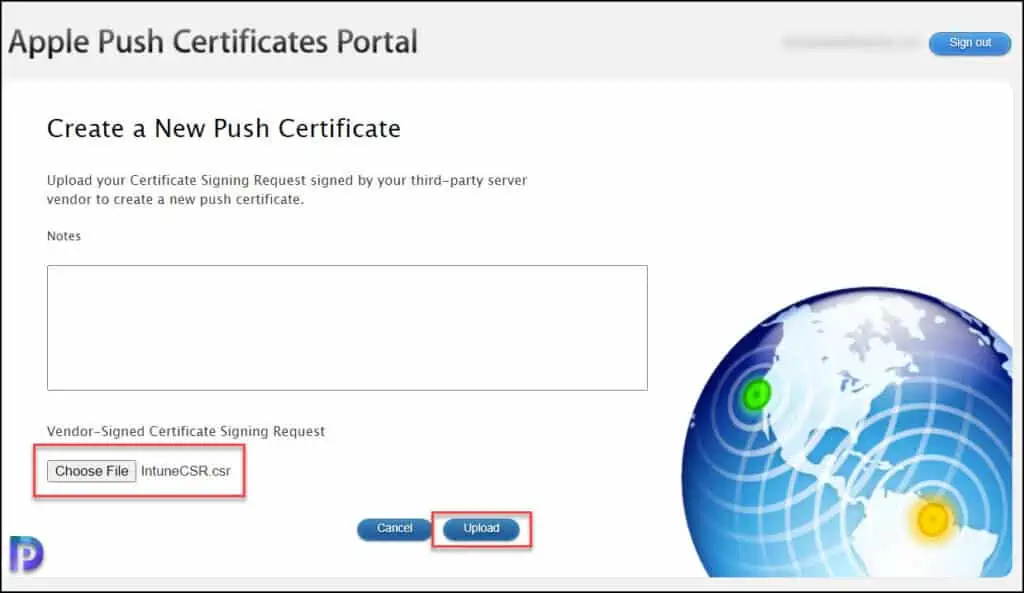
On the Create a new MDM Push Certificate page, select Choose File and browse to the Intune certificate signing request file (IntuneCSR.csr), and then choose Upload.
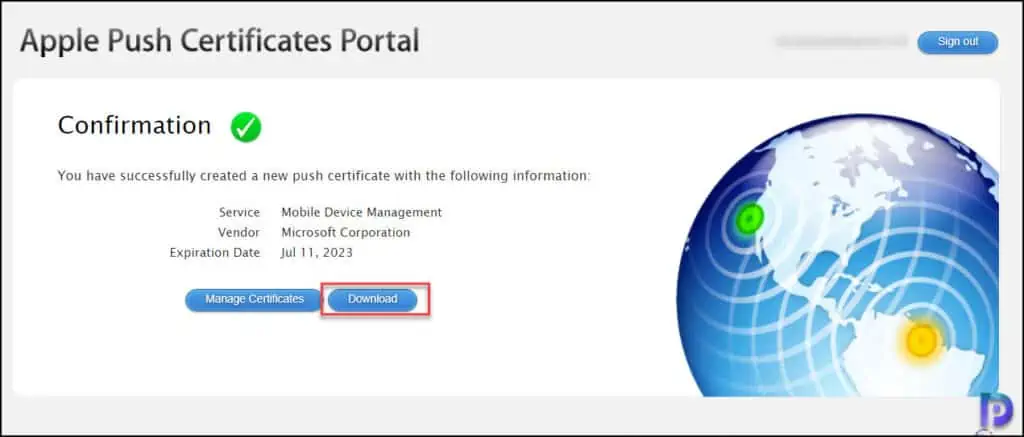
On the Confirmation page, select Download to download the certificate (.pem) file, and save the file locally. The Apple MDM push certificate file is saved with following name MDM_ Microsoft Corporation_Certificate.pem.
Step 4. Upload Apple MDM Push Certificate in Intune Portal
In step, you have two things that you need to configure:
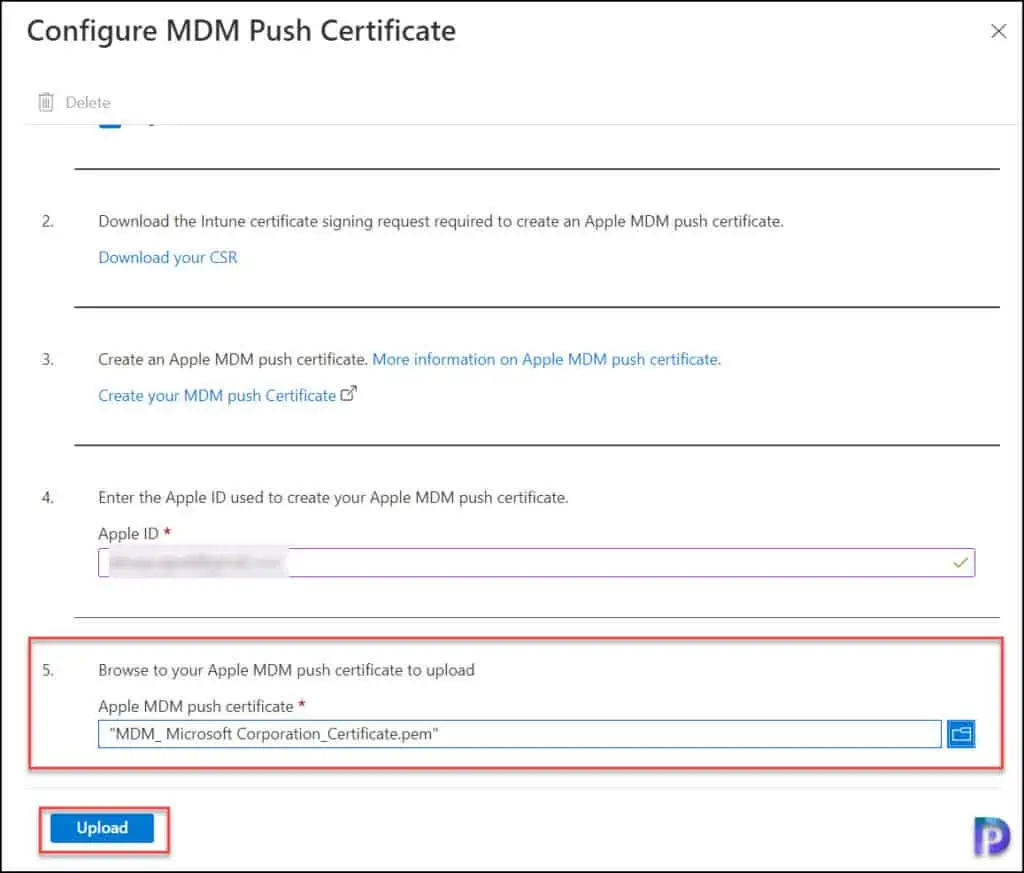
- Enter the Apple ID used to create your Apple MDM push certificate.
- Upload the Apple MDM Push certificate by clicking Browse icon and upload the MDM_ Microsoft Corporation_Certificate.pem file to Intune. By successfully uploading the Apple MDM push certificate, Intune can enroll and manage macOS devices.
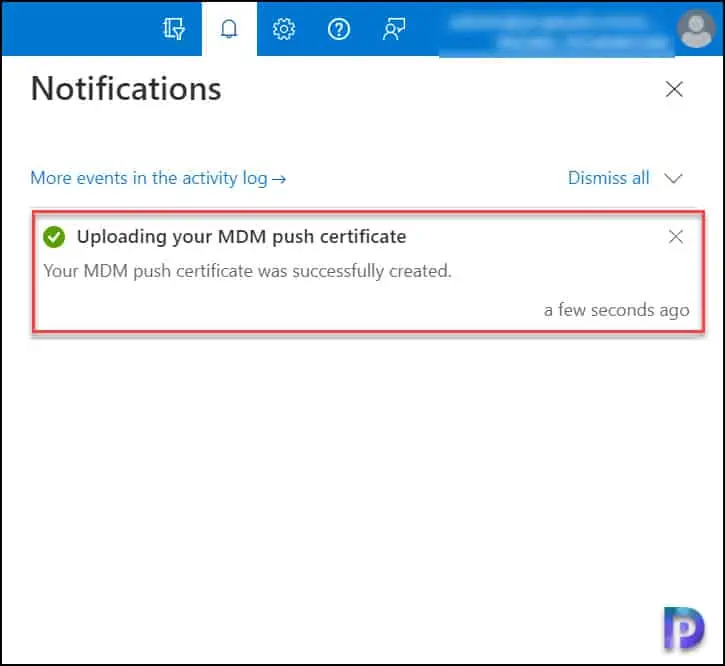
We see another notification confirming that your MDM push certificate was successfully created.
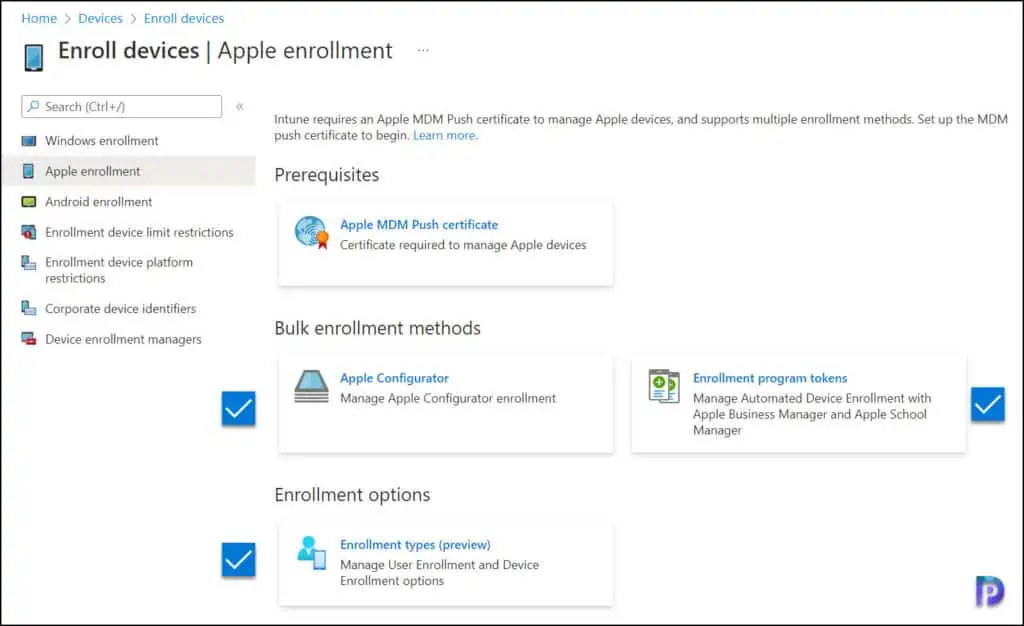
After you configure Apple MDM push certificate, the bulk enrollment methods are activated in Intune portal. The Apple bulk enrollment methods include:
- Apple configurator
- Enrollment Program Tokens
We also see the enrollment options that allow you to manage user enrollment and device enrollment options for iOS and iPadOS devices.
Step 5: Install Intune Company Portal App for Mac Enrollment
When you enroll iOS/iPadOS devices in Intune, you install the company portal app via App Store. However, for macOS devices, you will not find the company portal app on App Store. You have to download the app using the browser and manually run the installer.
To download the company portal for macOS, go to enroll my Mac and download the installer. The Company Portal installer .pkg file will download. Open the installer and continue through the steps. On the Introduction page, click Continue.
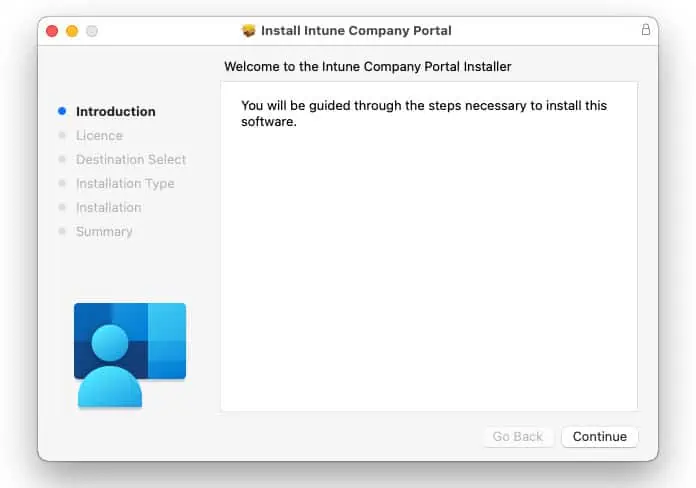
Accept the application license terms by clicking on Continue.
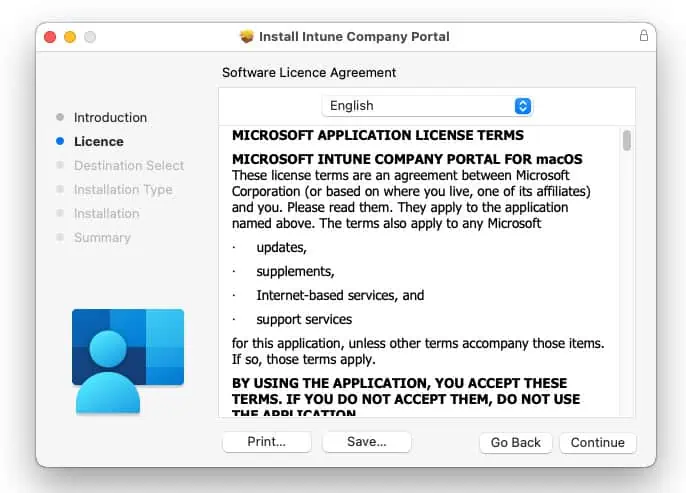
Click Agree to continue to next step.
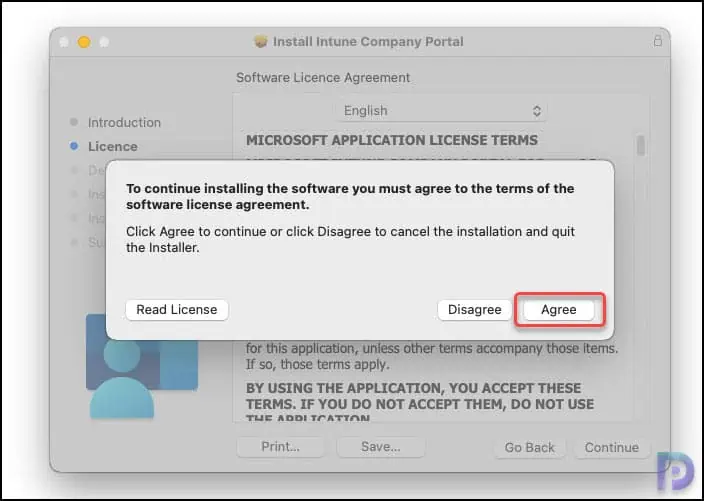
On the Destination Select page, click Continue.
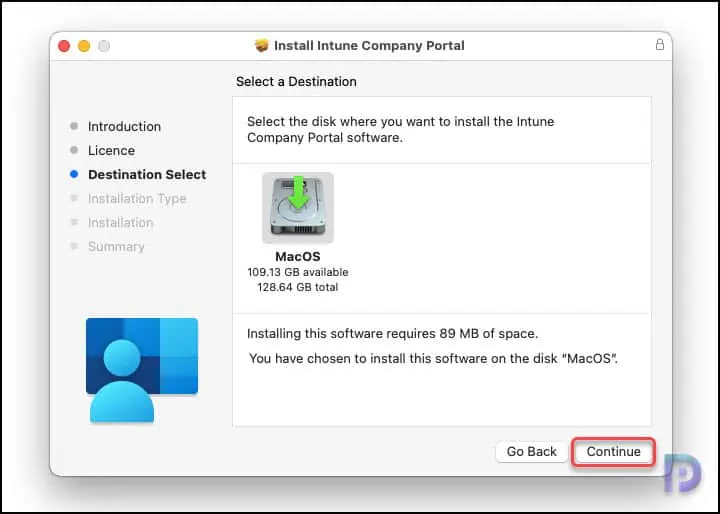
Leave the install location to default and click Install.
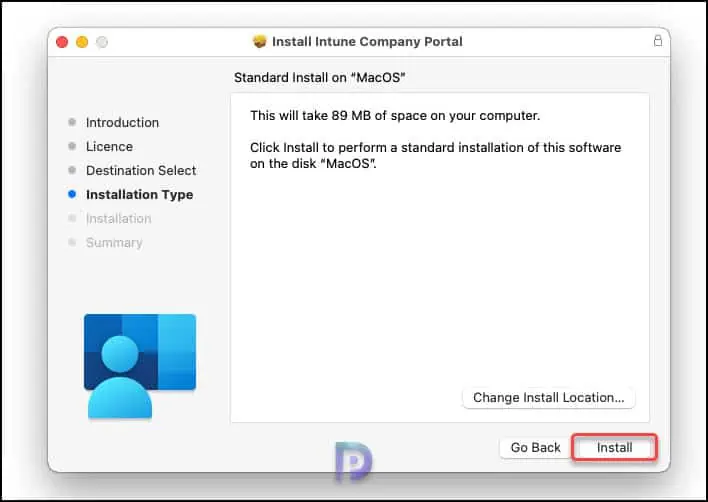
The company portal application is now installed on the macOS successfully. Click Close.
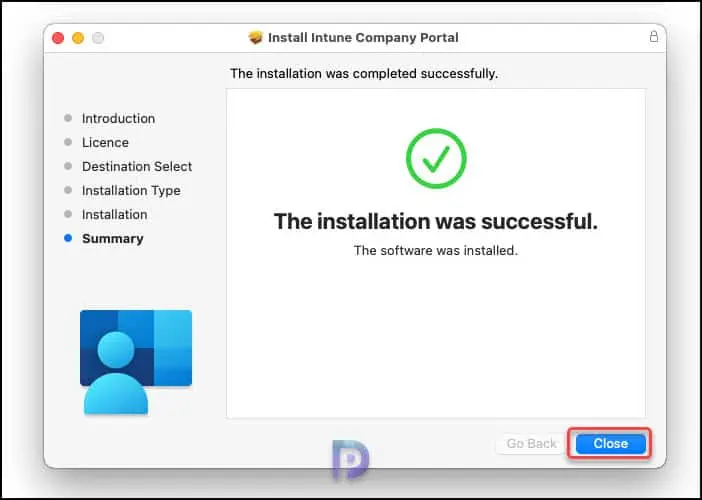
Step 6: Enroll macOS Devices in Intune using Company Portal App
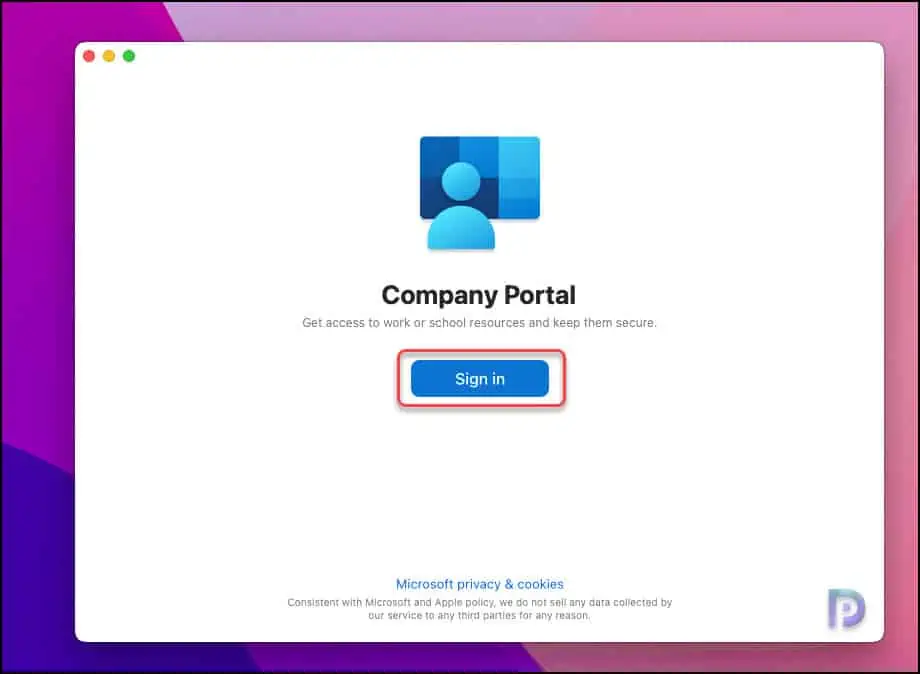
Launch the company portal app by pressing the keys Command + Spacebar which opens the Spotlight search. Type “Company Portal” and select the company portal app to launch it. Once the app launches, you will see the screen with the option to Sign in. Click on Sign in.
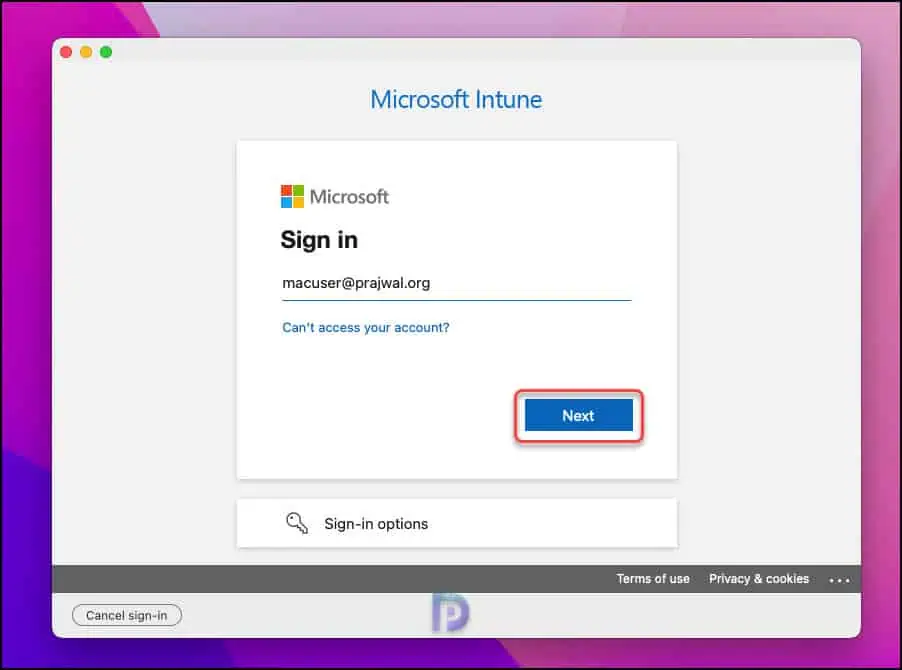
Enter the credentials of the account that has been assigned with an Intune license. This is typically the work account email address. Click Next.
On the next screen, enter the password for the account and complete the authentication.
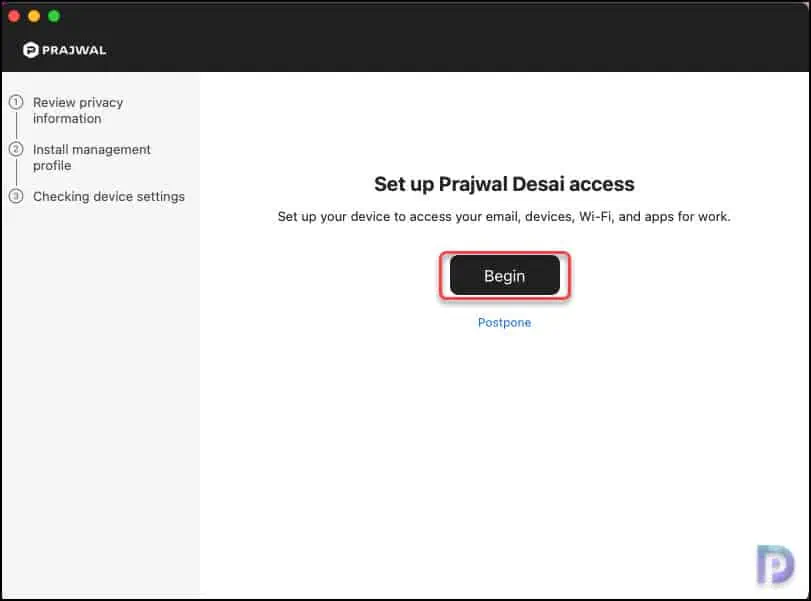
Once you have authenticated successfully, you see the Setup Portal Access screen. Click Begin to set up your device to access your email, devices, Wi-Fi, and apps for work.
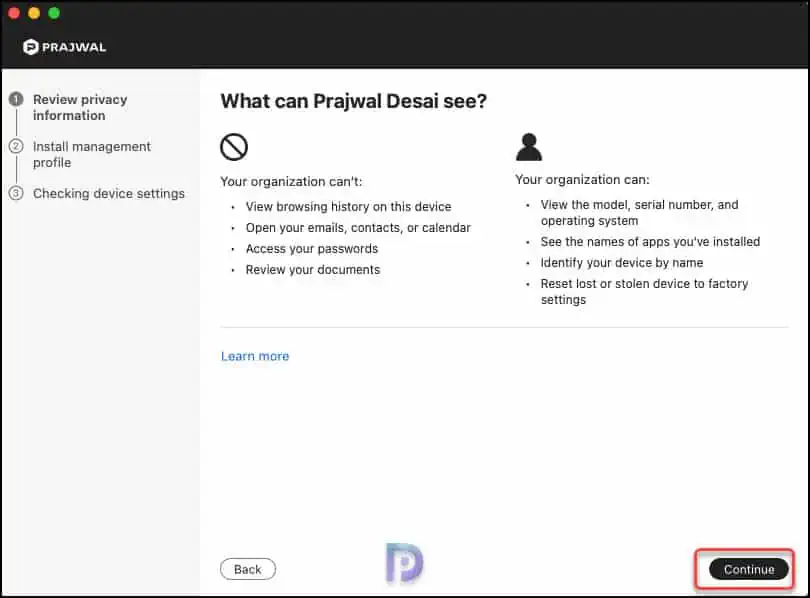
On the Review Privacy Information screen, you can find out what you can organization can access and what it can’t. Go through this information if you haven’t seen this earlier and click Continue.
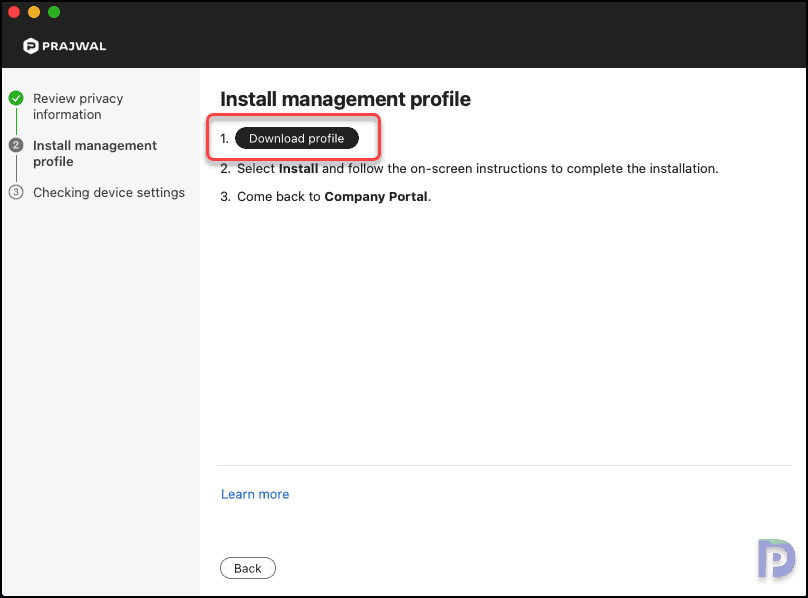
In this step, you download and install the management profile. On the Install management profile screen, select Download profile.
Your device’s system preferences will open. Select Install and then select Install again. If you’re prompted to, enter your device password.
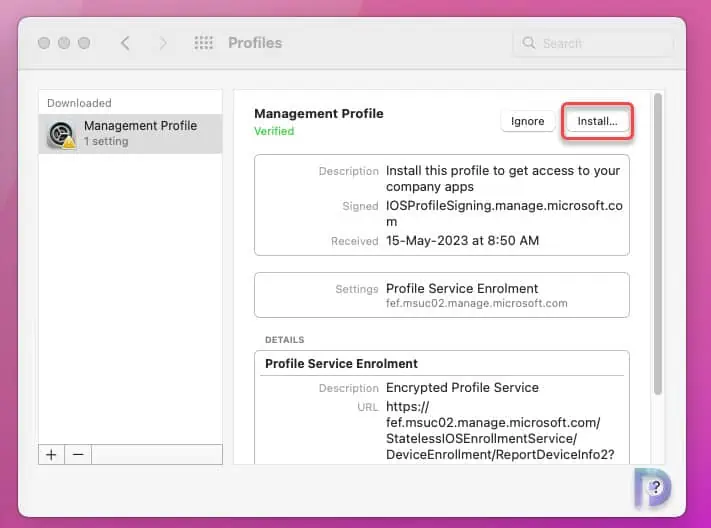
Note: While enrolling the macOS in Intune, you may encounter a warning, “Profile Installation Failed“. Could not obtain the final profile using the Encrypted Profile Service. Refer to the following article on how to resolve the profile installation error on macOS during enrollment in Intune.
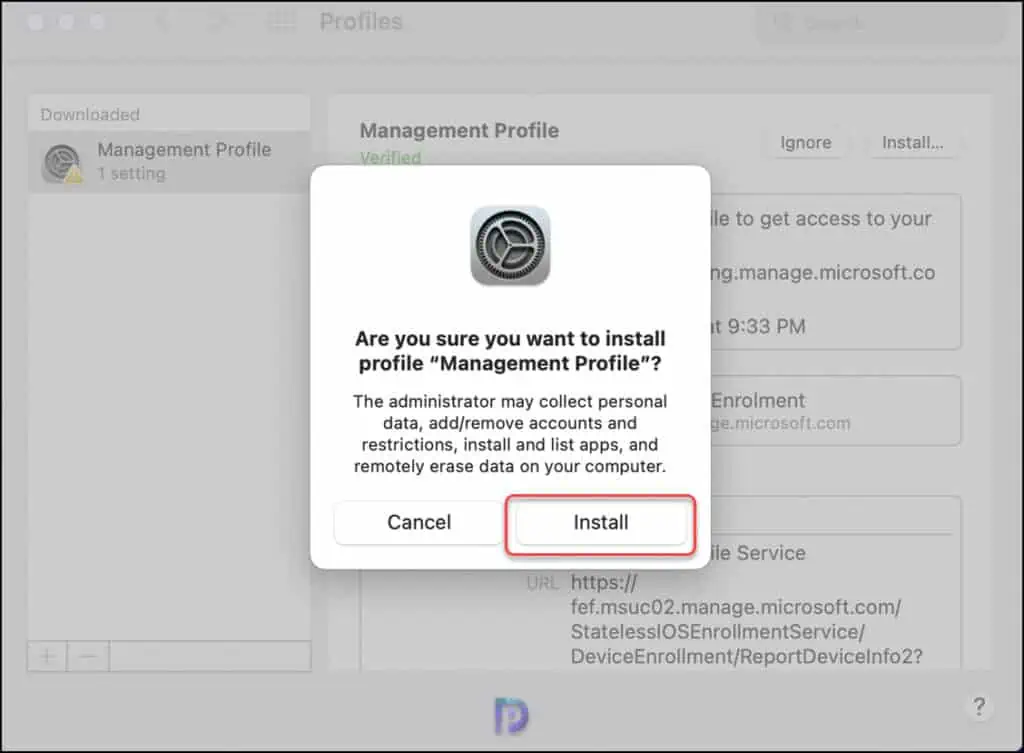
When asked Are you sure you want to install profile “Management Profile”?, select Install.
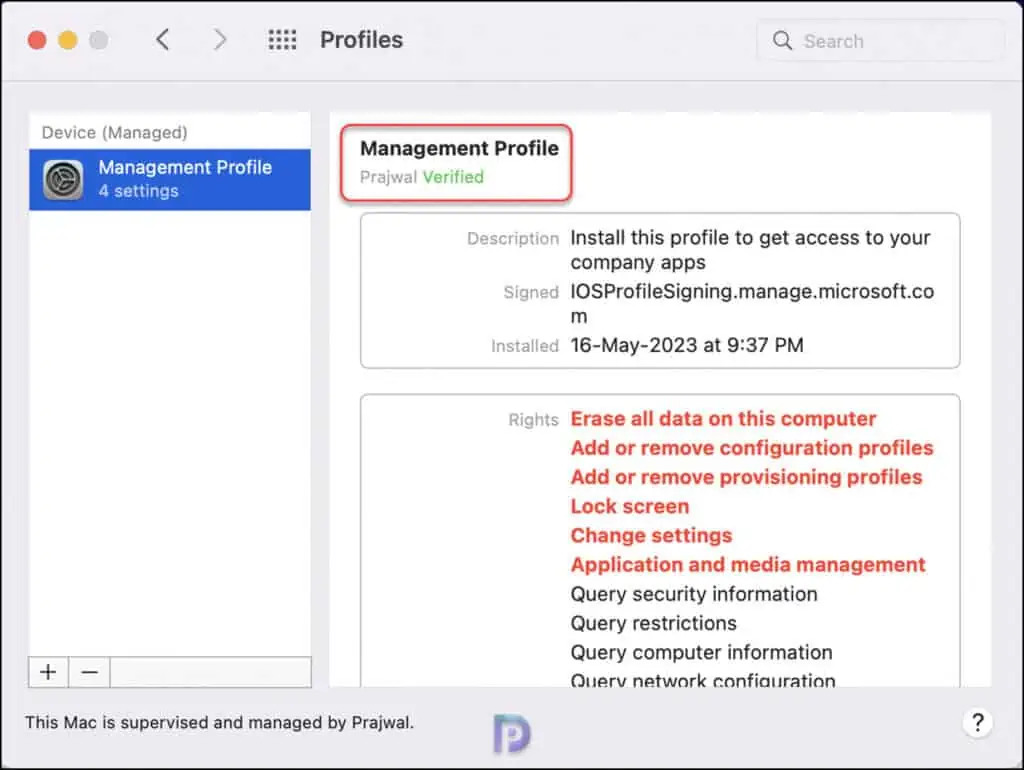
The management profile is installed now. You’ll notice that Management profile status now shows as “Verified” and there are four settings installed by management profile.
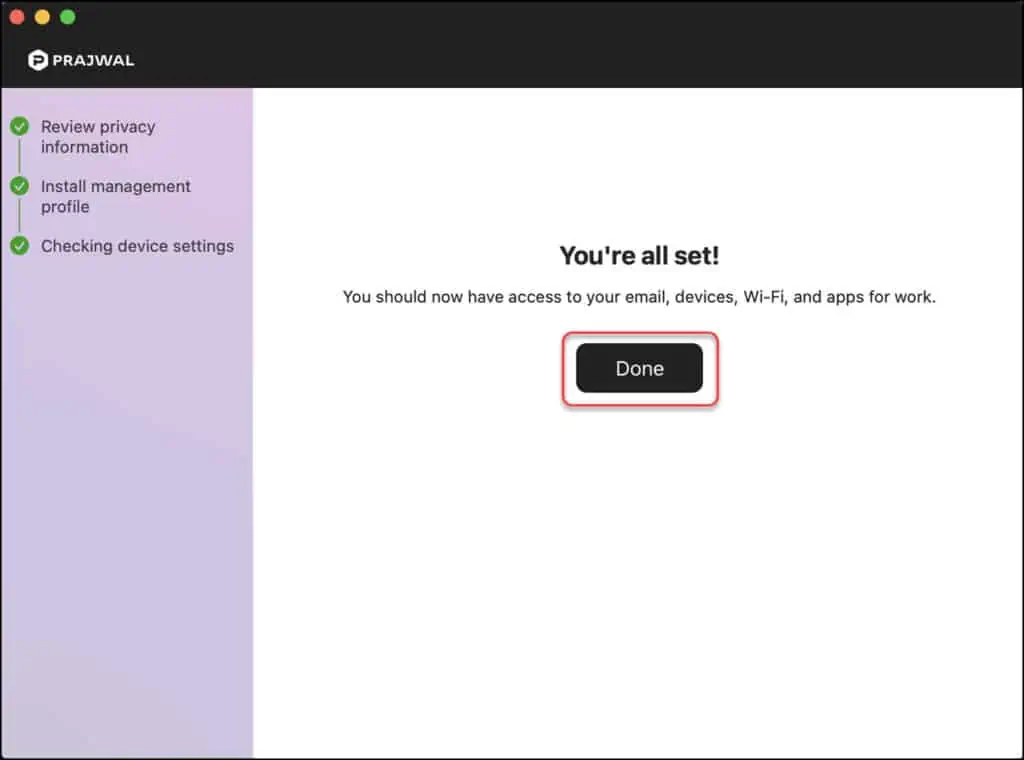
Once you have successfully enrolled your Mac into Intune, you will see the below screen. You should now have access to your email, devices, Wi-Fi, and apps for work. Click Done.
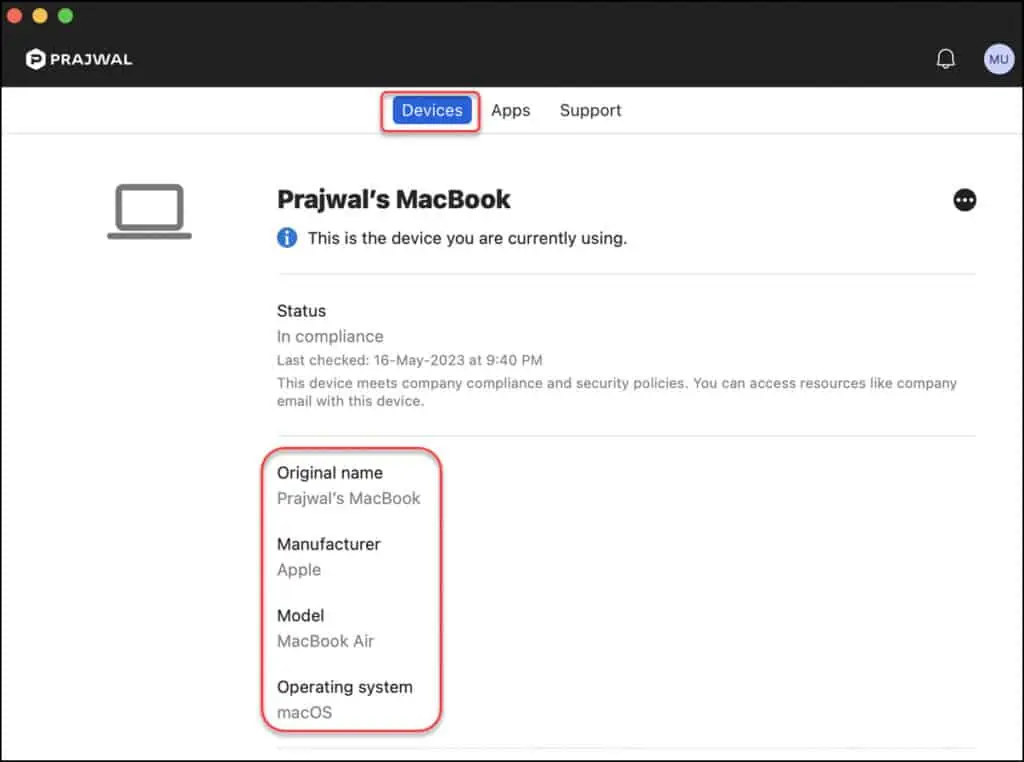
You can now re-launch the company portal to view more details about your device, apps, and support details for your organization. You can configure these details by reading the guide on Intune company portal branding.
The company portal app on your Mac shows three tabs: Devices, Apps and Support. The Devices tab shows the device name, manufacturer name, model and operating system.
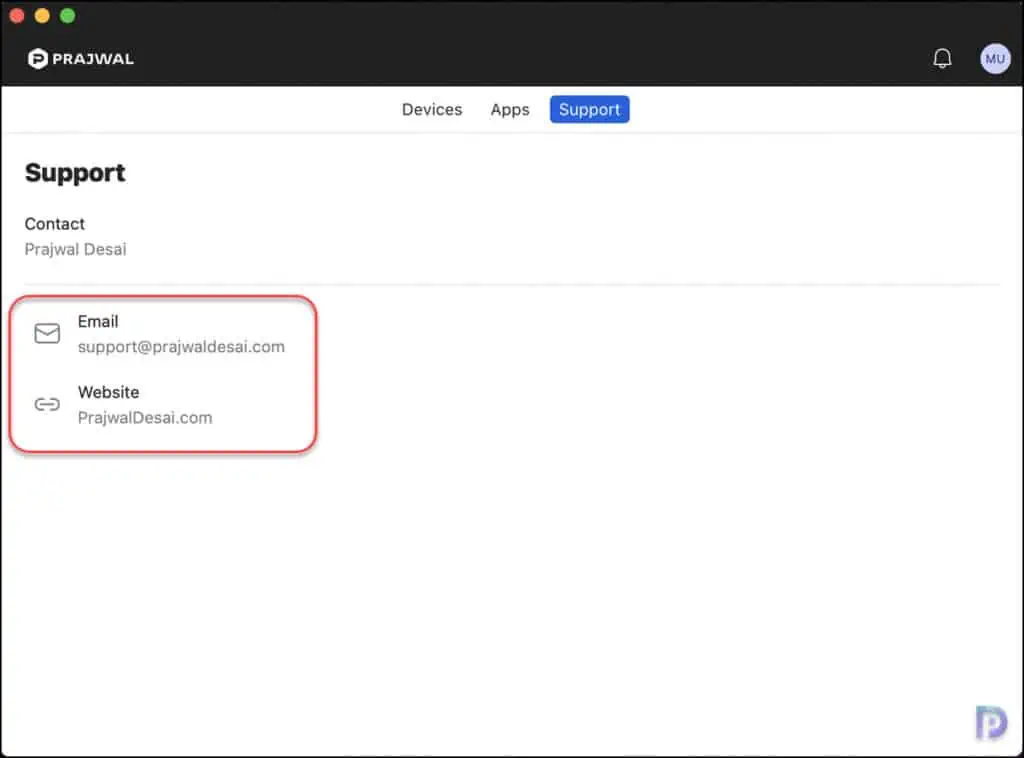
The Support tab shows the contact email and website details configured by your organization.
Check macOS Enrollment Status in Intune Portal
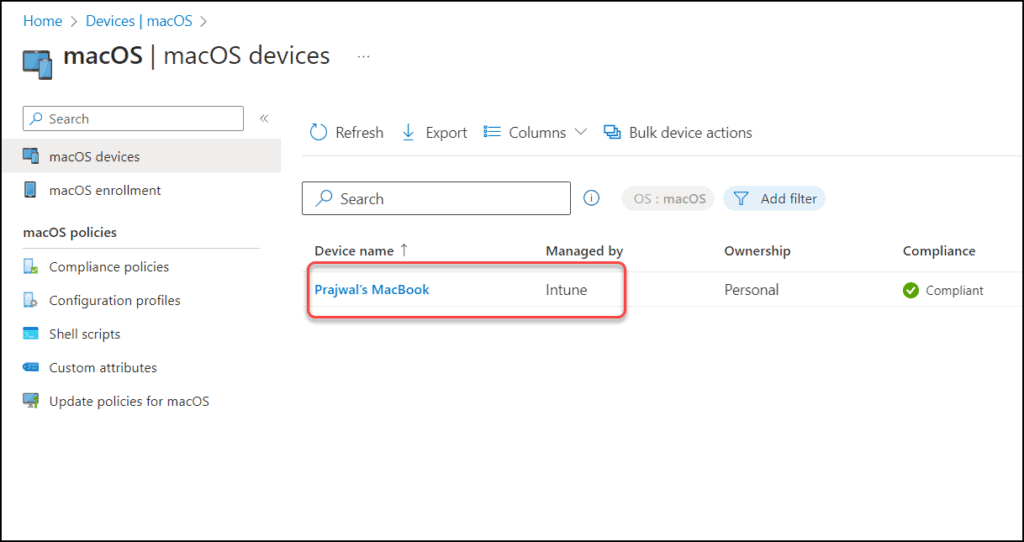
After you enroll macOS devices in Intune, you can verify the enrollment from the Intune Portal. To accomplish that, sign in to the Intune Portal. Navigate to Devices > macOS > macOS Devices. Here you can find all the macOS devices that are enrolled into Intune. By default, the ownership of mac devices is set to personal.
Conclusion
I hope this guide helps you to enroll macOS devices in Intune. Microsoft Intune makes it easy to manage mac devices in your organization by allowing to enroll them via company portal app. After you enroll macOS devices in Intune, you can assign apps, compliance policies and much more.
