Turn off Windows Presentation Settings using Intune | GPO
In this article, I will show you how to turn off Windows Presentation settings using Intune and Group Policy (GPO). If you don’t want users to enable the presentation settings on their laptops, you can disable it via Intune or GPO. Both the methods are covered in this guide.
When the presentation mode is enabled, the icon will be displayed in the notification area. This will give users a quick and easy way to configure their system settings before a presentation to block system notifications and screen blanking, adjust speaker volume, and apply a custom background image.
The Presentation mode works similarly to the DND mode on your smartphone. The presentation mode will automatically mute all the alerts and notifications. When the Windows Presentation mode is turned on, the laptop will not go to sleep and all system notifications will be temporarily turned off.
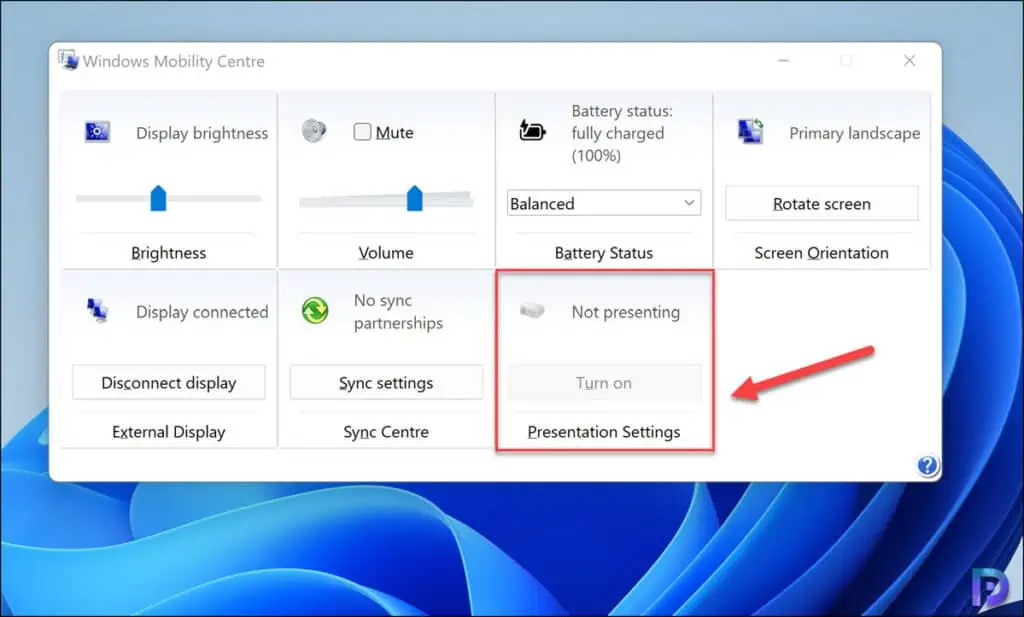
You can manually turn on/off the presentation settings from the Windows mobility center on your personal laptop. You can completely disable Windows Mobility Center using Intune or GPO. Note that presentation Mode is not available on home editions of Windows 10/11.
Turn off Windows Presentation Settings using Intune
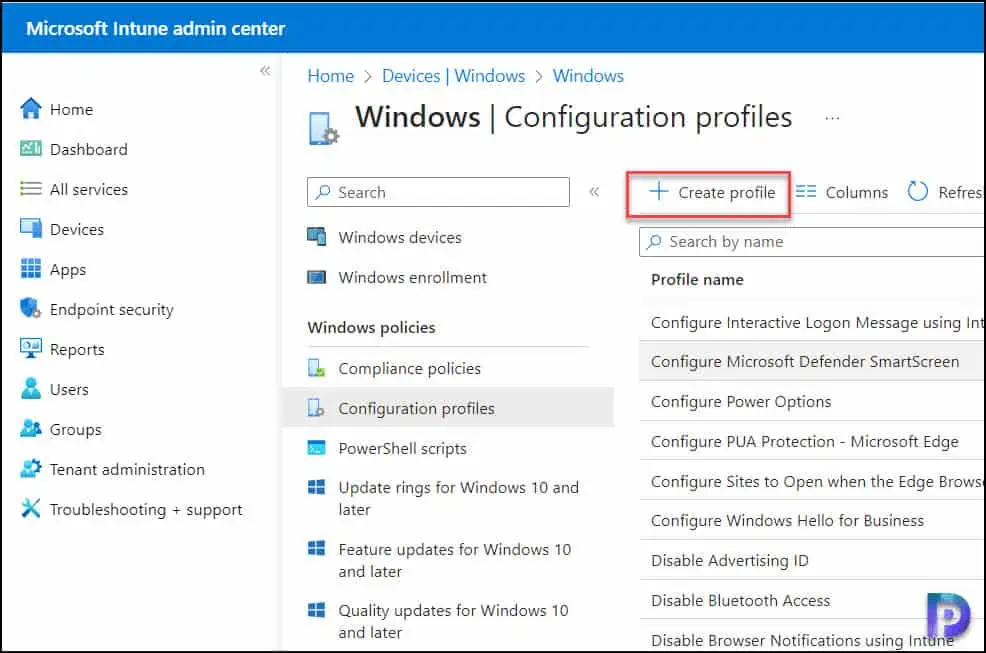
Perform the following steps to create a new configuration profile in Microsoft Intune to turn off windows presentation settings. First sign-in to the Intune Admin center. Select Devices > Manage Devices > Configuration > Policies > Create profile.
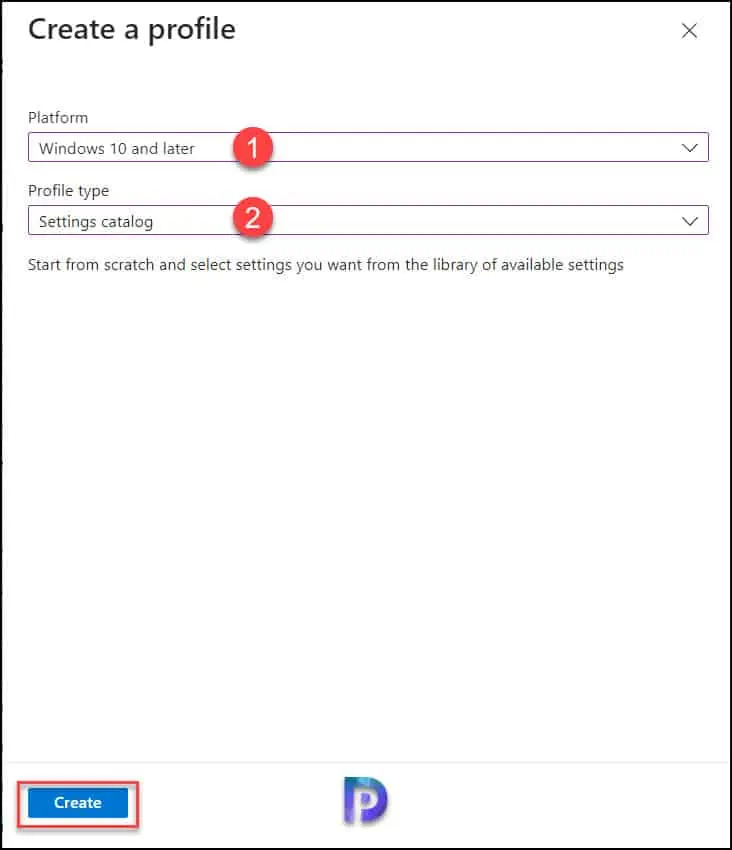
On the Create a profile window, configure the following settings and select Create.
- Platform: Windows 10 and later
- Profile Type: Settings Catalog
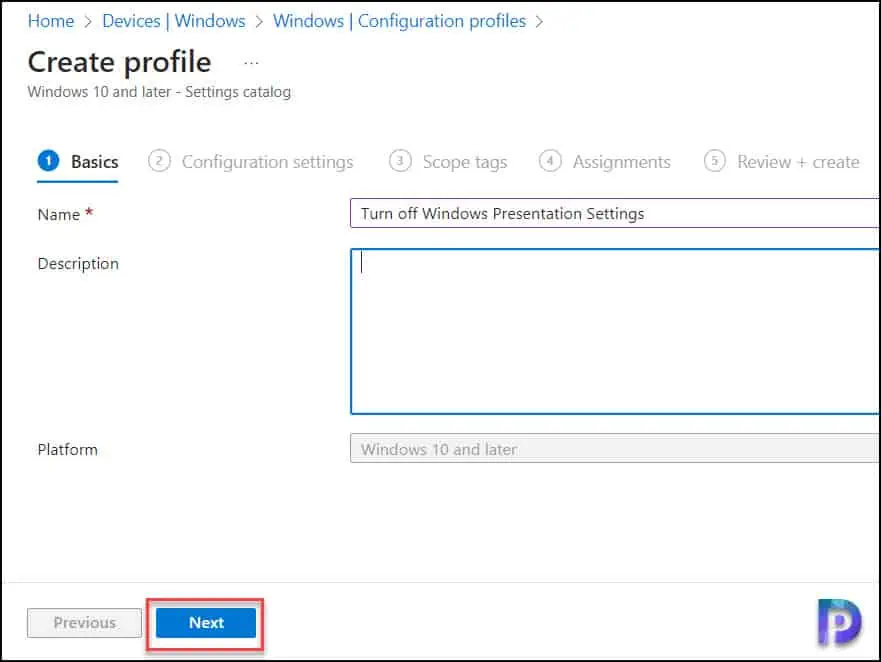
In the Basics tab, enter the following properties.
- Name: Enter a descriptive name for the profile, which you can easily identify them later. For example, a good profile name is Turn off Windows Presentation Settings.
- Description: Enter a brief description of the profile. This setting is optional, but recommended.
Click Next.
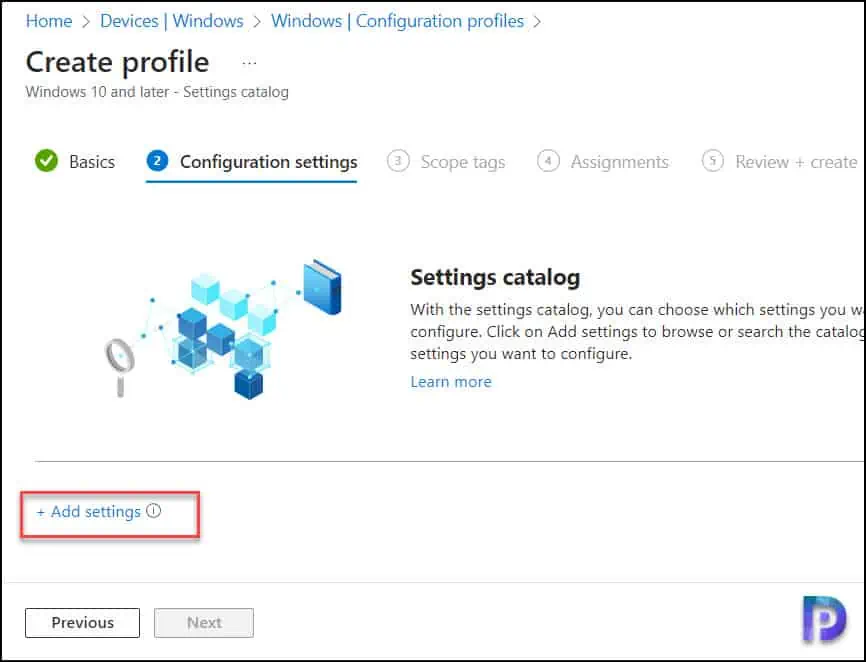
In the Configuration Settings section, under Settings Catalog, click Add Settings. The Settings catalog in Intune allows managing windows presentation settings. You can choose to enable or disable windows presentation settings and deploy the policy to devices or users.
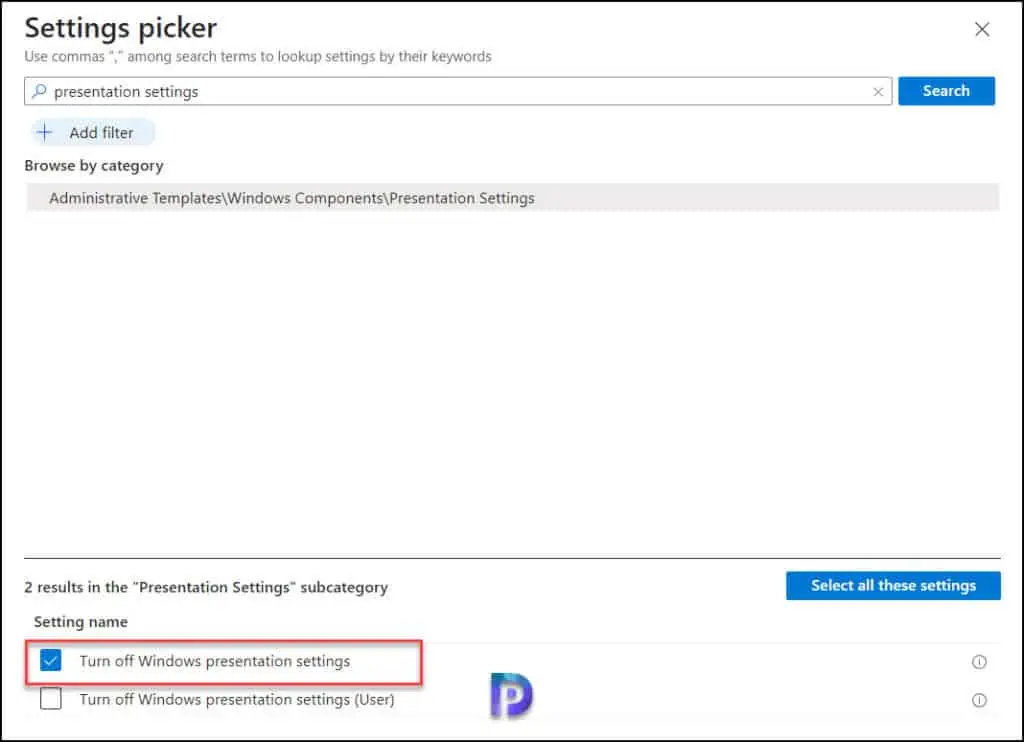
On the Settings picker window, type “presentation settings” in the search box and click Search. From the search results, select Administrative Templates\Windows Components\Presentation Settings.
Turn off Windows Presentation Settings: This policy setting turns off Windows presentation settings. If you enable this policy setting, Windows presentation settings cannot be invoked. If you disable this policy setting, Windows presentation settings can be invoked. The presentation settings icon will be displayed in the notification area. This will give users a quick and easy way to configure their system settings before a presentation to block system notifications and screen blanking, adjust speaker volume, and apply a custom background image. Note: Users will be able to customize their system settings for presentations in Windows Mobility Center. If you do not configure this policy setting, Windows presentation settings can be invoked.
- Turn off Windows Presentation Settings: Applies to system context
- Turn off Windows Presentation Settings (User): Applies to the user context
In the screenshot below, I have selected the setting “Turn off Windows Presentation Settings” that applies to the devices.
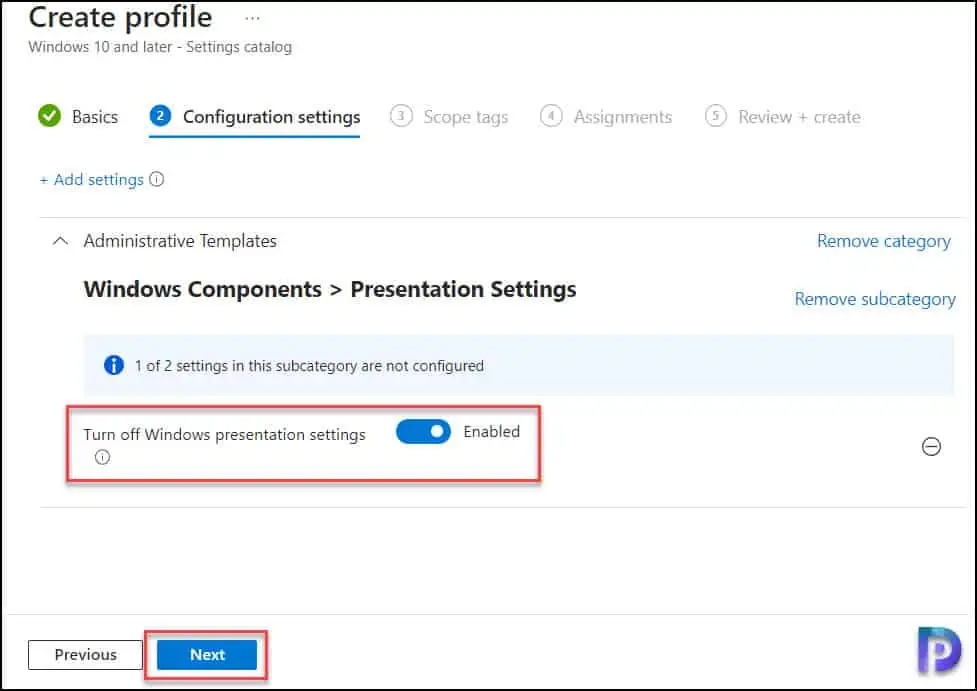
Close the Settings picker window, you will be presented with the setting that you just selected in the above step. To turn off windows presentation settings, turn the slider to Enabled. Click Next.
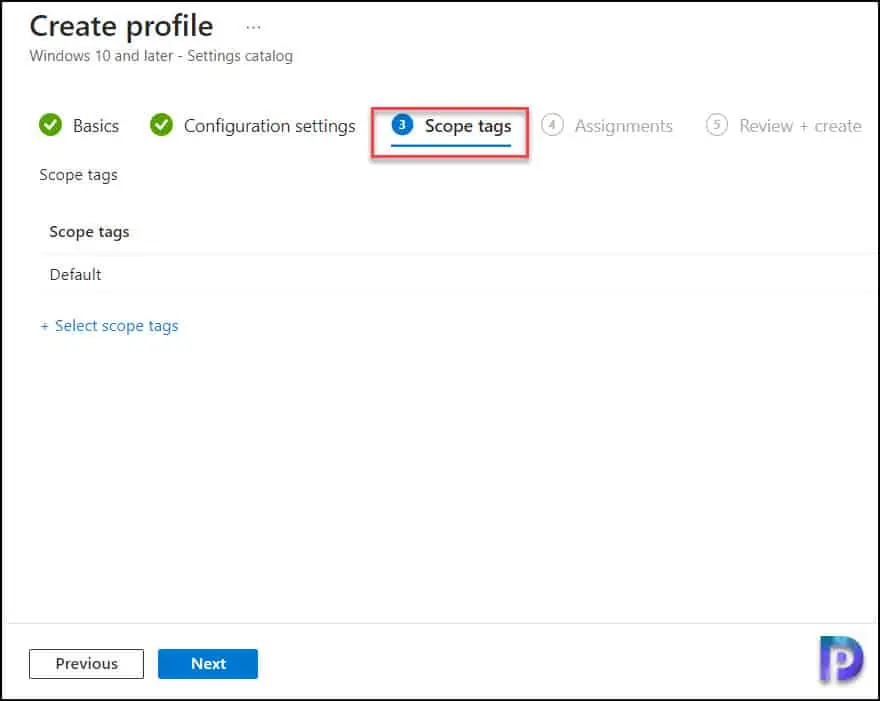
In Intune, Scope tags determine which objects admins can see. In the Scope tags section, you specify scope tags. Specifying scope tags is optional and you may skip this step. Click Next.
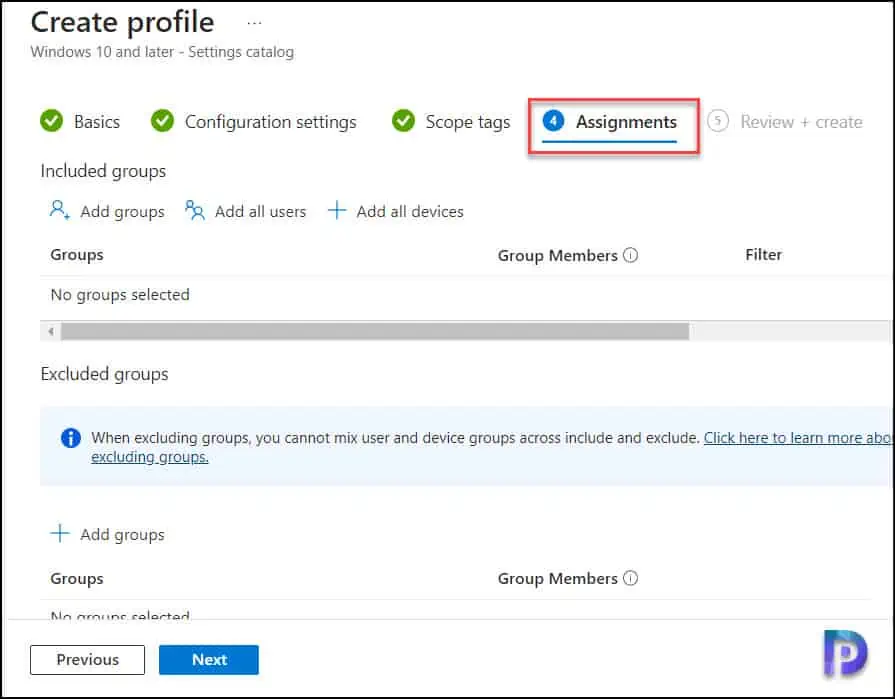
In the Assignments window, specify the groups to which you want to apply this policy. I advise deploying the profile for a few test groups first, and then rolling it out to more groups if the testing is successful. Select Next.
On the Review + Create page, review all the settings that you have defined to disable presentation mode via Intune and select Create.
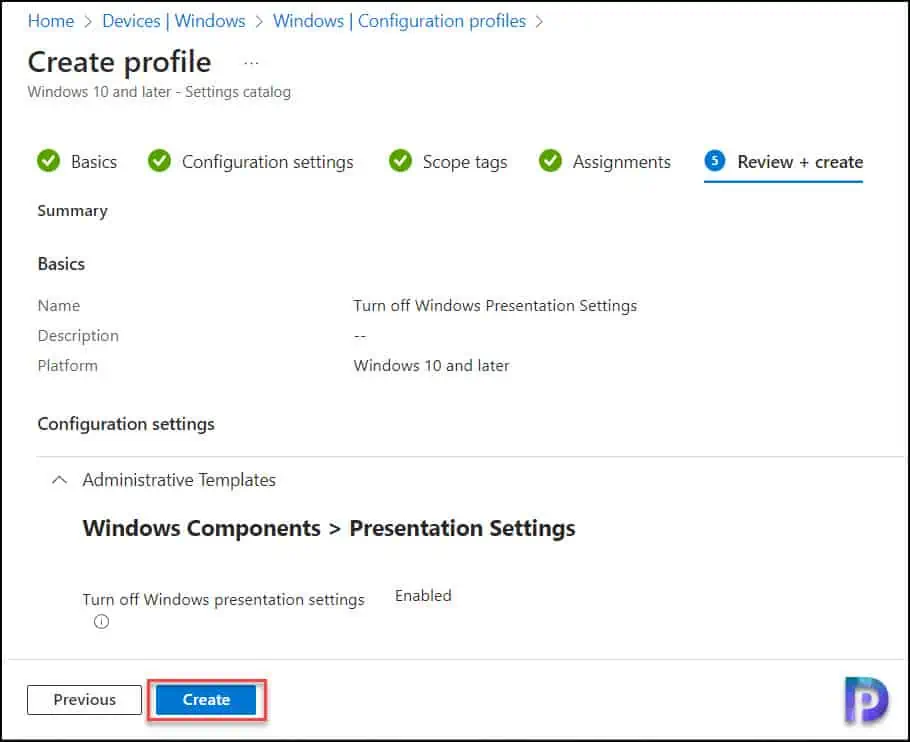
After you create a configuration policy in Intune, a notification appears, “Policy created successfully”. This confirms the policy is created and is being applied to groups that we selected. The new profile that we created to turn off presentation settings appears under the list of Configuration Profiles in Intune.
You must wait for the policy to apply to the targeted groups and once the devices check-in with the Intune service they will receive your profile settings. You can also force sync Intune policies on your computers. To monitor the deployment, select the policy and review the Device and user check-in status.
End-User Experience after Disabling Windows Presentation Settings
Let’s verify if the presentation settings policy deployed via Intune is actually applied to devices and what users see when they attempt to open Windows Mobility Center and use presentation settings.
On Windows PC, click start and type “Windows Mobility Centre” and select the first option in the results.
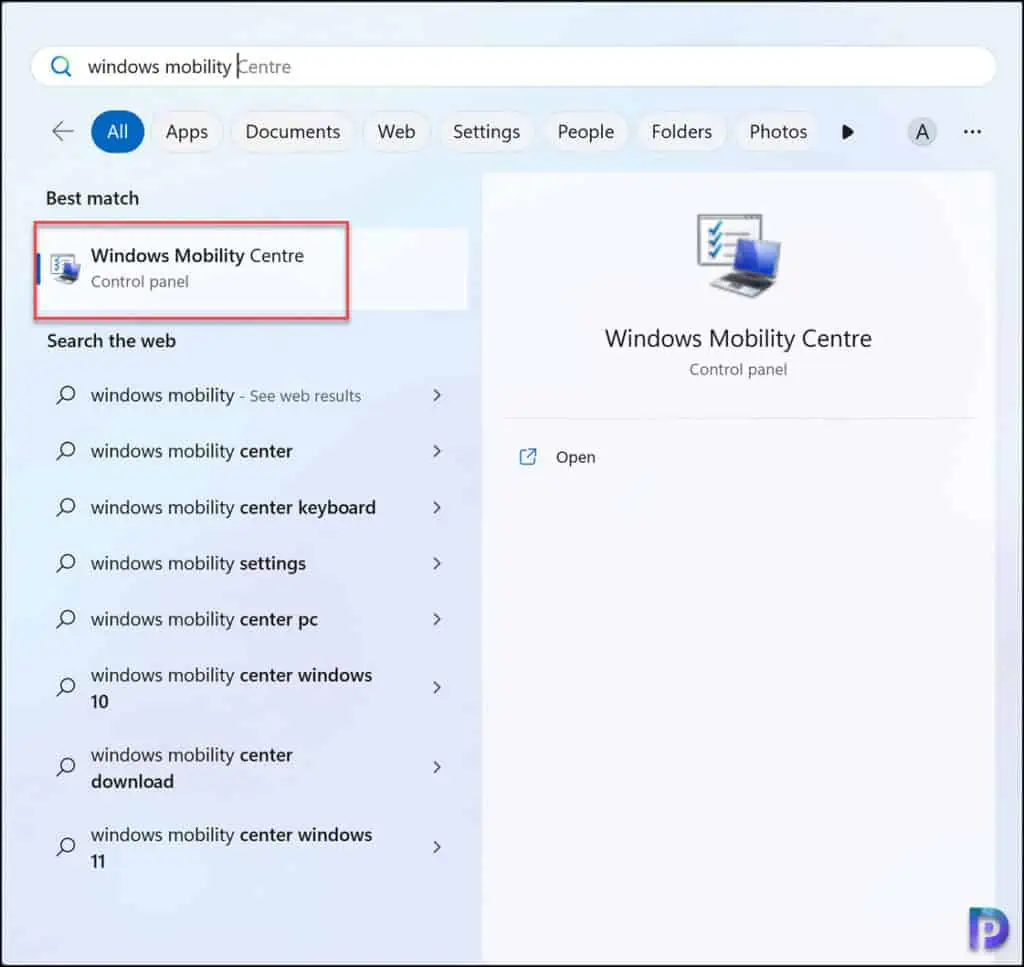
In the Windows Mobility Center window, we see that presentation settings cannot be turned on or off and the option has been disabled. This confirms that we have successfully disabled the presentation settings on Windows devices via Intune.
Turn off Windows Presentation Settings using GPO
On Windows devices, you can deploy a group policy to turn off windows presentation settings. This method is preferred when your organization isn’t using Microsoft Intune and computers are active directory domain joined.
When you deploy a new group policy, you either do it at the domain level or at the organizational unit level. I suggest creating a new group policy object, linking it to a test OU with the pilot computers, and then deploying it to a larger group of computers.
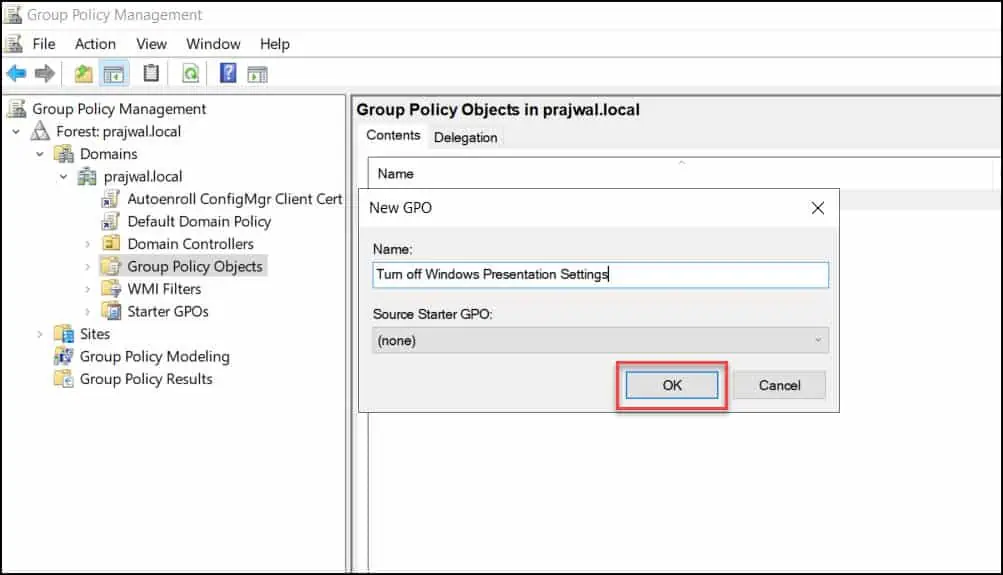
To create a new GPO, you can either log in to a domain controller or a member server installed with GPMC. You can also install the GPMC on Windows 11 and configure the group policies. Launch the Server Manager from the Start menu and select Tools > Group Policy Management console. In the Group Policy Management console, expand the domain, right-click Group Policy Objects or an OU, and select New. Enter the name for the group policy, such as “Turn off Windows Presentation Settings” and click OK.
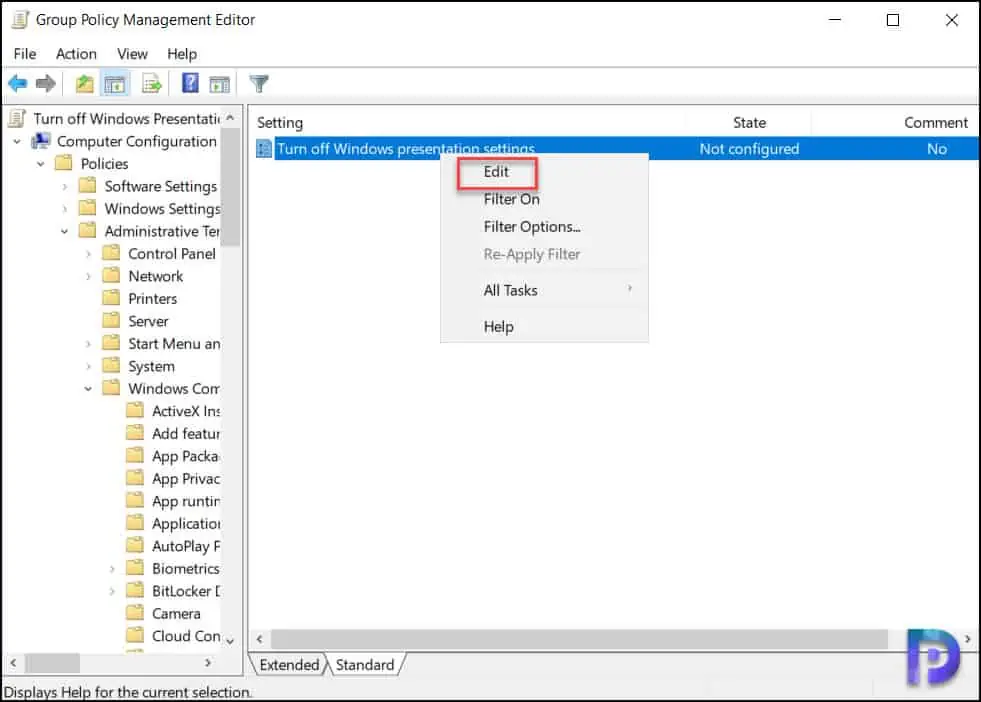
Right-click the GPO that you just created and select Edit. In the Group Policy Management Editor, navigate to Computer Configuration/Administrative Templates\Windows Components\Presentation Settings. Here, look for the policy setting “Turn off Windows Presentation Settings“, right-click the policy setting and select Edit.
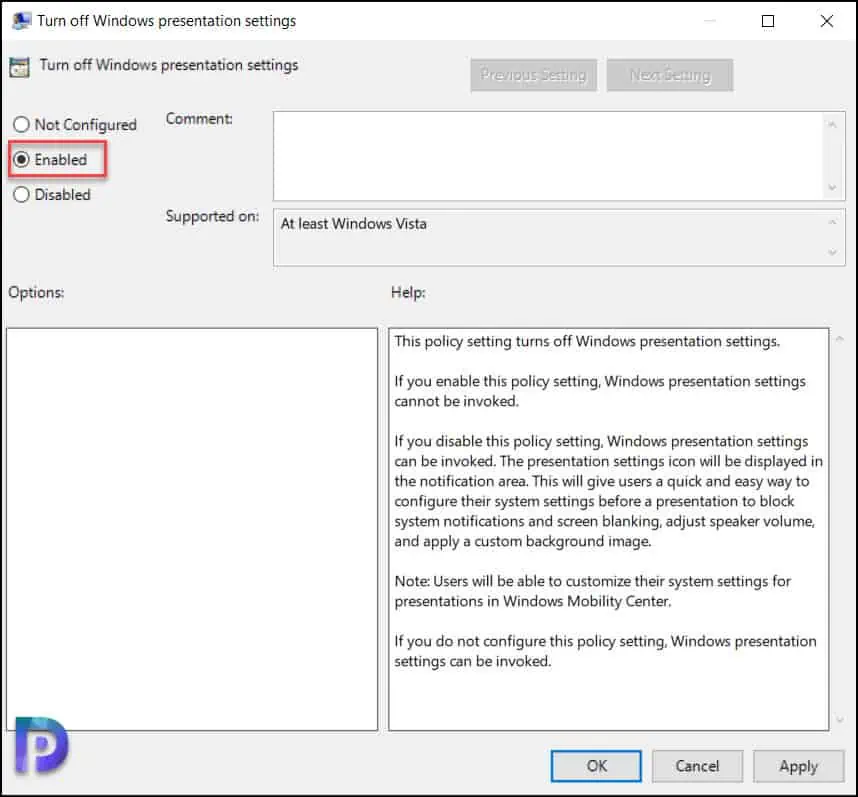
From the policy description, we see that this policy setting turns off Windows presentation settings. If this policy setting is turned on, windows presentation settings cannot be invoked by users. Enable this policy setting by choosing the option “Enabled” and clicking “Apply” and “OK.”
After the group policy object is configured, you need to link the GPO to an OU if you haven’t already. You can also link it to the domain, but doing so will make the GPO applicable to every computer in the domain, so it is not advised. The best approach is to choose a test OU, connect your GPO, and test the policy settings.
It’s time to update the group policy on the client computers and check to see if Windows presentation settings are disabled. You can use multiple ways to perform the group policy update on remote computers. On a test client machine, you can manually perform the group policy update by running the gpupdate /force command.
After the group policy has been refreshed, open the Windows Mobility Centre on your Windows devices, and now you’ll see that users cannot manage the presentation settings. This confirms that the GPO that we deployed was successful in turning off the presentation settings.
