Perform Test Database Upgrade Before Installing SCCM
This post shows you how to perform test database upgrade before installing SCCM. Most of the time we skip doing test database upgrade and install the SCCM in-console update directly. I haven’t come across any issue when i did that.
However performing the test database upgrade is not mandatory. But I recommend you to do it because you never know who would have modified or made some customization to the existing DB.
This post is for my own reference and I will use it when I want to run a test database upgrade.
Table of Contents
Perform Test Database Upgrade Before Installing SCCM
Now that you understand why one needs to run test database upgrade, we look at the steps to do it. I will break down the whole process into steps so that it is much easier to follow.
Step 1 – Prepare your environment for Test Database Upgrade
First of all you need a VM (member server) on which we will perform test database upgrade. Create a VM, install the server operating system and join it to the domain.
In the next step install SQL server (follow this guide). The SQL version must run the same edition and version of your production SQL. Once you install SQL server, proceed to step 2.
Step 2 – Backup your SCCM Database
In of my previous post, I showed the steps to backup SCCM server. To backup site server, we use the built-in maintenance task “Backup Site Server“.
If you have not enabled this task before, you can follow this post. I will cover some steps that will help you backup the SCCM database.
To backup your database, follow the below steps :-
- Launch Configuration Manager console.
- Navigate to Administration > Site Configuration > Sites.
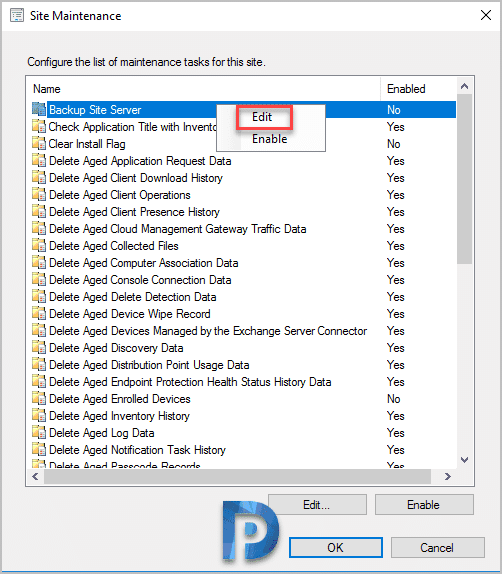
- Click Site Maintenance on top ribbon.
- Right click Backup Site Server and click Edit.
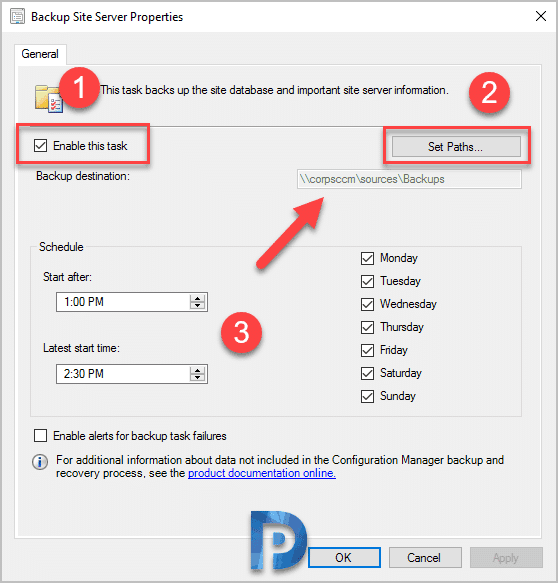
Under Backup Site Server Properties, perform the below steps.
- Check box Enable this task.
- Click Set Paths and choose the backup destination.
- Configure the backup schedule by setting Start after and latest start time schedule.
- Click OK and close backup site server properties window.
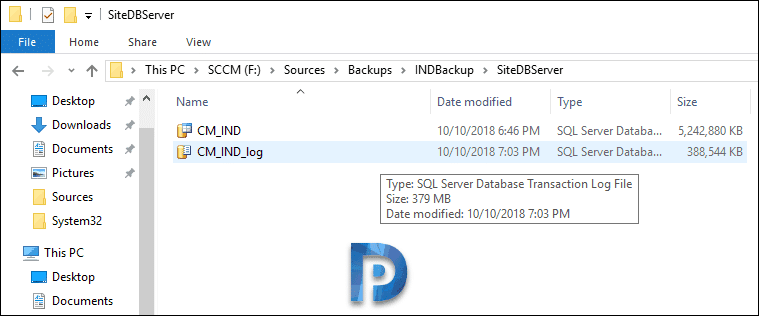
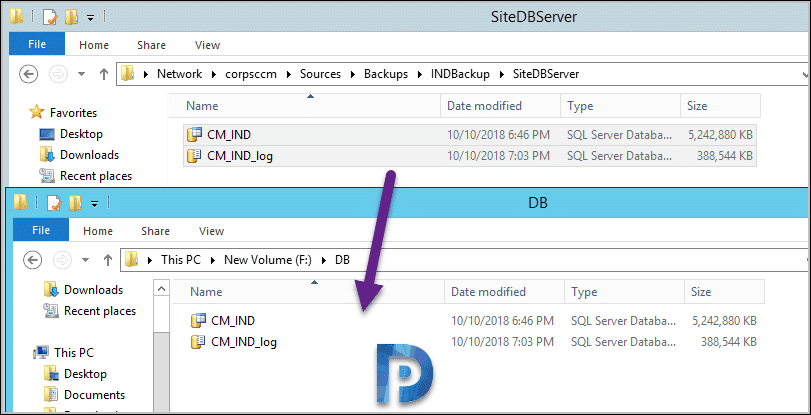
The backup task runs as per the schedule. If the backup task is already enabled, go to the backup location. Within SiteDBServer folder, we need those two files to copied to new VM.
Copy both .MDF and .LDF files to the SQL server where we will perform test database upgrade.
Step 3 – Attach Database Copy
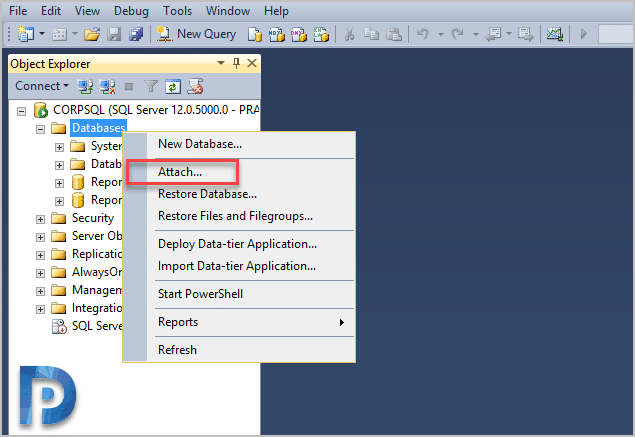
Now that we have got the backup files, login to the SQL server. Right click Databases and click Attach.
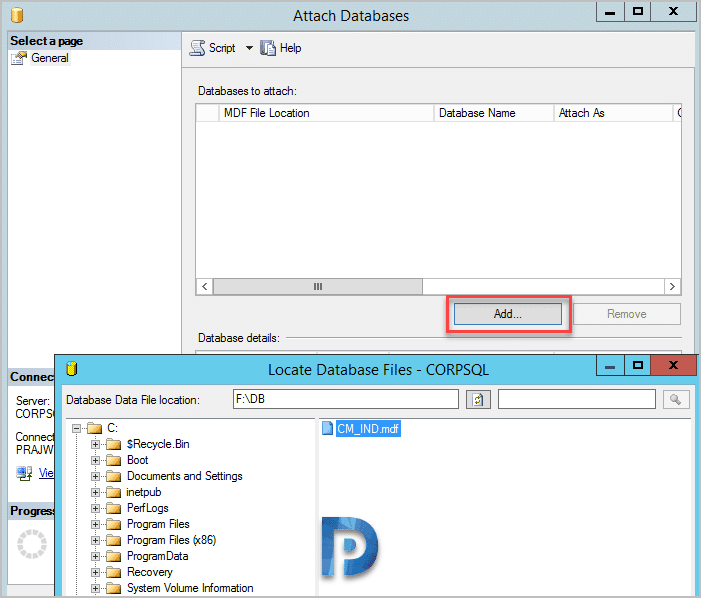
In Attach Databases window, click Add button. In the next step locate the database file. Select the .MDF file.
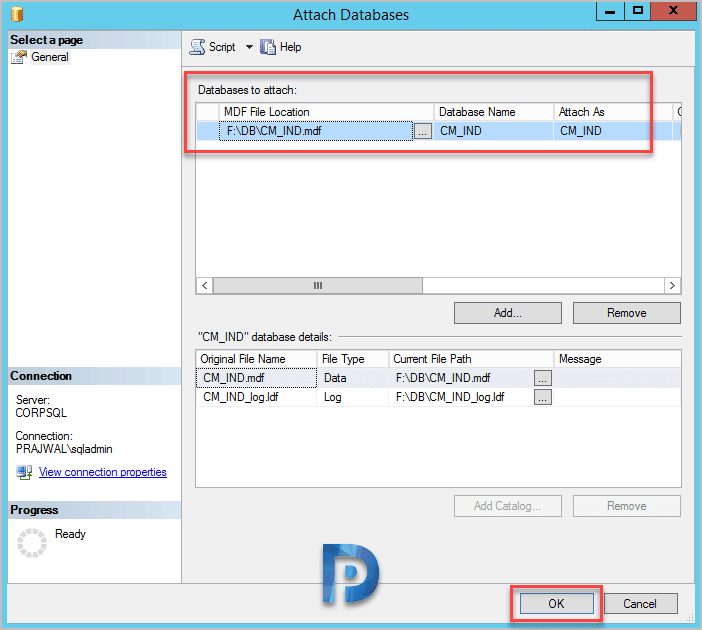
The Attach Databases window now shows the MDF file and it’s location. In the bottom pane, it also shows .MDF and .LDF files along with file path. Click OK and close the window.
Step 4 – Take DB Ownership
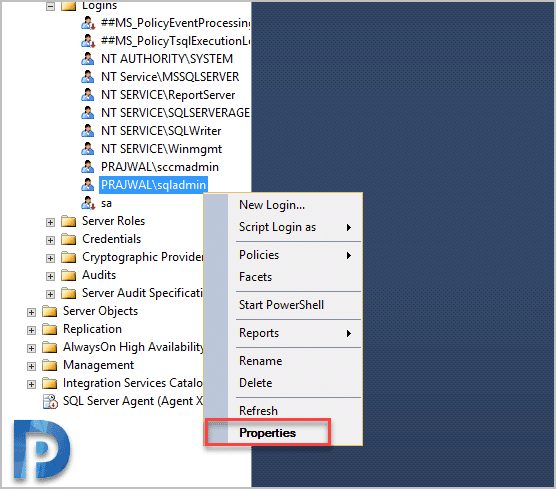
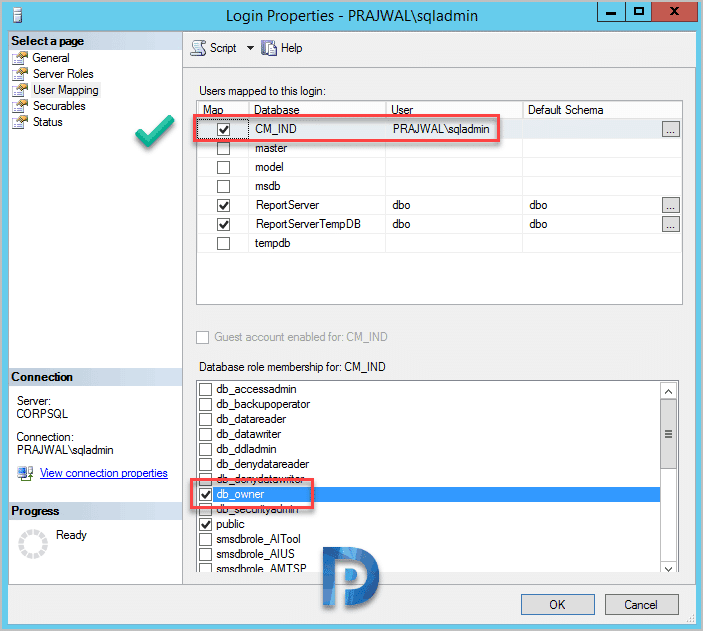
In this step we will take the DB ownership. Currently I am logged to this SQL server with an user account named sqladmin. Expand Security > logins and right-click the logged in user account and click Properties.
Click User Mapping and select the database that you attached. In the bottom pane, select db_owner role membership.
Step 4 – Perform Test Database Upgrade
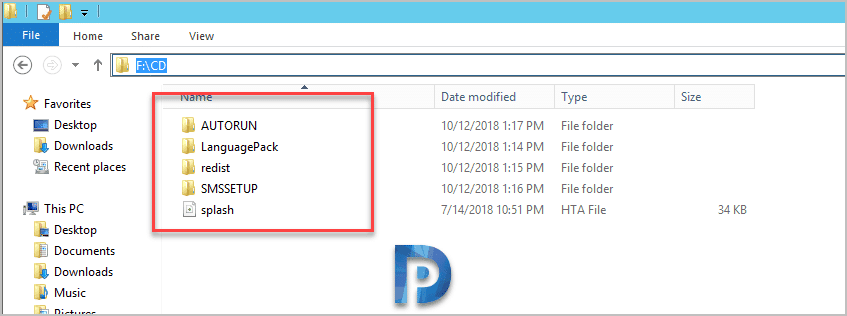
We are now good to perform test database upgrade. On your SQL server, mount SCCM ISO.
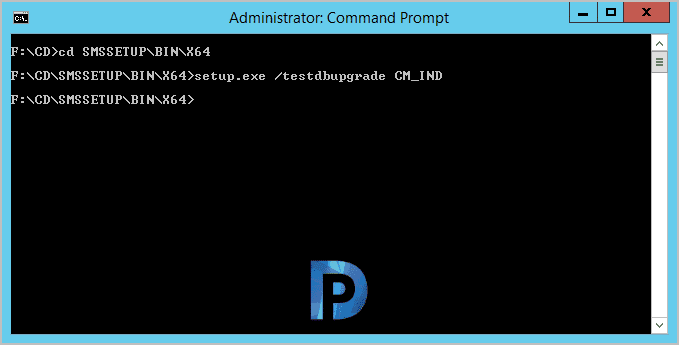
Run the command prompt as administrator. In addition, change the path to SMSSETUP\BIN\x64. Type the below command to perform test SCCM database upgrade.
setup.exe /testdbupgrade database_name
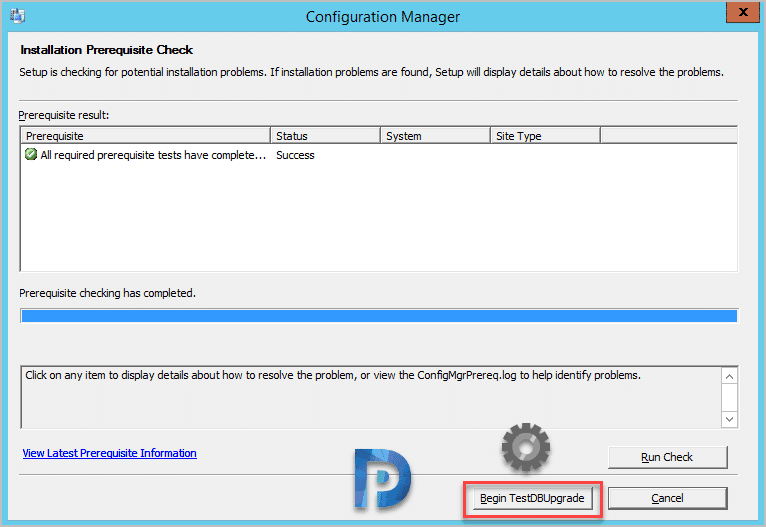
First the prerequisite checks are done. Click Begin TestDBUpgrade button.
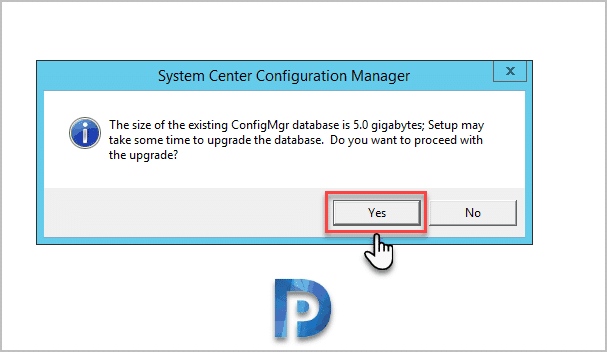
On the info window, click Yes.
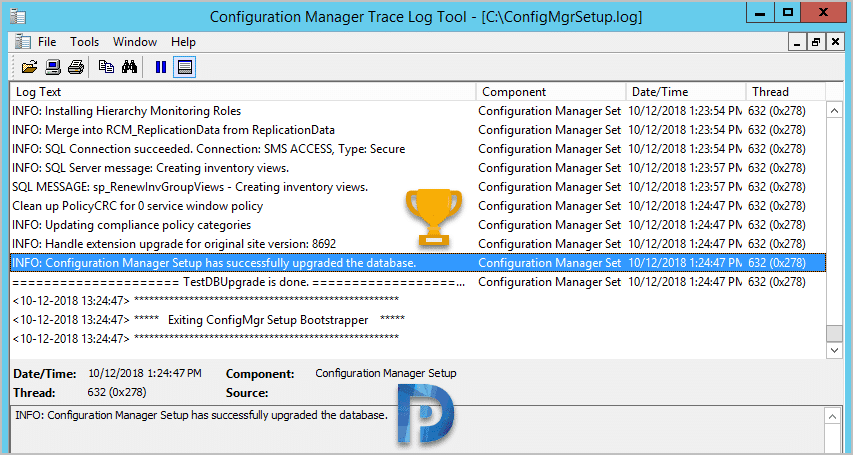
Open the ConfigMgrSetup.log file located on C: drive to monitor the testdbupgrade progress. At the end look for the line “Configuration Manager Setup has successfully upgraded the database“. You can now return to your active site and begin the update installation.

This post doesn’t address getting the most recent media. Downloads from VLSC don’t ever seem to be the right update versions except right now for 1902. Has something changed that they’re updating the media every release? I’ve always done a test upgrade prior to production upgrade, but to get the media I had to do the upgrade in a TEST environment with identical/similar setup so that I could copy the installation files from the “CD.LATEST” folder of that test environment since the files don’t update until you actually perform an upgrade.