Easily Enable Active Directory Recycle Bin | AD Recycle Bin
In this article, you will learn how to enable Active Directory Recycle Bin Feature in Windows Server. The AD Recycle bin helps recover the directory objects that were accidentally deleted.
The AD recycle bin comes in handy when you accidentally delete an AD object and need to restore it. I will cover 2 methods to enable the AD recycle bin feature – PowerShell and Server GUI.
Suppose a system administrator working in an Active Directory environment deletes any object in Active Directory accidentally. The effects of such mistakes can range from lost end-user productivity to broken network functionality.
In Windows Server 2008 AD DS, you could recover deleted Active Directory objects through tombstone reanimation. However, reanimated objects link-valued attributes that were physically removed and non-link-valued attributes that were cleared won’t be recovered.
The admins had a hard time in recovering the deleted objects. Therefore, administrators could not rely on tombstone reanimation as the ultimate solution to accidental deletion of objects.
The Active Directory Recycle Bin allows you to recover objects immediately, without the need to use your System State backups. Before you recover any deleted objects, you must first enable Active Directory Recycle Bin.
Table of Contents
What is Active Directory Recycle Bin Feature
Active Directory Recycle Bin helps administrators to recover directory objects that were accidentally deleted. Initially, the AD Recycle Bin in Windows Server environments proved difficult for some administrators.
That’s because enabling and using the recycle bin feature in AD could be performed only from the command-line, either by using the Ldp.exe utility or with Windows PowerShell cmdlets.
In the latest Windows Server versions, you can use the GUI-based Active Directory Administrative Center for both enabling the AD Recycle Bin and recovering deleted objects.
Active Directory Object States
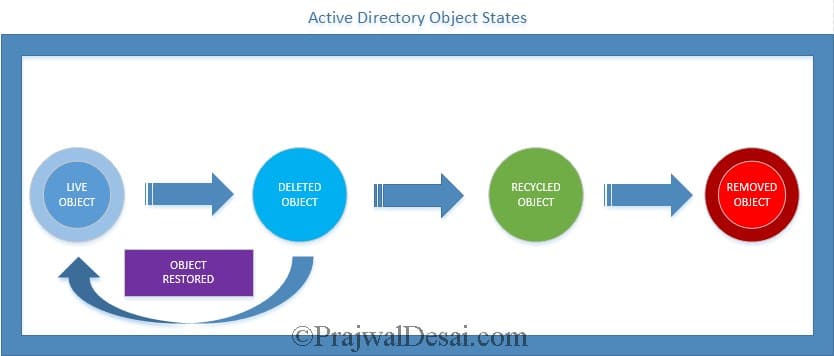
Before we enable the AD recycle bin, let’s understand about Active Directory object states. When the AD Recycle Bin feature is enabled in an Active Directory environment, directory objects can be in one of the following four states.
- Live Object State – Suppose you create a user account for a user, and the user is now logged in with this account. The user account is being used to log in to the computer, or it is being used to access the resources from a network. This state of the object is known as Object Live state.
- Deleted Object State – When you delete an object from the Active Directory, it is moved to deleted objects container. But the object’s link-valued and non-link-valued attributes are still preserved. If you have already turned on active directory recycle bin, the object can be recovered by restoring it from the AD Recycle Bin. And also if the lifetime of the deleted object has not yet expired. By default, the deleted object lifetime is configured as 180 days. If the object is in deleted state, you can restore the object back to the Active Directory and the object goes to live state.
- Recycled Object State – In the recycled state, the object remains in the Deleted Objects container, but most of its attributes are now stripped away. You cannot restore the object from the AD Recycle Bin or by taking other steps, such as reanimating Active Directory tombstone objects, when the object is in recycled state.
- Removed Object State – Once the lifetime of a recycled object is expired, the AD garbage collection process starts by removing the remains of previously deleted objects from the database.
Active Directory Recycle bin requirements
Before you enable AD recycle bin feature on Windows server, here are some of the prerequisites.
- Extend your schema to Windows Server 2008 R2.
- Have only Windows Server 2008 R2 DC’s and above in your forest.
- Raise your domain(s) functional level.
- Raise your forest’s functional level.
Raise Forest Functional Level for AD Recycle Bin
Most important, the forest functional level should be Windows Server 2008 R2 or higher. This means that all domain controllers in your forest must be running Windows Server 2008 R2 or higher.
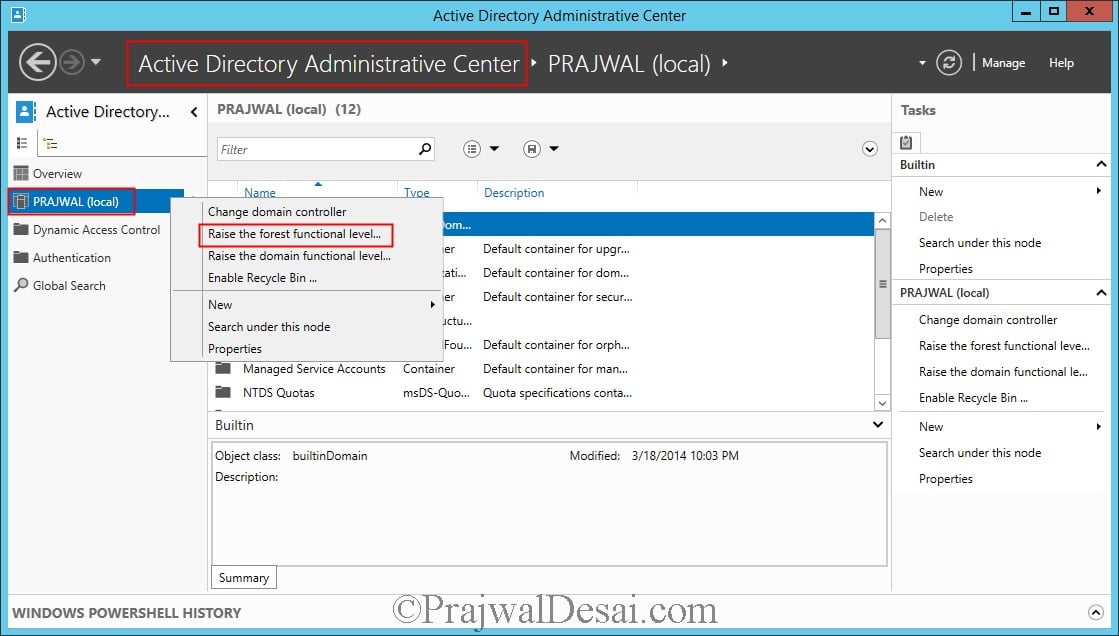
The below screenshot shows you how to raise forest functional level for AD recycle bin. You may skip this step if your forest functional level is Windows Server 2008 R2 or higher.
Launch the Server Manager and click on Tools and select Active Directory Administrative Center. Right-click the target domain in the left pane and select Raise the forest functional level.
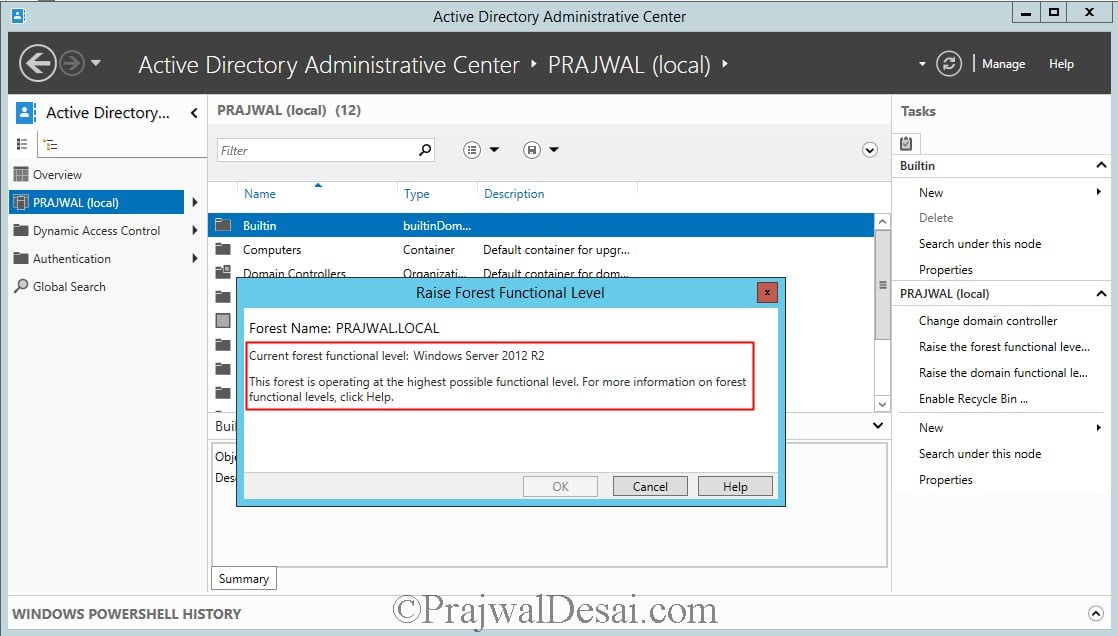
In the below example, the Active Directory Forest Functional level is already Windows Server 2012 R2. You have to perform this task only if your organization forest functional level is lower than Windows Server 2008 R2.
Check Forest Functional Level
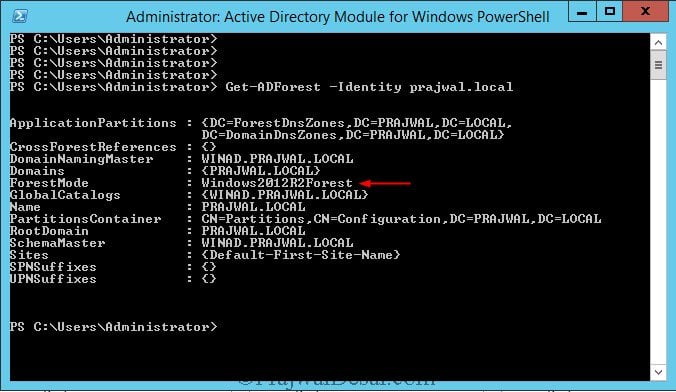
To check the current Forest functional level of your organization using PowerShell command, execute the below command in AD module for Windows PowerShell.
Get-ADForest -Identity Prajwal.local
Use PowerShell to Raise Forest Functional Level
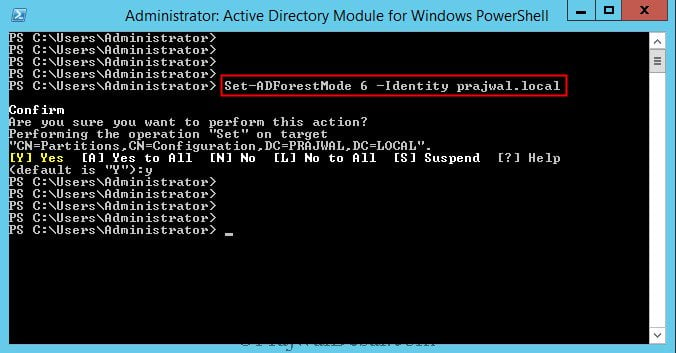
If you are looking to raise the forest functional level using PowerShell command, then launch Active Directory Module for Windows PowerShell and execute the below command.
Set-ADForestMode 6 -Identity PRAJWAL.LOCAL (6 - If you want to raise the forest functional level to Windows Server 2012 R2)
Set-ADForestMode 5 -Identity PRAJWAL.LOCAL (5 - If you want to raise the forest functional level to Windows Server 2012)
Set-ADForestMode 4 -Identity PRAJWAL.LOCAL (4 - If you want to raise the forest functional level to Windows Server 2008 R2)
Enable Active Directory Recycle Bin Feature using Server GUI
Let’s look at the steps to enable the Active Directory Recycle Bin feature using Server GUI. When you install Windows Server, by default, the AD recycle bin is disabled.
The process of enabling Active Directory Recycle Bin is irreversible, this means that once you enable the Active Directory Recycle Bin you cannot disable it.
To enable the Active Directory Bin Feature on Windows Server, log in with a user account that belongs to the Enterprise Admins or Schema Admins group.
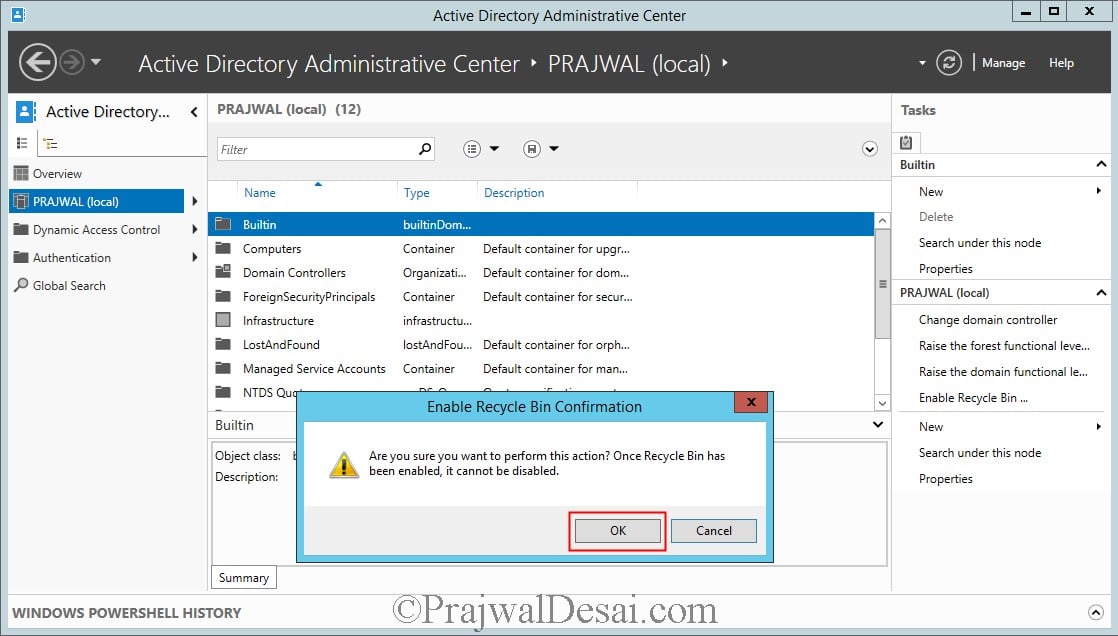
Right-click on the target domain and click Enable Recycle Bin. Are you sure you want to perform this action? Once Recycle Bin has been enabled, it cannot be disabled. On the confirmation box, click OK.
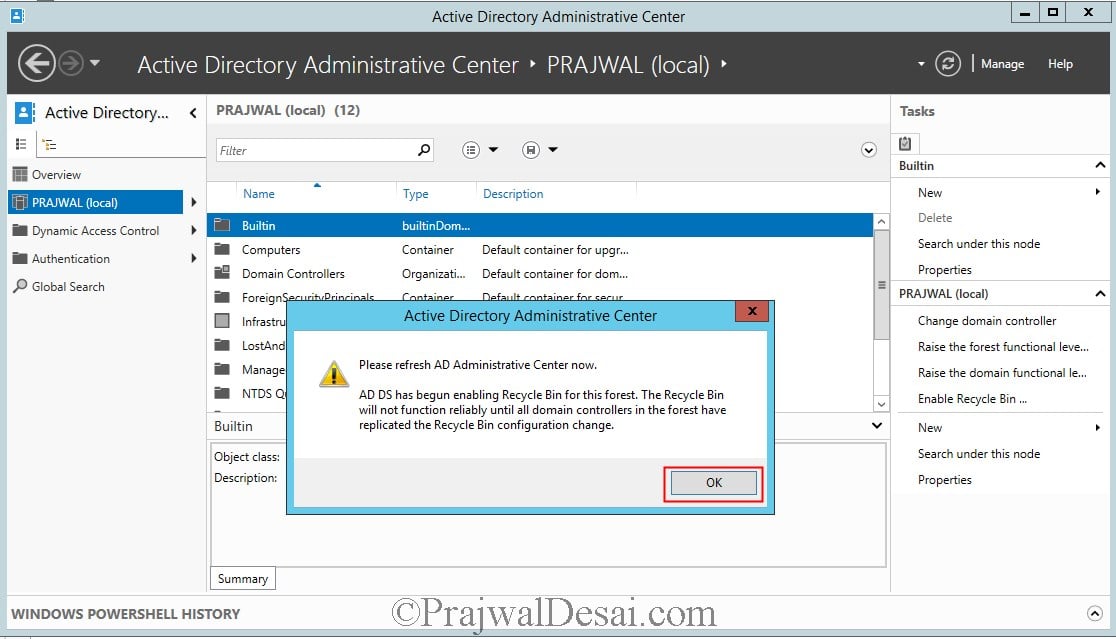
Click OK. On the top ribbon, click on Refresh Icon.
Enable AD Recycle Bin using PowerShell
We will now look at the steps to enable the AD recycle bin feature using PowerShell on Windows Server.
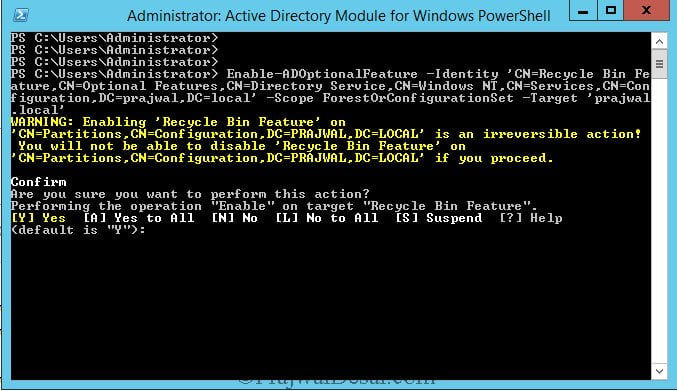
Run the following PowerShell command in AD module for Windows PowerShell to enable AD recycle bin.
Enable-ADOptionalFeature –Identity 'CN=Recycle Bin Feature,CN=Optional Features,CN=Directory Service,CN=Windows NT,CN=Services,CN=Configuration,DC=prajwal,DC=local' –Scope ForestOrConfigurationSet –Target 'prajwal.local'
Verify Active Directory Recycle Bin Enable
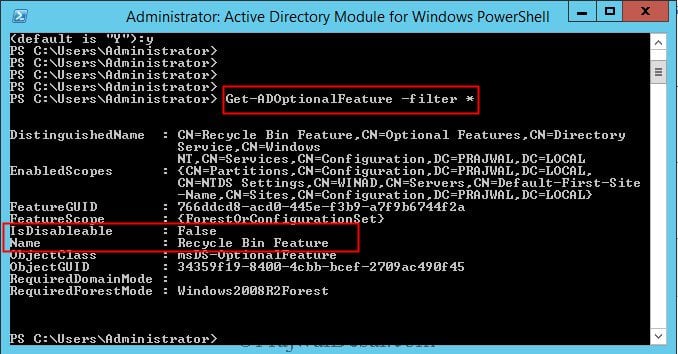
To verify if the AD Recycle Bin feature is enabled or not, execute the below command.
Get-ADOptionalFeature -filter *
In the output, the Name=Recycle Bin feature means the recycle bin feature is successfully enabled on Windows Server.
Delete an Object from Active Directory
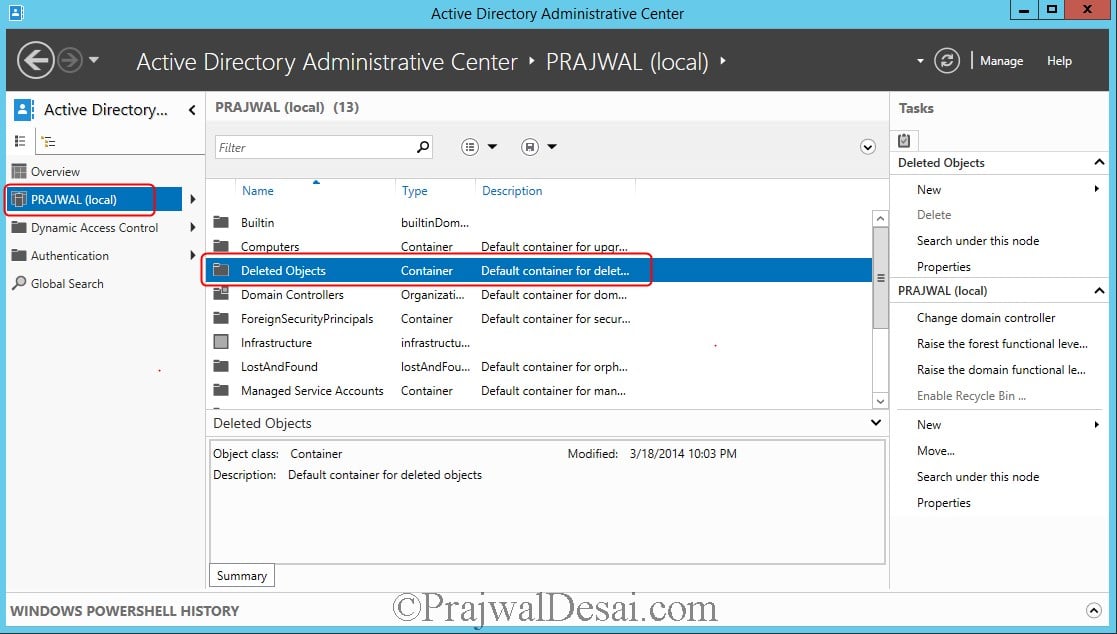
Now we see a new container called Deleted Objects under the target domain. When you delete any object from the Active Directory, it moves to Deleted Objects container. We will come back to this folder later.
Now we are going to test the recycle bin feature in AD. We will create and delete the object purposely. This is only done to test the recycle bin feature of Active Directory.
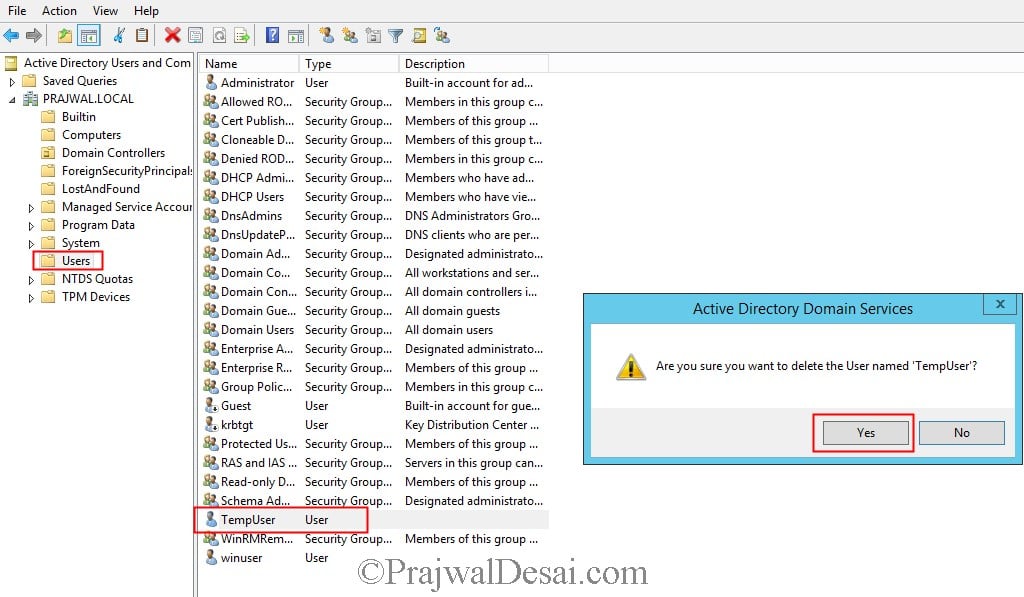
Let’s create a test user named TempUser in the Users OU. Right-click the newly created user and click on delete. When asked for confirmation to delete, the user click Yes.
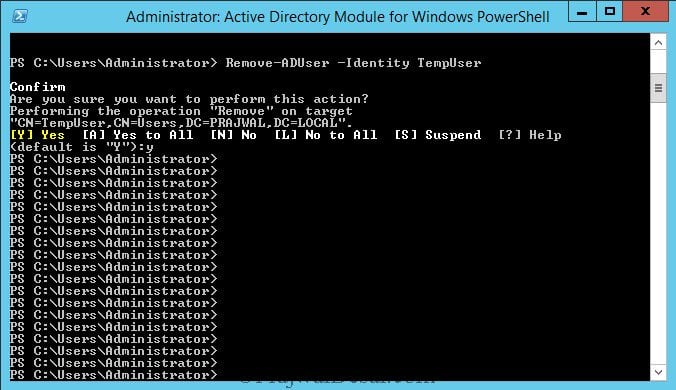
Alternatively, to delete the user account from the Active Directory, you can use the PowerShell command given below.
Remove-ADUser -Identity TempUser
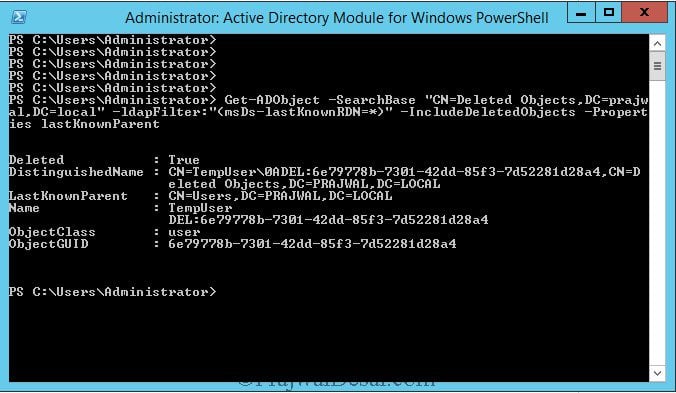
First, let us search for the AD object that has been deleted using PowerShell command.
Get-ADObject -SearchBase "CN=Deleted Objects,DC=prajwal,DC=local" -ldapFilter:"(msDs-lastKnownRDN=*)" – IncludeDeletedObjects –Properties lastKnownParent
In the command output, Deleted=True means the object is deleted successfully.
How to Restore Deleted Objects with AD Recycle Bin
The Active Directory Recycle Bin feature is enhanced with a new graphical user interface for users to manage and restore deleted objects.
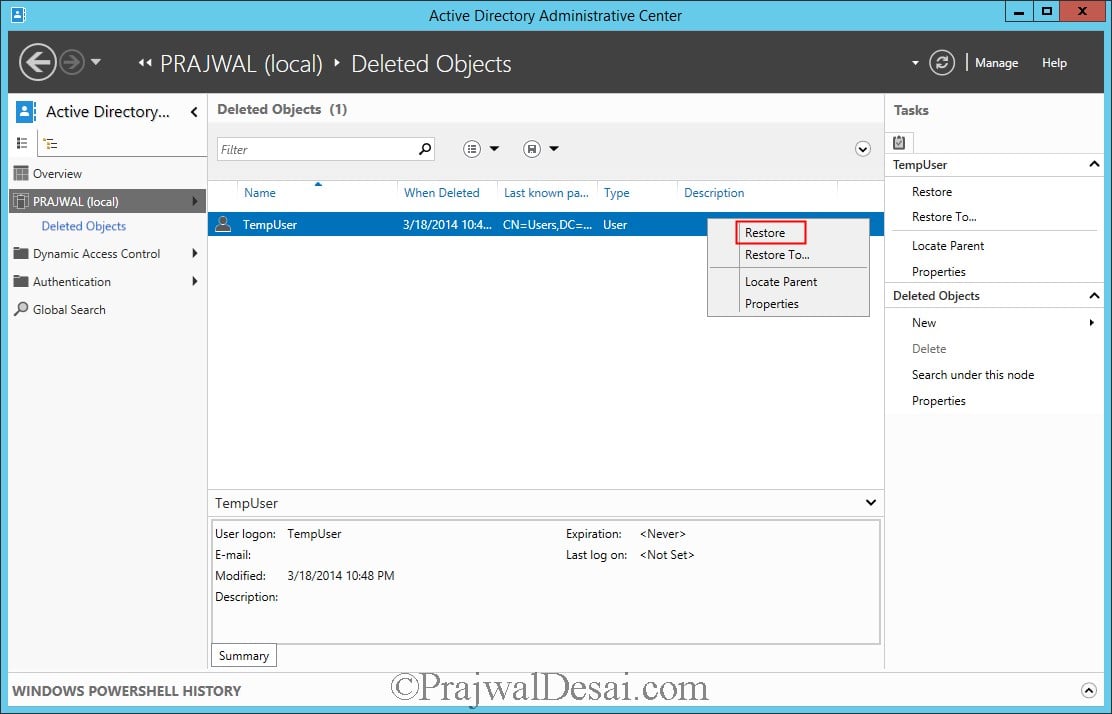
The deleted objects can now be seen under Deleted Objects container. When you right-click on the deleted object, you see four options.
- Restore – This option restores the deleted object to the location where it originally located before deletion. This is the recommended option in most cases for deleted objects recovery.
- Restore To – With this option, you can restore the object to the desired container. You would choose this if you want to specifically restore the deleted object to a new OU or location.
- Locate Parent – Displays the Container where the object was present before deletion. Select this option to know the original location of an object before you use Restore or Restore To.
- Properties – Displays the properties of the object such as name, Object Class, USN etc.
Right-click the object present in the Deleted Objects container and click Restore.
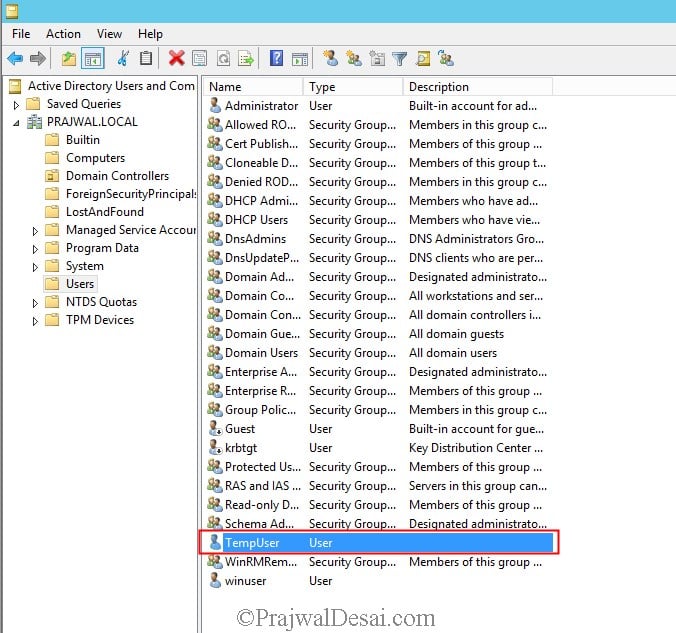
We see that the user account is restored back to the original location using the Restore Option.
Restore Active Directory Deleted Objects using PowerShell
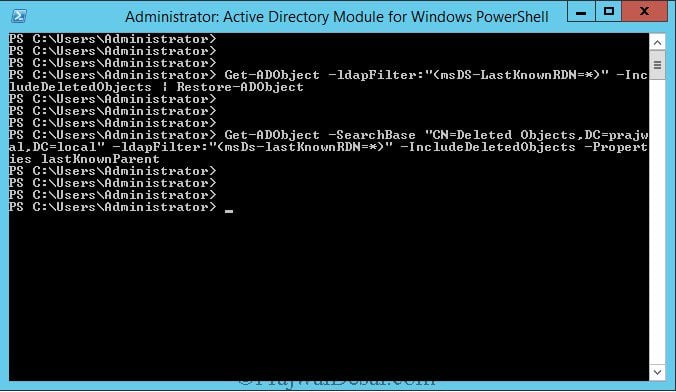
To restore the deleted object back to the original location, use the PowerShell command.
Get-ADObject -ldapFilter:"(msDS-LastKnownRDN=*)" –IncludeDeletedObjects | Restore-ADObject
What is Active Directory Recycle Bin Feature?
The AD Recycle bin helps recover the directory objects that were accidentally deleted without the need to use your System State backups.
Can I disable AD Recycle Bin Feature?
No, once you enable AD Recycle Bin, you cannot disable it.
Find Who deleted objects using Recycle Bin?
The Recycle Bin will not tell you who deleted your users, groups, and computers.
How long does Active Directory keep deleted objects?
180 days.

Hello , Prajwal I am stillconfused with the SQl server compatibility with SCCM 2012 and 2012 R2…Could you please provide me the link that I can use to upgrade Sql server in order to install SCCM 2012 R2 on server 2012 R2
Its here – https://www.prajwaldesai.com/installing-sql-server-2012-for-configuration-manager-2012-r2/
Nice post but I am bit confused on life cycle of an object in deleted state and recycle state. I assume it is 180 days in deleted items and 180 days in recycle bin which makes it 360 days by default ( changeable)
Correct me if I am wrong…
@Naveen – You are absolutely correct..
hello prajwal it is amazing to watch your site and i am also working as SYS.admin in DC on win-server Can you kindly share me the win-server trouble shooting features .