Install Windows Admin Center on Windows 11
In this post, you will learn how to install Windows Admin Center on Windows 11 PC. We will download the latest version of Windows Admin Center and install it on Windows 11 PC.
Windows Admin Center can be installed on Windows 11 and is fully compatible with computers running Windows 11.
According to Microsoft, Windows Admin Center is a lightweight, browser-based GUI platform and tool set for IT Admins to manage Windows Server, Windows 10 and Windows 11.
It’s the evolution of familiar in-box administrative tools, such as Server Manager and Microsoft Management Console (MMC) into a modernized, simplified, integrated, and secure experience.
Windows Admin Center is a locally deployed, browser-based app for managing Windows servers, clusters, hyper-converged infrastructure, as well as Windows 11 PCs.
On a Windows 11 PC, when you install Windows Admin Center, it offers the following benefits :
- Simple and modern management experience
- Hybrid capabilities
- Integrated tool set
- Designed for extensibility
This post covers the manual installation of Windows Admin Center on Windows 11 computer. For deploying Windows Admin Center on multiple Windows 11 PCs, refer to deploy Windows Admin Center using SCCM.
Download Windows Admin Center
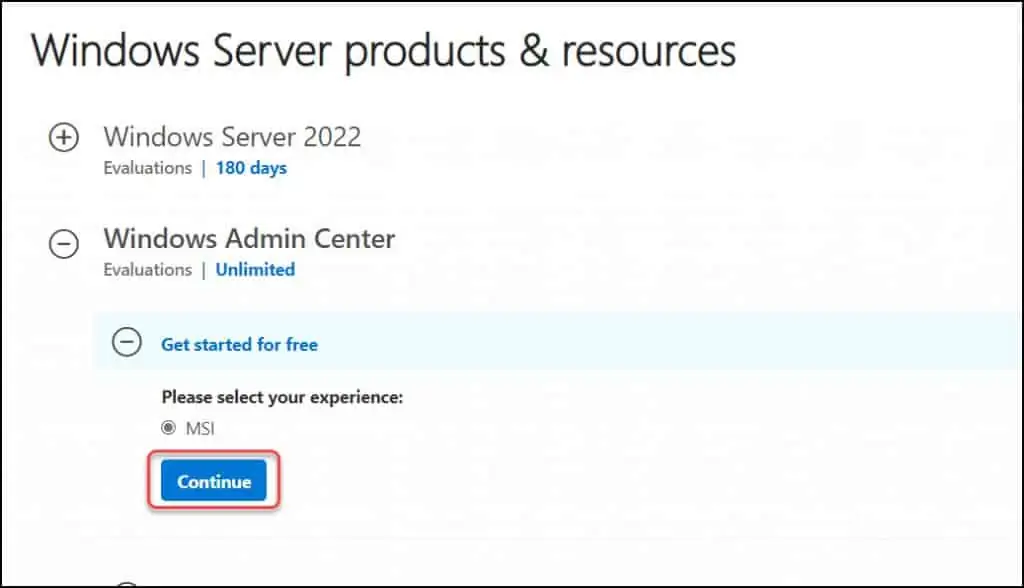
On Windows 11 PC, you can download the latest version of Windows Admin Center from Microsoft evaluation center. Under Window Server products and resources, look for Windows Admin Center and select Continue.
The Windows Admin Center installer is available as .msi installer. If you are deploying this WindowsAdminCenter.msi using SCCM or ConfigMgr, the installation commands will be populated automatically.
Read: how to deploy Windows Admin Center using SCCM.
Before you download the Windows Admin Center setup file, you will be asked for few details, enter them and click Download. What you get is the WindowsAdminCenter.msi installer.
The Windows Admin Center updates are released frequently by Microsoft. You can update Windows Admin Center using Windows Updates.
How to Install Windows Admin Center on Windows 11 PC
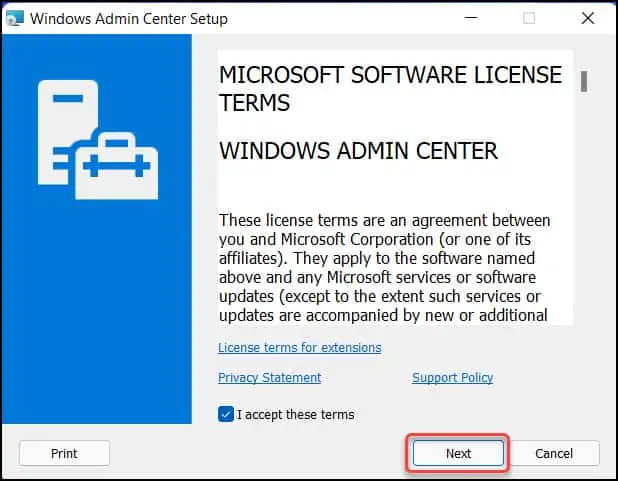
Let’s see how to install Windows Admin Center on Windows 11 PC. Right click WindowsAdminCenter.msi and click Install. On the Windows Admin Center setup screen, select I accept these license terms and click Next.
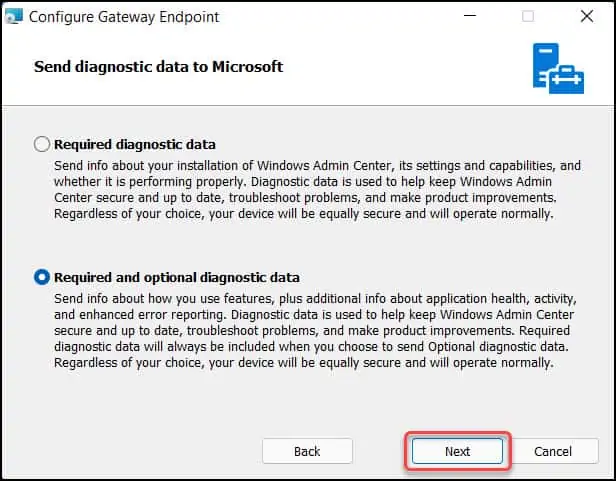
For sending diagnostic data to Microsoft, there are two options :-
- Required diagnostic data – Select this option if you want to send info about your installation of Windows Admin Center, it’s settings and capabilities to Microsoft.
- Required and optional diagnostic data – Select this option to send info about how you use features, plus additional info about application health, activity, error reporting.
Select the appropriate option and click Next.
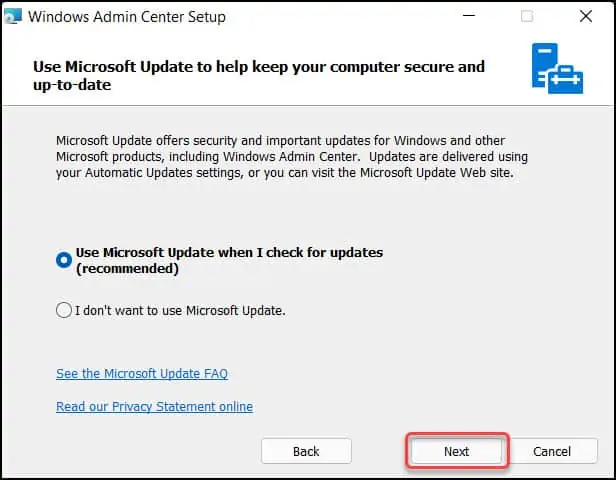
As mentioned earlier, on your Windows 11 PC, you can update the Windows Admin Center via Microsoft Update. Select Use Microsoft Update when I check for updates and click Next.
Once you install Windows Admin Center, you can manage computers directly from this PC using a web browser. Click Next.
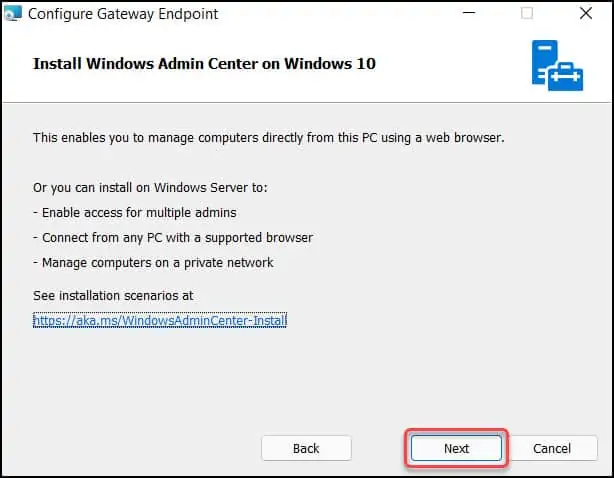
You must select a port for the Windows Admin Center site. By default, the Windows Admin Center uses port 6516, however you can enter a different port number.
You can also allow the installer to create a shortcut to launch Windows Admin Center.
The option Automatic update Windows Admin Center ensure the latest updates are installed via Windows Updates on Windows 11.
Click Install.
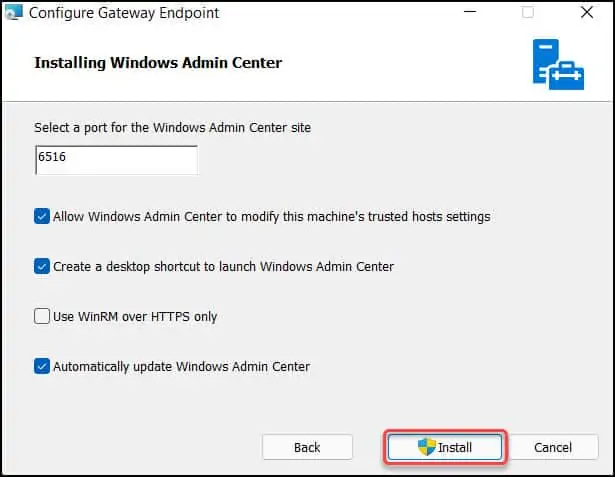
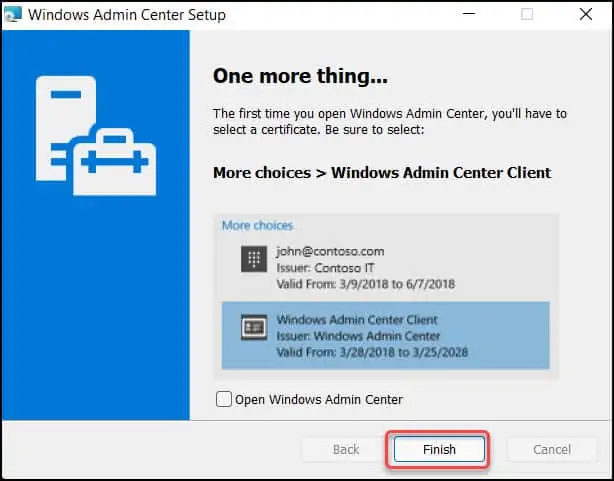
The Windows Admin Center installation on Windows 11 is complete. The next important step is to select a certificate which is covered in the next step. Click Finish.
Launch Windows Admin Center on Windows 11 PC
There are two ways to launch Windows Admin Center on the Windows 11 PC:
- On your Windows 11 PC, Click Start > type Windows Admin Center in the Search box and open the Windows Admin Center application.
- You can also launch the Windows Admin Center by using the desktop shortcut created by Windows Admin Center setup.
When you start Windows Admin Center from the Start menu, it opens in your default browser. I recommend using Microsoft Edge browser because it is secure, and the performance is excellent.
Configure Windows Admin Center Certificate for Authentication
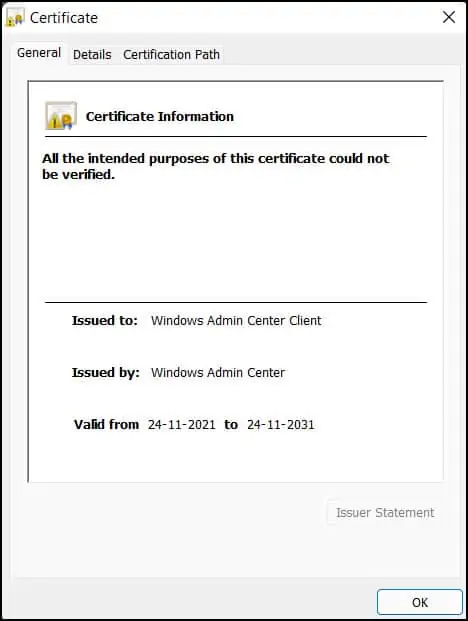
After you install Windows Admin Center on Windows 11 PC and launch it, the first step involves selecting a client certificate. You should see a Windows Admin Center client certificate prompt.
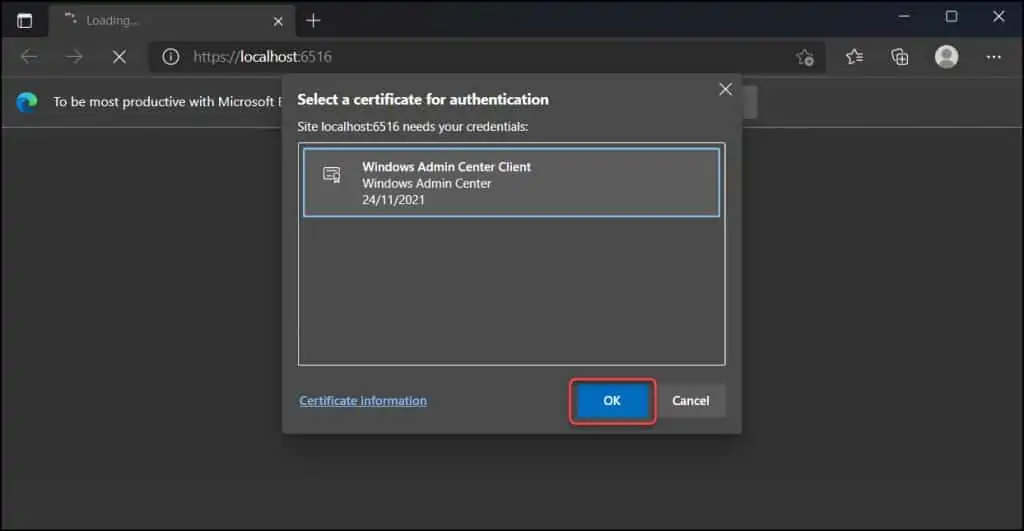
If you select Client Information, the certificate details are displayed. To use this certificate, select OK.
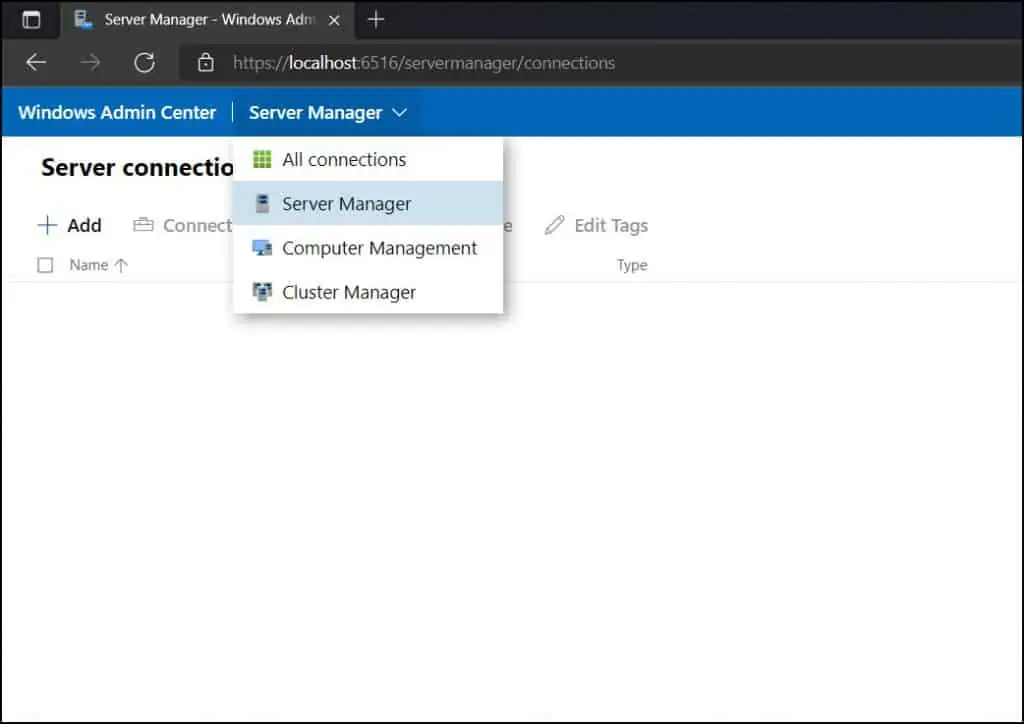
With Windows Admin Center installed, you can manage almost everything from your local browser. For example, you can select Server Manager tool and add your Windows Servers existing in the AD domain.
You can also add tool such as Computer Management, Cluster Manager and the possibilities are endless. As I explore these tools, I will publish the information. Keep following my blog for more updates on Windows Admin Center.

Hello. Thank you for this. Question: The client machine I’m trying to access WAC from is macOS with Microsoft Edge as browser. When I go to the URL using the FQDN, I get a prompt for a certificate, but I do not see the Windows Admin Center certificate option. Any ideas on what I need to export from Windows (certificate?) and which keychain I need to import it into on macOS to get this to work? Thanks.