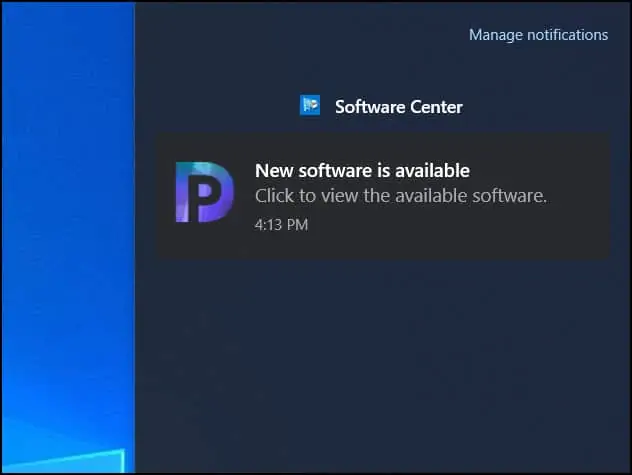
How to Set up Software Center Notification Logo in SCCM
Starting in SCCM 2111, you can setup logo for notifications in software center. To set up Software Center notification logo, you have to first enable Set Logo for Notifications setting in client settings.
One of the new features introduced in SCCM version 2111 is Software Center notifications can display a logo. This notification logo helps users to trust these notifications.
To configure the logo for notifications, you must first upgrade to SCCM 2111 and update the client agents to the latest version.
When you set up software center notification logo in SCCM and deploy software to a client, the user sees notifications with your logo. This logo represents your brand name or company logo.
Note – The notification logo is visible to users only if you select the notifications to appear during the deploy software wizard. I have covered about this in the later part of the post.
What is Notification Logo?
The notification logo helps users to trust the notifications that appear on the client machines. The software center settings now include a new option called “Select a logo for notifications“. When you enable this setting, the logo appears along with the notifications on devices running Windows 10 or Windows 11.
Until now, you could only specify a logo for Software Center. However, with the latest version 2111 of Configuration Manager, you can set a logo for notifications separately from Software Center.
If you enable Software Center customizations, Microsoft gives you the option to specify a separate logo for Windows notifications and Software Center logo.
In other words, you can specify different logo for Software center and windows notifications. This is a nice feature in SCCM 2111 and easy to set up.
Requirements for Selecting a Logo for Notifications
The logo for notifications has the following requirements:
- A JPG, PNG, or BMP file.
- Square aspect ratio. For example, 100 x 100 pixels.
- A maximum file size of 2 MB.
- No spaces in the file name.
You can assign the same logo for both Software Center and Windows notifications. Yes, that is possible and ideally organizations have just one logo registered as it represents their brand.
You may assign a different logo for notifications and software center and that is completely your choice. Remember that when you set logo for notifications, ensure it meets the above notification logo size and file format requirements.
Important – Most of the Software Center customizations are available in SCCM only when you enable the new Software Center. Only when you enable new software center settings, you can set a logo for notifications.
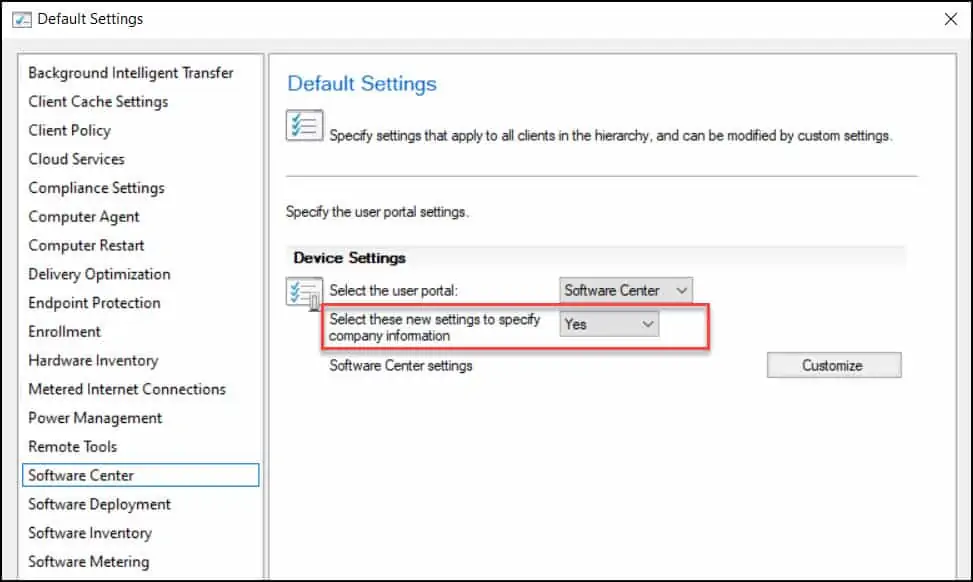
How to Set up Software Center Notification Logo in SCCM
The steps to set up notification logo for Software Center in SCCM are as follows:
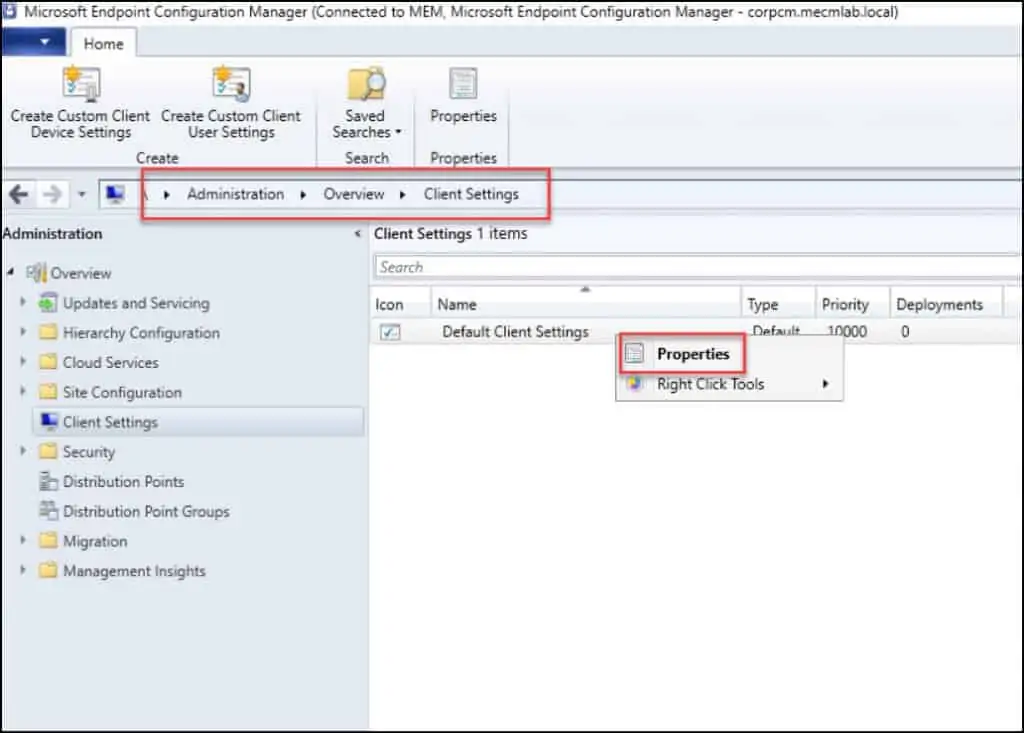
- Launch the SCCM console.
- Go to Administration\Overview\Client Settings.
- Right-click Default Client Settings and select Properties.
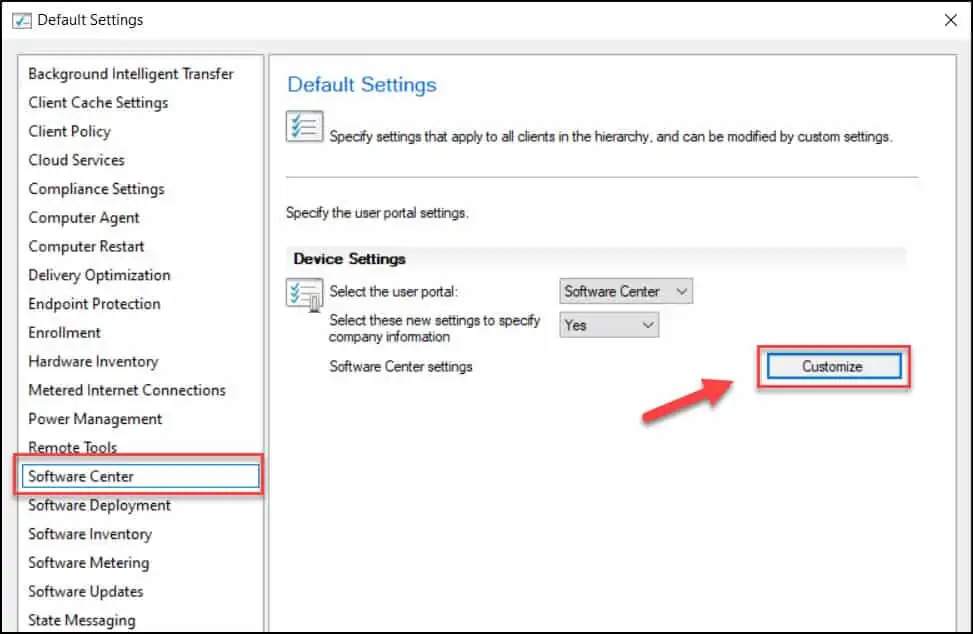
- Select Software Center option and click Customize button.
- Configure Select a logo for notifications and assign a logo for notifications.
Under the client settings, you can either select Default Client Settings or the custom ones. When you set a logo for notifications, you ideally select Default client settings because it applies for all users.
To view the options available for Software Center customizations, click Customize button.
On the General tab of Software Center Customization, look for the setting named Select a logo for notifications. Click the Browse button and select a logo that you want it to appear along with notifications.
Once you are done making the changes, click OK to save settings.
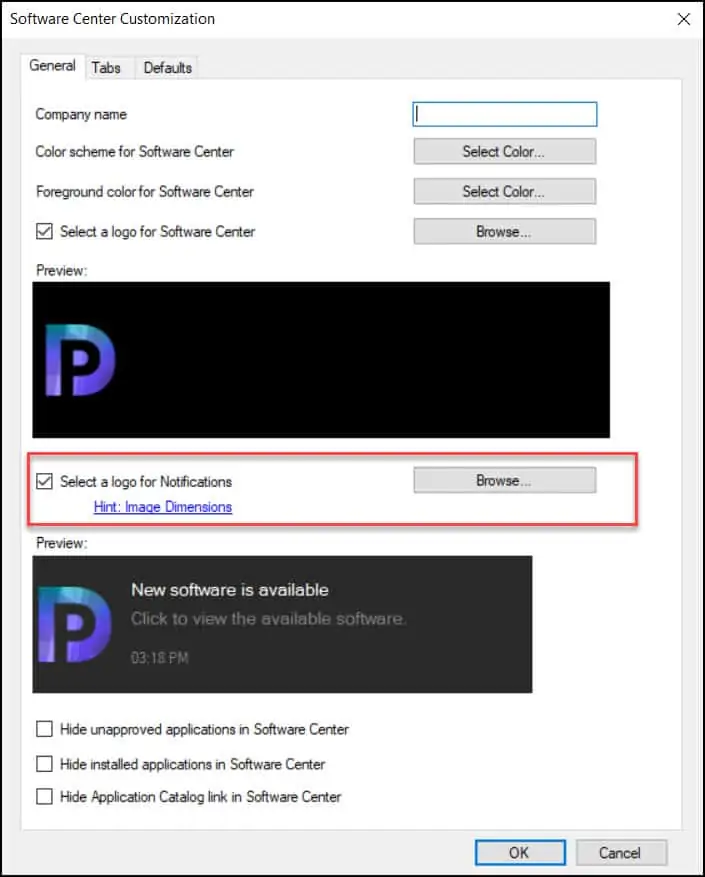
Ok, that was about configuring the software center notification logo. Let’s check how the notification logo looks when it appears on the client computers.
Enable User Notifications during Deployment
To view the notification logo on the client computers, you must either deploy an application or task sequence to the computers.
In order for the notification logo to appear for users, there is one important configuration required during the deployment.
When you deploy an application or task sequence, ensure you configure the user notifications to Display in Software Center and show all notifications. This option is available on User Experience page of Deploy software wizard.
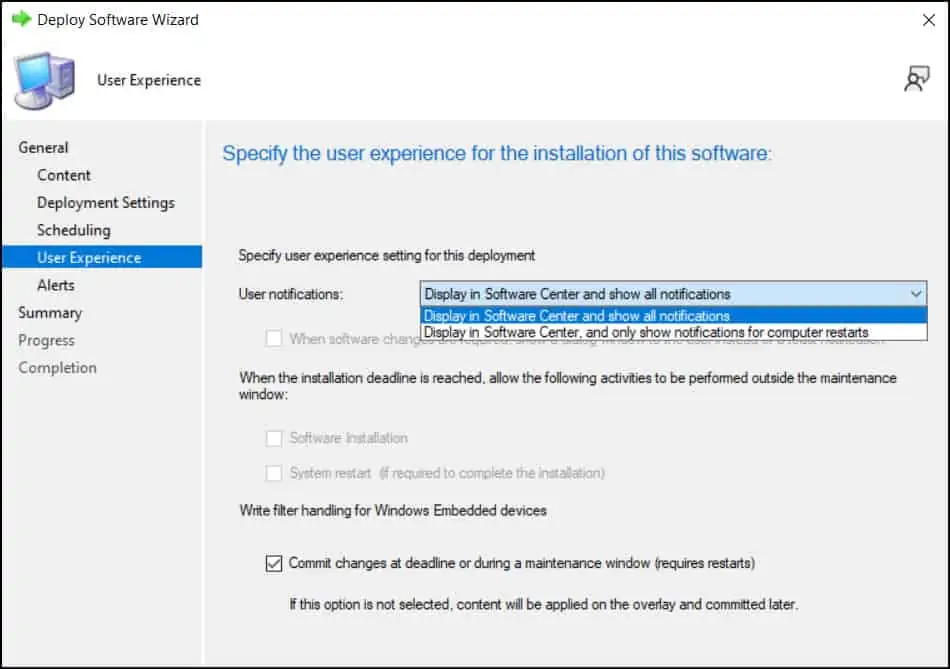
If you want to change the user notifications settings for an existing deployment, you can do that. For example, I am going to change the user experience settings for an application that is already deployed to a device collection.
In the SCCM console, go to Software Library\Overview\Application Management\Applications. Select the application and at the bottom click the Deployments tab. Right click the deployment and select Properties.
Select the User Experience tab and next to user notifications, click the drop-down and select the option Display in Software Center and show all notifications. Click Apply and OK.
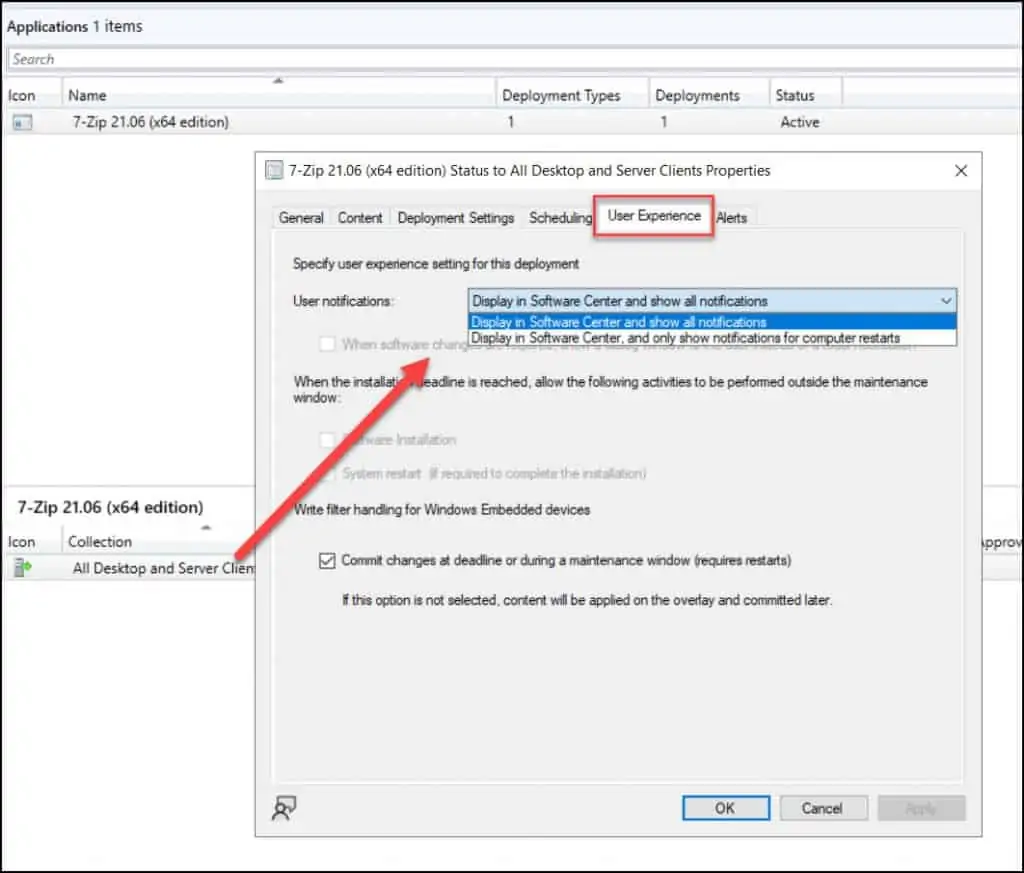
Test the new Notifications Logo on Client Computers
Once you set up logo for notifications, let’s deploy an application and see how the logo for notifications looks on the client computers.
The below screenshot shows how the Software Center Notification Logo looks on Windows 11 PC.
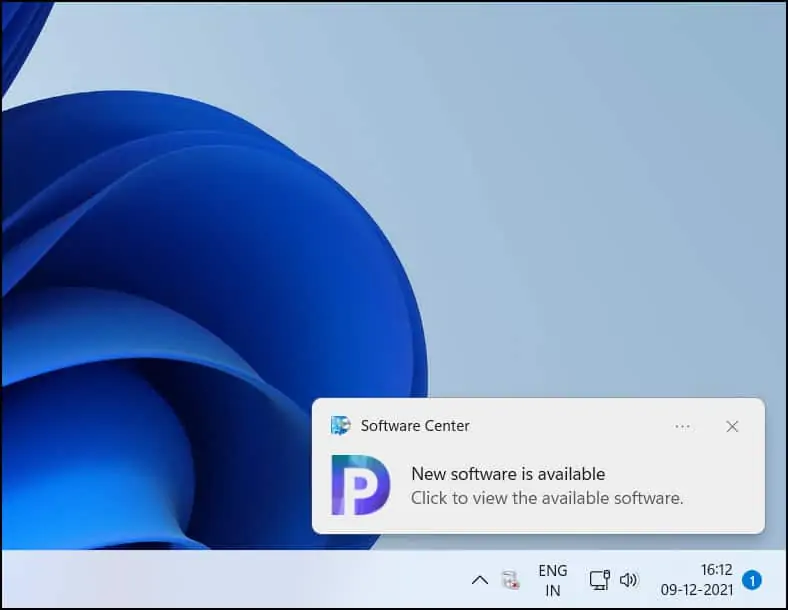
The below screenshot shows how the Software Center notification logo looks on Windows 10 computer.
