Patch Server Core Installation with latest Windows Updates
In this guide, I will show you how to patch server core installation with the latest Windows Updates. Through Windows Update, you can install the latest patches on the server core automatically or manually install the latest updates.
When you install the Server Core, it is recommended to install the latest patches to keep it secure and updated. Unlike Windows Server (installed with Desktop Experience), the Server Core doesn’t have a GUI to check for updates.
When you have multiple server core installations in your setup, patching all them of the servers becomes a critical task. By patching a server core installation, you get the performance improvements and the known issues or bugs are fixed.
Methods to Patch Server Core Installations
There are three methods that you can use to patch a server running Windows Server Core:
- Using Windows Updates automatically: By using Windows Update, either automatically or with command-line tools, you can patch server core installations.
- Windows Server Update Services (WSUS): Using Windows Server Update Services (WSUS), you can service servers running a Server Core installation.
- Manually install updates on Server Core: Organizations that do not use Windows update or WSUS, you can apply updates manually and keep the server core updated.
Patch Server Core with latest Windows Updates
We’ll now go through the steps to automatically install the latest updates on the server core using Windows Update. The first step involves configuring the update setting on the server core. When a server core is first installed, the update setting is set to Download only. However, the SConfig screen allows you to modify this configuration.
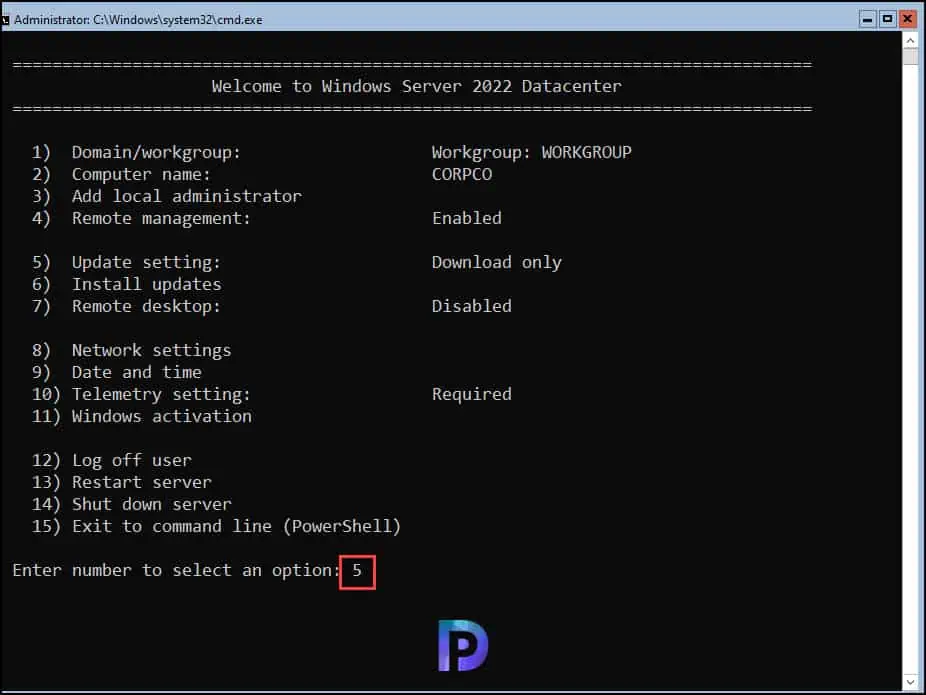
You will be presented with three update options:
- Automatic
- Download Only
- Manual Updates
To enable automatic updates on the server core, type “A” and press the Enter key.
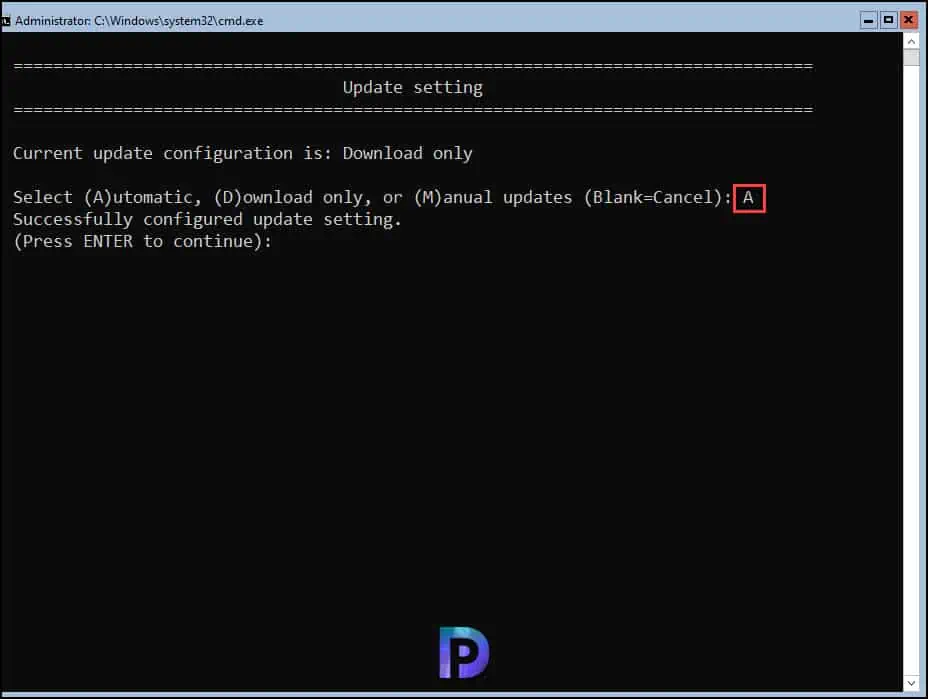
On the SConfig screen, notice that the update setting is now changed to Automatic. We have now enabled automatic updates on the Windows Server core. In the next step, we will check for the latest updates from Microsoft and install them. Select the option 6 to install the updates.
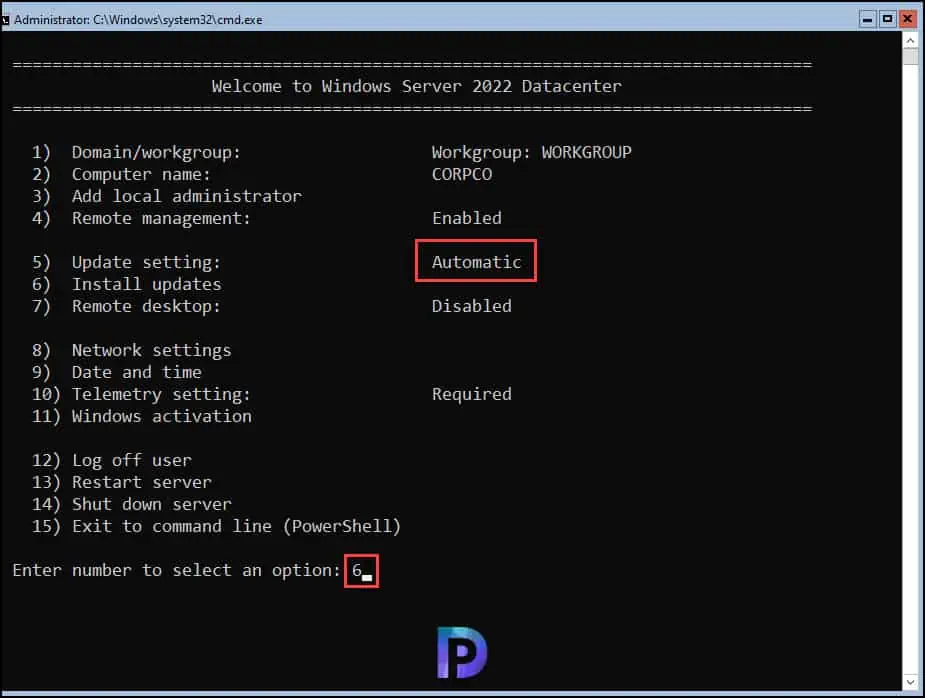
There are three options presented when you choose to install updates on server core:
- All quality updates
- Recommended quality updates only
- Feature Updates
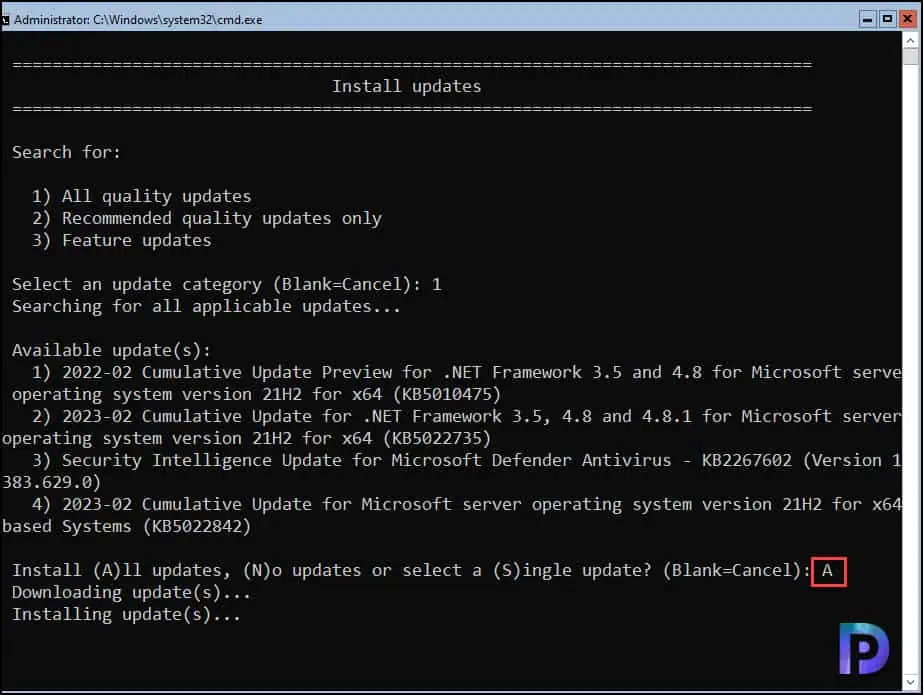
Type the option “1” and press the enter key. The Server Core now checks for the quality updates. From the screenshot below, we see there are 4 Windows updates applicable for the server core.
You can install all the updates, select and install single update or choose not to install any update.
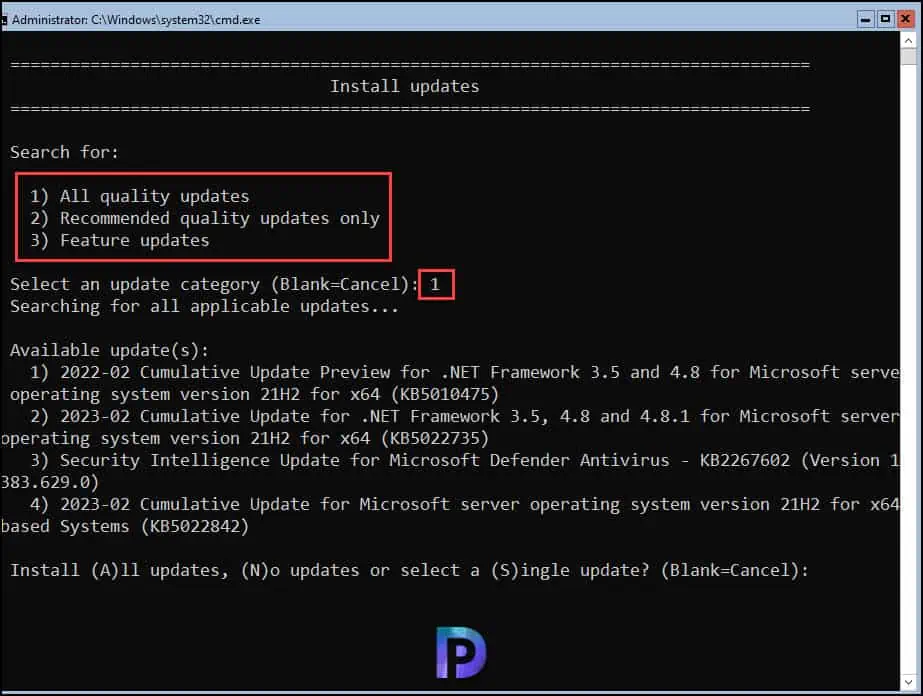
To install all the latest updates on Server Core, select the option “A” and press the enter key. The updates are now downloaded and installed on the server core. Remember that downloading and installing the updates will take time. Make sure the server has connectivity to the internet.
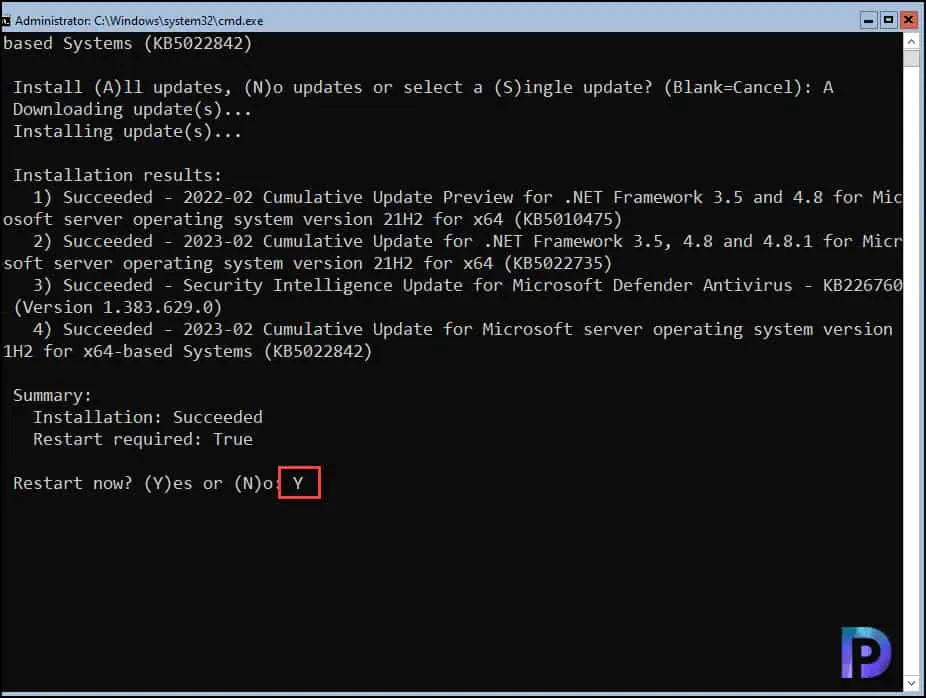
After sometime, the updates are installed on the server core, and we see a server restart is required to complete the installation of updates. Type “Y” and press the enter key to confirm the server restart.
Check Installed Updates on Server Core
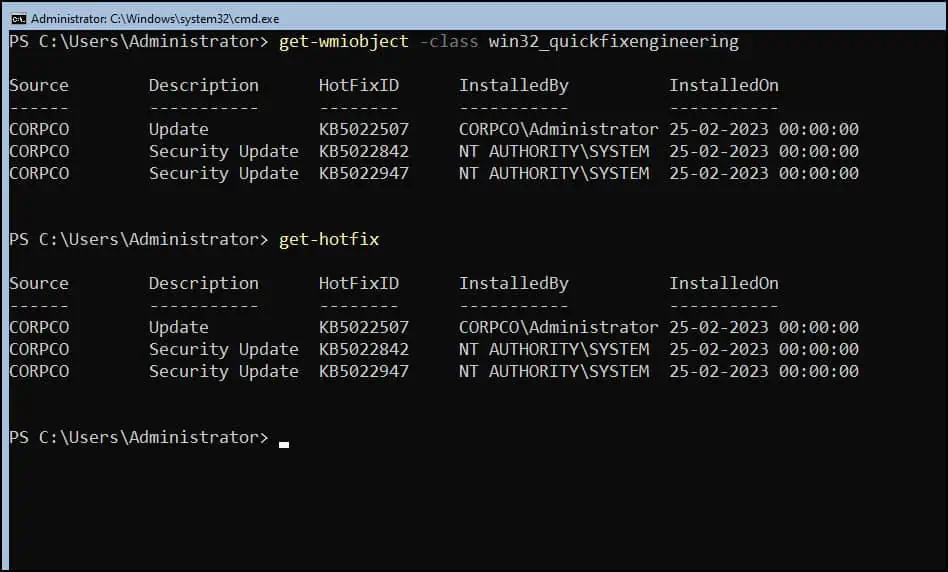
There are multiple ways to check the installed updates on server core. You can use any of the commands listed below to get Windows updates installed on server core.
- get-wmiobject -class win32_quickfixengineering
- get-hotfix
- run wmic qfe list from the command line
- View updates by running a command systeminfo.exe
Manually Patch Server Core Installation
To manually install updates on the server core installation, you have to download the update and make it available to the server core installation. At a command prompt, run the following command:
Wusa update.msu /quiet
Depending on the updates that are installed, you may need to restart the computer, although the system will not notify you of this. To uninstall an update manually, run the following command on server core:
Wusa /uninstall update.msu /quiet
