How to Uninstall Windows Updates using PowerShell
In this article, I will show you how to uninstall Windows updates using PowerShell. You can list all the updates installed on your Windows computer using PowerShell and remove the updates using KB number.
Microsoft periodically releases updates, some of which are intended to resolve specific problems, but others of which unintentionally cause new problems. We have witnessed this occurring multiple times, which is why the majority of IT administrators choose to delay the deployment of new updates.
The updates that you want to uninstall may have been deployed via SCCM or you may have manually imported the update into WSUS from Microsoft Update Catalog. In case the update that you want to remove is installed using Configuration Manager, you can roll back a patch via SCCM.
If the update is causing issues on the computer, the only solution is to uninstall that problematic update. Your first goal is to find the update(s) that is causing issues when you update your Windows 10/11 computers. By looking at the updates that were installed on a particular date, you can do it quickly. Either you have to find the problematic update(s) and uninstall it, or you have to wait for Microsoft to release a separate patch. You can uninstall specific Windows updates using PowerShell if you realize it’s causing problems with the PC.
How to Uninstall Windows Updates using PowerShell
Let’s look at the steps to uninstall Windows updates using PowerShell.
Step 1: Click Start and Launch the PowerShell as administrator. In the PowerShell window, run the below command. The below command lists all the updates installed on Windows computer.
wmic qfe list brief /format:table
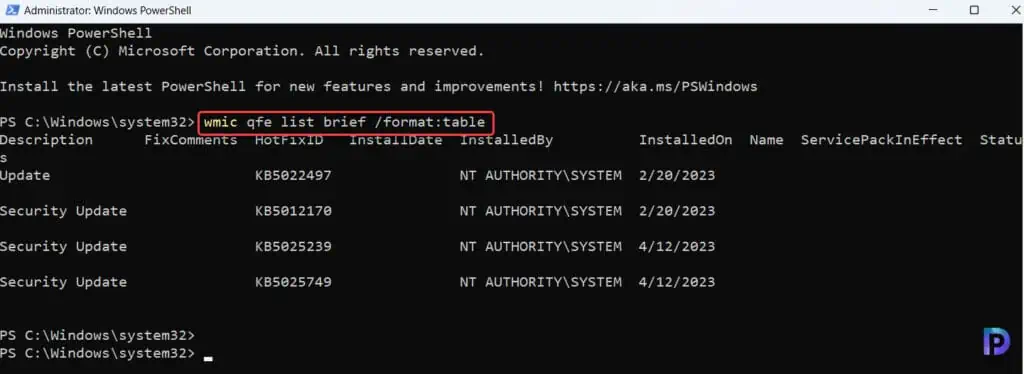
The above command lists the following details in the output:
- Update Description: Whether it’s a security update or update.
- HotfixID: The KB number of the update.
- InstalledBy: The user account that installed the update.
- InstalledOn: The date on which the update was installed.
Step 2: From the list of installed updates, make a note of the hotfix ID that you wish to remove. Next, in the PowerShell window, run the below command to uninstall the update.
wusa /uninstall /kb:updateID
Note: Replace the UpdateID with the actual KB Update ID, from the list and then hit enter. This command will uninstall the Update.
The above command uses Windows Update Standalone Installer (Wusa.exe) to uninstall Windows Updates from the computer. The Wusa.exe file is located in the %windir%\System32 folder.
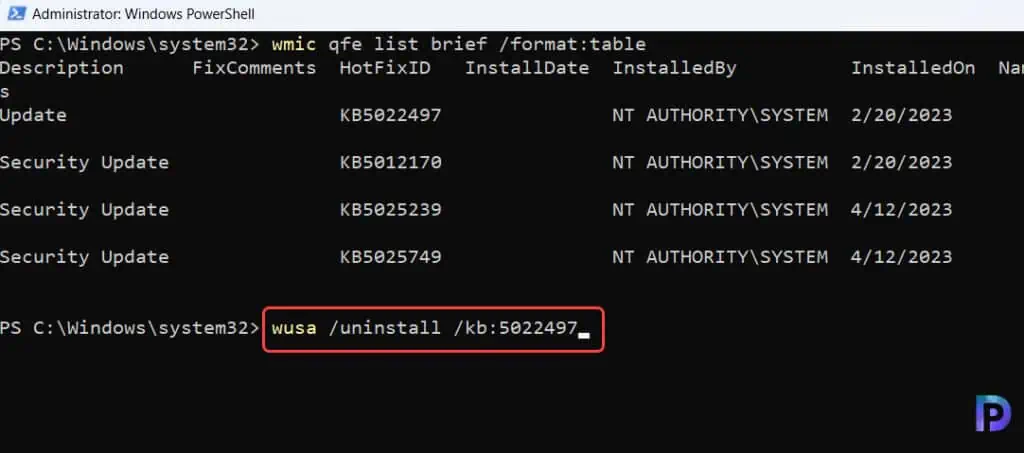
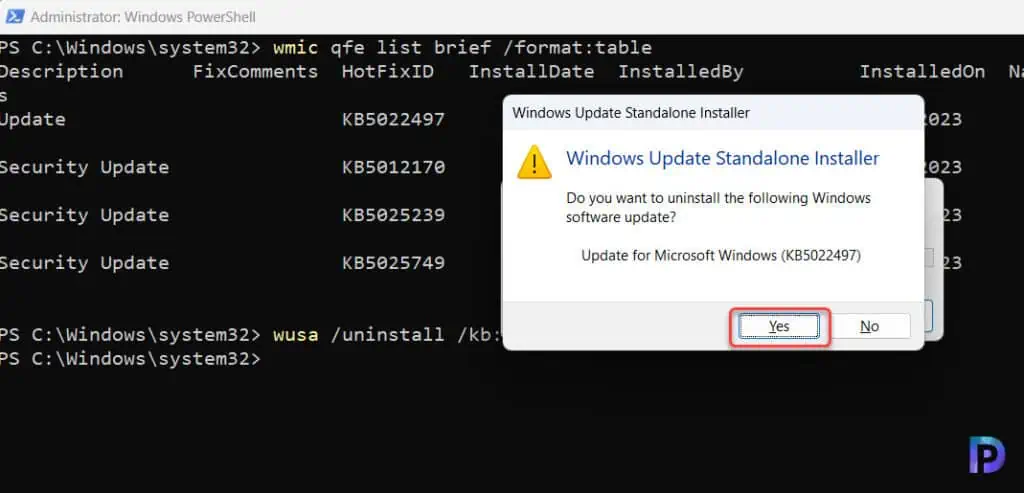
Step 3: After you run the above command, you need to confirm the removal of update. On the Windows Update Standalone installer, you see “Do you want to uninstall the following windows software update?” Select Yes to proceed with uninstalling the update.
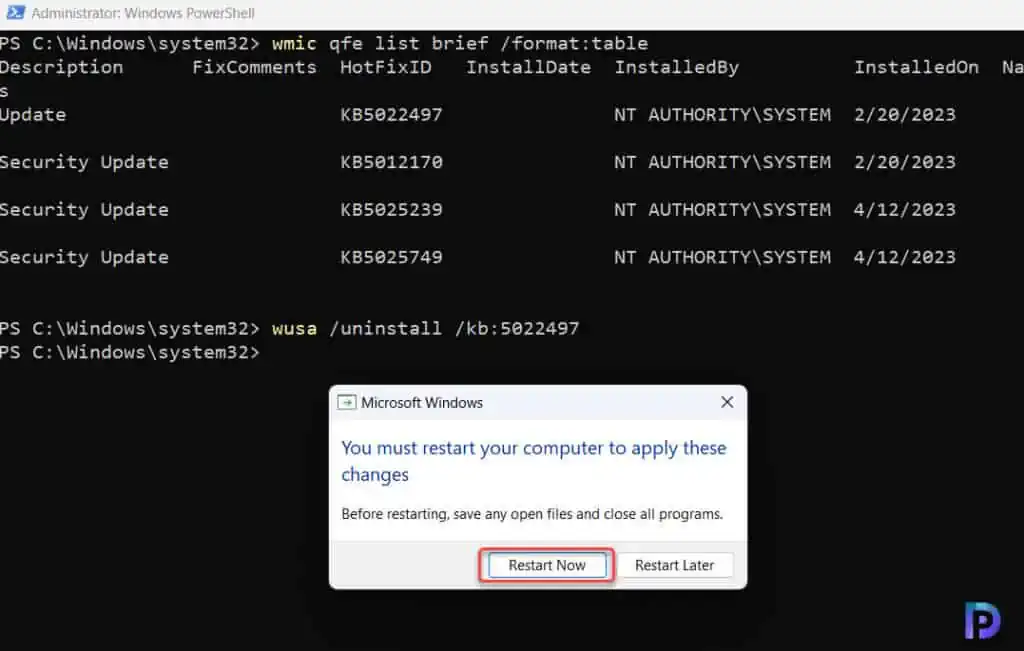
Step 4: It takes just a few seconds to uninstall the update. Most updates require a reboot when you uninstall them. To restart the computer, select Restart Now. With these steps, you can easily uninstall Windows Updates using PowerShell.
Unable to Uninstall Updates using PowerShell?
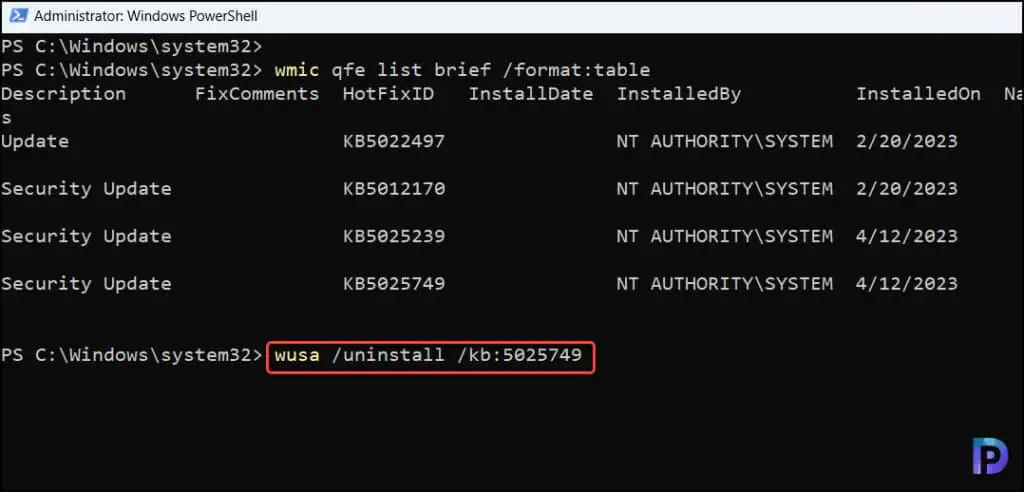
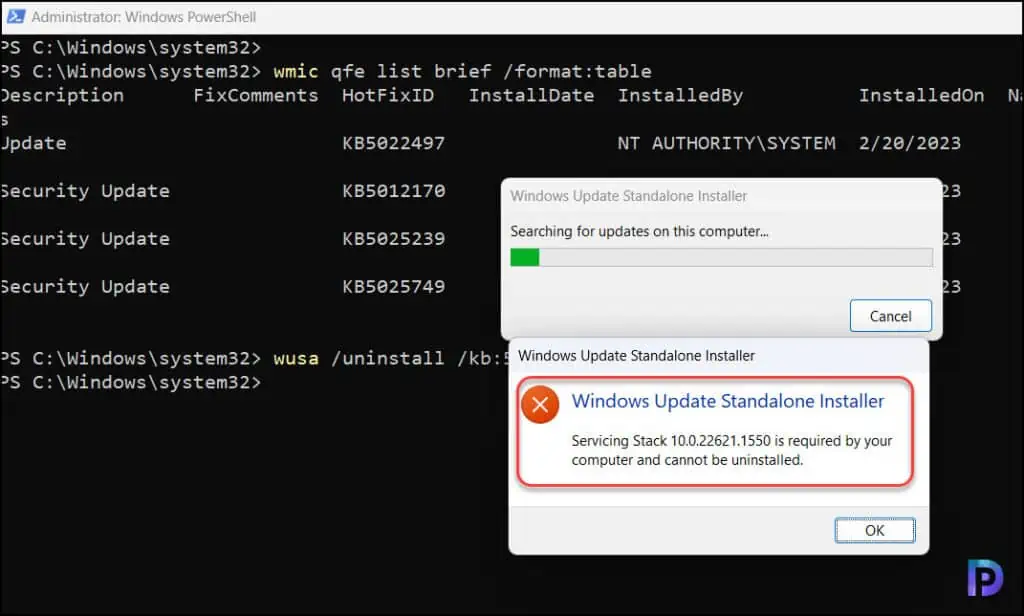
In some cases, you cannot uninstall certain updates such as Servicing Stack updates using PowerShell. In the screenshot below, we are attempting to remove the patch KB5025749 from the computer using the following command.
wusa /uninstall /kb:5025749
The following error is displayed as a result of the update’s failure to uninstall: “Servicing Stack update is required by your machine and cannot be uninstalled.” You are unable to delete a servicing stack Update from your computer since your machine needs it, which is why you are seeing this message.
Servicing stack updates improve the reliability of the update process to mitigate potential issues while installing the latest quality updates and feature updates. If you don’t install the latest servicing stack update, there’s a risk that your device can’t be updated with the latest Microsoft security fixes.

HI Great article,
Two questions, Monthly CU now come with SSU combined within it, so is it the case, that if the month you wish to uninstall contains an SSU it cannot be removed?
Secondly will this Powershell command also work to remove/rollback Enablement updates?
Super helpful! Thank you! I recently had a problem where a Microsoft update (KB5028245) seemed to conflict with the version of ExplorerPatcher I was running on Windows 11. The desktop and taskbar were flashing repeatedly, though I could load Task Manager, which wouldn’t flash on the screen. I needed to find a way to uninstall the recent update and the application of concern, but my system would not let me get to Settings. I tried launching appwiz.cpl, but that window would not load, either. Then I found your PowerShell instructions and I was able to remove the patch. Upon reboot, I could now get to Add/Remove programs and further clean up. I am back in control of my system and enjoyed learning a new technique from your site.
Glad to hear that.