How to Deploy Microsoft LAPS Using SCCM
In this short post we will see how to deploy Microsoft LAPS using SCCM. Microsoft LAPS can be deployed using various methods, one among them is using the Configuration Manager or SCCM.
The Local Administrator Password Solution (LAPS) provides management of local account passwords of domain joined computers. Passwords are stored in Active Directory (AD) and protected by ACL, so only eligible users can read it or request its reset.
If you are planning to implement LAPS in your setup, the below topics should help you.
- Install and deploy Microsoft LAPS Software – https://www.prajwaldesai.com/how-to-install-and-deploy-microsoft-laps-software/
- How to Configure Active Directory for LAPS – https://www.prajwaldesai.com/how-to-configure-active-directory-for-laps/
- Configure Group Policy for LAPS – https://www.prajwaldesai.com/how-to-configure-group-policy-for-laps/
How to Deploy Microsoft LAPS using SCCM
To deploy LAPS using SCCM
- Launch the SCCM console.
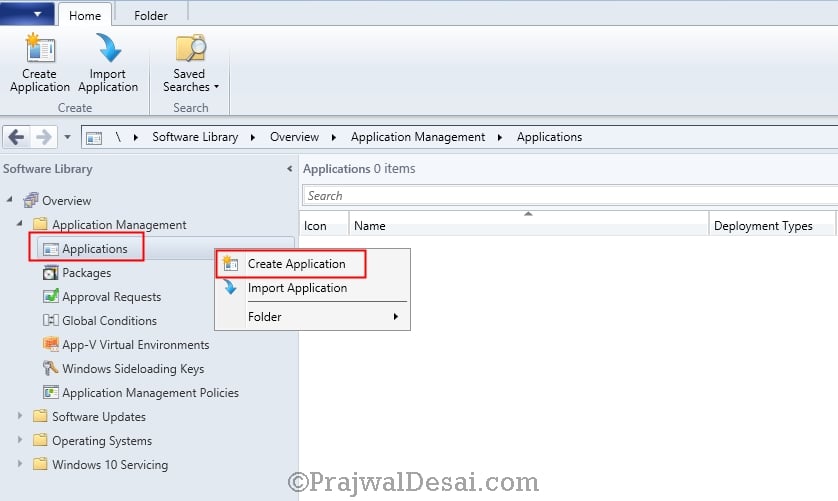
- Navigate to Software Library, expand Application Management.
- Right click Applications and click Create Application for LAPS.
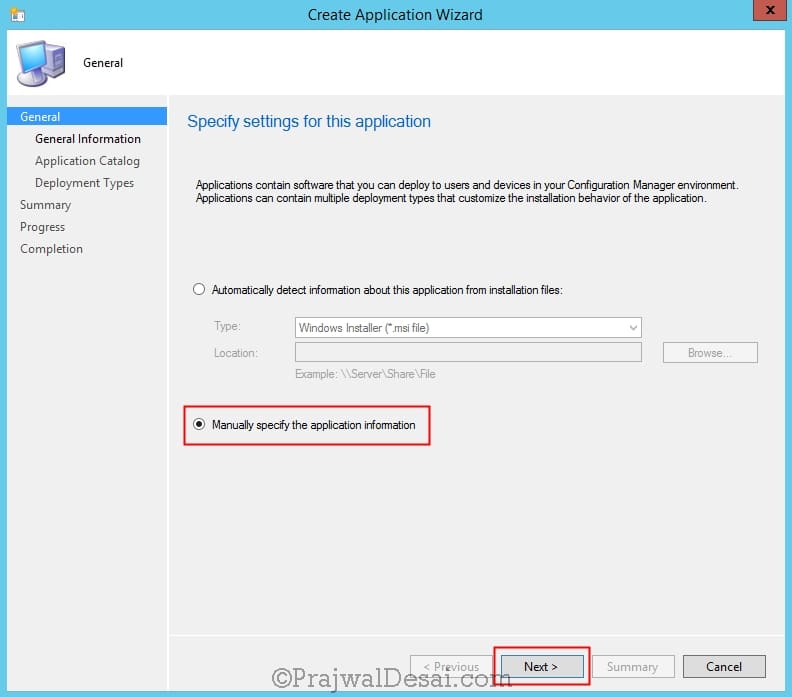
In the Create Application Wizard, choose Manually specify the application information. Click Next.
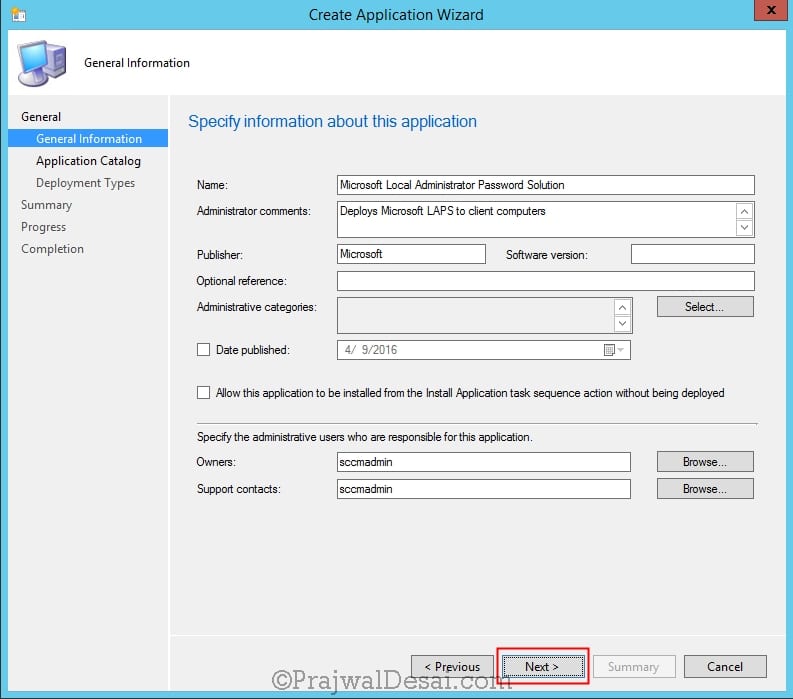
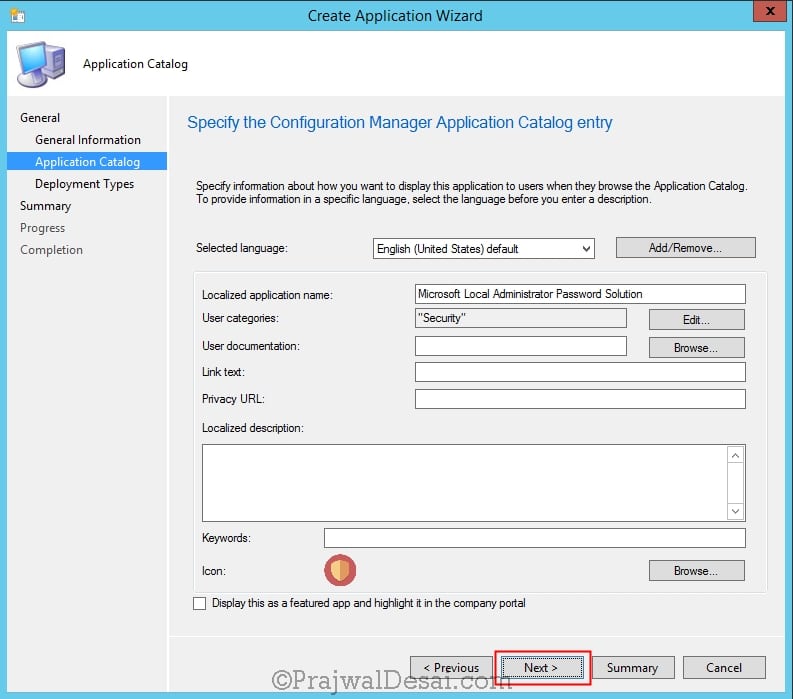
Provide a name to the app and some other details, click on Next.
Click Next.
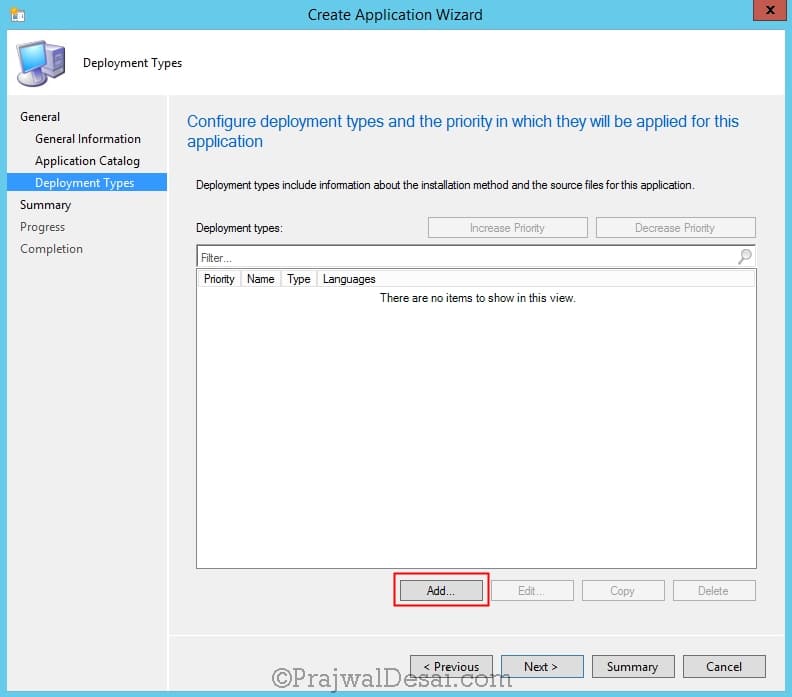
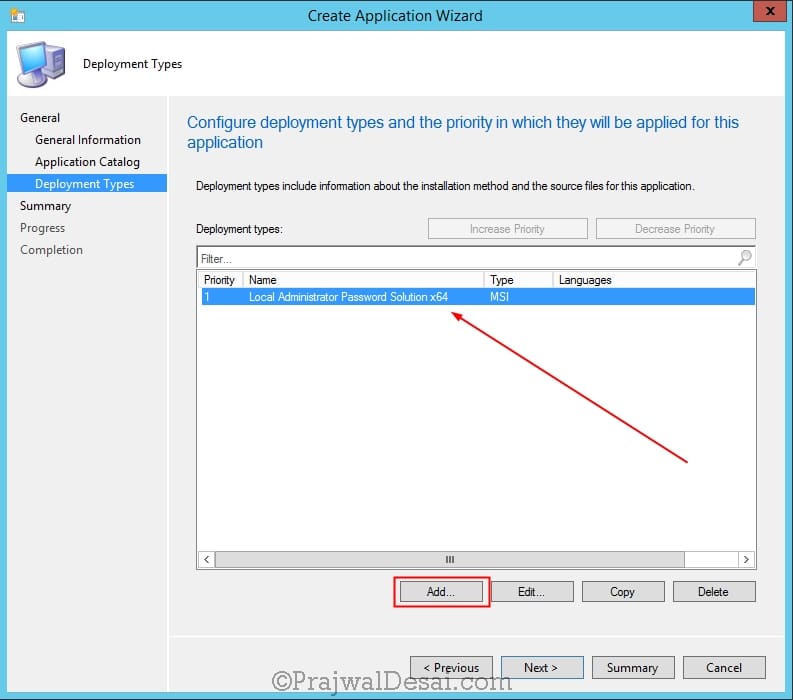
I will add both x64 and x86 LAPS msi files. Click Add.
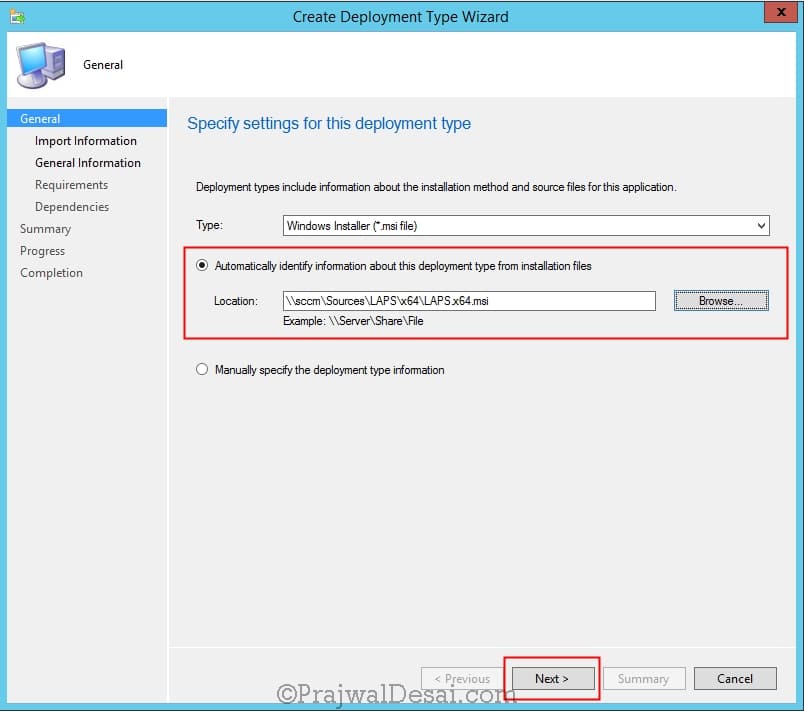
Choose Automatically identify information about this deployment type from installation files. Choose the location of LAPS x64 msi file. Click Next.
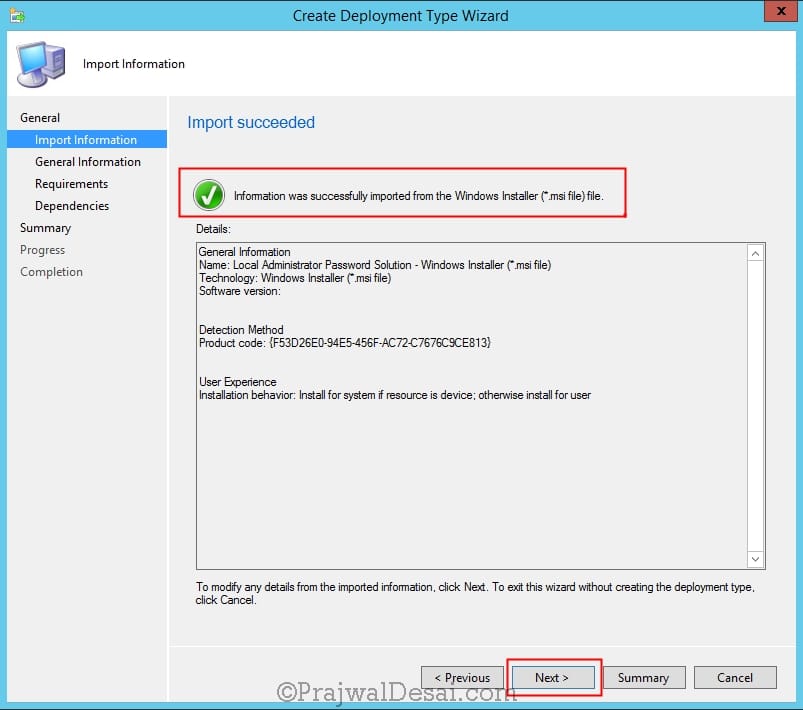
The information is picked up from msi file. Click Next.
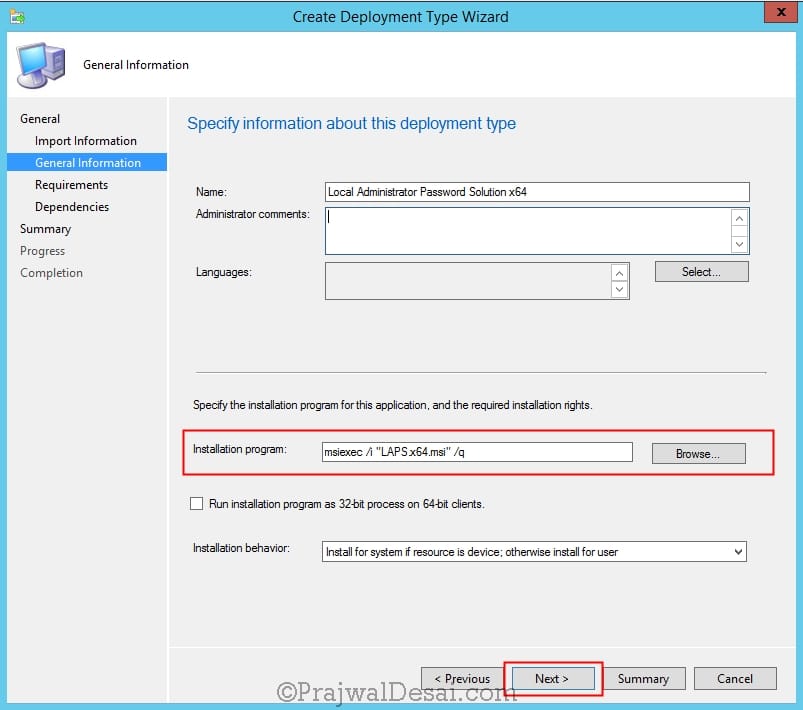
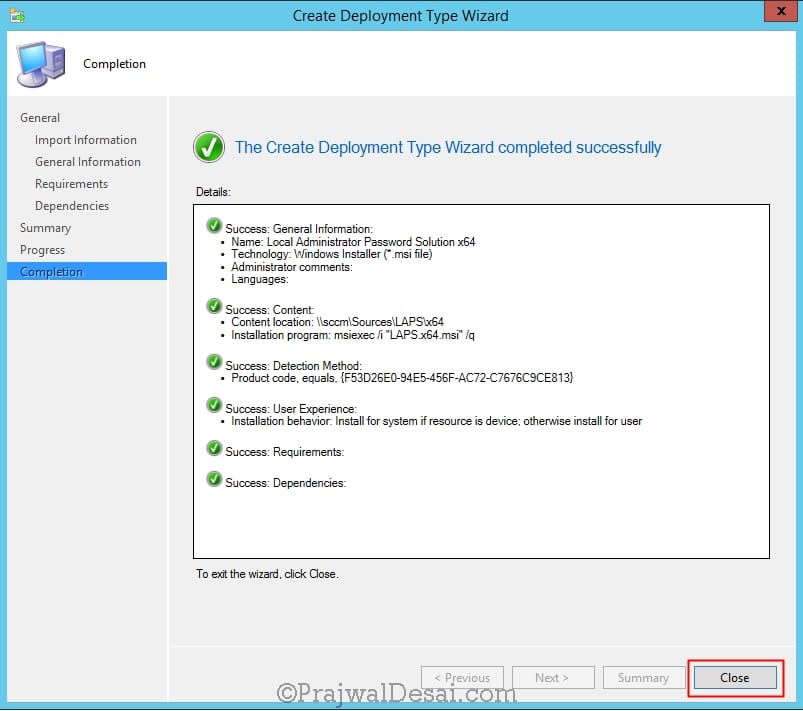
Provide a name to the deployment type and ensure the installation program is same as seen in the screenshot below. Click Next.
I have not specified any Requirements and dependencies for this app. So click Next and finally on the completion page click on Close.
So we have just imported the LAPS x64 msi. The next step is to import LAPS x86 msi file. Click on Add. You need to repeat the same steps as shown above to import the LAPS x86 msi file.
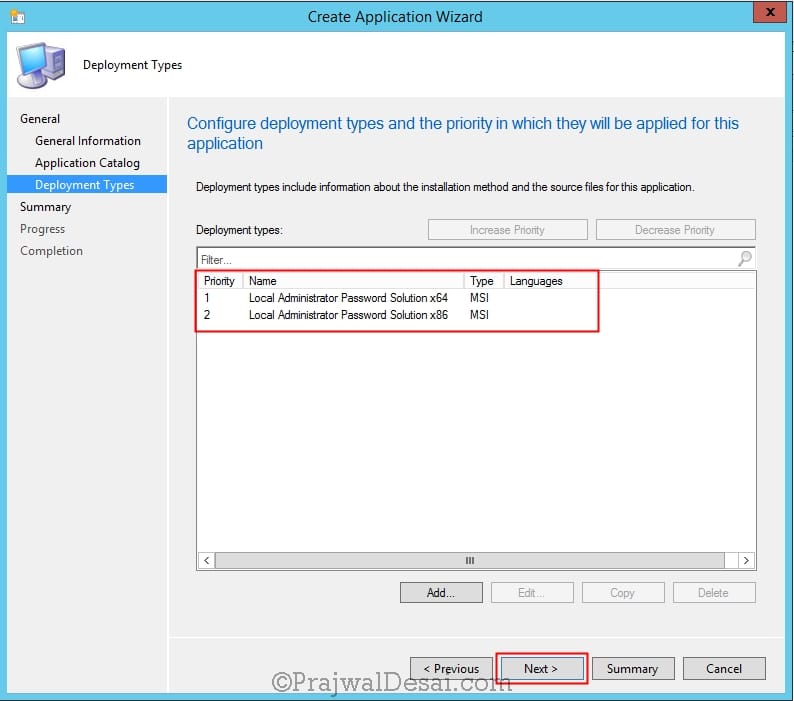
Once you import the LAPS x86, you will see both the msi files. Click Next.
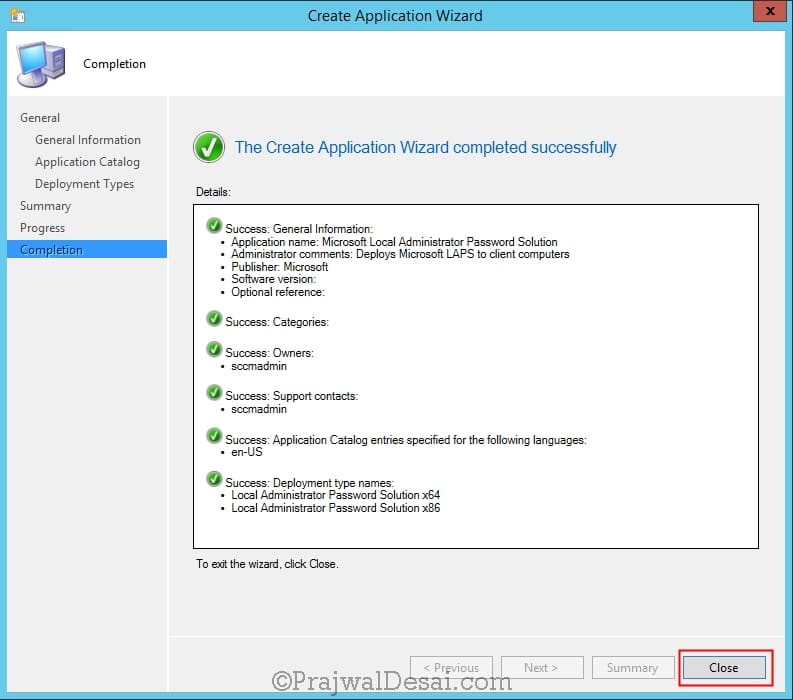
On the completion screen, click on Close.
Installing Microsoft LAPS
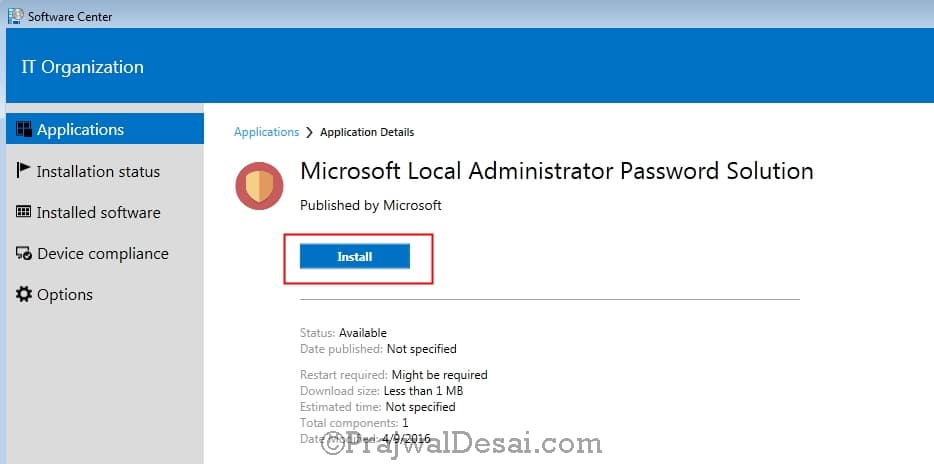
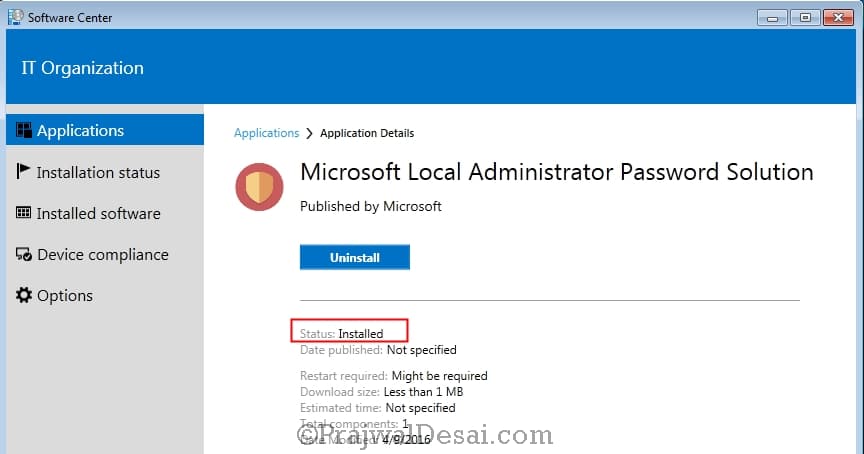
Distribute the LAPS application to the SCCM distribution points. Deploy the Microsoft LAPS to the device collection. On the client machine, launch the software center. Under Applications, select the LAPS app and click Install.
The installation is very quick and within few seconds you will find the LAPS installed on the computer. To verify the LAPS installation, launch the control panel and click Programs and Features. If the installation is successful you will find the LAPS entry in the list of installed programs in Programs and Features.
Note – The uninstall command and detection methods are automatically added when you import the msi file. The uninstall option should also work fine. In case of install errors look for appenforce.log file for troubleshooting.

Install just LAPS UI:
msiexec /i “LAPS.x64.msi” ADDLOCAL=Management.UI ALLUSERS=1 /qn
Curious. Why not just define the deployment type automatically from the msi, instead of manually?
Hi, is it possible that we can deploy LAPS “Package” instead of “Application”. What is the difference between Package and Application. Is there any limitations on both?
Thanks but how do you also deploy the LAPS UI via SCCM? is there a MSI command line to include that feature?
Do you not need to specify requirements for the apps so that they only deploy to the appropriate architecture?
Yeah, you’re right. It also came to my mind and already did it in my lab.