Desktop Analytics Logs Collector (DALogsCollector Tool)
In this post I am going to cover about Desktop Analytics logs collector tool. It is also referred as DALogsCollector tool or M365 Analytics Log Collector. If you are looking to troubleshoot the device enrollment issues in Desktop Analytics, this tool is for you.
There are certain prerequisites to run this tool and I am also going to cover it in this post. This tool was first introduced in SCCM 1906 and you must be running Configuration Manager 1906 and above to get this tool.
Table of Contents
What is Desktop Analytics Logs Collector Tool
The logs collector tool helps you to troubleshoot Desktop Analytics device enrollment issues. This tool is available starting with Configuration Manager version 1906. The DesktopAnalyticsLogsCollector.ps1 tool is located in the Configuration Manager install directory.
For example if you have installed SCCM on C: drive, the location of tool is C:\Program Files\Microsoft Configuration Manager\tools\DesktopAnalyticsLogsCollector.
When you run the DesktopAnalyticsLogsCollector.ps1, it runs some basic troubleshooting steps and collects the relevant logs into a single working directory. You can grab the log files and share this content with Microsoft support.

DALogsCollector Prerequisites
There are some prerequisites before you run DALogsCollector script or tool.
- A Desktop Analytics client running Windows 10, Windows 8.1, or Windows 7 with Service Pack 1.
- You must run the script on the device as an administrative user and Run as Administrator.
- Minimum required PowerShell version is 4.0 or later.
- Requires .NET framework version 4.6 or later on a machine.
- Windows Management Framework version 4.0 or later must be installed on the machine.
How to Run Desktop Analytics Logs Collector Tool
Here are the steps to run Desktop Analytics logs collector tool on a machine.
- First of all copy DesktopAnalyticsLogsCollector.ps1 to the Desktop Analytics client machine.
- On the client computer, run the PowerShell as administrator.
- You can also run PowerShell ISE as administrator and open the script directly.
- Run the script and let the tool collect the log files.
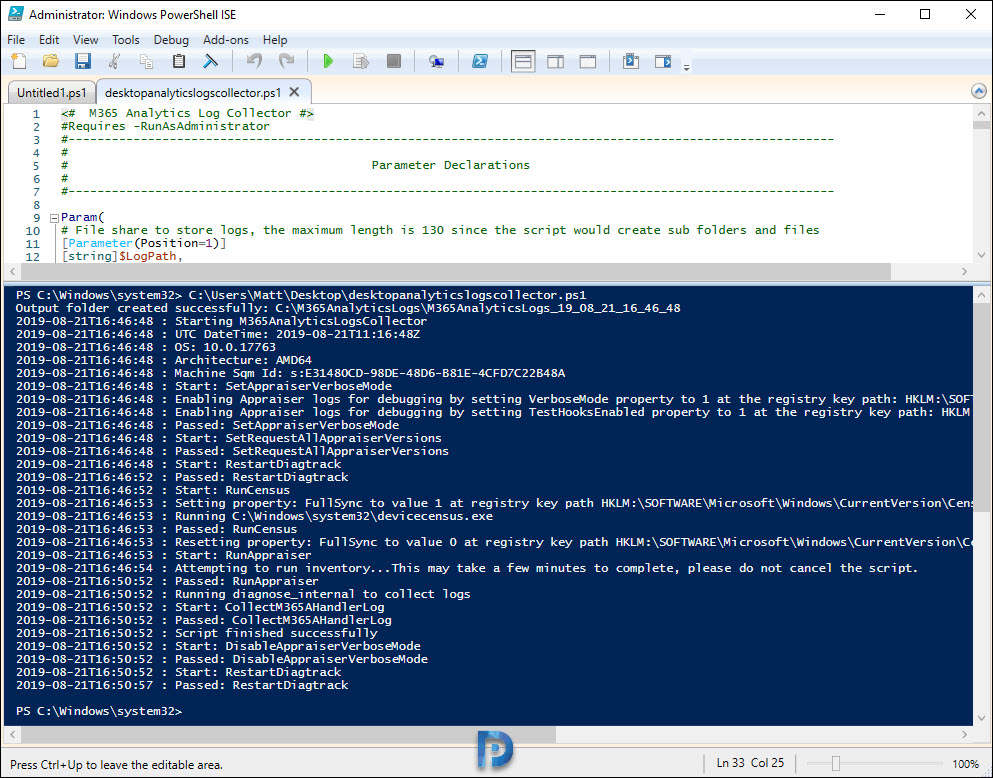
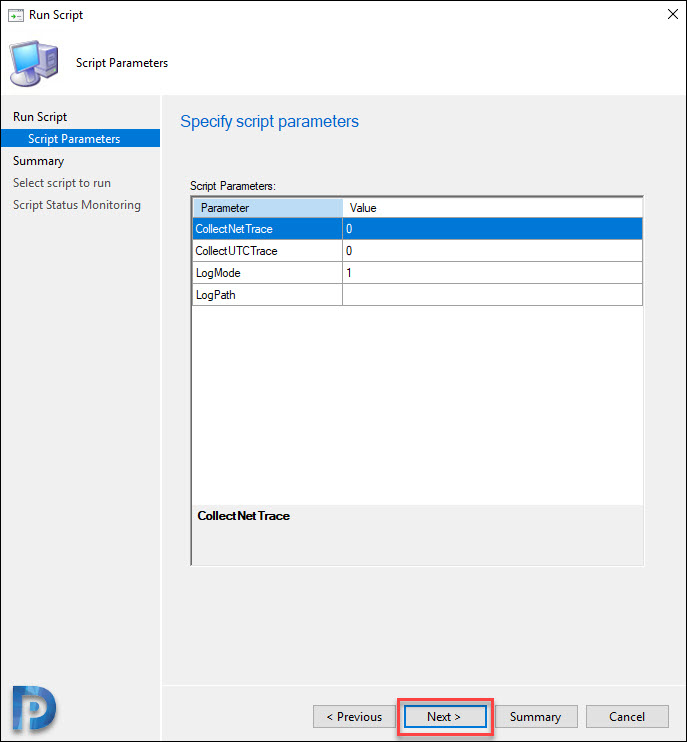
In the below example, I am running the script with default values. The script supports usage of parameters such as –LogPath, -LogMode, -CollectNetTrace and -CollectUTCTrace. You can run the script by specifying additional parameters which are covered here.

Below is the output of M365AnalyticsLogsCollector script.
Output folder created successfully: C:\M365AnalyticsLogs\M365AnalyticsLogs_19_08_21_16_46_48
2019-08-21T16:46:48 : Starting M365AnalyticsLogsCollector
2019-08-21T16:46:48 : UTC DateTime: 2019-08-21T11:16:48Z
2019-08-21T16:46:48 : OS: 10.0.17763
2019-08-21T16:46:48 : Architecture: AMD64
2019-08-21T16:46:48 : Machine Sqm Id: s:E31480CD-98DE-48D6-B81E-4CFD7C22B48A
2019-08-21T16:46:48 : Start: SetAppraiserVerboseMode
2019-08-21T16:46:48 : Enabling Appraiser logs for debugging by setting VerboseMode property to 1 at the registry key path: HKLM:\SOFTWARE\Microsoft\Windows NT\CurrentVersion\AppCompatFlags\Appraiser
2019-08-21T16:46:48 : Enabling Appraiser logs for debugging by setting TestHooksEnabled property to 1 at the registry key path: HKLM:\SOFTWARE\Microsoft\Windows NT\CurrentVersion\AppCompatFlags\Appraiser
2019-08-21T16:46:48 : Passed: SetAppraiserVerboseMode
2019-08-21T16:46:48 : Start: SetRequestAllAppraiserVersions
2019-08-21T16:46:48 : Passed: SetRequestAllAppraiserVersions
2019-08-21T16:46:48 : Start: RestartDiagtrack
2019-08-21T16:46:52 : Passed: RestartDiagtrack
2019-08-21T16:46:52 : Start: RunCensus
2019-08-21T16:46:53 : Setting property: FullSync to value 1 at registry key path HKLM:\SOFTWARE\Microsoft\Windows\CurrentVersion\Census to turn on Census FullSync mode
2019-08-21T16:46:53 : Running C:\Windows\system32\devicecensus.exe
2019-08-21T16:46:53 : Passed: RunCensus
2019-08-21T16:46:53 : Resetting property: FullSync to value 0 at registry key path HKLM:\SOFTWARE\Microsoft\Windows\CurrentVersion\Census to turn off Census FullSync mode
2019-08-21T16:46:53 : Start: RunAppraiser
2019-08-21T16:46:54 : Attempting to run inventory...This may take a few minutes to complete, please do not cancel the script.
2019-08-21T16:50:52 : Passed: RunAppraiser
2019-08-21T16:50:52 : Running diagnose_internal to collect logs
2019-08-21T16:50:52 : Start: CollectM365AHandlerLog
2019-08-21T16:50:52 : Passed: CollectM365AHandlerLog
2019-08-21T16:50:52 : Script finished successfully
2019-08-21T16:50:52 : Start: DisableAppraiserVerboseMode
2019-08-21T16:50:52 : Passed: DisableAppraiserVerboseMode
2019-08-21T16:50:52 : Start: RestartDiagtrack
2019-08-21T16:50:57 : Passed: RestartDiagtrack
The file line in the output shows the location of folder containing the DA log files. “Output folder created successfully: C:\M365AnalyticsLogs\M365AnalyticsLogs_YY_MM_DD_HH_MM_SS“.
Deploy DALogsCollector Script via Configuration Manager
In the above method, we manually ran the script on a computer to collect relevant log files. However you can deploy the DALogsCollector Script via Configuration Manager.
To do so you must first create a script and approve it. I am not going to cover the steps to create a script and approve it, I will do that in some other post.
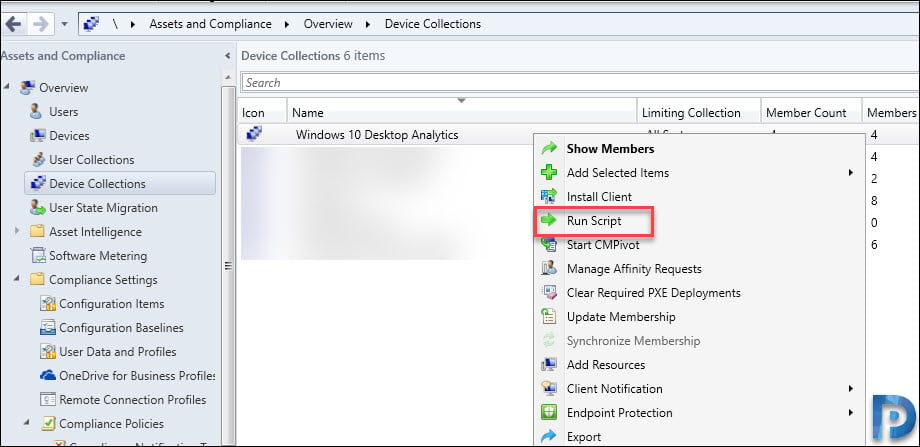
To run the script against the device collection, right click device collection and click Run Script.
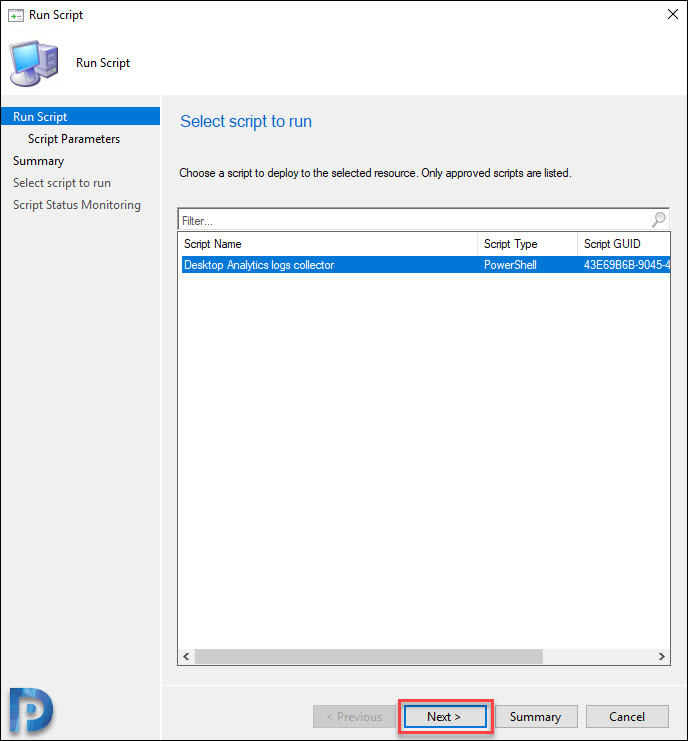
Select the DesktopAnalyticsLogsCollector script and click Next.
Click Next.
Now wait for Script to run on all the machines that are part of the device collection. Finally the script status shows completed and I can see the script execution is successful on all the machines.


