Deploy RSAT for Windows 10 using SCCM 2012 R2
Remote Server Administration Tools for Windows 10 lets IT administrators manage Windows Server from a remote computer running the full release version of Windows 10. Remote Server Administration Tools for Windows 10 includes Server Manager, Microsoft Management Console (MMC) snap-ins, consoles, Windows PowerShell cmdlets and providers, and command-line tools for managing roles and features that run on Windows Server Technical Preview. In my previous posts we have seen deploying various softwares using SCCM. Let’s also see the steps to deploy RSAT for Windows 10 using SCCM 2012 R2.
Steps to Deploy RSAT for Windows 10 using SCCM 2012 R2
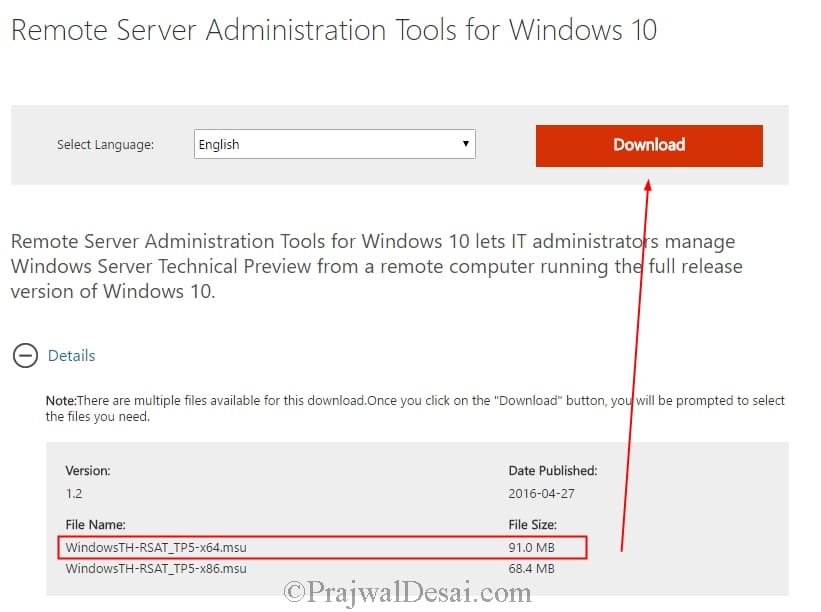
The RSAT for Windows 10 is available in 32 bit and 64 bit version. Click on the below link to download the Remote Server Administration Tools for Windows 10 package that is appropriate for your computer’s architecture.
Note :- Remove all older versions of Administration Tools Pack or Remote Server Administration Tools from the computer before you install Remote Server Administration Tools for Windows 10. Remote Server Administration Tools for Windows 10 can be installed ONLY on computers that are running the full release of Windows 10 Professional, Windows 10 Enterprise, or Windows 10 Education. They cannot be installed on Windows RT, computers with an Advanced RISC Machine (ARM) architecture, or other system-on-chip devices.
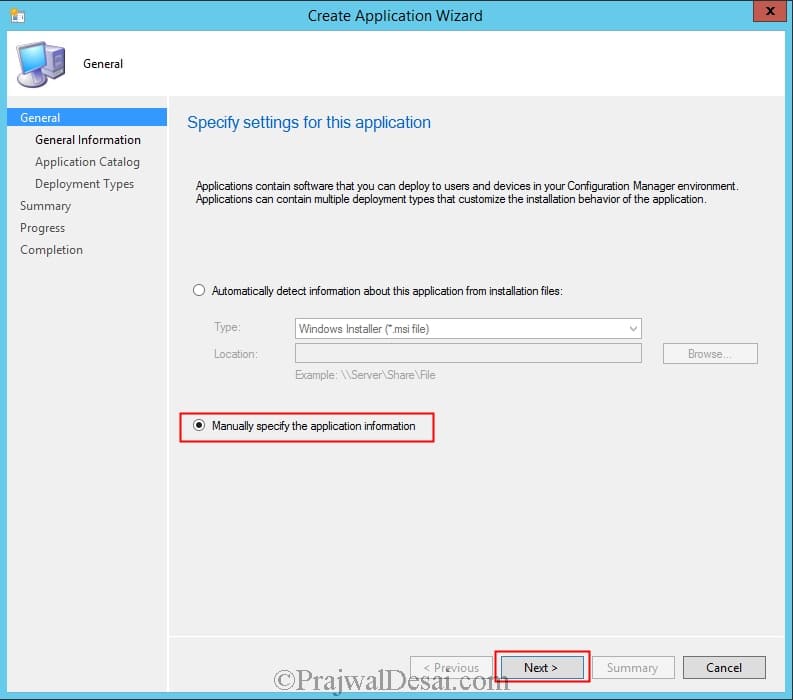
 Copy the RSAT installer file to the sources folder or any shared folder on the ConfigMgr server. Launch the Configuration Manager console, click Software Library, under Application Management right click Applications and click Create Application. Choose Manually specify the application information and click Next.
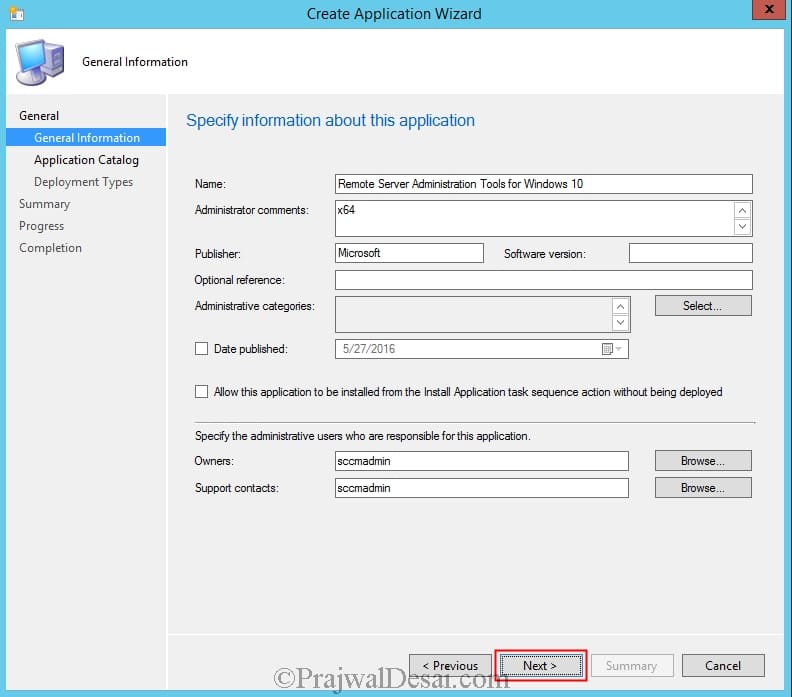
Specify some information about the application such as Name, Publisher etc. Click Next.
You can specify more information about the application here. Click Next.
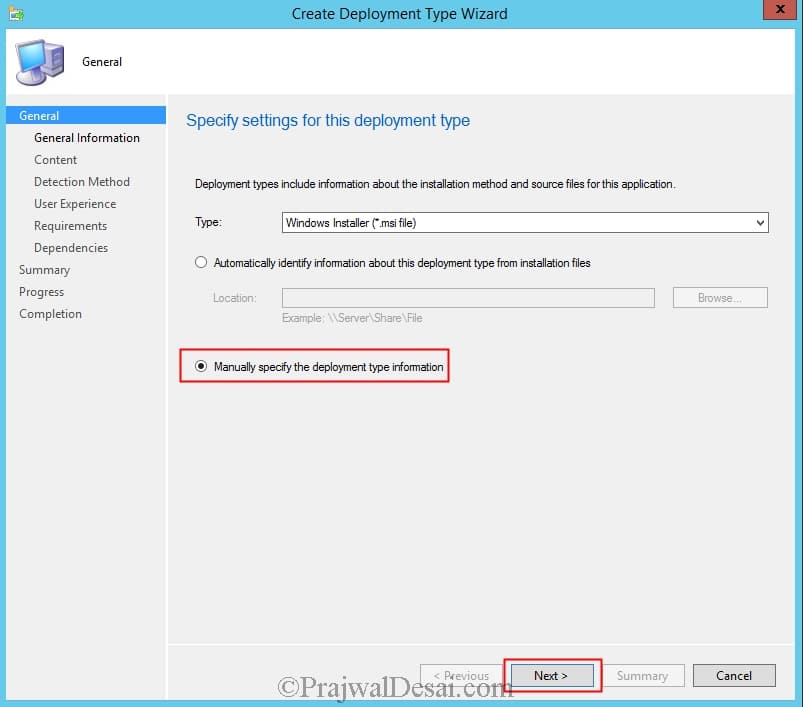
We will now configure the Deployment Type for RSAT. Click on Add. Let the deployment type be a Windows Installer (*.msi), choose Manually specify the deployment type information. Click Next.
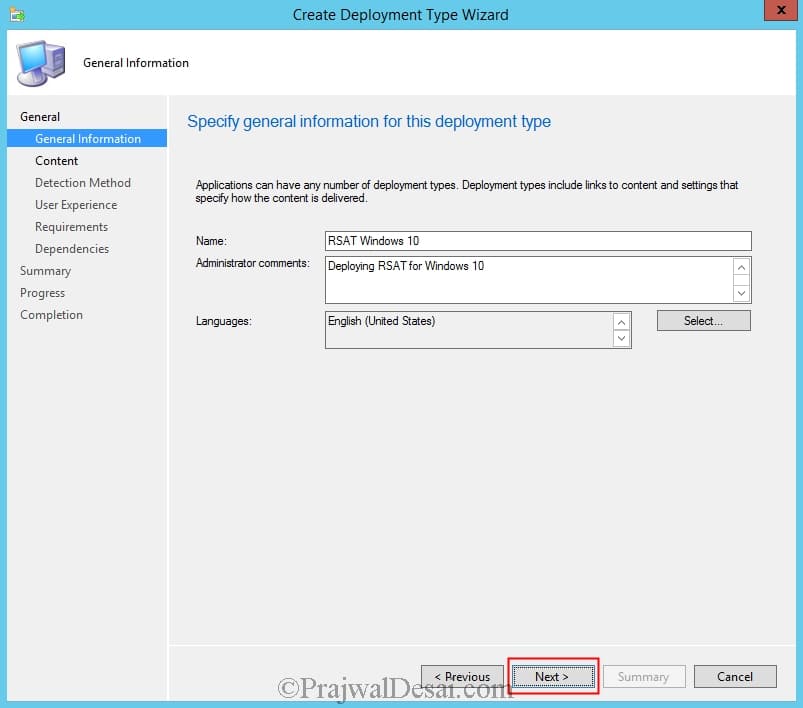
Add some information about this deployment type and click Next.
For content location, provide the path where the RSAT is located. Specify Install and Uninstall command as shown below.
Installation Program – wusa WindowsTH-RSAT_TP5-x64.msu /quiet /norestart
Uninstall Program – wusa /uninstall WindowsTH-RSAT_TP5-x64.msu /quiet /norestart
Click Next.
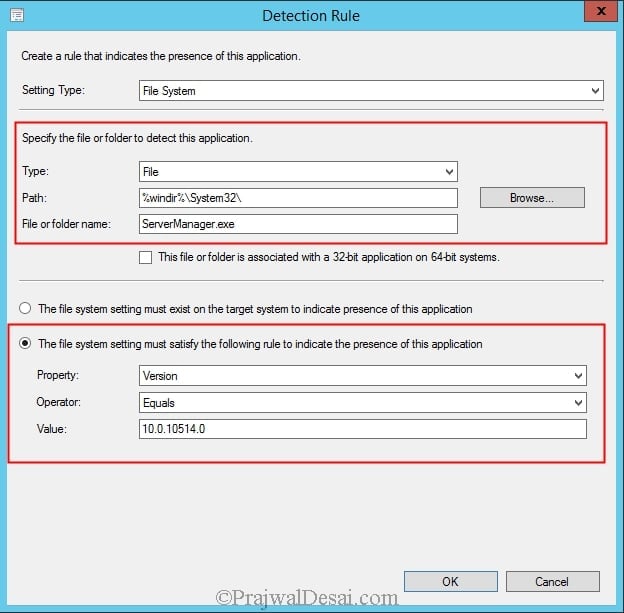
On the Detection Rule window, choose Setting Type as File System. Under Specify the file or folder to detect the app, set the following
Type – File
Path –%windir%>System32
File or Folder name – ServerManager.exe
Select the option file system setting must the following rule to indicate the presence of this application.
Set Property = Version, Operator = Equals, Value = 10.0.10514.0
Click OK and then Next.
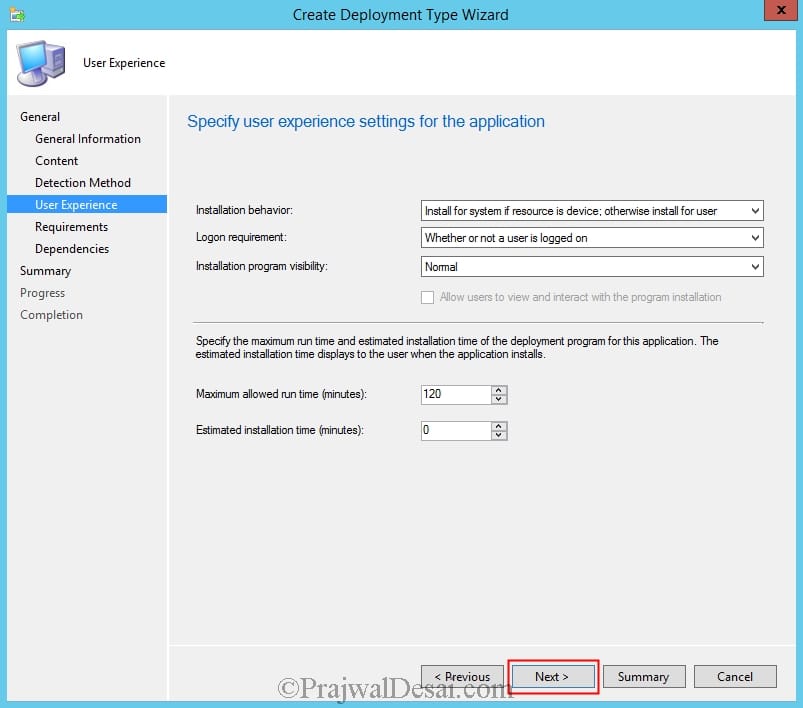
Select the Installation behavior as Install for system if resource is device; otherwise install for user, Logon requirement as Whether or not a user is logged on and Installation program visibility to Normal. Click Next and complete the remaining steps.
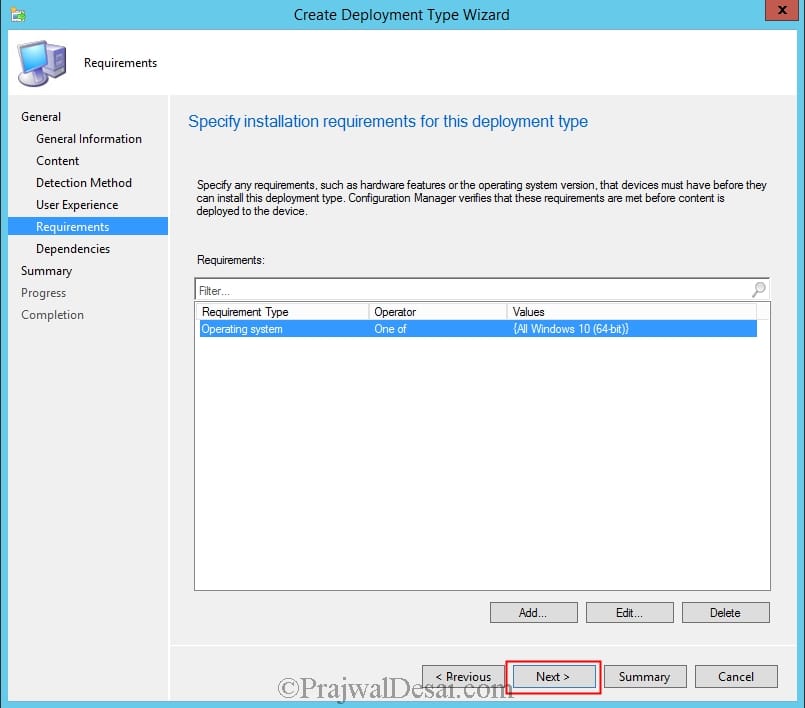
As Remote Server Administration Tools for Windows 10 can be installed only on computers that are running the full release of Windows 10, I have setup a requirement that the OS has to be Windows 10 64 bit. Click Next.
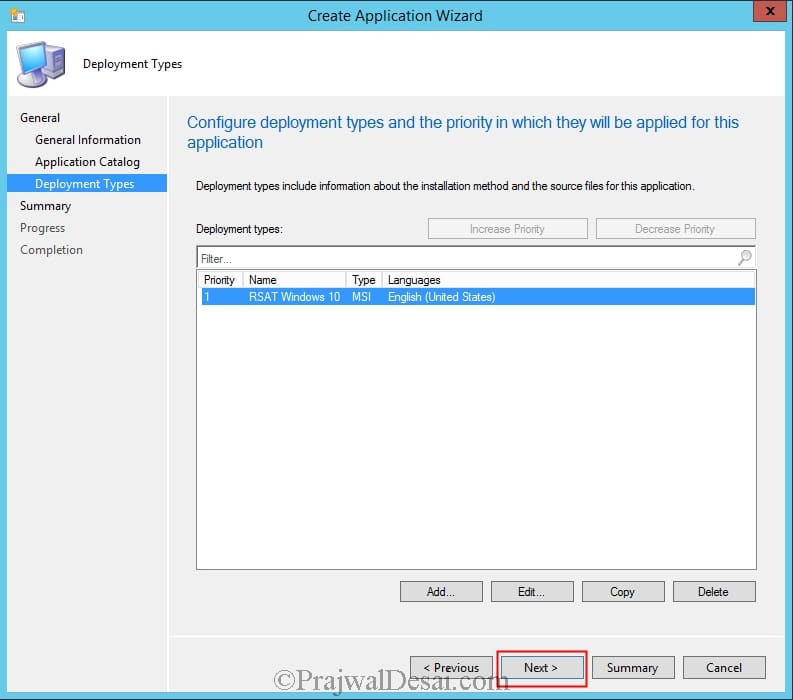
Click Next.
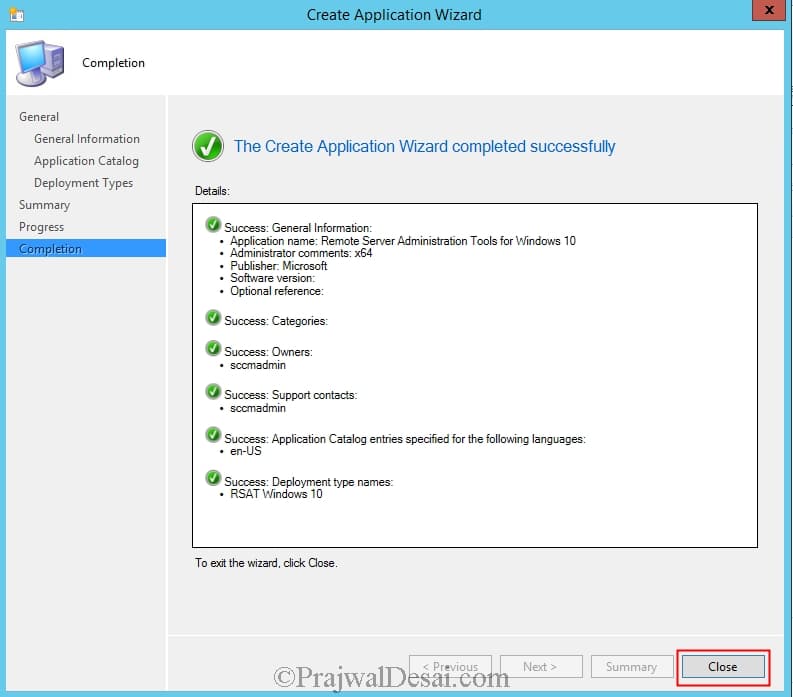
Click Close.
Right click the RSAT application and click on Distribute Content. Add the Distribution Point and complete the wizard. After you distribute the application to DP, right click on the RSAT application and click on Deploy. Choose the Collection where this application is to be deployed and click Next. Under Deployment settings, set the Action as Install and Purpose as Available. Click on Next and complete the wizard.
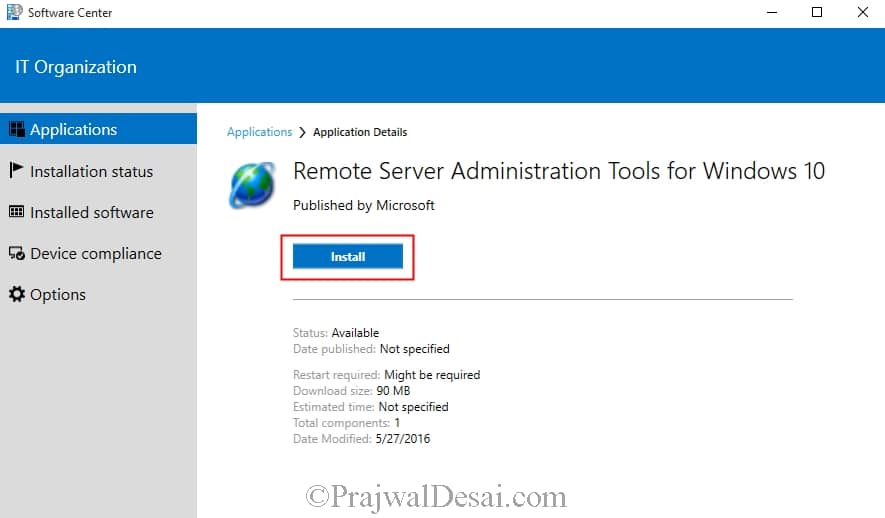
After few minutes the RSAT app can be seen in the Software Center under Available Software. Select the app and click on Install Selected. The app is downloaded from the DP and installed.
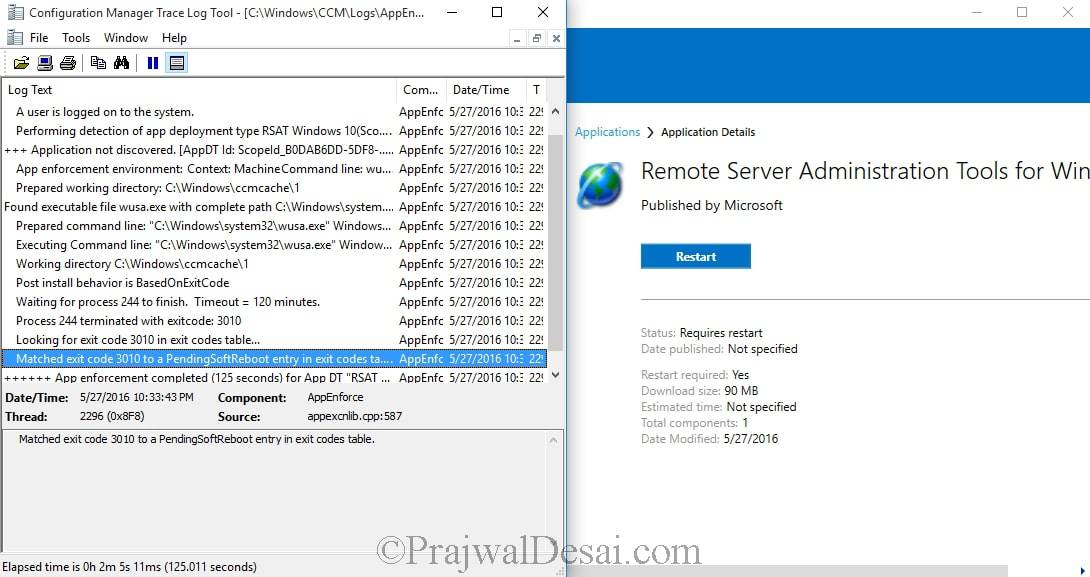
You can check the installation progress by opening Appenforce.log file using CMTrace tool. After the installation a restart is required.
All tools are enabled by default. You do not need to open Turn Windows features on or off in Windows 10 to enable tools that you want to use.




How to create an install/uninstall package with all RSAT CAB files?
Example: Microsoft-Windows-ActiveDirectory-DS-LDS-Tools-FoD-Package~31bf3856ad364e35~amd64~~.cab
I am having the same problem with uninstall in CM. Ran the command from CMD worked.
Merci Prajwal
I’m receiving an error 2 back on all systems that I attempt this on, any idea?
config and Install worked perfectly through software center but once install. I do not have the option to uninstall in software center. Still indicate install, but confirmed that it was install in the admin tool , also all application are working fine. Double check my uninstall cmd:
wusa.exe /uninstall WindowsTH-RSAT_WS2016-x64.msu /quiet /norestart
Any idea?
If you run that uninstall command separately from command prompt, do you see the uninstall working ?.
I’m getting the same problem for the same msu file. It works fine if I run the uninstall command in a command prompt, but it does not work in software center.
Process terminated with exitcode: 2147549183
I followed exactly what you said and I’m now getting an error in Software Centre, even though the Software is installed.
0x240006 (2359302)