How to Add and Verify a Domain in Microsoft Intune
This post shows how to add and verify a Domain in Microsoft Intune. In the previous post we saw the Microsoft Intune overview and its features, we also saw the steps to create Microsoft Intune account. In this post we will see how to add and verify a domain in Microsoft Intune.
When you sign up for a Microsoft cloud service, you are issued a domain name that has the following format example.onmicrosoft.com. You can continue to use that initial domain name, or you can add your own custom domain name to the cloud service.
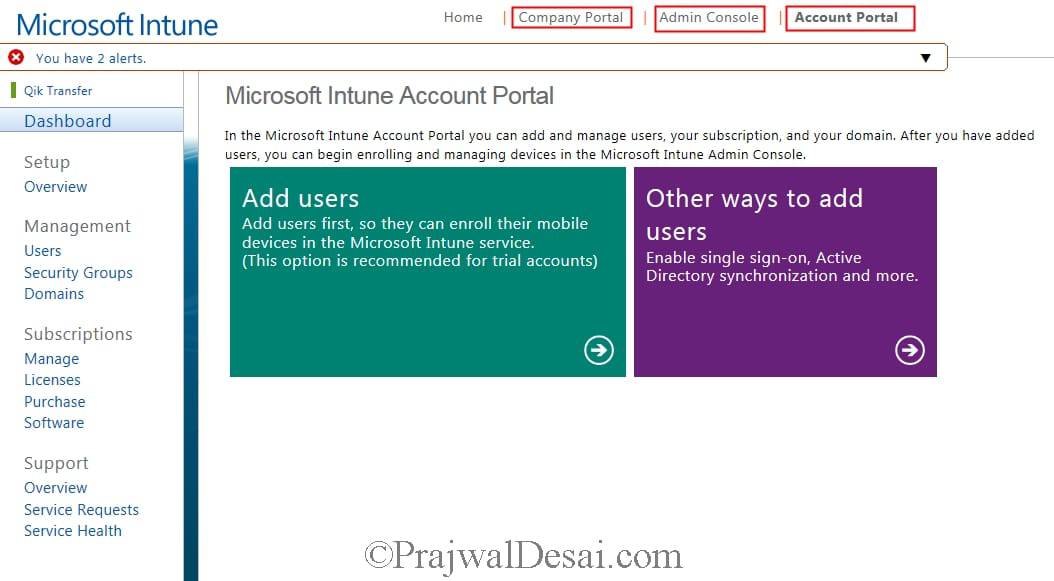
When you login to the Microsoft Intune account portal, there are few things that I would want you to understand. On the top bar you see Company Portal, Admin Console and Account Portal. These are three important web portals.
Company Portal – A company specific custom portal that users can access via the web. Users can view their managed devices and company published applications that can be deployed to their devices.
Admin Console – A service specific administrative console where all policies and processes can be created and assigned to devices, you can also enroll and manage your devices once the users have been added to the account portal.
Account Portal – When you access this portal, you an add and manage users, your subscription and your domain.
How to add and verify a Domain in Microsoft Intune
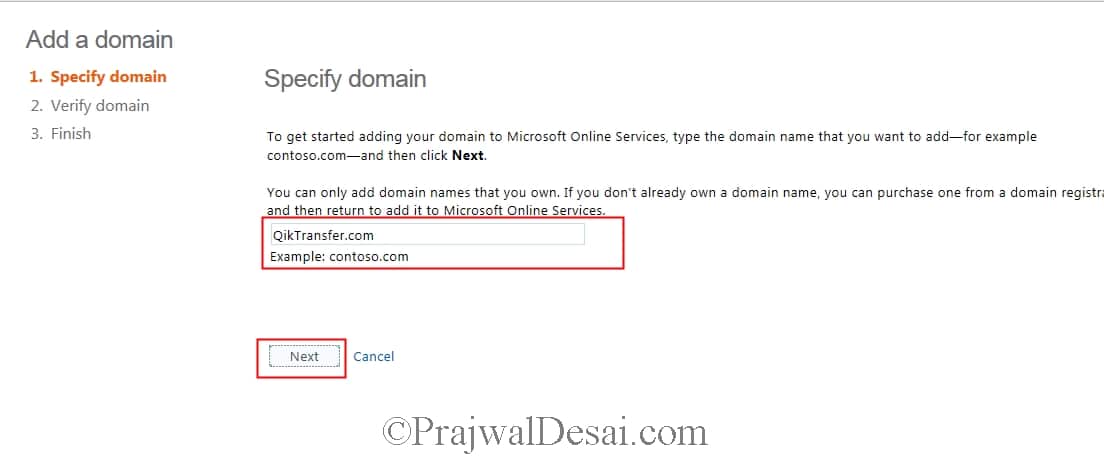
When you sign up for a Microsoft cloud service, you get a domain name that has the following format example.onmicrosoft.com. You can continue to use that initial domain name, or you can add your own custom domain name to the cloud service. Let’s now take a look at steps for adding a domain. Under the Management, click on Domains. Click on Add a Domain.
In the next step, specify or add your domain, click Next.
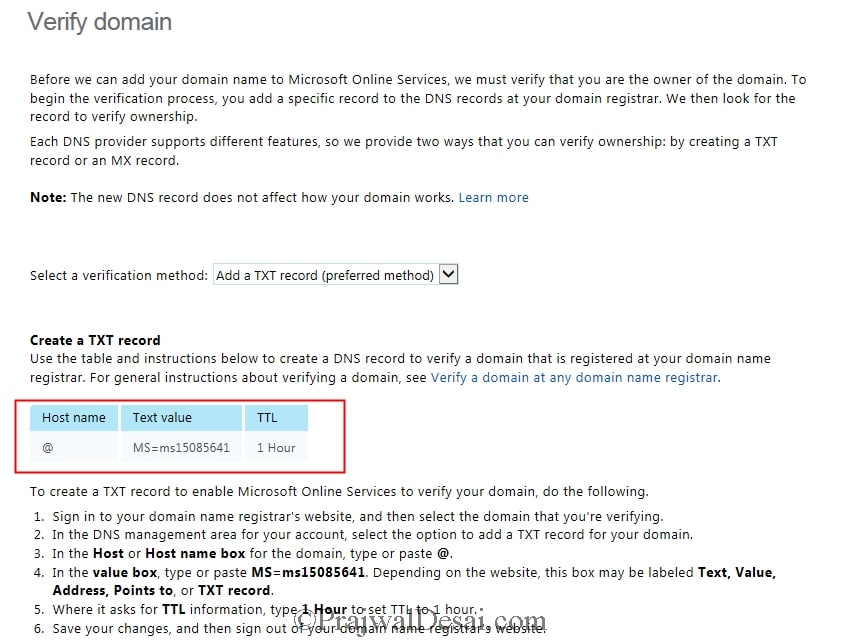
Verify Domain – In the previous a domain name was specified, the next step is to verify the domain. For domain verification you can either create a TXT record or MX record in DNS provider settings. I feel creating TXT record is very easy, so i will go with that. You can also configure a DNS record for your domain that directs EnterpriseEnrollment to manage.microsoft.com. I will be covering this in a separate post.
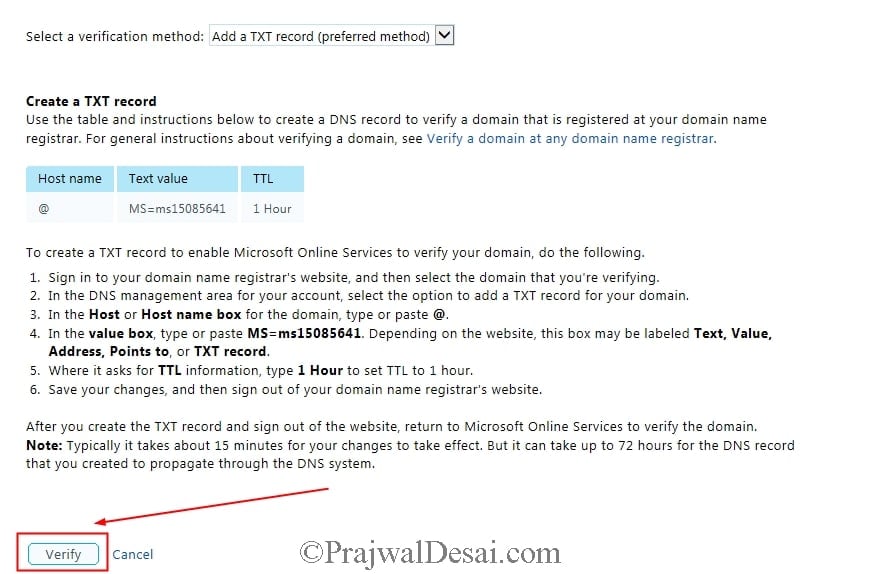
Choose the verification method as Add a TXT record, note down the info required to create TXT record (Host Name, Text Value, TTL).
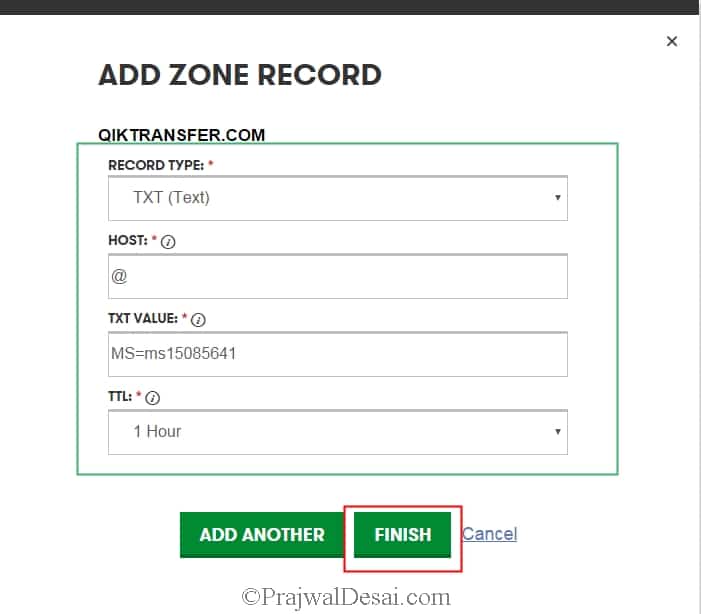
In my case, I’ve got my public DNS hosted with GoDaddy. However I believe the process is very similar across all DNS providers. Login to your DNS provider, look for the DNS section where you have options to create records. Create a TXT record with the same info that was shown on Verify Domain page. Click Finish.
Note – When you create a TXT record, DNS can take a while to update depending on your DNS hosting provider. During this if you try to verify domain, you might end up seeing error Verification DNS record not found. So I would suggest you to wait for at least 15-30 minutes before you verify the domain in the next step.
After adding the TXT record in DNS, click on Verify.
You’ll now receive a confirmation that the domain has been added to your account successfully.
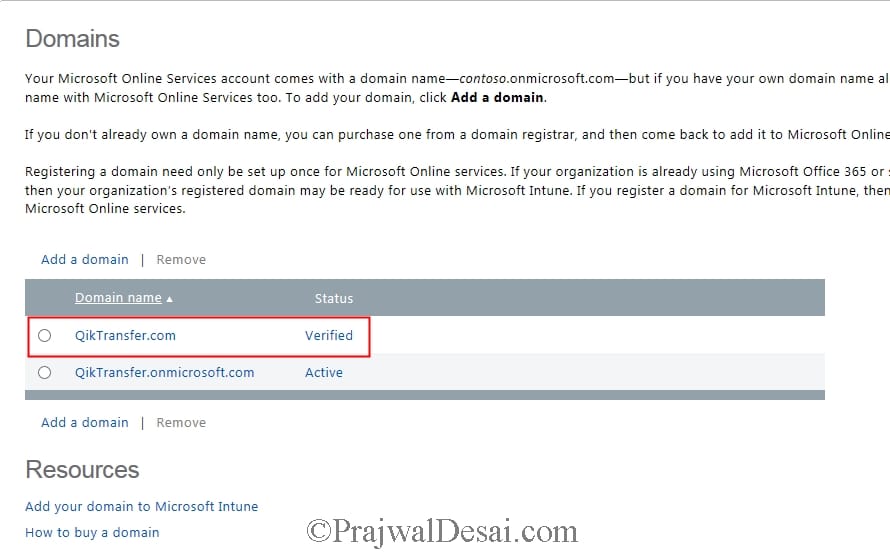
Once the domain is verified, you should see that domain status as verified.

