Capture SCCM Task Sequence Log files post OSD
This post shows the steps to capture SCCM task sequence log files post OSD. In most cases the log files are required to investigate OSD failure. You basically copy the log files from failed deployment and troubleshoot the issue. SMSTS.log file is a something that you need to get hold of for troubleshooting OSD issues. The smsts.log file changes it location depending on the phase of the operating system installation. However this time I had a different requirement. I wanted to capture the log files upon successful OSD. It is a matter of adding few steps in the task sequence.
Capture SCCM Task Sequence Log files post OSD
To summarize, I will be adding the following steps to the TS sequence to capture the log files.
- Connect to a network folder
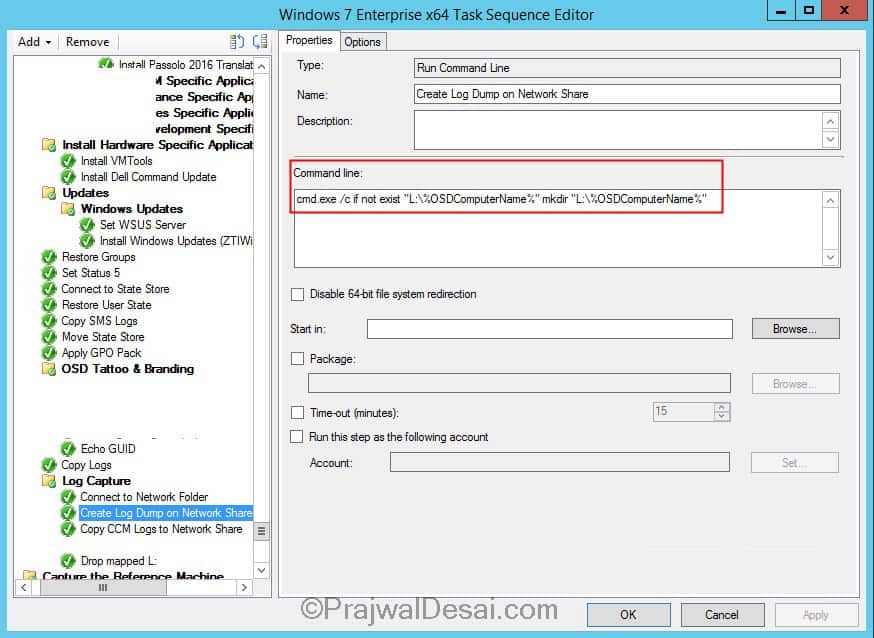
- Create log dump on network share
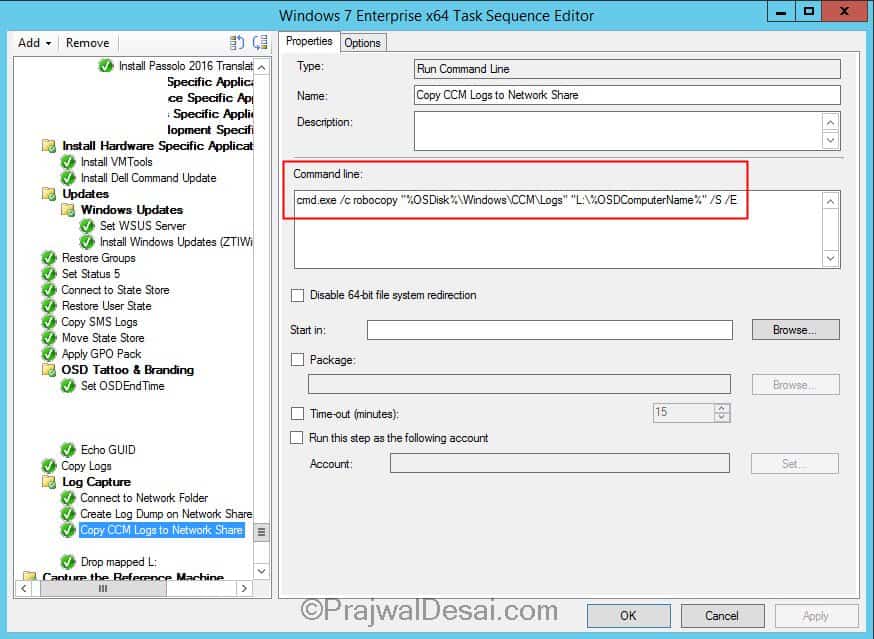
- Copy SCCM log files to network share
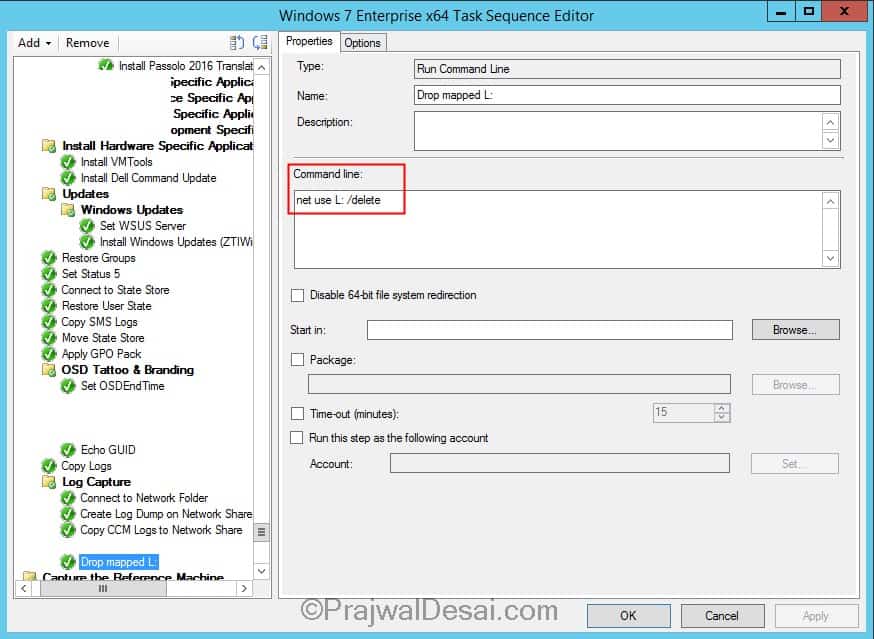
- Drop the mapped letter
To capture sccm task sequence log files post OSD, follow the below steps.
1. Connect to a network share – Create a network share and provide full permissions to user account. In my case I have created folder with name Logging. The user account is the one that you specify in the below step. Create a new group by clicking Add > New Group. Name the group as Log Capture. To add the first step, click on Add > General > Connect to Network Folder. Enter the path, choose the Drive Letter and specify the user account. Under options tab, check the box – Continue on Error.  2. Create Log Dump on Network Share – Click on Add > General > Run Command Line. Specify the command line as
 cmd.exe /c if not exist "L:\%OSDComputerName%" mkdir "L:\%OSDComputerName%". Under Options tab, check the box Continue on error.
 3. Copy CCM Logs to Network Share – In this step we will copy the ccm log files to network share. Click on Add > General > Run Command Line. Specify the command line as
 cmd.exe /c robocopy "%OSDisk%\Windows\CCM\Logs" "L:\%OSDComputerName%" /S /E. Under Options tab, check the box Continue on error.
 4. Drop Mapped Drive Letter – Click on Add > General > Run Command Line. Specify the command line as
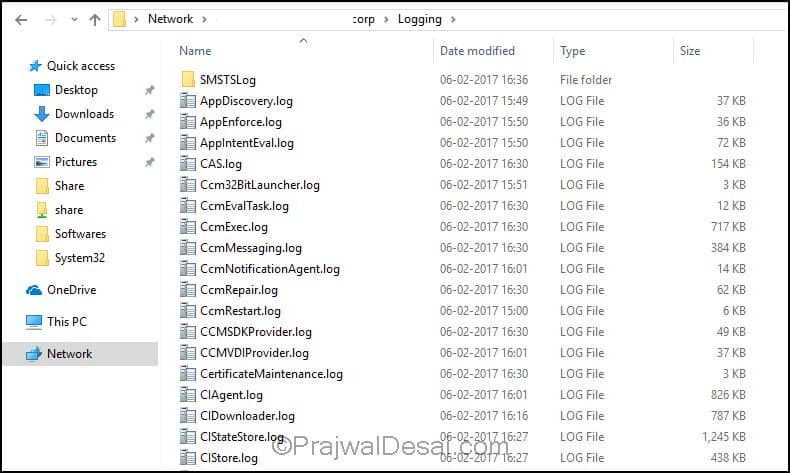
 net use L:/delete. Under Options tab, check the box Continue on error. Click OK and close the Task Sequence Editor. Finally after adding all the above steps in TS, once the OSD is successful the log files are copied to network share.


net use L:/delete
Need a space between : and /
Hello Prajwal,
Thank you for this post it works great. I have this step at the very end of my TS but on some steps I actually want the TS to NOT continue on error. It makes sense to me that Log Capture will not take place in this scenario, how do I still send the logs upon error / TS stop?
It’s been several months, but for anyone coming across this, to mark an execution as failed, simply add a Run Command Line task. Give it a name like “OSD Failed” or “Imaging Failed”, set the Command line to “exit 1” (no quotes), and set that as the last item in whatever error handling you have added. Make sure that your error handling is not set to continue on error, and your imaging should properly end when it fails. Note that this will mean the on-screen failure display will NOT be useful for troubleshooting what happened, since it will always be the script failure message.