How To Configure DHCP Failover In Windows Server 2012 R2
How To Configure DHCP Failover In Windows Server 2012 R2 In this post we will see how to configure DHCP failover in Windows Server 2012 R2. But before that let’s understand what DHCP failover is. DHCP failover is a new feature available in Windows Server 2012 and Windows Server 2012 R2 which ensures continuous availability of DHCP service to clients. In Windows Server 2008 R2 there were two high availability options available for DHCP server : DHCP in a Windows failover cluster and Split scope DHCP. When you implement DHCP failover, two DHCP servers share DHCP scope and lease information, enabling one server to provide DHCP leases to DHCP clients if the other server is down or unavailable. The new DHCP Failover functionality allows you to configure two DHCP servers in either an active/passive configuration known as hot standby or in an active/active configuration known as load balanced. We will now see the steps on how to configure DHCP failover in Windows Server 2012 R2.
When you are planning to implement DHCP failover, keep these things in mind.
- Both DHCP servers in a DHCP failover relationship must be running Windows Server 2012 or a later operating system.
- Both computers participating in a DHCP failover relationship must have the DHCP Server role installed and running.
- Use a static IP address on all DHCP server network interfaces.
- At least one IPv4 DHCP scope must be configured on the primary DHCP server.
- DHCP failover supports DHCPv4 scopes only. DHCPv6 scopes cannot be failover-enabled.
- You cannot configure DHCP failover on a DHCP scope to include more than two DHCP servers.
How To Configure DHCP Failover In Windows Server 2012 R2
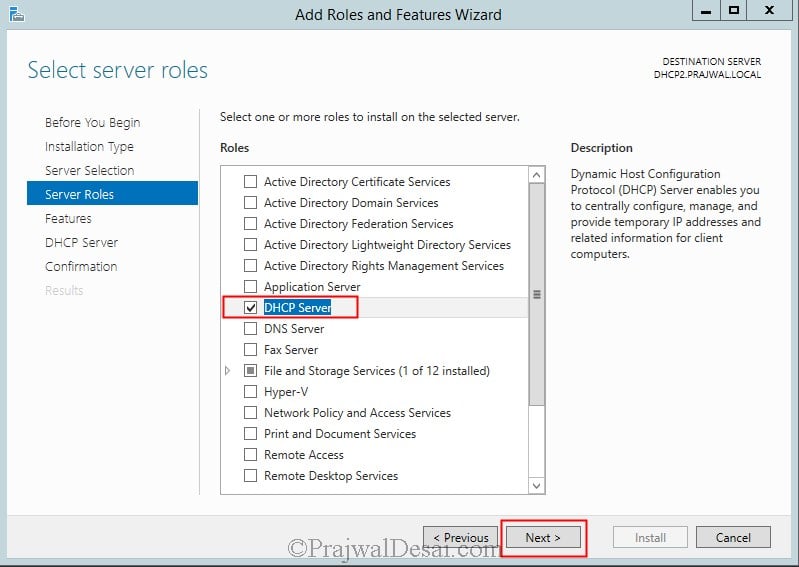
In this example we will be using 2 servers, each on which DHCP server role will be installed, on our first server which is a domain controller the DHCP server role has been installed and configured. This is our primary DHCP server (AD.PRAJWAL.LOCAL) running Windows Server 2012 R2 Datacenter edition. On another server running Windows Server 2012 R2 Datacenter edition (DHCP2.PRAJWAL.LOCAL), we will be installing the DHCP server role. Launch the Server Manager and select DHCP Server role. Click Next.
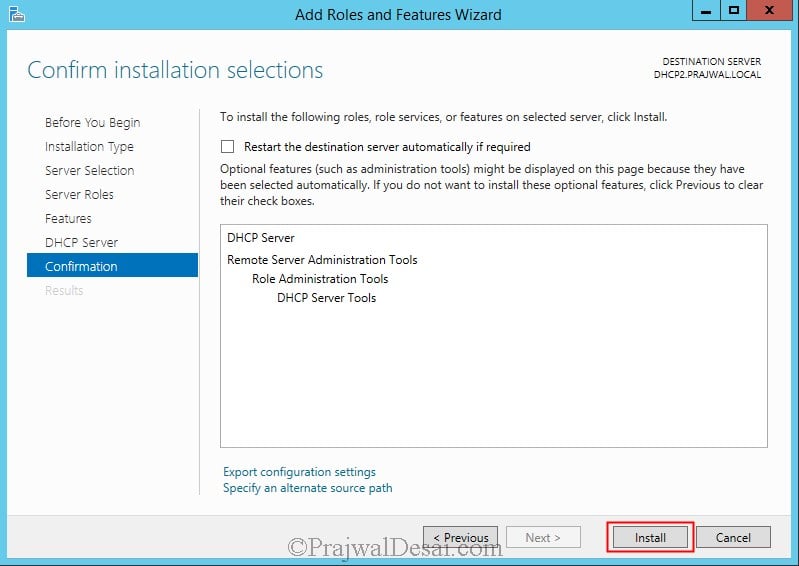
Click on Install.
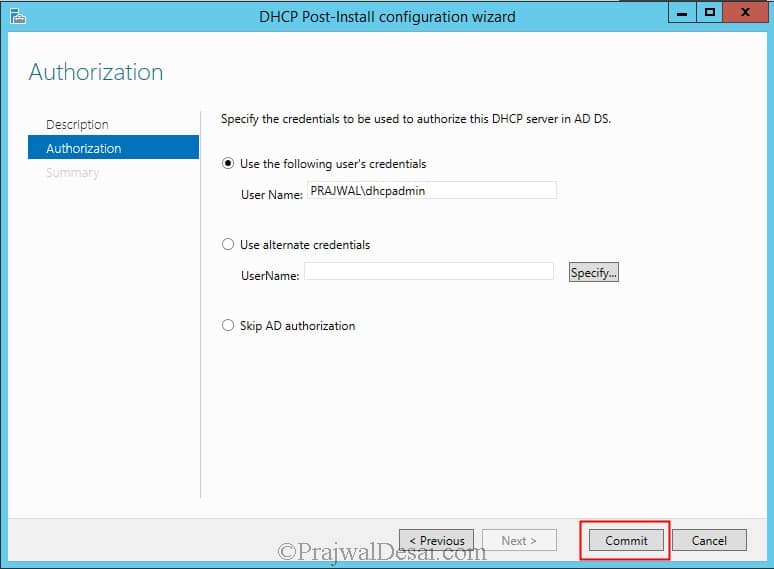
Do not click Close, click on Complete DHCP configuration.
Click Commit.
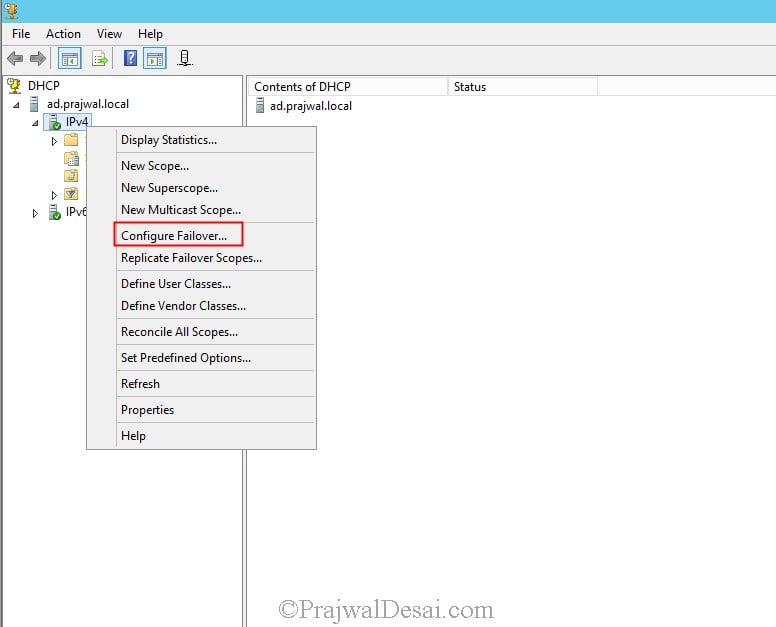
Now on the first DHCP server, launch the DHCP console, right click on IPv4 and click on Configure Failover.
Click Next.
Click on Add Server to add the partner server used for failover. Add the second DHCP server and click Next.
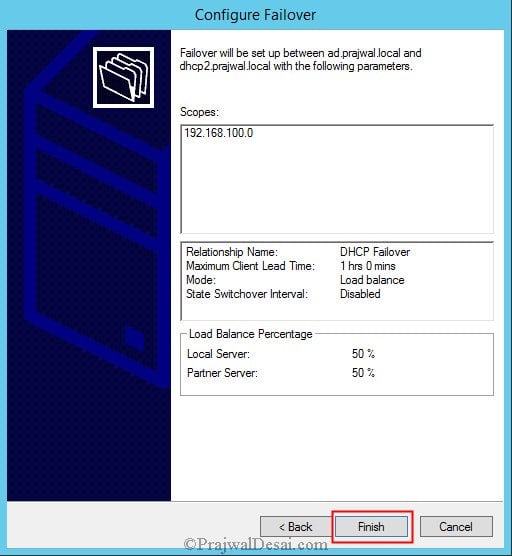
Type the Relationship Name, select the Mode as Load Balance. Click Next.
If you are looking for explanation of each setting, here it is
Relationship Name – A name to identify the failover.
Maximum Client Lead Time – Determines maximum amount of time that one server can extend a DHCP lease for a client beyond the time known by the failover server.
Mode – Load Balance settings for an active/active configuration or Hot Standby for an active/passive configuration.
State Switchover Interval – If this setting is enabled the active DHCP server will automatically place its partner into down state when it can’t communicate with it for the specified amount of time.
Enable Message Authentication – This option enables authentication of the failover replication traffic between partners. If you enable this option you must also specify the Shared Secret.
Click Finish.
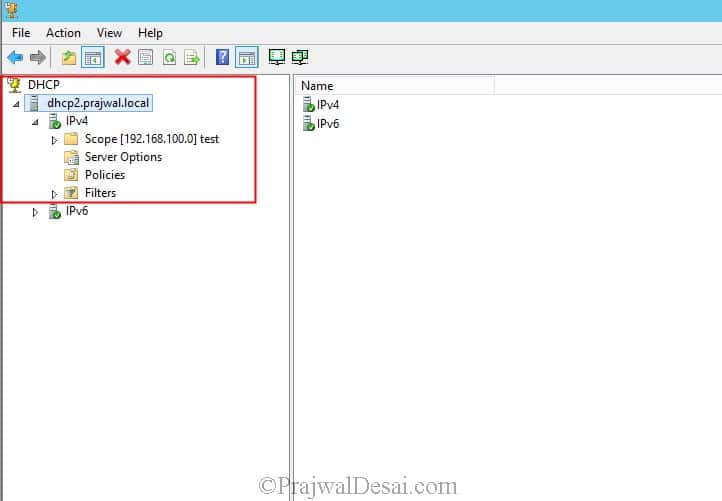
Launch the DHCP console on the second DHCP server and you should see the IPv4 Scope similar to the one seen on primary DHCP server.
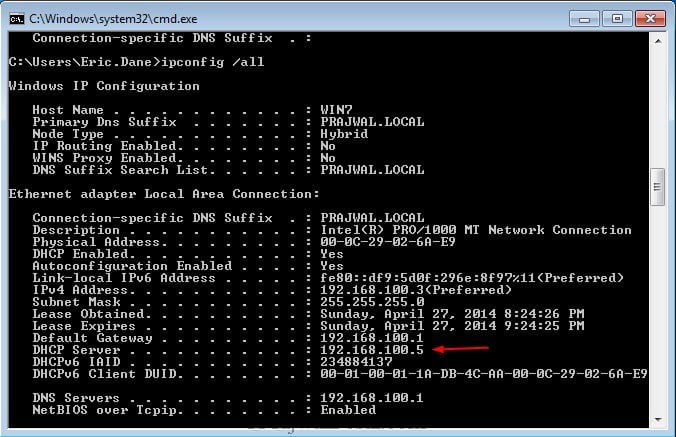
To test the DHCP failover we will log in to one of the client machine. Launch the command prompt and type ipconfig /all, make a note of DHCP server that has provided the IP address. In our case the DHCP server is 192.168.100.1 (AD.PRAJWAL.LOCAL).
Now on 192.168.100.1 DHCP server we will disable the network device. After waiting for few seconds on the client machine we see that DHCP server IP is changed to 192.168.100.5. This means that when our primary DHCP server 192.168.100.1 was down, the other DHCP server 192.168.100.5 assigned the IP address to the client machine.





How to connect both this servers? Means provide static ip of server 1 in dns of server 2 or create a domain n join it?
Excellent document. I have been using sccm guide for the last 2 weeks. Close to completing all the labs. Look forward to more labs within sccm 2012 and if you can please do the same for MDOP 2013 (App-v).
Thank you Ram. I shall post on MDOP topics sometime later..As of now some new posts are in the queue.
Thank you. Look forward to MDOP R2 2013.
In the mean time will watch for new posts – enjoyed Dot Net 4.0.