How to Deploy Pulse Secure Desktop Client using SCCM
In this article, you’ll learn how to deploy Pulse Secure desktop client using SCCM. We will download the latest Pulse Secure Client, package it in SCCM and deploy it to computers.
The Pulse Secure desktop client provides a secure and authenticated connection from an endpoint device to a Pulse Secure gateway.
The endpoint device on which you install Pulse Secure desktop client could be a Windows 10/Windows 11 computer or a Mac computer.
The pulses secure gateway could be either Pulse Connect Secure or Pulse Policy Secure.
The Pulse Connect Secure is a mobile VPN to enable secure access from any device to enterprise apps and services in the data center or cloud.
I have seen some large enterprises using pulse secure desktop clients. Since this deployment is popular, this guide should help you deploy pulse secure using SCCM.
At the time of writing this post, the latest version of pulse secure desktop client is 5.3 R6. The application will be updated often.
Hence, always download the latest available installer when you plan to deploy Pulse secure desktop client using SCCM.
Configuration Manager makes the deployment of Pulse secure client easy, especially when you have numerous computers that needs this application.
Ways to Deploy Pulse Secure Client
There are three methods that you can use to deploy Pulse Secure client:
- Manually install the Pulse Secure client – This method works best when you have few computers in your setup.
- Deploy Pulse Secure Client using Configuration Manager – Use this method if you are managing your devices using Configuration Manager.
- Deploy Pulse Secure Desktop Client using Group policy – A GPO is the best way to deploy the software without using any tools.
Download Pulse Secure Desktop Client
You can download Pulse Client for Desktop from this download link. The Pulse Secure client for Windows is available for download as 32-bit and 64-bit installers.
Depending upon the architecture (64 bit/32 bit), download the appropriate installer for your organization.
In this article, I will cover the deployment of pulse secure client along with preconfiguration file. With preconfiguration file, you can define settings such URI, server ID, GUID etc.
When you deploy a preconfiguration file along with the client, the user sees those connections when the app is launched.
A user can choose the desired connection and then connect to it by authenticating with the credentials.
In addition, if you specify more than one connection in the preconfiguration file, the user can choose and connect to any of those connections.
How to Deploy Pulse Secure Desktop Client using SCCM
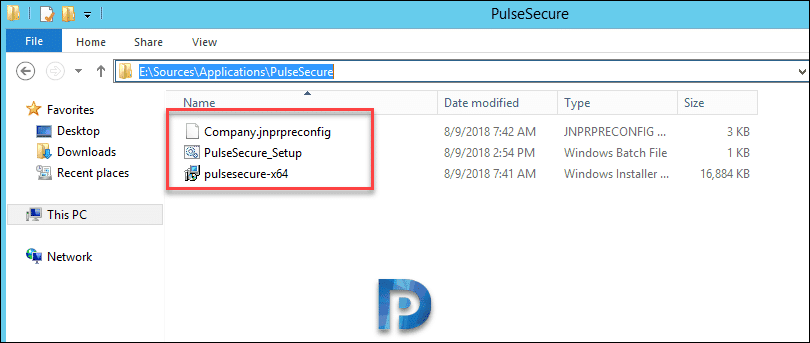
To deploy Pulse Secure desktop client using SCCM, follow the below steps. I have got the 64 bit installer with me and along with that I have got a batch file and a preconfiguration file.
The batch file includes the commands to install pulse secure desktop client. The commands included in the batch file are listed below. Copy the commands to a file and save it with .bat extension.
mkdir c:\pulse\ copy pulsesecure-x64.msi c:\pulse\ copy Company.jnprpreconfig c:\pulse\ msiexec -i "c:\pulse\pulsesecure-x64.msi" CONFIGFILE="c:\pulse\Company.jnprpreconfig" /l*v "%windir%\Logs\PulseSecure_Install.log" /q del c:\pulse\pulsesecure-x64.msi PING 127.0.0.1 -n 1 -w 5000 >NUL del c:\pulse\Company.jnprpreconfig rmdir c:\pulse\
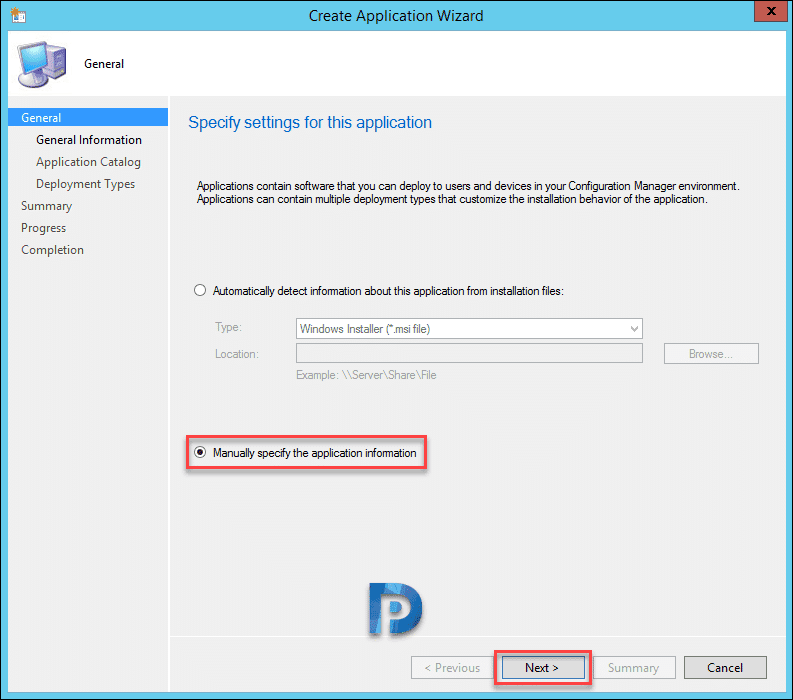
Launch configuration manager console. Go to Software Library > Overview > Application Management > Applications. Create a new application and select Manually specify the application information. Click Next.
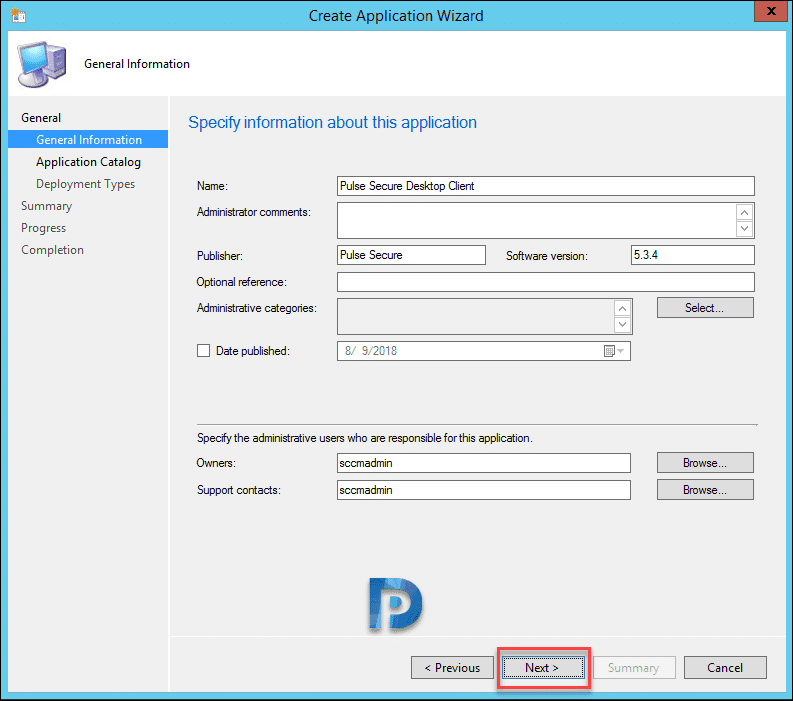
Specify app details and click Next.
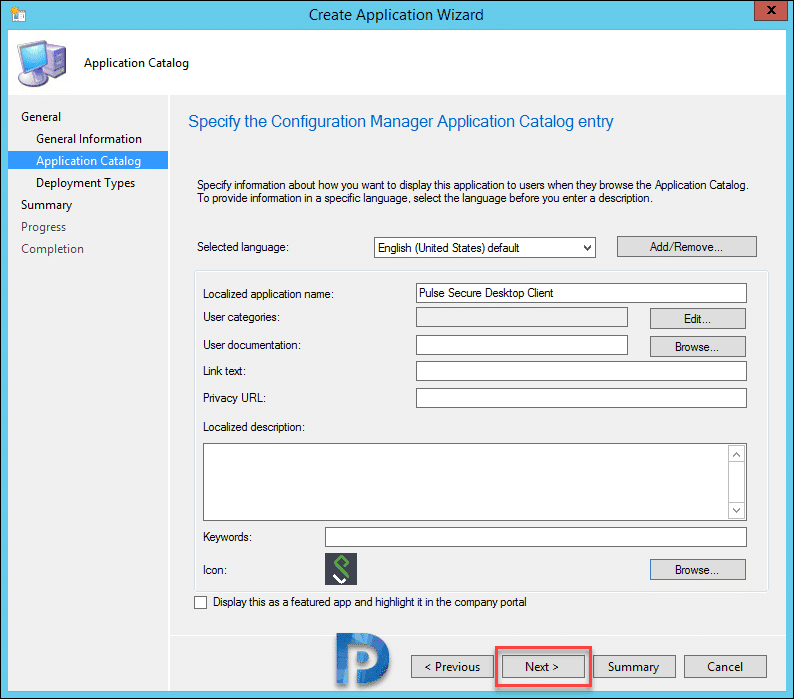
Some more details if you want to add here. Click Next.
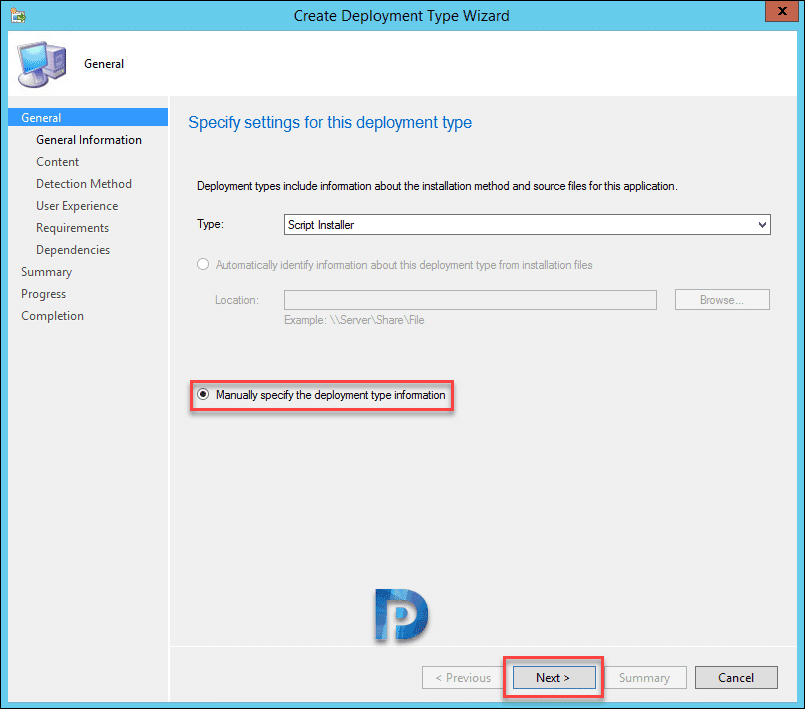
Add a new SCCM deployment type and select Manually specify the deployment type information.
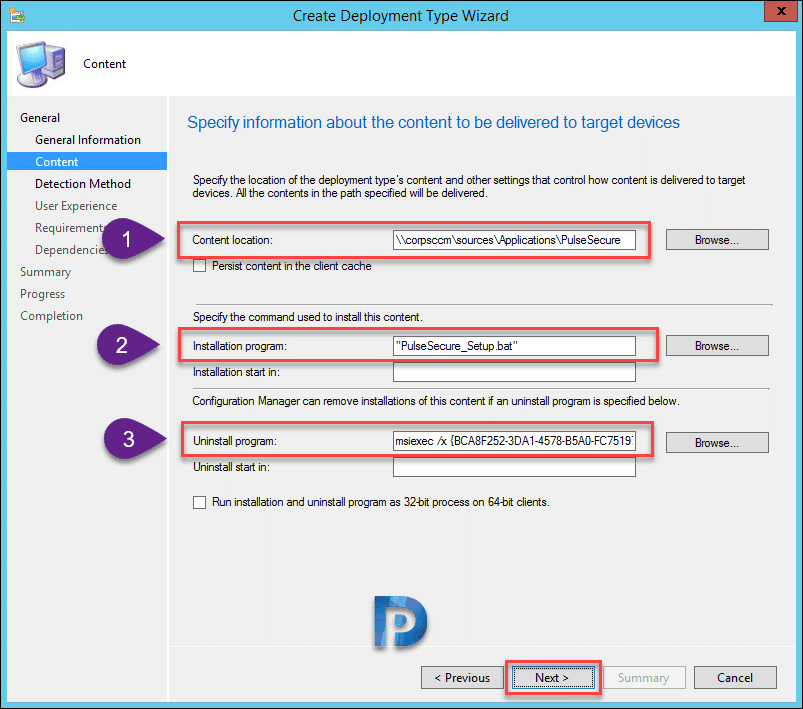
- Specify content location.
- Input Installation program command.
- Specify Uninstall program command.
Click Next.
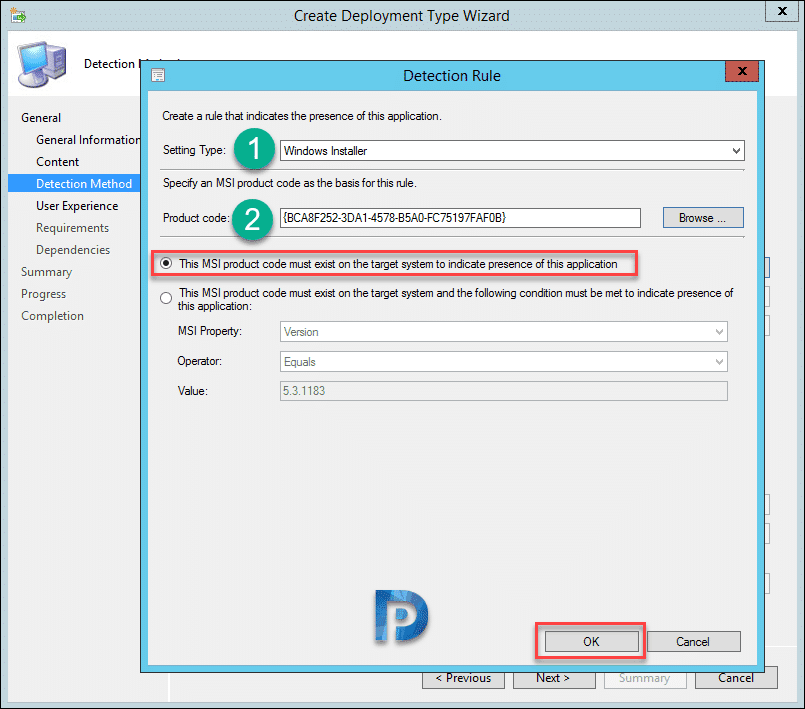
Add a detection method to detect the presence of app. Choose the setting type as Windows Installer.
Click Browse and select the msi installer and that will automatically pick the product code. Click Next.
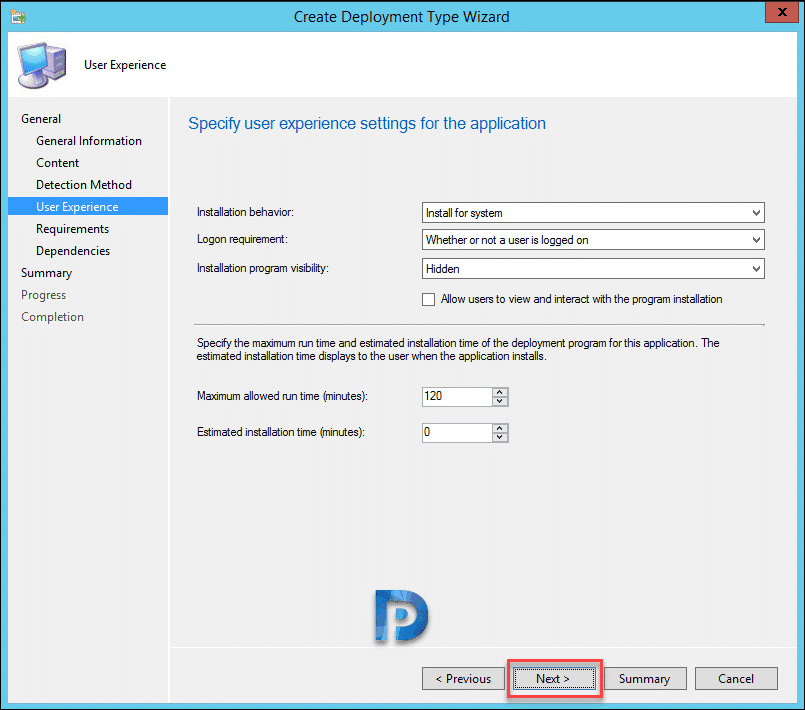
Specify the settings for user experience. Click Next.
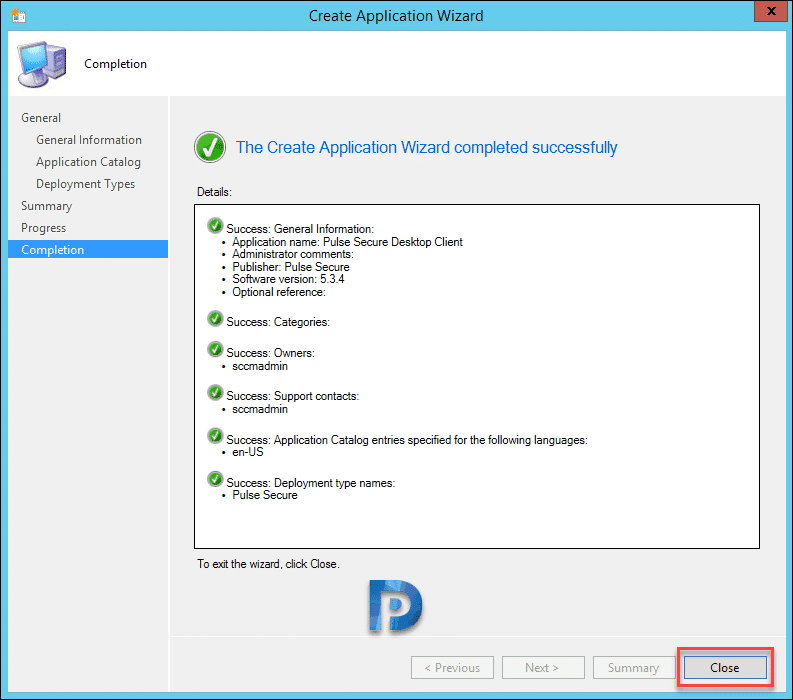
On the remaining steps, click Next and on completion page, click Close.
Congratulations, you have packaged the pulse secure desktop client using SCCM.
Deploy Pulse Secure Using SCCM – Test the Installation
This is important, you must distribute the Pulse Secure application to all your distribution points and deploy it to a device collection.
In case your application fails to reach the distribution points, read how to Re-Distribute Failed Packages in SCCM.
After you deploy pulse secure using SCCM, log in to the client machine and launch the Software Center. You can also set up a logo for notifications in software center.
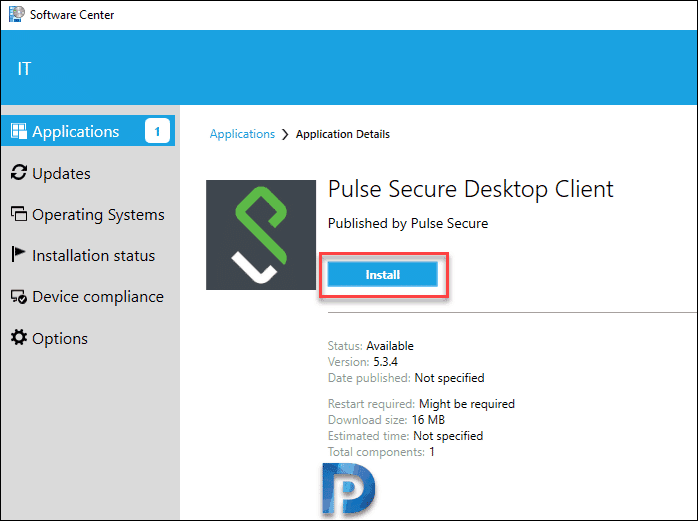
In the Software Center, click the Applications tab and select the Pulse Secure Desktop Client. To install this application, click Install button.
Open AppEnforce.log file on the client computer to monitor installation of app. The batch file that we specified installs the app as per the commands specified in it.
Read: List of SCCM Log Files | ConfigMgr Log Files
I have tested both installation and uninstallation of Pulse Secure client, and it works flawlessly. This completes the steps to deploy Pulse Secure using SCCM.


We are looking to uninstall the pulse secure client via SCCM. can someone please help us
Thanks for this article,
Please advise , how to push pulse desktop client installation through Windows Group Policy.
Hi Prajwal,
Do you have any document or guide on how to depoy pulse secure client for Autopilot over VPN scenario ? I am trying to use Autopilot with pulse secure client however I couldnt find much info regarding it. Your advice would be much appreciated.
Thank you for your valuable information.
When we tried to install the agent on the user PC its getting error as ” Past due – will be retried” Can you advise please.
Regards,
S Khan
Hi 🙂
First time I comment your blog but I read it a lot, thanks for your job, i really appreciate.
I am having issue with the detection method, in fact if a computer is in different language, the msi uninstallation product code is different..
Any informations about that ?
Regards
Under detection methods you can choose registry, file, folder. Can you send me a screenshot of what detection method are you talking about ?.
What is in your Company.jnprpreconfig file?
Hello,
Have you deployed it with Task Sequence?
Unexpected, we receive a problem when a package is installed during building OS.
Pulse Secure was successfully installed but it totally ignored import “connections” from CONFIGFILE. All works when we deploy it to already built computers.
This method works for me… Using a batch file.
set installpath = %cd%
msiexec /i “pulsesecure-x65.msi” /q CONFIGFILE=”%cd%Company.pulsepreconfig” /l “%windir%temppulse_secure_install.log”