SCCM 1802 Install Guide using Baseline Media
This post is a Step-by-Step SCCM 1802 Install guide using Baseline Media. I was waiting for SCCM 1802 baseline media to be released so that I can create a step-by-step SCCM 1802 install guide. The last time that I created a bunch of step by step guides was for SCCM 2012 R2. I will try my best to add all the information in just one post. Basically I don’t want to split the info into parts because I know it is time consuming and sometimes confusing as well.
SCCM 1802 Intro – We know that update 1802 for Configuration Manager current branch is available as an in-console update. Here is my post that shows how to install SCCM 1802 update. There are a lot of new features and fixes in SCCM 1802. You can apply this update on sites that run version 1702, 1706, or 1710. However, if you are installing SCCM for a new site, SCCM 1802 is now available as a baseline version.
Who can use this guide – Many people had requested me to prepare a SCCM 1802 install guide. This is to install and get some hands on SCCM CB in lab setup. If you are working as sysadmin, SCCM admin or any profession that requires you to work on SCCM, this guide should help you. I understand that not everyone wants to try something new on prod setup directly. Though you might have access to SCCM running in your prod setup, who would want to make changes without approval ? So, the best thing is to have SCCM installed on your lab setup so that you can try out things by yourself.
SCCM 1802 Install Guide – Lab Setup
So here is what my SCCM 1802 lab setup includes. You can either use Hyper-V or VMware as hypervisor. If you want to add more client operating systems in your setup, feel free to do so. I will be using Windows Server 2012 R2 Datacenter as operating system for installing SCCM and other roles. That’s my choice and I still love 2012 R2 OS. You can use Windows Server 2016 if you’d like to.
| Virtual Machine Name | Operating System | Roles | Specs |
| CORPAD.PRAJWAL.LOCAL | Windows Server 2012 R2 Datacenter | Active Directory, DNS, DHCP | 2GB Memory, 60GB HDD |
| CORPSCCM.PRAJWAL.LOCAL | Windows Server 2012 R2 Datacenter | Primary Site Server | 12GB Memory, 120GB HDD for OS, 120GB HDD for SCCM Content |
| CORPWIN7.PRAJWAL.LOCAL | Windows 7 SP1 Enterprise x64 | Client | 2GB Memory, 60GB HDD |
| CORPWIN10.PRAJWAL.LOCAL | Windows 10 1709 Enterprise x64 | Client | 2GB Memory, 60GB HDD |
SCCM 1802 Install Guide – Required Softwares
I will also be covering more things in SCCM 1802 install guide. We won’t be installing SCCM 1802 directly. There are some softwares that are required and here are the list of some of them.
- Windows Server 2012 R2 Datacenter – You can get this OS if you have access to VLSC or MSDN subscription. If you don’t have both you can straight away get it from Microsoft Evaluation Center. You can try all the features for 180 days. The eval file types are available as Azure, ISO, Virtual Lab, VHD. You can download ISO file for installing it in lab setup.
- Windows 10 and Windows 7 – You can get the eval editions of Windows 10 and Windows 7 from here.
- System Center Configuration Manager and Endpoint Protection (current branch – version 1802) – Get the eval version from here.
- Windows ADK – The latest version of ADK is 1709 and you can download it from here.
- SQL Server – We will be using the latest version of SQL Server 2017 – Enterprise edition. You can get the eval version from here. Other SQL server support versions are listed here.
SCCM 1802 Install Guide – Installing Prerequisites
Here are some the steps that should be performed before you install SCCM. These are mandatory and if you miss any of them, you might see errors or warning during final setup.
SCCM 1802 Install Guide – Creating the System Management Container
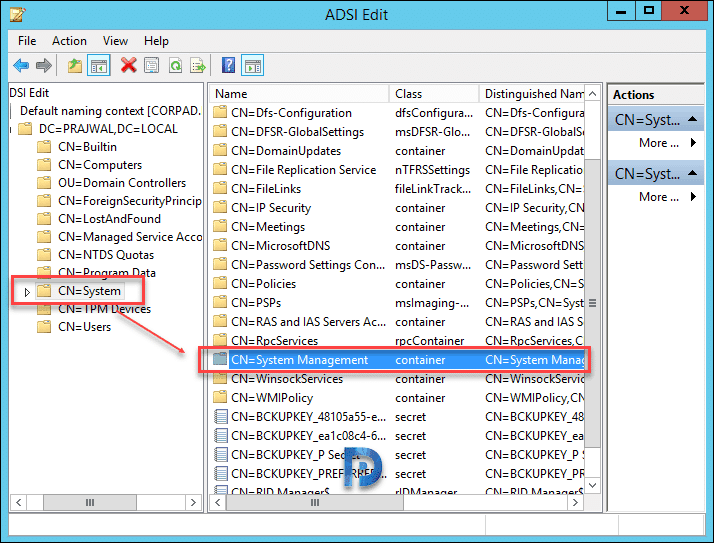
First of all we will create the “System Management” container and we will assign the SCCM server full permissions on it. This is required for SCCM server to create objects under the system container.
Follow the below steps to create System Management container.
- Login to domain controller. Click Server Manager, Tools, click ADSI Edit.
- Right click ADSI Edit and click Connect to.
- On the Connection Settings window, the naming context should be Default naming context. Click OK.
- Expand Default Naming Context. Right click CN=System. Click New and create an Object.
- Select the class as container and click on Next.
- Name it as System Management.
- Click Next and click Finish to close the wizard.
SCCM 1802 Install Guide – Grant SCCM Server Permissions on System Management Container
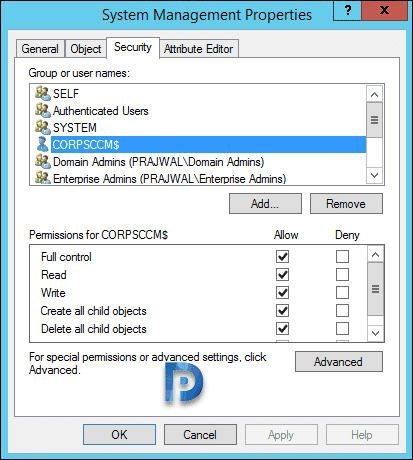
After you create System Management container, you must delegate SCCM server full permissions on System Management container. To do so follow the below steps.
- Launch Active Directory Users and Computers.
- Click View and click Advanced Features.
- Expand System, right click System Management and click Delegate Control.
- Click Add. On select users, computers or groups window click on Object Types and check for Computers as object types. Click OK.
- Type the name of the primary site server computer account and click OK.
- Add primary site server computer account and Click Next.
- On the Tasks to Delegate page, click Create a custom task to delegate. Click Next.
- Select This folder, existing objects in this folder and creation of new objects in this folder. Click Next.
- Select General, Property Specific and Creation/deletion of specific child objects.
- Under permissions, click Full Control. When you check the box Full Control, all the other permissions gets checked automatically.
- Click Next and click Finish to close the wizard.
SCCM 1802 Install Guide – Extending Active Directory Schema
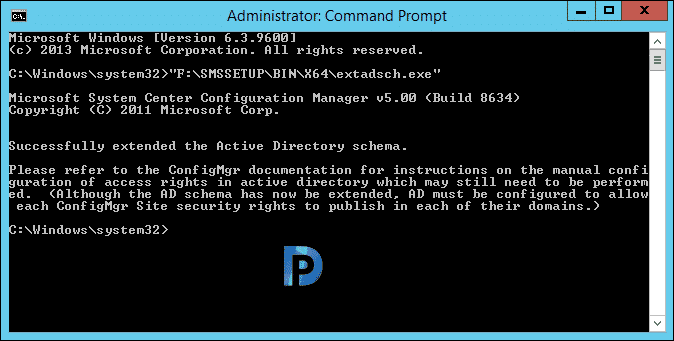
We will now see the steps to extend the Active Directory Schema using extadsch utility. To extend Schema, use an account that is a member of the Schema Admins security group. Be signed in to the schema master domain controller.
- Locate the extadsch which can be found in SMSSETUP\BIN\X64 of the configuration manager setup DVD.
- Hold the shift key on your keyboard and right click extadsch and click on Copy as Path.
- Launch the command prompt. Right click and click paste and hit enter.
- You should see the line Successfully extended the Active Directory Schema.
- Open the log file extadsch.log located in the root of the system drive. You should see the line “Successfully extended the Active Directory Schema”.
SCCM 1802 Install Guide – Enabling Web Server Role
Based on OS that you use, Microsoft lists prerequisites for SCCM site and site system servers. You can take a look at the post if you are using OS older than server 2012.
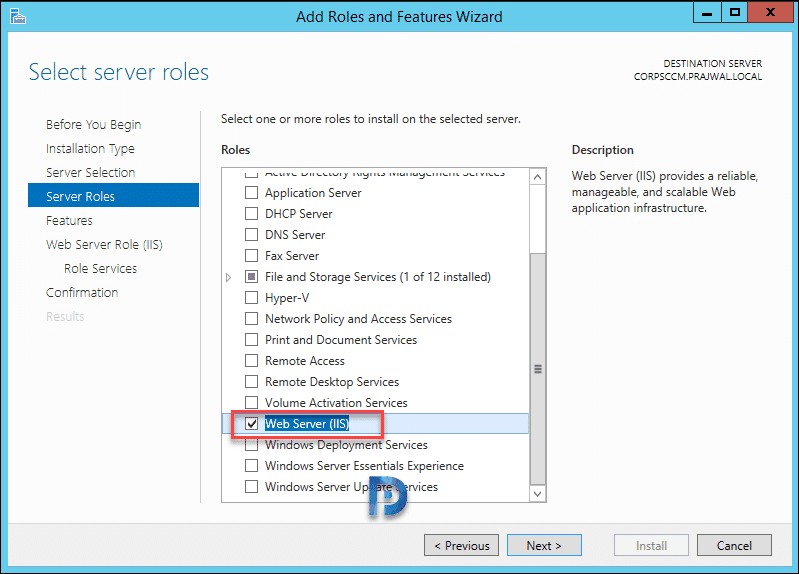
To enable Web server role and other features, login to SCCM server. Click Server Manager, click Manage, click Add Roles and Features. Click Select a server from the server pool and click Next. Select Web Server (IIS) server role and click Next.
Enable/Install the following features :-
- .Net Framework 3.5 Features [Install all sub features]
- .Net Framework 4.5 Features [Install all sub features]
- BITS
- Remote Differential Compression
Enable/Install the following Roles Services :-
- Common HTTP Features – Default Document, Static Content.
- Application Development – .NET Extensibility 3.5, ASP.NET 3.5, ISAPI extensions, ASP.NET 4.5 and .NET Extensibility 4.5
- Security – Windows Authentication.
- IIS 6 Management Compatibility – IIS Management Console, IIS 6 Metabase Compatibility, IIS 6 WMI Compatibility, IIS Management Scripts and Tools.
Complete the installation of all the features and role services and close the wizard.
SCCM 1802 Install Guide – Installing Windows ADK 1709
When you deploy operating systems with Configuration Manager, the Windows ADK is required. ADK is a collection of tools that you can use to customize, assess, and deploy Windows OS to new computers. The latest version is ADK version 1709. It is always good to download ADK offline so that it can installed quickly. To download and install ADK offline refer this post.
Perform the below steps to Install Windows ADK 1709 for SCCM 1802. We will be installing ADK on SCCM server.
- Right click adksetup executable and click Run as Administrator.
- Choose the default installation path and click Next.
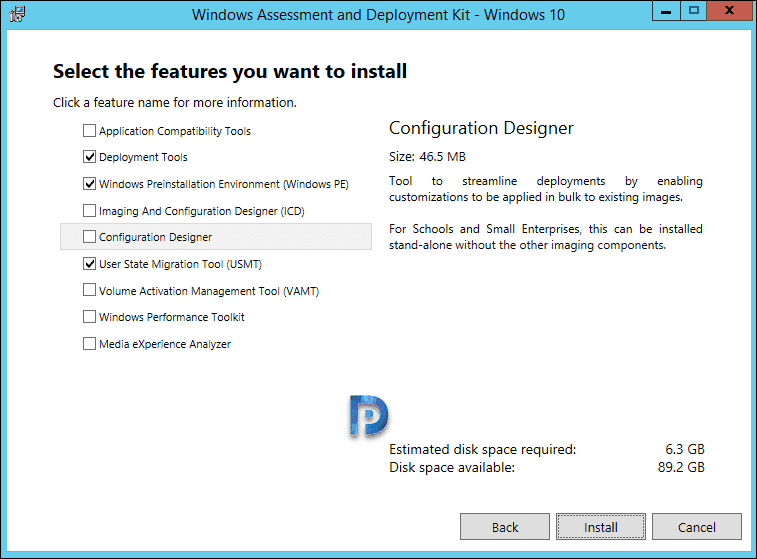
- Select Deployment Tools, Windows Preinstallation Environment and User State Migration Tool.
- Click Install. After ADK is installed click Close.
SCCM 1802 Install Guide – Installing SQL Server 2017
We will now look at the steps to install SQL Server 2017 for SCCM 1802. For supported SQL version for SCCM 1802, refer this post. We will be installing SQL server 2017 Enterprise x64 version. Each Configuration Manager site requires a supported SQL Server version and configuration to host the site database. For CAS and Primary sites, SQL Server can be located on site server computer or on computer that is remote from the site server.
If you are installing SQL 2017 ensure you also install CU2 update. This update contains the fixes listed here. You can first install SQL server 2017 and then install cumulative update 2. I assume you install the CU2 after installing SQL server 2017.
Note – If you install SQL server 2016 and above, by default SQL management studio is not installed on the machine. Microsoft decided to split the installation of management studio from the main SQL server installation. Probably the idea behind is to manage your SQL servers remotely. Read this post for more info.
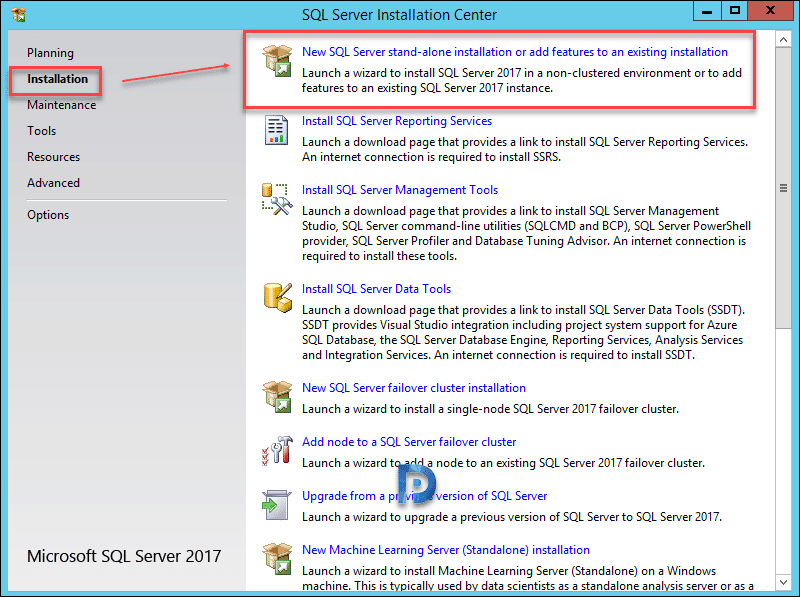
Launch the SQL server setup (run as administrator). On the installation window, click Installation and then click New SQL server stand-alone installation.
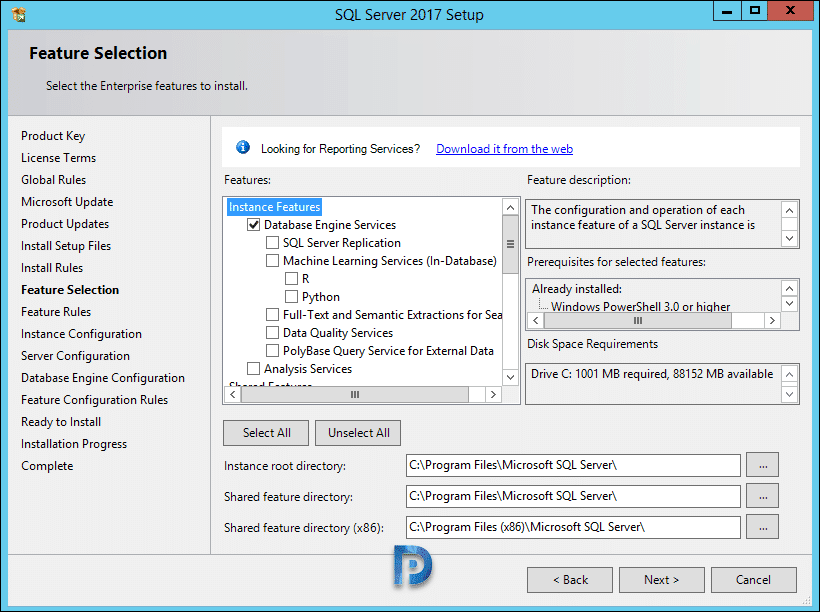
 Feature Selection – Select Database Engine Services and click Next.
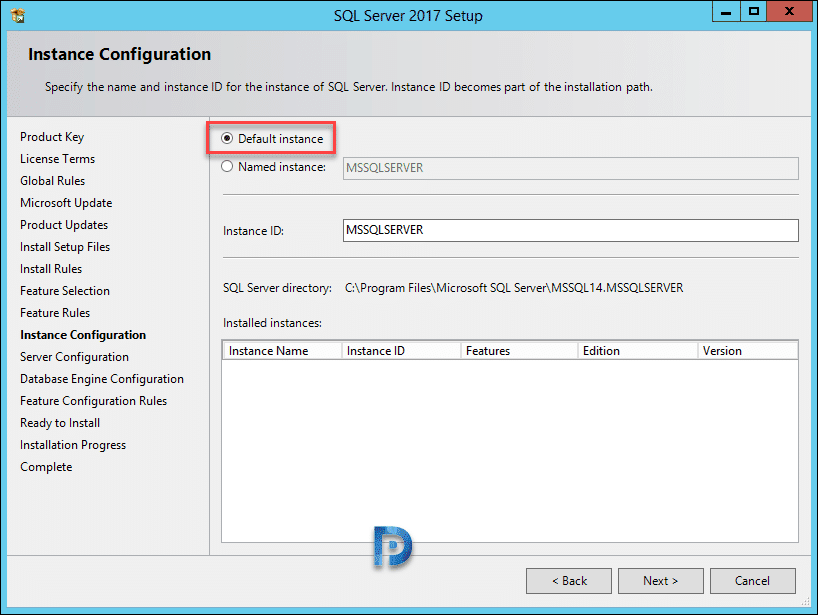
 Instance Configuration – Select Default Instance. Click Next.
 Specify the service accounts. Note the you must use a separate account for each SQL server service.
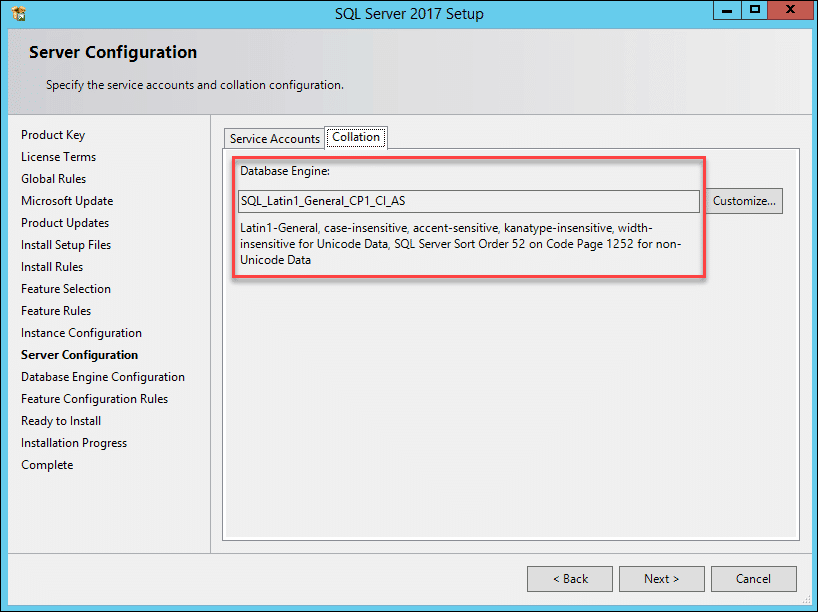
 Click Collation tab. Ensure that collation is SQL_Latin1_General_CP1_CI_AS.
 Click Add Current User to add the account to SQL server administrators. Click Next.
Complete the remaining steps. Close the setup wizard and reboot the server once.
SCCM 1802 Install Guide – Installing SQL Server Management Studio
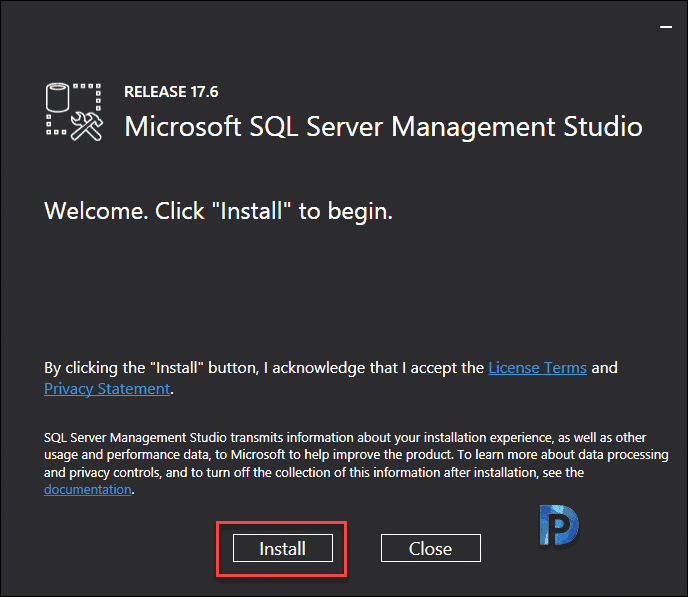
In the next step we will download and install SQL Server Management Studio on primary site server. Download the latest version of SSMS from here. Run the SSMS executable as administrator. Installation is simple, just click Install and wait for installation to complete. A reboot is required after installation.
SCCM 1802 Install Guide – Install WSUS Role
If you are planning to deploy updates using SCCM, then WSUS is required. I will not get into more details here, you can read this post to understand more.
To install WSUS on Windows Server 2012 R2, launch Server Manager. Click Manage, click Add Roles and Features. Select Windows Server Update Services and click Next.
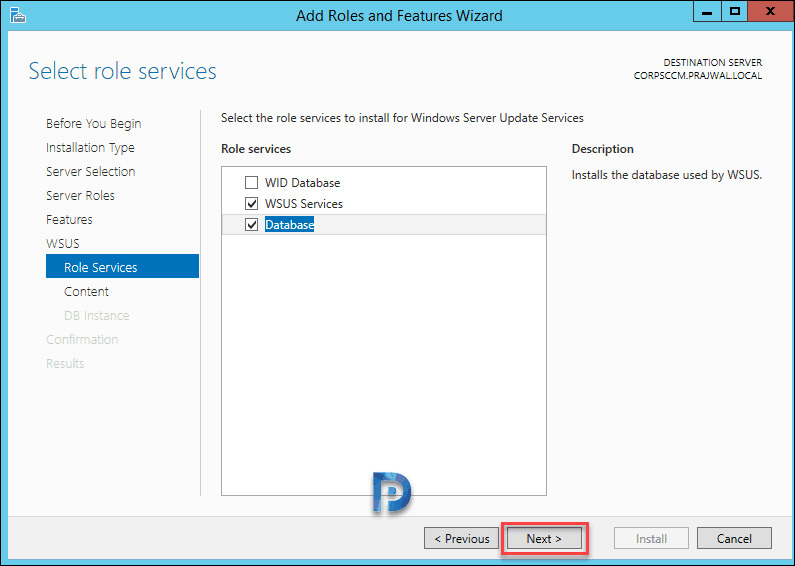
 Select WSUS Services and Database as these are the ones that are actually required. Do not select WID Database here. Click Next.
 Specify folder path to store updates.
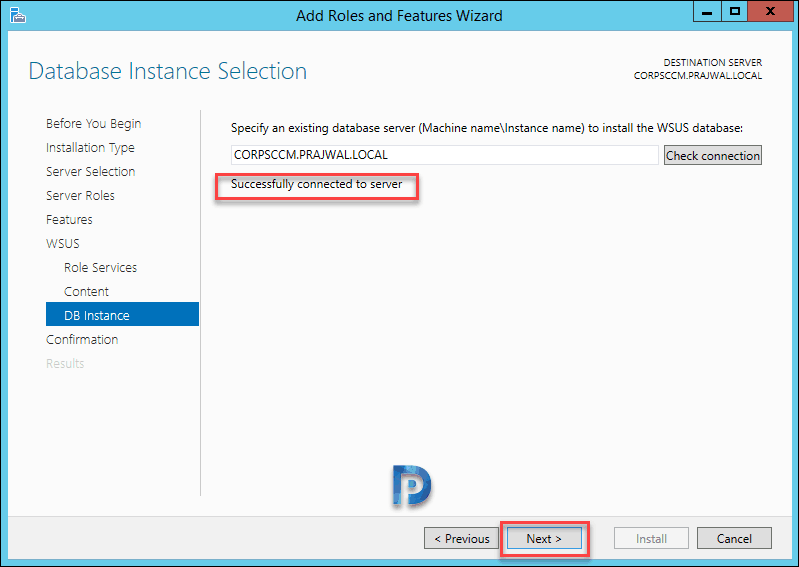
 Specify the database server where you want to store the WSUS database. Enter the server name and click Check connection. You must see the message Successfully connected to server. Click on Next. Complete the remaining steps and wait for installation to complete.
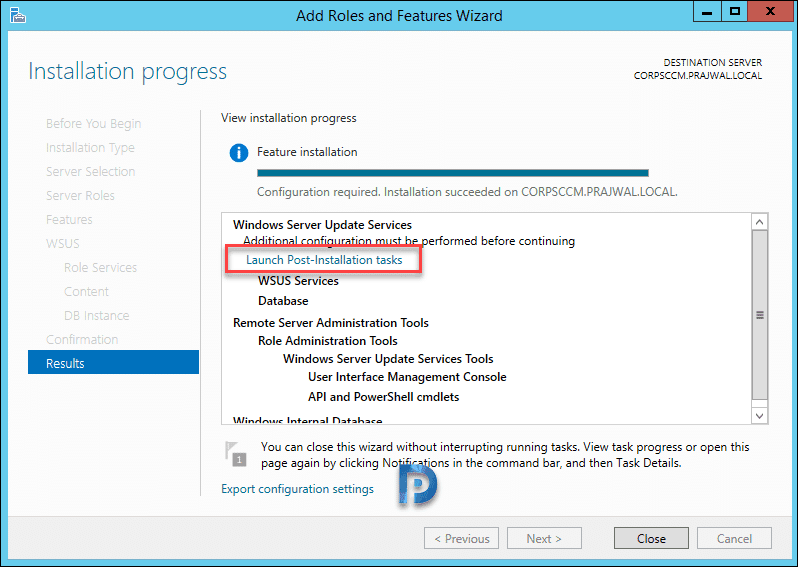
 The next step is to complete post installation tasks. To do so click Launch Post-Installation tasks.
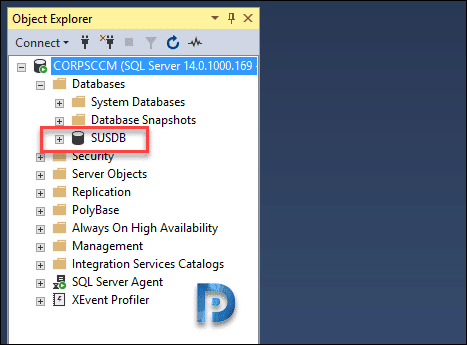
 After the post installation tasks are complete, login to SQL server management studio. Expand Databases and you should see WSUS Database SUSDB entry. Close the management studio.
SCCM 1802 – Installing Reporting Services
When you install SQL server 2017, it doesn’t include reporting services. You have to download and install it separately. Download SQL server reporting services 2017 from here.
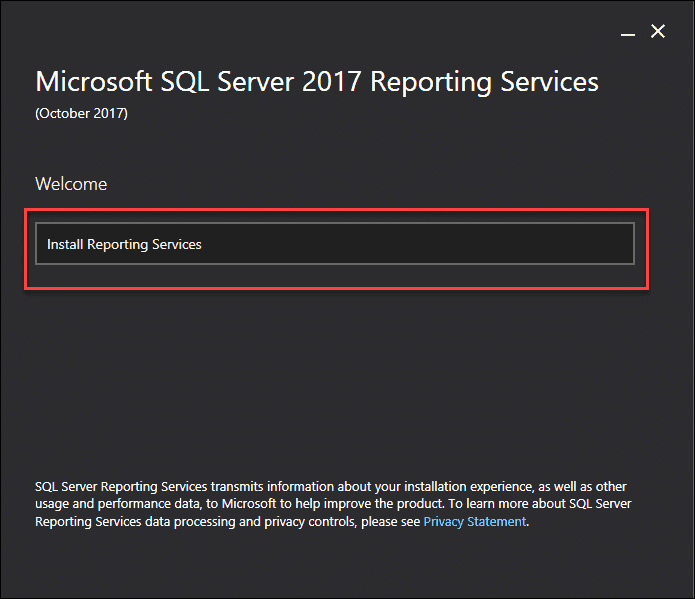
Run the setup and click Install Reporting Services.
 Select Install Reporting Services only and click Next.
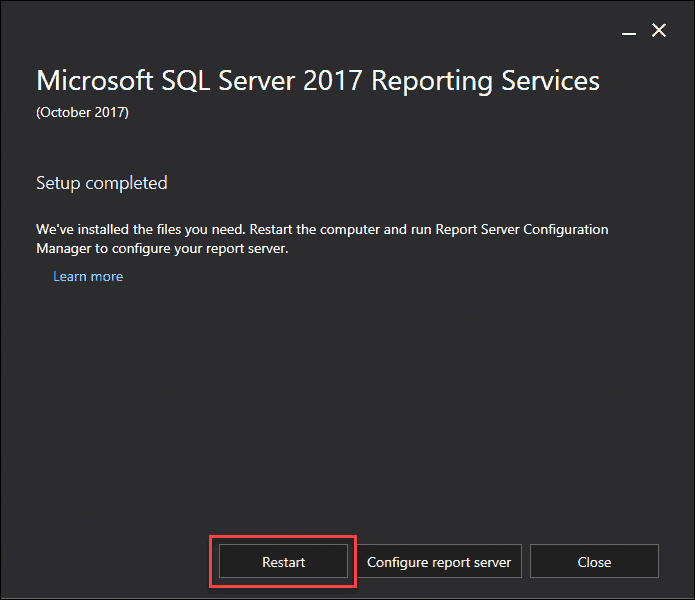
Once the setup is complete, click Restart.
SCCM 1802 – Configuring Firewall Settings
Your firewall has to be configured properly so that you don’t face issues while deploying client agents. If there is a firewall between the site system servers and the client computer, confirm whether the firewall permits traffic for the ports that are required for the client installation.
- File and Printer Sharing.
- Windows Management Instrumentation (WMI).
You also need to create a group policy to open TCP ports 1433 and 4022. Refer the following post to configure firewall settings for SCCM 1802.
Step-by-Step SCCM 1802 Install Guide via Baseline Media
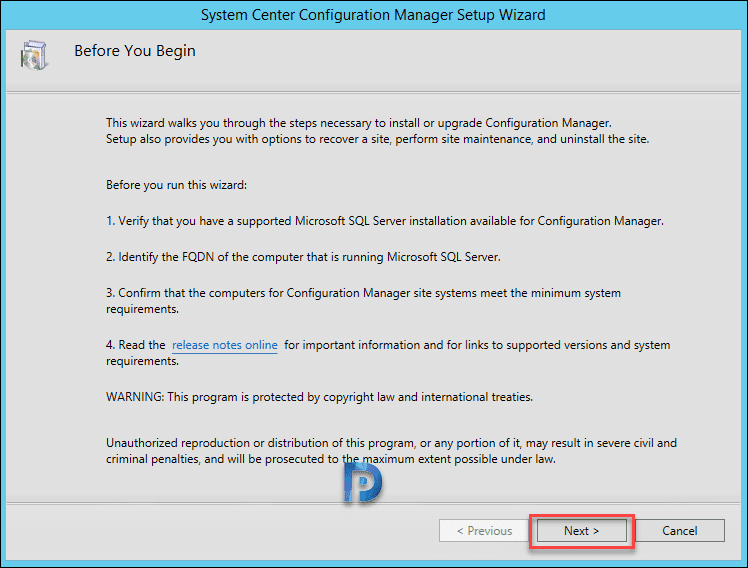
Finally we have installed all the SCCM 1802 prerequisites. To install SCCM 1802 current branch, follow these steps. Mount the 1802 CB media and run the splash HTML application located inside media. This will bring up window to install the configuration manager. Click Install.
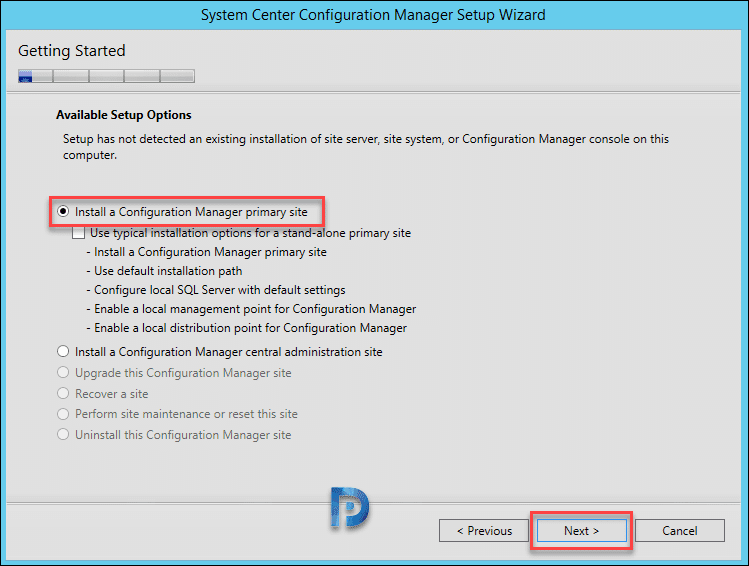
 Select Install a Configuration Manager primary site. Click Next.
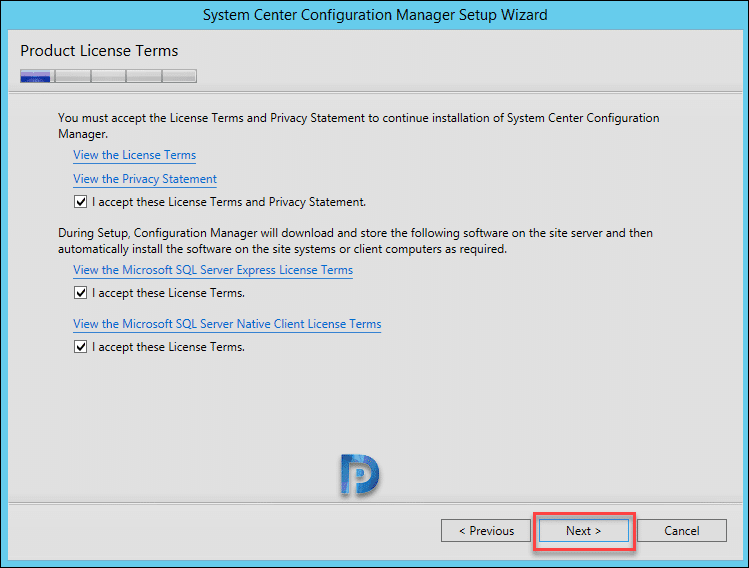
 Accept all the license terms and click Next.
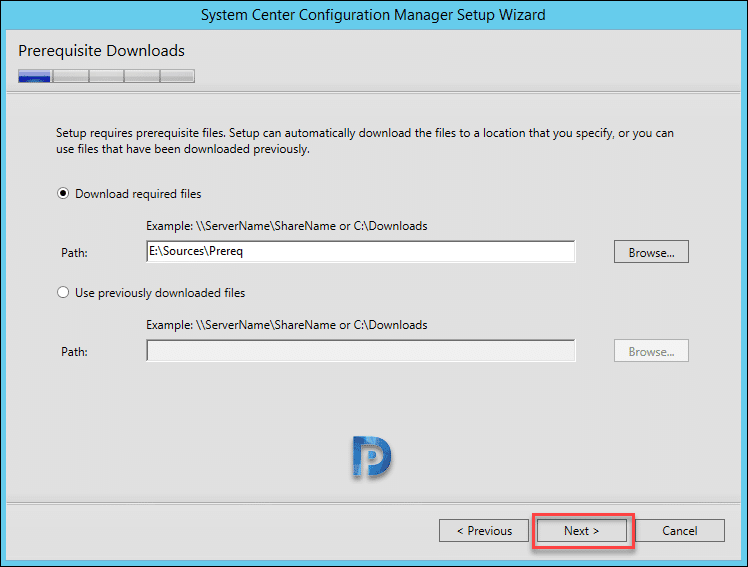
 Specify a folder path to download prerequisite files. Click Next.
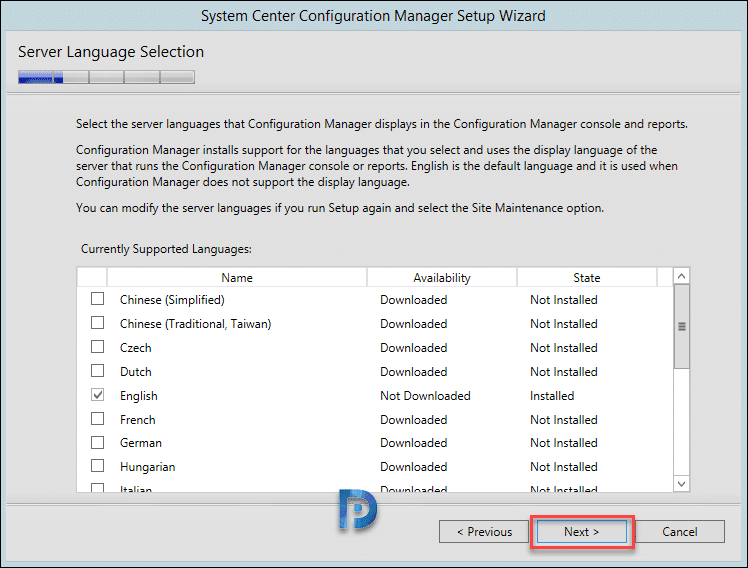
Nothing to select here, English is the default language selected. Click Next.
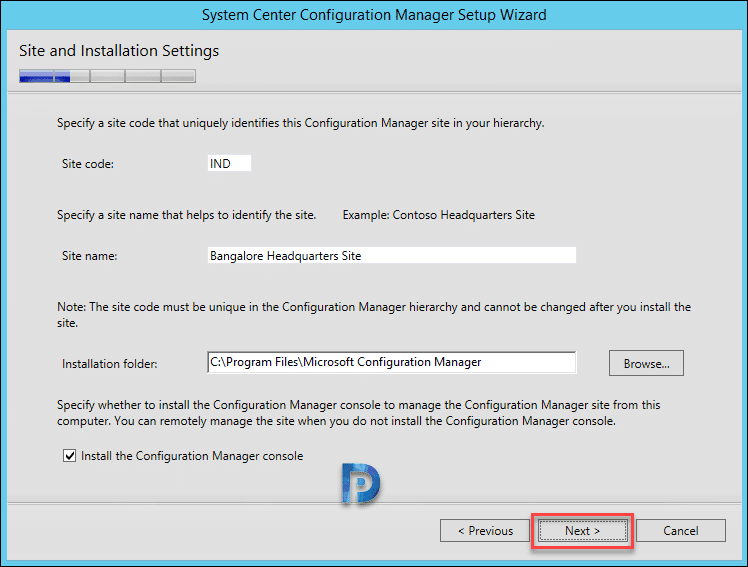
 Specify Site Code, site name and click Next.
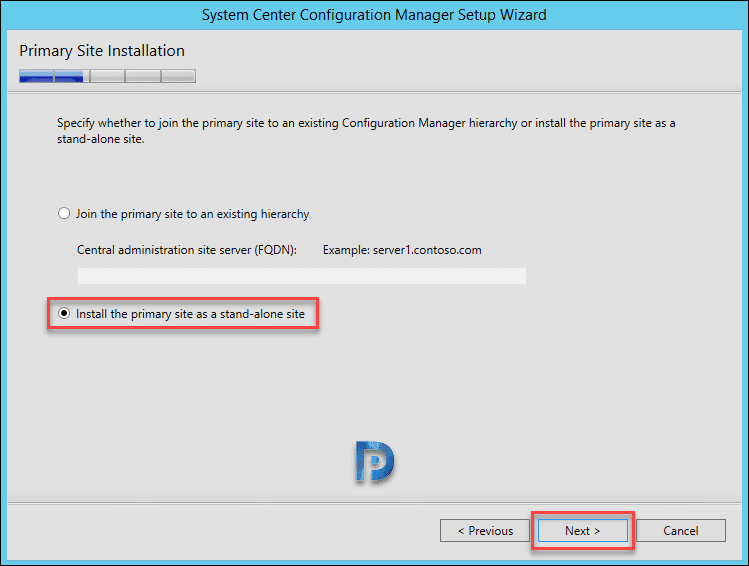
 Select Install the primary site as a stand-alone site. Click Next.
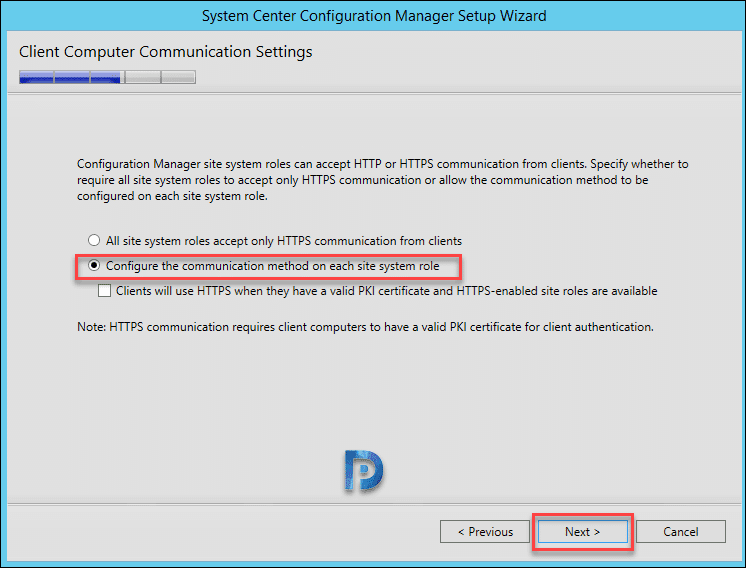
 Select Configure the communication method on each site system role. Click Next.
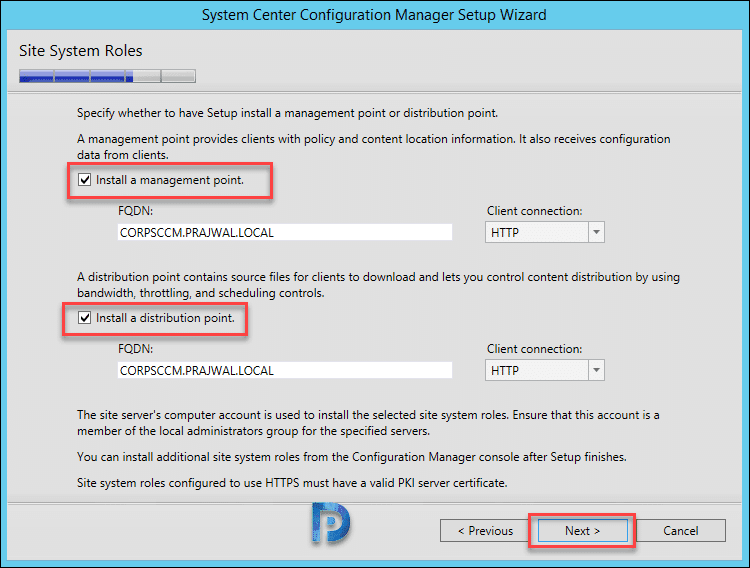
 By default management point and distribution point are selected for installation. Do not change anything here, click Next.
 In the next step, Configuration Manager setup checks whether all prerequisites are installed correctly. If any of the prerequisite is not installed it would be displayed. If all the prerequisites are installed correctly then you will see the message “All prerequisites rules pass successfully”. Click Begin Install.
To monitor the installation, you can view the setup log file with a tool called CMTrace. Launch the CMTrace tool, open the log file ConfigMgrSetup.log located in C drive.
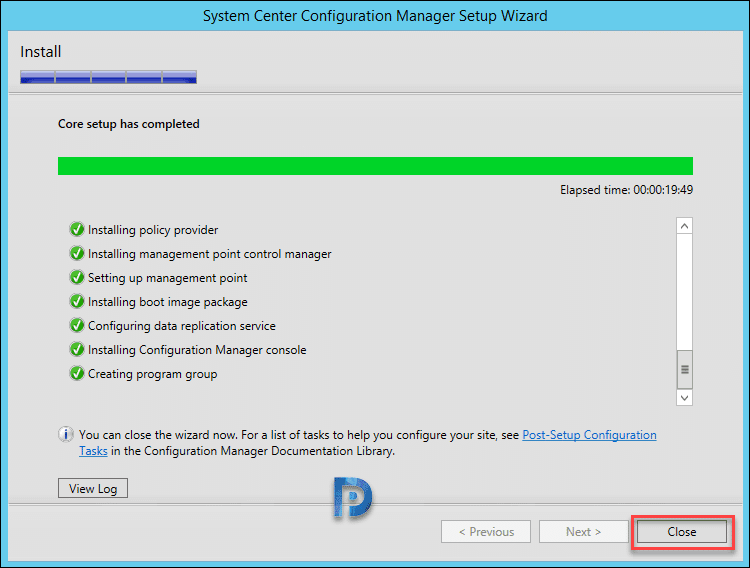
Wohoo SCCM 1802 installation is completed successfully. Click Close.
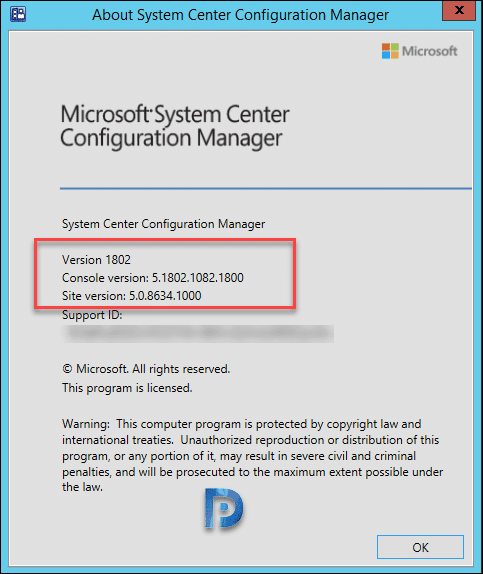
 Let’s launch Configuration Manager console and check out the version.
Version – 1802
Console Version – 5.1802.1082.1800
Site Version – 5.0.8634.1000




.Net 3.5 can longer be installed via “Add/Remove Roles and Features in the Server Manager on Server 2016. It will complain about the source.
You can provide the source by loading the Windows Server 2016 installation media. Let’s say if it is an ISO, then mount the ISO and you can find the .net 3.5 installer at F:\sources\sxs (F being my Media drive. Replace it with your own drive letter).
You can point the source to this location or copy the installer to a local disk and point the Server Manager to this source.
Good luck!
Note: .net framework 3.5 downloads via the internet wouldn’t work. Either the installer or pointing the server management to this installer.
I see no mention of installing the remote server database. I don’t have mine all in one system. I have a separate DB, DOMAIN and SCCM Servers.
I am trying to setup a 1902 SCCM Site and use my Old DB from an 1806 evaluation site.
I can find no clear concise documentation on adding a new site to an existing infrastructure.
The parts covering use of an existing DB are nebulous at best.
Can you point me in the right direction?
Hi, I am getting prerequisite check error “Setup is unable to verify that the Server Service is started”. can you help me out from this. I have checked the log file in that it says “Failed to get Service: LanmanServer information from Win32_Service”. checked Lanman server state in services it’s running only. I am using SCCM 1802 and SQL Server 2016.
Try restarting the server and see if that error disappears.
tried restarting, shutdown many times but still the error didnt solve.
Tired Restart and Shutdown many times, but still i am facing the same issue.
Hi Prajwal,
Can you please tell us which permission required for SQL administrator & SCCM Administrator Id’s.
for Installation & configuration
Hi Rahul, please read this – https://docs.microsoft.com/en-us/sccm/core/plan-design/hierarchy/accounts
Hi Prajwal, I have followed this document until WSUS Roll installed & configured. But I cannot see SUSDB under SQL Server Databases.. Shall I go ahead & install SCCM?
Hi Rahul, after installing WSUS, have you completed the post installation tasks ?.
I accidentally select WID Database instead of SQL Server Connectivity. I removed role and re-added it and its now showing SUSDB Database under SQL.
Now I have installed Config Mgr 1802 from baseline media and now on Prerequisite check its showing as below:
SQL Server Service running account failed
The logon account for the SQL Server service cannot be a local user account, NT SERVICE\ or LOCAL SERVICE. You must configure the SQL Server service to use a valid domain account, NETWORK SERVICE, or LOCAL SYSTEM.
Hi , is SQL 2017 license required ?
Hello Prajwal,
Thanks for your instructions, much appreciated! I already have an active primary site. I’m building a new primary site with the latest version of SCCM(1802) that will eventually become the primary. Do I still have to extend the schema for the new site configuration?
No, schema was extended when the current SCCM infrastructure was setup
Thanks for the tutorial. Saved me loads of time with the prerequisites. BTW as others have mentioned, ADK no longer includes PE. Here is the link to download the Add-On: https://docs.microsoft.com/en-us/windows-hardware/manufacture/desktop/download-winpe–windows-pe
Thanks for the update.
Looks really good. Thank you.
Thank you
Hi Prajwal,
Thanks for your amazing guide. Now SSRS is deployed spared and when I try add a Reporting Services Point role, I cannot select spared instance of SSRS2017. SSRS2017 RTM not allow you use same instance of database engine, despite the database is DB Engine/Instance of SQL. Can you try this config, enable SSRS 2017 on your SCCM Lab?
ADK 1809 ships without windows PE, its a separate download now.
Hi,
I am installing SCCM with a External SQL Server 2017 DB on Linux and everything went fine until the part that asks for the Data File Path as it is not recognized /var/opt/mssql/data/ as a path as it has to be in a UNC format. First of all is the SCCM 1802 compatible with this SQL Version?
Hello Prajwal
For Test Lab we have Physical Hardware i3 Processor, 16GB RAM and 500 GB HDD
will it ok for to run test lab.
I have big issue in SCCM 1802 hotfix installation,
SCCM 1802 stack on Extract update packing step, i attach the errors and where stop, please support me to solve this issue .
i get the update SCCM console message to install the console update, When i press Ok, System stuck and close and not complete.
The first think , The package not download completely,
I tried to do below solution but but issue still not solved
1.delete the package under EasySetupPayload folder
2.delete SQL record by this command:
DELETE FROM dbo.CM_UpdatePackages WHERE PackageGuid = ‘dbef803d-d936-46b3-88fe-a5bdd7a03168’
3.Use CMUpdateReset.exe reset the package with same guid
CMUpdateReset.exe -FDELETE -S sccm2012.mydomain.com -D CM_MYD -P dbef803d-d936-46b3-88fe-a5bdd7a03168
Please, Your support in in this regard will be highly appreciated.
Hello Prajwal,
Very nice article!
I had a minor problem with 1802 installation and below advise may help other users.
My SCCM was built in isolated network, no internet access. And I had to download prerequisite files before “Prerequisite Downloads” step. For this I used a computer that had Internet access. SCCM ISO was mapped as D disk. I ran the command: “D:\SMSSETUP\BIN\X64\SetupDL.exe C:\Temp”. Then the C:\Temp files were copied to SCCM and “Use previously downloaded files” was selected and directed to the downloaded files.
Thank you,
Talgat
also error below
Failed to run the action: RemoveApps2.
Unknown error (Error: FFFD0000; Source: Unknown)
Hello Prajwal,
Thank you for the article.
Can you please guide me how to run a powershell command for sccm task sequence with parameters please? The parameters will be -allusers -cleanstart. I did try to create a powershell script with these parameters and the task sequence failed.
Below is the errror what i’m seeing in the logs
“The argument ‘RemoveApps\decrapifier.ps1’ to the -File parameter does not exist. Provide the path to an existing ‘.ps1’ file as an argument to the -File parameter.”
Hope to hear from you soon.
Thanks,
pavan