Best Guide to Deploy Windows 11 using SCCM | ConfigMgr
Windows 11 21H2 has been released by Microsoft, and if you are planning to deploy Windows 11 using SCCM or ConfigMgr, this guide is for you. ConfigMgr makes it easy to deploy Windows 11 to your laptops.
This step-by-step guide includes the steps to download Windows 11 ISO, import Windows 11 into SCCM and deploy it using task sequence.
Microsoft released the new Windows 11 operating system on 5th October 2021, and it is also known as Windows 11 October 2021 Update [21H2].
Windows 11 is very new, and I don’t recommend deploying it to laptops running in production. You can start pilot deployment by first picking up a few laptops for testing. If you find any issues with deployment, you always pause and troubleshoot the deployment issues.
In this article, we will use the SCCM task sequence to deploy Windows 11 operating systems to client computers. I will be covering the Windows 11 upgrade using ConfigMgr in a separate post.
Table of Contents
Windows 11 Deployment Prerequisites
Before you use SCCM to deploy Windows 11 to laptops, ensure the following prerequisites are in place.
- The laptop must meet the minimum system requirements for installing Windows 11. I recommend reading Windows 11 specifications before installing Windows 11 on any computer.
- Installing Windows 11 media on a PC that does not meet the Windows 11 minimum system requirements is not recommended and may result in compatibility issues.
- If you proceed with installing Windows 11 on a PC that does not meet the requirements, that PC will no longer be supported and won’t be entitled to receive updates.
- You must be using ConfigMgr 2107 and above to deploy Windows 11. I haven’t tested the deployment with older versions of ConfigMgr, but always use the latest ConfigMgr version.
- Your SCCM setup must have PXE enabled on distribution points. I recommend using the ConfigMgr PXE responder instead of multicast.
- Windows 11 requires TPM 2.0 to be enabled on the PC. This is an important prerequisite to be considered before deploying Windows 11 using SCCM.
- You can uninstall the older version of Windows 10 ADK and install Windows 11 ADK.
Support for Windows 11 ADK Version in ConfigMgr
If you are deciding whether you should install Windows ADK 11 for ConfigMgr, here are some important points.
- If you’re deploying both Windows 11 and Windows Server 2022, use the Windows ADK for Windows 11, which is the latest version.
- If you’re deploying Windows Server 2022 and not Windows 11, you can use either Windows ADK for Windows Server 2022 or Windows 11.
ConfigMgr Windows 11 21H2 Support
Before you deploy Windows 11 using SCCM, you may want to confirm if the new Windows 11 version is actually supported by ConfigMgr.
So, is Windows 11 supported by Configuration Manager? Yes, the ConfigMgr version 2107 and above supports Windows 11 versions as a client.
If you want to deploy and manage Windows 11 using ConfigMgr, you must use ConfigMgr version 2107 and above. In other words, ConfigMgr 2107 agent is fully compatible with Windows 11.
The official docs need to be updated by ConfigMgr team and I will then update this space with a screenshot.
Step 1 – Download Windows 11 ISO from MSDN or VLSC
You need the Windows 11 setup files (install.wim) to import and deploy it via SCCM. Windows 11 ISO’s are available for download in both VLSC and MSDN sites. If you have access to either of them, download the ISO file for Windows 11.
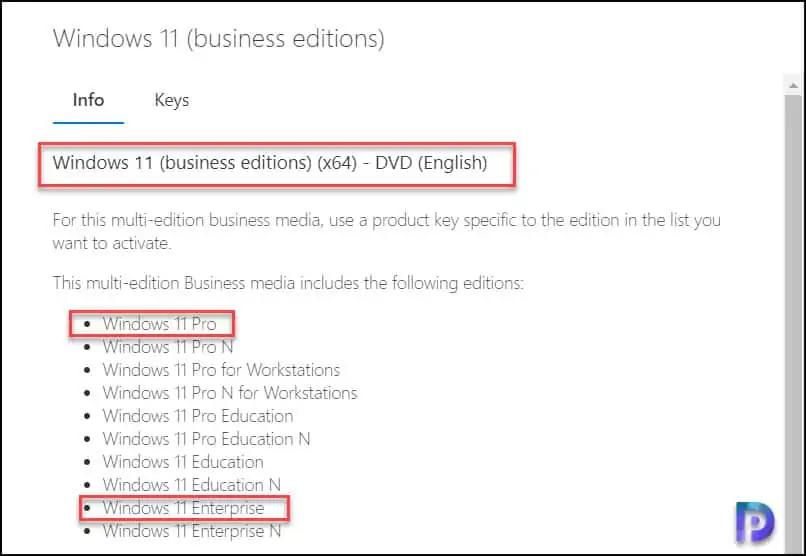
If you are downloading the Windows 11 ISO file from MSDN, I recommend downloading the Windows 11 business editions. That’s because a business edition media includes both Windows 11 Pro and Windows 11 Enterprise editions.
Once you have downloaded the Windows 11 ISO file, copy the ISO file to a shared folder on server or sources folder on SCCM server. I have placed the Windows 11 setup files in a separate folder.
You can mount the Windows 11 ISO file on server and copy all the files to a folder on ConfigMgr server.

Step 2 – Add or Import Windows 11 OS in SCCM
The following steps will import the Windows 11 operating system into SCCM.
- Launch the Configuration Manager console.
- Go to Software Library > Overview > Operating Systems.
- Right click Operating System Images and click Add Operating System Image.
- We will now import Windows 11 21H2 OS in ConfigMgr.

On the Data Source window – Add Operating System Image wizard, specify the path of Windows 11 install.wim file. The install.wim file is present inside the Windows 11 media sources folder.
The Windows 11 ISO that we downloaded contains multiple editions. Extracting all the editions will increase the size of the image file.
If you want to extract a specific edition of Windows 11, like Enterprise edition, you can do that. Select the option Extract a specific image index from the specified WIM file.
Next to image index, click the drop-down and select Windows 11 Enterprise edition.
Ideally, the image index should be displayed as Windows 11 enterprise edition and not Windows 10 Enterprise edition. This should be fixed in the upcoming version of ConfigMgr 2111, and that’s my assumption.
Click Next.

On the Pre-cache settings window, click Next.

On the General window, specify the information about Windows 11 operating system that will appear in SCCM console. You may add the version and more details in the comment box. Click Next.

Review the settings on Summary window and click Next.

On the Completion window, click Close. We have successfully imported Windows 11 OS in to SCCM.

Step 3 – Create SCCM Task Sequence to Deploy Windows 11
In this step, we will create a new SCCM task sequence to deploy Windows 11.
- In the SCCM console, go to Software Library > Operating Systems > Task Sequences.
- Right click Task Sequences and click Create Task Sequence.
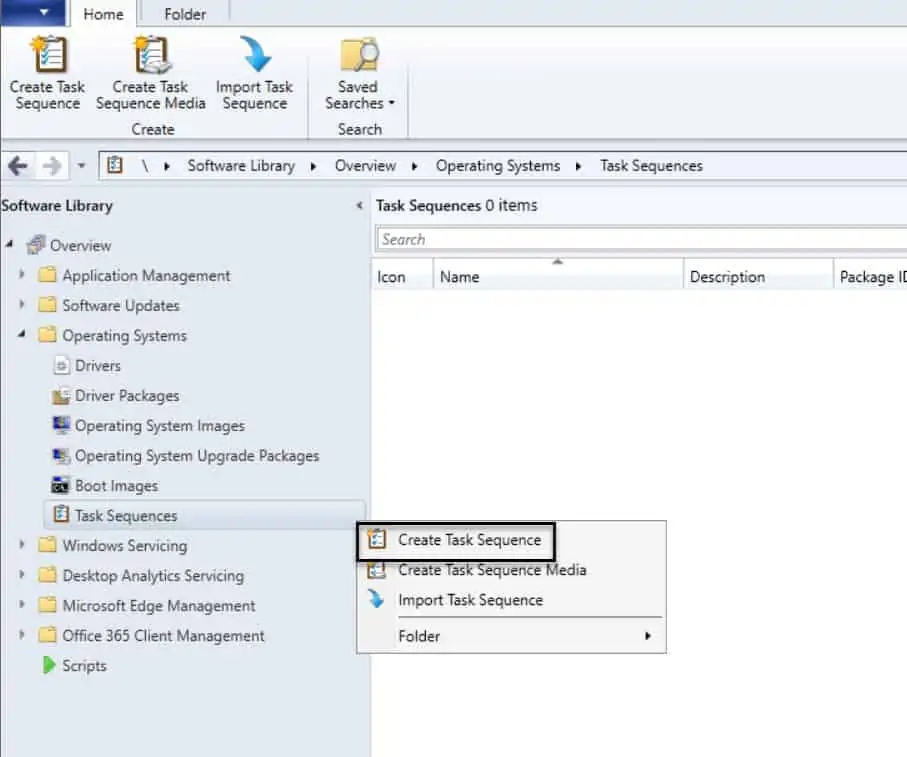
On the Create New Task Sequence window, select Install an existing image package. Click Next.

On the Task Sequence Information window, specify the following.
- Task Sequence Name – Deploy Windows 11 using SCCM or ConfigMgr.
- Description – You can more details about what this task sequence does.
- Boot Image – Click Browse and select x64 boot image.
Click Next.

On the Install Windows section, next to Image Package, click Browse and select Windows 11 Enterprise Image Package. The Image Index should be populated automatically as Windows 11 enterprise.
Select the option partition and format the target computer before installing the operating system. You can also enable configure task sequence for use with BitLocker, but I will not be enabling it for my lab.
To activate your copy of Windows 11, specify the product key for Windows 11. You can later specify the key by editing the Windows 11 task sequence in SCCM console.
You can also choose to randomly generate a local admin password, or you can specify an administrator password. Click Next.

On the Configure Network window, you choose whether you want your Windows 11 to stay in Workgroup or join the domain. To under Windows 11 domain join process, read how to join Windows 11 to AD domain.
Select Join a domain, specify the domain and domain OU. I wouldn’t recommend selecting computers OU here as it may sometimes cause issues with domain join.
So select some other OU if you are testing the Windows 11 deployment using SCCM. Specify the account that has permissions to join the machine to the domain. Click Next.
Read how to allow domain user to add computer to domain.

If you need to specify additional installation properties while installing SCCM client, you can specify it here. Click Next.

Uncheck all the options on State Migration window and click Next.

Since Windows 11 is very new, I currently don’t see any new updates. In the future, once the Windows 11 updates are released, you can deploy it along with Windows 11.
For now, select Do not install any software updates. Click Next.

Along with Windows 11, you can specify the applications that will install using the task sequence. You may add applications later by editing the Windows 11 task sequence in SCCM console. Click Next.

The Summary window shows all the settings that you have selected so far. Click Next.

On the Completion window, click Close. This completes the process of creating task sequence for Windows 11 in SCCM.

Step 4 – Edit the Windows 11 Task Sequence
In the above step, we create a Windows 11 task sequence in SCCM console. Now if you want to introduce changes to the task sequence like adding applications, drivers etc., you can edit the task sequence and make the changes.
In the SCCM console, go to Software Library\Overview\Operating Systems\Task Sequences. Right-click the Windows 11 task sequence and select Edit.
In the task sequence editor, you can add drivers for Windows 11, add additional steps, registry tweaks etc.

Step 5 – Add drivers for Windows 11 in Task Sequence
Along with Windows 11 deployment, deploying the drivers for Windows 11 is also important. Otherwise, you will have just the Windows 11 installed and no drivers installed.
If you are looking to download Windows 11 driver packages, you must contact the hardware vendor. It’s worth checking the driver downloads page to see if the new Windows 11 drivers are available for specific models of a laptop.
There are multiple ways to deploy drivers and manage driver updates. Each organization has their own way to deploy drivers and driver updates.
If I have to recommend a commonly used method to deploy drivers, that is via the task sequence again. You must first import the drivers into SCCM and then edit the task sequence and add Drivers > Apply Driver Package step. You can use the WMI to detect the laptop model and apply the right drivers.
After adding the Windows 11 drivers, you may add more steps to task sequence and customize it based on your requirements. Once the Windows 11 task sequence is ready, go to the next step.
Step 6 – Distribute Windows 11 Task Sequence to SCCM Distribution Points
Once your Windows 11 task sequence is finalized, you must distribute the task sequence content to all ConfigMgr distribution points.
If you are testing the Windows 11 deployment, you can initially distribute the content only to your local distribution point server.
To distribute the task sequence content, go to Software Library\Overview\Operating Systems\Task Sequences. Right-click Window 11 task sequence and select Distribute Content.

On the General window, click Next.

On the content window, you can see all the task sequence associated dependencies. Click Next.

Click Add button to specify distribution points or distribution point groups. Click Next.

On the Completion window, click Close.

You must wait until the content is distributed to distribution points. You can go to content monitoring and check the content status. Green color indicates the content has been distributed to the DP.
Step 7 – Deploy Windows 11 using SCCM
Let’s deploy Windows 11 using SCCM task sequence.
- Launch the ConfigMgr console.
- Go to Software Library\Overview\Operating Systems\Task Sequences.
- Right click Deploy Windows 11 using SCCM task sequence and click Deploy.

On the General page, specify the target SCCM device collection to which you want to deploy Windows 11 task sequence. Click Next.

Select the purpose as Available and make the deployment available to only media and PXE. Click Next.

If you wish to schedule the deployment, you may do it here. Otherwise, click Next.

Specify the user experience settings for the deployment. Click Next.

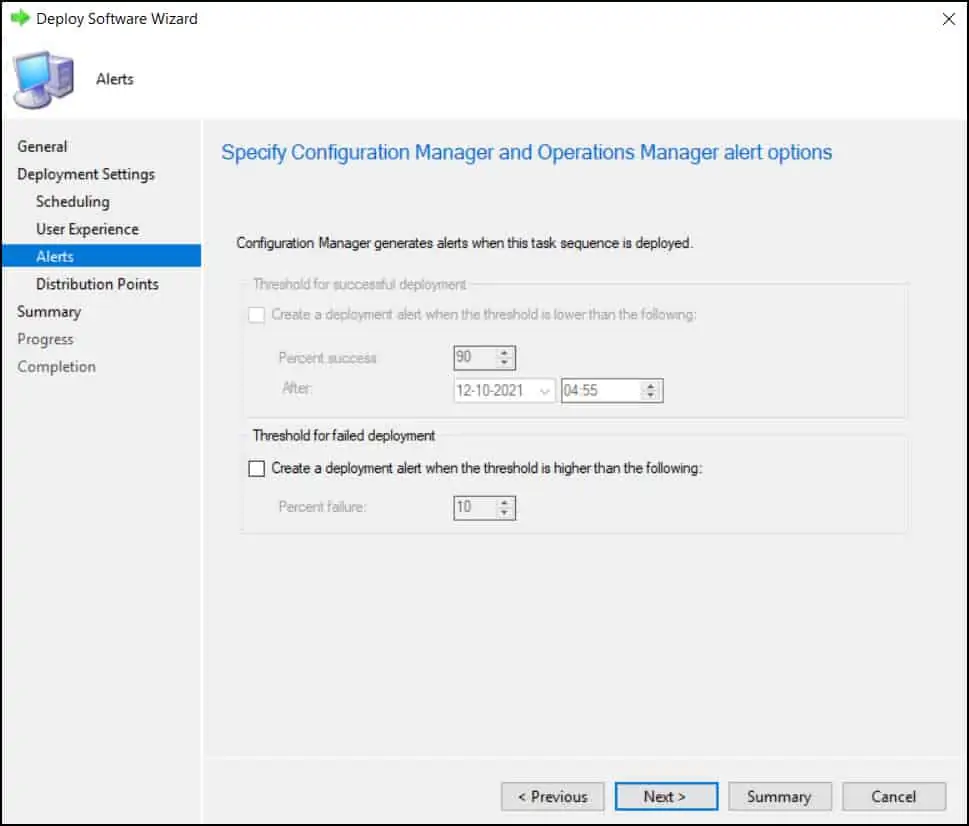
On the Alerts window, I won’t configure anything. Click Next.
You don’t need to make any changes on distribution points window, click Next.

Click Next on Summary window.

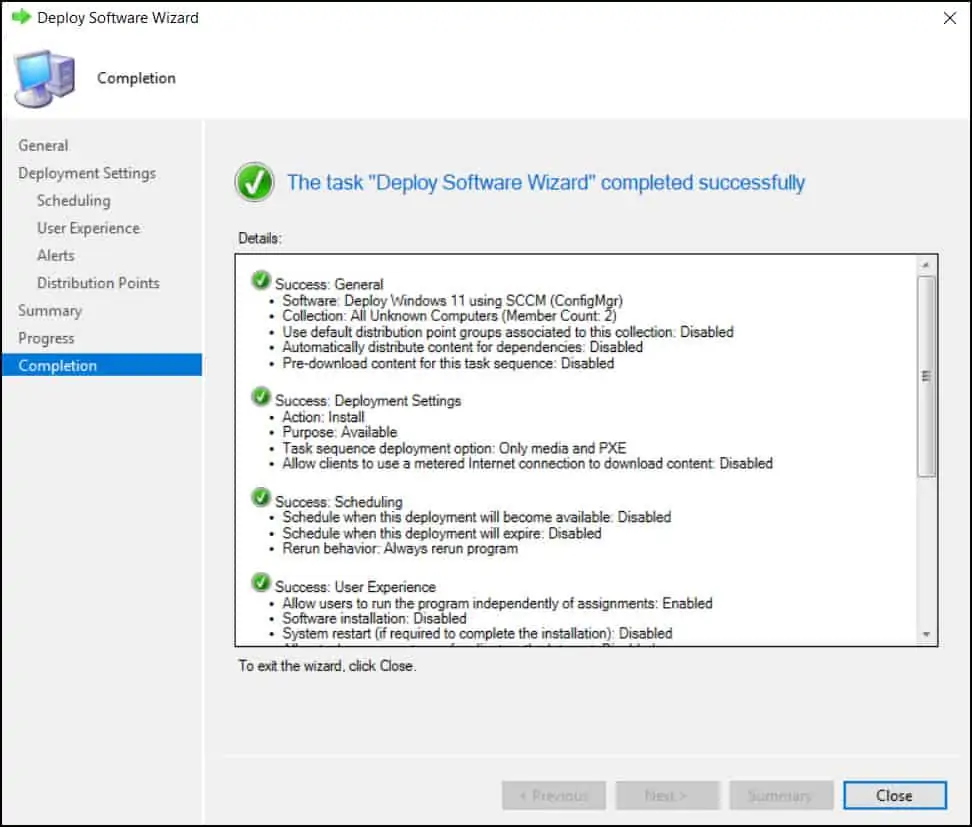
Close the deployment software wizard.
Step 8 – Testing Windows 11 Deployment using SCCM
In the above steps, we deployed the Windows 11 using SCCM task sequence to device collection. Now you can either connect a laptop to the network or create a new VM to test Windows 11 deployment.
In my lab, I am going to create a new Virtual Machine with no OS installed. I have enabled the TPM on my VM. If you are not sure how to do that, read how to enable trusted platform module on virtual machine.
I have enabled ConfigMgr PXE responder service and the boot images are distributed to DP’s. Power on the VM and press F12 for network boot. The VM downloads the boot image from the distribution point.

Enter the PXE password (in case you have configured one on DP). Otherwise, click Next.

Select Deploy Windows 11 using SCCM (ConfigMgr) task sequence and click Next.
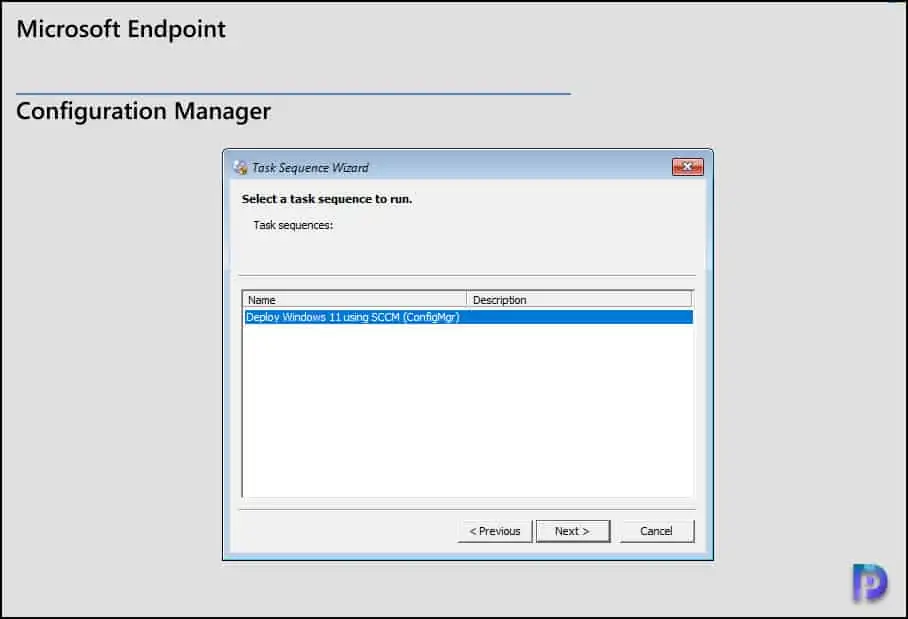
The task sequence execution begins now. The task sequence downloads the Windows 11 OS from DP and install it on VM.

Allow the task sequence to complete and the Windows 11 should be installed on the endpoint now. The Windows 11 VM should be joined to the domain. Log in with your domain user account. This completes the steps to deploy Windows 11 using SCCM task sequence.
Troubleshooting Windows 11 21H2 OS Deployment
If the Windows 11 21H2 task sequence fails, you can troubleshoot the deployment failures by reviewing SMSTS.log file. The location of SMSTS.log file changes during the operating system deployment as the task sequence progresses.
When a Windows 11 deployment via SCCM fails, the task sequence should report an error with the error code. If it doesn’t, always examine the SMSTS.log file because it logs the u troubleshoot installation issues related to Operating System
Deployment (OSD)

Has anyone figured out how to deploy language packs with Windows 11 during OSD?
Running into unsigned drivers not installing via Windows 11 task sequence v22H2.
The option in the Apply Driver Package “Do unattended installation of unsigned drivers on versions of Windows where this is allowed” is checked.
What is needed to accomplish this?
Please tell me whether it is necessary to update boot.wim (we have version 10.0.19041.1) to deploy Windows 11?
Hi,
Anyone know how to deploy Win11 to an unsupported PC? Need to do that for test.
Yes. Google the registry entries for this feature. Microsoft supports this method as well but does not document it for public use. The registry settings allows for TPM to be completely bypassed allowing Windows to install onto *ANY* computer.
nice guide. However what i’m actually is looking for i the best guide to remove all the extra stuff Microsoft put in a Windows Image, even the enterprise version, has alot of stuff we dont need.
So can you tell, whats the best method to remove all the extra stuff, when create a new wim file and use it for SCCM deployment?
is it sysprep or something else?
Has anyone run into an issue where after imaging a bare pc to win11, it doesn’t show up in the sccm console?
Well if the ConfigMgr client is installed, it should report the details and display the machine in SCCM console.
Using ADK for Win10 and 2103 does work too. Might not be supported.. but it does provide a working/running W11.
(Tested on a virtual and physical machine)
Nice1
Dear Prajwal
Please Post a method to upgrade windows 10 to windows 11 using SSCM servicing and placing method