How to Enable Remote Desktop on Windows Server Core
In this post, I will show how to enable remote desktop on Windows Server Core. The Remote Desktop feature on Windows Server Core is by default disabled, and I’ll show you how to enable it.
On Windows Server Core, you can use the Server Configuration Tool (SConfig.cmd) to configure and manage several aspects of Server Core installations. However, keep in mind that, in order to use the SConfig tool, you must be a member of the Administrators group.
In a previous article, we discussed Windows Server Core SConfig Options and joining Windows Server Core to Domain. You can remotely control the server by enabling RDP on Windows Server Core. You don’t have to physically log in to the server core with RDP enabled.
There are multiple ways to manage a Server Core server:
- Using Windows Admin Center
- Using Remote Server Administration Tools running on Windows 10/11
- Locally and remotely using Windows PowerShell
- Remotely using Server Manager
- Remotely using an MMC snap-in
- Remote Desktop Services
In addition to that, you can also add hardware and manage drivers locally, as long as you do that from the command line.
Enable Remote Desktop on Windows Server Core
Following are the steps to enable remote desktop on Windows Server core.
Step 1: Power on the server installed with Windows core. Start the Server Configuration Tool and login to your Windows Server core. Type “SConfig” and press Enter.
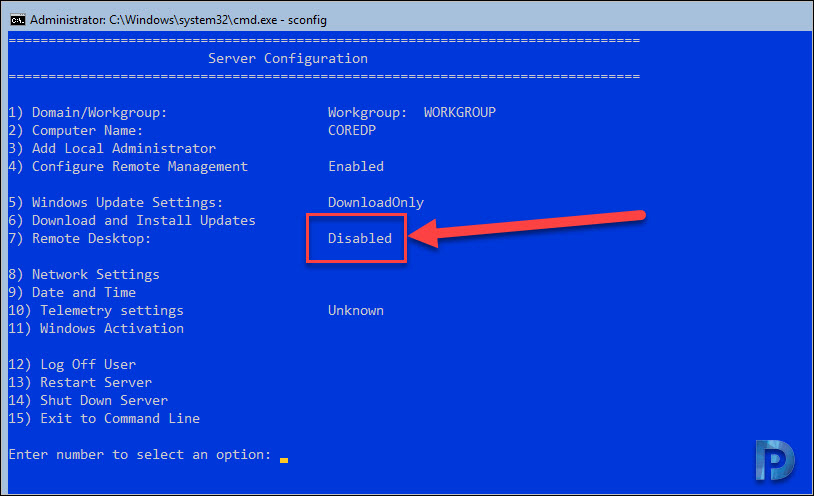
Step 2: On the Server Configuration screen, you’ll find a list of options to manage the server core. Option 7 on the list of choices lets you turn on or off Remote Desktop on Windows Server core. The Remote Desktop feature is currently disabled on the server core.
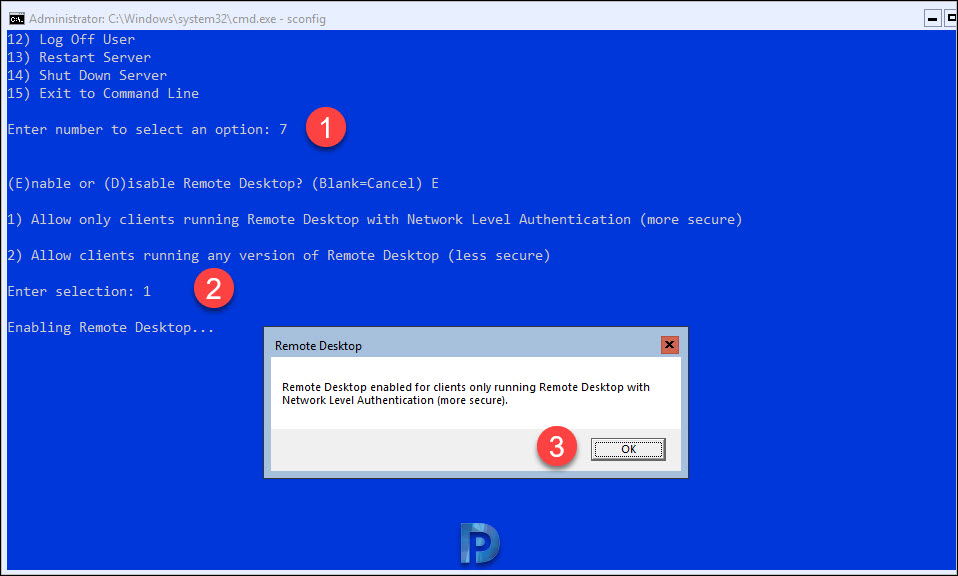
Step 3: Press 7 and press enter key. The next line that you see lets you Enable or Disable remote desktop. To enable the remote desktop, type E and press enter key.
There are two options that you see when you select RDP configuration on Server Core:
- Allow only clients running Remote Desktop with Network Level Authentication (more secure)
- Allow clients running any version of Remote Desktop (less secure)
Type 1 and press Enter. You get a confirmation box for enabling Remote Desktop. Select OK.
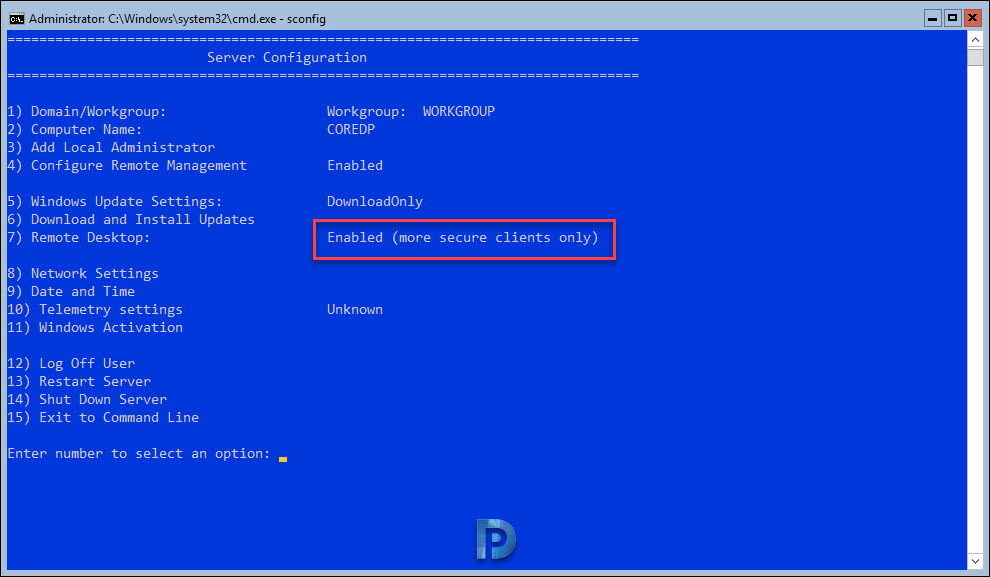
Step 4: Now if you look at the option 7 on the Server Configuration screen, we see the Remote Desktop Enabled (more secure clients only). This is the procedure to enable RDP on Windows Server core.
Enable Firewall to Allow RDP on Server Core
After you enable the RDP on Windows Serve core, the next step is to enable the firewall to allow the remote desktop. This configuration is required because the firewall on server core may block the RDP connections initiated from remote computer.
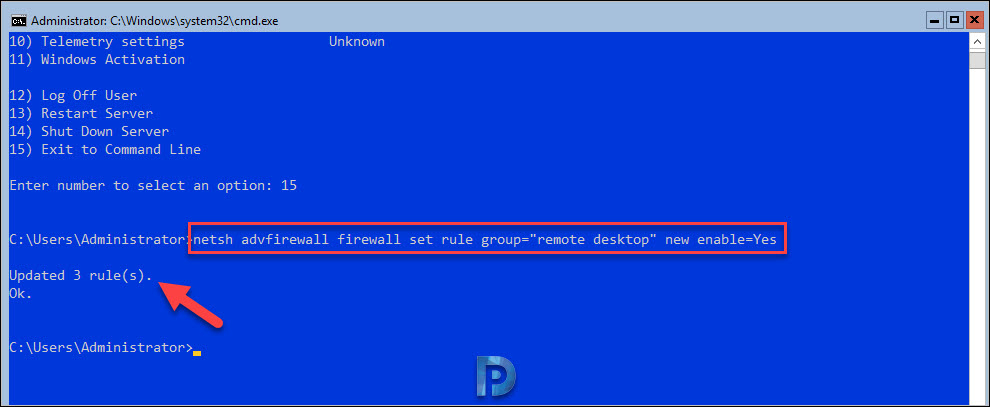
To enable the firewall to allow RDP connections, on the server configuration screen, type 15 which will exit to command line. On the Command prompt window, type the below command and press enter key. This command will enable the RDP connections through the firewall on Server Core.
netsh advfirewall firewall set rule group="remote desktop" new enable=Yes
After running the above command, you’ll see the following output “Updated 3 rules” which confirms that you have successfully enabled firewall on server core to allow RDP connections.
Managing Server Core with Remote Desktop Services
You can use Remote Desktop to manage a Server Core server from remote computers. Before you can access Server Core, you’ll need to run the following command:
cscript C:\Windows\System32\Scregedit.wsf /ar 0
This enables the Remote Desktop for Administration mode to accept connections.


